1970 Starchief conversion to center console

BajaRon

Petty Officer 3rd Class
Joined
Aug 23, 2015
Messages
85
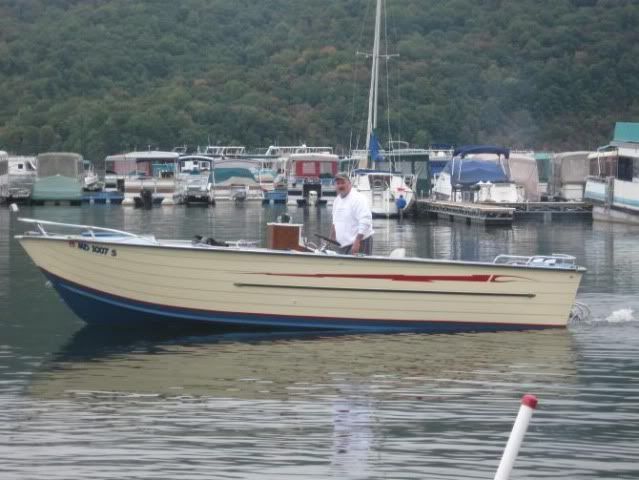
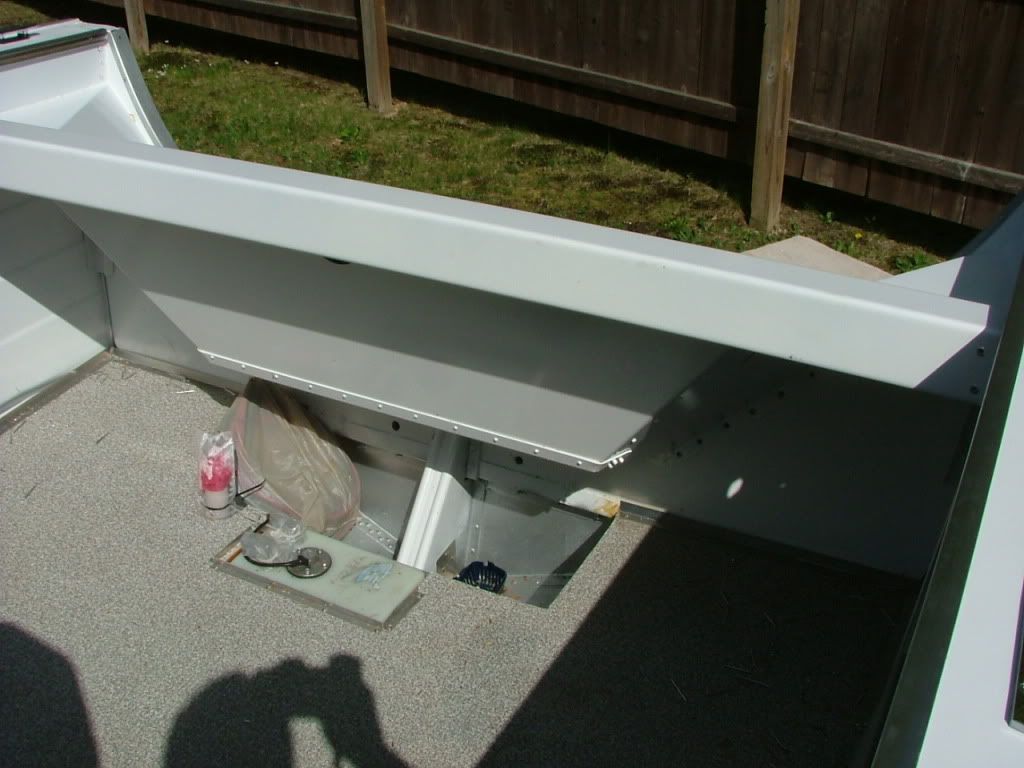
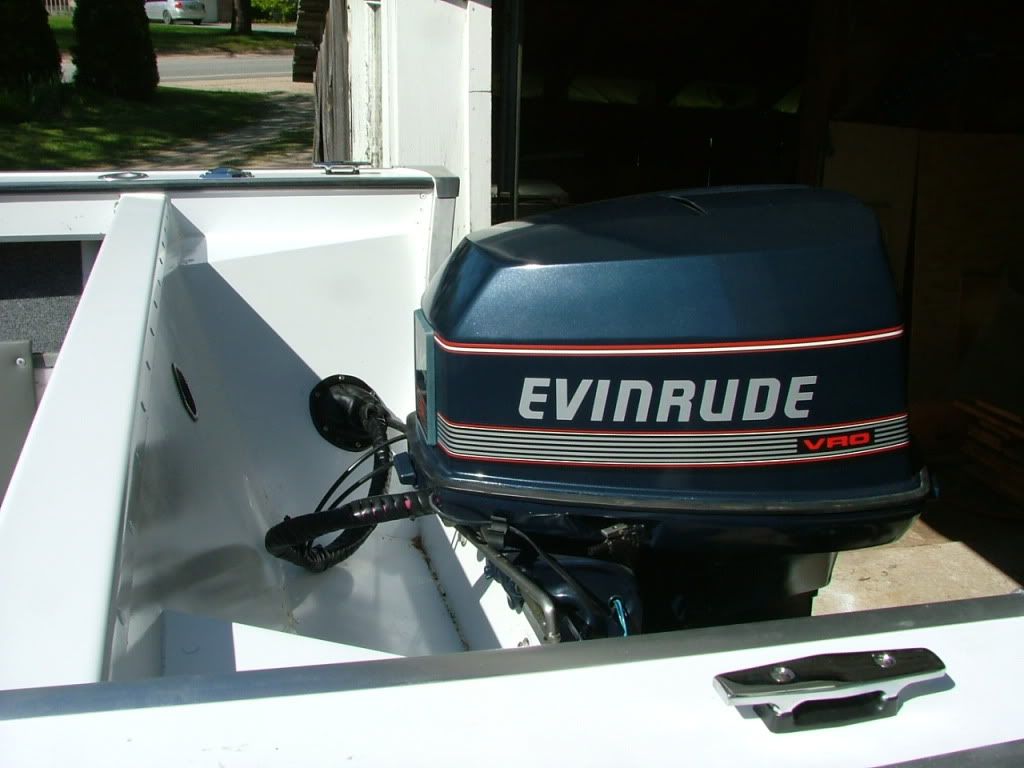
Hola Everyone! New kid on the block. I picked up a 1970 18ft Starchief recently...it came with a Calking galvanized trailer, a 1990 Yamaha 85hp (I think). Paid $850.00 for everything. Cleaned up the Yamaha, new plugs installed and sold the motor for ....$1200.00!!! Knocked off the cab, removed the floor, saved some of the good flotation, removed the transom, ( in three pieces), removed....everything!
My plan? To build a Center Console for the Norther California Coast and for Baja. This will be my second Starcraft. I had a 79 Chieftain 18ft that I converted to a CC about 20 years ago. That was several boats ago but I loved that boat, so....I hope to build for this boat....

1) install a below deck fuel tank for better handling on the Pacific and the Sea of Cortez...maybe up to 30 gallons
2) build my own t-top ( my last effort worked great on a 22ft Bayrunner)
3) beef up the hull by coping some of the examples I have seen here
4) install the most modern, fuel efficient motor available
5) beef up the trailer for 1500 mile trips to Baja (39 trips to Baja in 38 years...never flown, only driven)
6) 100% utilitarian, easy to clean, cheap to run, fun to fish and dive!!!

I will post pictures ASAP, as soon as I figure it out. I have already spent many hours on the Starcraft Restorations...have learned an immense amount that I plan on implementing on my Starcraft. Here are a few of the many questions I may have

1) what is the difference between the 1970 Starchief and the 1979 Chieftain?
2) is there a better grade rivet to use?
3) can I go with a larger rivet? From 3/16 to 1/4 if there is a very loose rivet?
4) lots of loose rivets...should I get a top grade rivet gun?
5) what am I forgetting? I am here is California...so I can work year round

Thanks in advance, Baja Ron
 

Watermann

Starmada Splash of the Year 2014
Joined
Jan 12, 2013
Messages
13,753
Welcome aboard Ron, :wave:

It's just a matter of semantics with the Chief's name, they just are different sizes and some minor changes in cabin window shapes over the years.
I used the 2117 alloy rivets over the soft AL 1100, they also have the dumple in the head the same as the originals
You can go larger but 1/4" rivets are crazy huge at least I think so. Best to use 3/16" and 5200 to seal the deal.
I use a cheap air hammer with rivet set, just turn down the line pressure.
Get a blind rivet gun too.

Photos... http://forums.iboats.com/forum/forum-rules-and-guidelines/9938375-photo-upload-tutorial
 

oldhaven

Chief Petty Officer
Joined
Aug 30, 2015
Messages
568
My advice is to sell the Chief to someone who wants a nice little cuddy cabin boat and get a period Holiday or later SS for this CC project. Seems a shame to lose the original somewhat hard to find character of the boat when other open boats could serve with less effort.

Ron
 

jbcurt00

Moderator
Staff member
Joined
Oct 25, 2011
Messages
24,871
Cabins already been cut off, so...

Welcome to iboats. Lets see some pix of where you started, and any along the way to where you are now.
 

laurentide

Lieutenant Commander
Joined
Jul 24, 2011
Messages
1,869
Hey Ron, welcome! I also have an 18' Chief and I love it. I had the same plan when I got mine to convert to CC or side console, but for me I'm glad I kept the cuddy. I live in Vermont, though...way different climate.

Here's a pic of what looks to be a 21' i/o conversion. Judging by the MD registration and bottom paint I'd guess saltwater:


IMG_0455.jpg


Good luck with your project. Three things I'd go back and change on mine if I could (and may still do when I replace the junk ply in my transom): 1) belly fuel tank, as you already mentioned, to lower the center of gravity and move weight forward (very important IMO for a much better ride), 2) redesign the splashwell for more deck space, which requires a fuel tank under the deck or console, and 3) add the hull stiffeners from rib ends to hull sides. No spray rail cracks for me yet, but I'd do it for peace of mind.

Oh, I guess (4) would be to use marine ply for the transom with 10 oz glass and epoxy. My ACX is delaminating between factory plies. I'd also take the time to pre-drill and epoxy soak the transom holes.

PS: mine may someday become a CC or big tiller if I ever get around to building a Tolman jumbo :eek:
 
Last edited:

BajaRon

Petty Officer 3rd Class
Joined
Aug 23, 2015
Messages
85
Hola Everyone, Thanks! for all the replies. I went to the photo tutorial and still have not figured it out yet. Looks like it needs to be updated. Soon, as either my wife or daughter will assist with downloading pictures.

Great advice so far...I will read more on the hull stiffeners and changing the splash well. I caught the stiffeners Waterman installed...excellent. Where are the spray rails? And where do they crack? I will investigate that problem. Have not see a splash well change. And I will be sure to use marine grade plywood for the transom.

I want a bare bones utilitarian boat that can handle the ocean.

The tear down was great. Tons of old lures under the deck, a good knife, an old can of Olympia beer, and more! And what a hillbilly job of add ons. The worst was the drain plug was replace with a bronze after marked product...yep, a nice spot of corrosion. Lots of holes to plug, rivets to replace....but the best part so far is planning or dreaming on what I want to do with this hull. Thanks again to everyone, Ron
 

jbcurt00

Moderator
Staff member
Joined
Oct 25, 2011
Messages
24,871
this is the up to date pix help topic:
Photo Upload Tutorial

Where the hull sides meet the bottom there's an angle, that's the spray rail. Watermann's repair bridged the hull sides to the bottom, across the inside of it.

They crack along the outside corner edge, where the flexing of the hull sides in/out or down fatigues the aluminum or around the rivets in that area.

Rib end cracks to the hull or ribs is common to.
 

laurentide

Lieutenant Commander
Joined
Jul 24, 2011
Messages
1,869
Here's probably the best example of a shortened splashwell from MichaelP's thread:


DSCF3113.jpg


DSCF3136.jpg


DSCF3135.jpg


The Starcraft factory put the 18 gallon tank under the big splashwell, so it wasn't totally wasted space, but a belly tank solves that issue. I think this mod gives you 9" of deck space, which doesn't sound like a lot but it would make a big difference.

He also shortened the width of the header piece by a couple of inches. You can find his thread in the index sticky post.
 
Last edited:

BWR1953

Vice Admiral
Joined
Jan 23, 2009
Messages
5,857
Here's probably the best example of a shortened splashwell from MichaelP's thread:


DSCF3113.jpg


DSCF3136.jpg


DSCF3135.jpg


The Starcraft factory put the 18 gallon tank under the big splashwell, so it wasn't totally wasted space, but a belly tank solves that issue. I think this mod gives you 9" of deck space, which doesn't sound like a lot but it would make a big difference.

He also shortened the width of the header piece by a couple of inches. You can find his thread in the index sticky post.
That's a very neat job. I wonder if anyone has ever done a full height transom with a bracket on the back? Could be interesting. :)
 

laurentide

Lieutenant Commander
Joined
Jul 24, 2011
Messages
1,869
That's a very neat job. I wonder if anyone has ever done a full height transom with a bracket on the back? Could be interesting. :)


It would have to be a buoyant bracket if shifting that much weight back on a lever. The hulls are too light for a regular open bracket I think.
 

BWR1953

Vice Admiral
Joined
Jan 23, 2009
Messages
5,857
It would have to be a buoyant bracket if shifting that much weight back on a lever. The hulls are too light for a regular open bracket I think.
That makes sense. And a buoyant bracket would technically increase LOA too. Hmmm...
 

oldhaven

Chief Petty Officer
Joined
Aug 30, 2015
Messages
568
I had considered shortening my splash well, but to keep my belly tank through deck filler and vent under a shorter well would put the tank back toward the stern, as is shown in the above pictures. I want to keep the tank as far forward as I can for weight distribution and that extra 9 inches is a lot with 27 gallons of fuel. So I will be keeping the original size well and using the space under for light storage instead of battery and fuel. I also am not sure about clearance for my tilted 90 Merc 4S motor until I can get it mounted, so I cannot tell if shortening that much is going to work anyway. MichaelP had just enough clearance with a smaller motor, and his cables have to bend quite a bit when tilted. Things to consider when planning. I do wish I had the later style well shown with the kick up at the edges, since it provides more room underneath. On my '67 the well is full width and resembles a bathtub. I may be able to do something with the well space later. Since B Ron is doing a console, he has some other options for the belly tank plumbing, if he chooses to go that way. He may benefit from the shorter well for his concept and fishing deck room. This should be an interesting project to follow along.

OH Ron
 

jbcurt00

Moderator
Staff member
Joined
Oct 25, 2011
Messages
24,871
Baja, be sure to check out the SOTY 2015 topic.
 
Last edited:

Watermann

Starmada Splash of the Year 2014
Joined
Jan 12, 2013
Messages
13,753
Sure would like to see some pics of that Starcraft you say you have ;)

Pics are the right of passage into the Starmada and I'm surprised the mob hasn't started to form up. I guess maybe we're becoming a bit more understanding in our old age. :lol:
 

BajaRon

Petty Officer 3rd Class
Joined
Aug 23, 2015
Messages
85
Ok Guys...still no pictures. Wife cannot figure it out. Daughter will be home from school for early x-mas. We have a small Apple (new!!!) which will not let us post pictures yet.

Just finished working 6 ten hour days at the local refinery. And have been spending mucho time with the boat. Took off the outside top rub rail...hope it is not to hard to put back! Drilled out all excess rivets,.... and many loose ones up front, where I have a cracked rib on both port and starboard, and many loose rivets with the ribs. I will post pictures when I can. Cleaned up the job site and stored lots of go back parts. Ready to roll.

Made my first purchase at Home Depot....a gallon of Jasco Premium paint and epoxy remover. $26.00. I applied a little and it seems to work ok. Lots of elbow grease, and instructions want a temperature between 68 and 85 degrees....which might be hard to do in winter. I will go back and see what was the best tool to scrub off the paint. The scraper works ok...a fiber pad similar to steel wool works best, but fills up with paint fast.

I do not own a air rivet gun....saw the Eastwood Solid Rivet Kit for $200.00. Any one have a opinion on this kit? They come with the wrong type rivets...but that is not a problem. I am still looking to either borrow or rent. If not, and no one here feels the Eastwood gun is a bad investment, I may purchase it. Waterman suggested the 2117 alloy rivets in 3/16. This sounds like what I need for saltwater and the ocean. What length? Maybe two different lengths?

I already have a cheap blind rivet gun for inside.

Chemicalwire posted pictures of the splash well shorting by MichaelP. If I can, I will do this....that is, if the motor will still lift up 100% and the cables/hoses fit. And...if the belly tank hoses are clear. On one of MichaelP pictures it show the transom to keel support with an added piece riveted on. See it? Down low. What is this piece called. I will go back to his thread and check it out. My support is beat-up.

Chemicalwire...I will definitely go with the marine grade plywood for the transom. And I will pre drill and epoxy before installing.

Waterman, I will go back and reread your thread...I need to copy the hull stiffeners...the length, width and gauge of aluminum. My guess is 8x4x? .Sweet job overall!

jbcurt00, I will check out the SOTY

I am ready to get after it! Thanks!!!! to all. Baja
 

jbcurt00

Moderator
Staff member
Joined
Oct 25, 2011
Messages
24,871
Chemicalwire posted pictures of the splash well shorting by MichaelP. If I can, I will do this....that is, if the motor will still lift up 100% and the cables/hoses fit. And...if the belly tank hoses are clear. On one of MichaelP pictures it show the transom to keel support with an added piece riveted on. See it? Down low. What is this piece called.
The small aluminum square on the port side of the support/knee brace? Just above the black ashtray looking thing?

I think the black thing is the base of his bilge pump, and the square piece of aluminim is the L bracket he fab'd to mount the bilge pump.

Or he may have run a piece of aluminim angle along side the knee brace to tie a cracked knee brace firmly to the transom
 
Last edited:

laurentide

Lieutenant Commander
Joined
Jul 24, 2011
Messages
1,869
Chemicalwire...I will definitely go with the marine grade plywood for the transom. And I will pre drill and epoxy before installing.

Ron, I didn't really clarify that epoxy idea. To do it right (I didn't...was in a rush to get the boat done) you would overbore the holes, then fill them completely with epoxy peanut butter (look it up if you don't know what I mean :D). Then you drill through the cured epoxy for the bolt holes. This way there is absolutely no exposed wood. If the transom has some glass cloth epoxied on it will last forever.

This is total overkill but you'll never need to think about it again.
 
Top