Man of Steel Goes Aluminum

classiccat

"Captain" + Starmada Splash Of The Year 2020
Joined
Dec 20, 2010
Messages
3,405
The paint job looks pretty good pike! what paint/color did you use?
fetch
 

Watermann

Starmada Splash of the Year 2014
Joined
Jan 12, 2013
Messages
13,753
Looking good, time to get tearing into her, the fish are waking up.
 

PikeHunter431

Petty Officer 2nd Class
Joined
Sep 8, 2015
Messages
171
No Title

Thanks Guys.

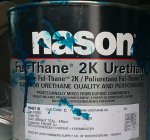
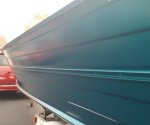
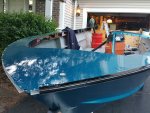
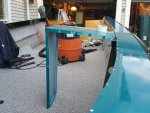
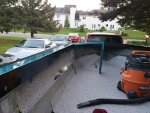
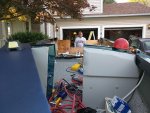
Classcat: It is supposedly a "bright teal", but seems to be pretty blue. It is a metallic and in the sun you do see some of the teal in it.

Waterman: I know, 27 days, drive splash (or else I will probably be the splash).

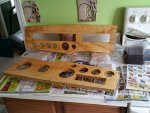
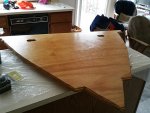
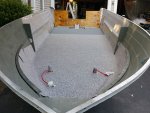
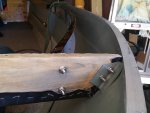
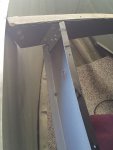
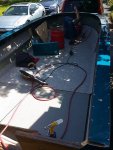
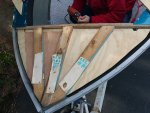
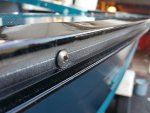
The body shop just called. They just finished painting the pieces I took and can pick them up on Monday. That is good, Then I can start putting the gunnels back together with the rest of the top pieces as well as the consoles. FYI, I am painting the top side pieces of the gunnels (done) and the aluminum trim on the outside and inside of the top all black. I ordered the vinyl for the floor, Merideck, stone color and it should be here this week.
 

Attachments

  • photo263811.jpg
    photo263811.jpg
    147.6 KB · Views: 2
  • photo263812.jpg
    photo263812.jpg
    122.6 KB · Views: 2

PikeHunter431

Petty Officer 2nd Class
Joined
Sep 8, 2015
Messages
171
No Title

Today I am working on cutting out the holes for the switches, gauges, steering wheel, etc on the console boards. The plan is to seal with old timers formula and cover with black vinyl before installing everything.
 

Attachments

  • photo263814.jpg
    photo263814.jpg
    200.2 KB · Views: 3
  • photo263815.jpg
    photo263815.jpg
    214.6 KB · Views: 3

PikeHunter431

Petty Officer 2nd Class
Joined
Sep 8, 2015
Messages
171
No Title

May went by in a blur and I didn't have time to post. Now that I have caught my breath, I will post the timeline progress. May 12th: Dashes - cut & OTFed, Bow floor piece - cut & OTFed, Stern Floor section - vinyl down with spray contact cement ( a new learning process for me) and stapled underneath, a conduit section for bow floor to make running wires between consoles in the future easier.
 

Attachments

  • photo267445.jpg
    photo267445.jpg
    186.1 KB · Views: 5
  • photo267446.jpg
    photo267446.jpg
    164.1 KB · Views: 5
  • photo267447.jpg
    photo267447.jpg
    157.9 KB · Views: 3
  • photo267448.jpg
    photo267448.jpg
    187.3 KB · Views: 3
  • photo267449.jpg
    photo267449.jpg
    186.9 KB · Views: 5

PikeHunter431

Petty Officer 2nd Class
Joined
Sep 8, 2015
Messages
171
No Title

May 13th: Floors down and Vinyl on floors / gunnels.
 

Attachments

  • photo267450.jpg
    photo267450.jpg
    194.3 KB · Views: 3
  • photo267451.jpg
    photo267451.jpg
    192.1 KB · Views: 3

Candutch

Chief Petty Officer
Joined
May 8, 2015
Messages
637
Coming along nicely Terry. I'm impressed how much you managed to fit into those dash panels.
 

ezmobee

Supreme Mariner
Joined
Mar 26, 2007
Messages
23,767
Excellent work. Yeah those dashes are epic for what one can fit in an SS.
 

PikeHunter431

Petty Officer 2nd Class
Joined
Sep 8, 2015
Messages
171
No Title

The weather in May continued to be cold and wet. I had set up for the same local body shop that did the top plates and gunnel sides to do the gunnel trim / rub rail holders. But due to some guys being out sick, it was getting pushed out a couple weeks (which I didn't have.) When I found out on May 19th, 5:30 PM, I ran over (only had 30 minutes before their close), picked up the pieces, came home, laid them out in the back yard and sprayed them. It was one of the few days we had which was warm enough and dry. It was my second use of a spray gun. The pieces were just dry enough to move indoors that night. Then the rains came again.
 

Attachments

  • photo267742.jpg
    photo267742.jpg
    189.9 KB · Views: 2

PikeHunter431

Petty Officer 2nd Class
Joined
Sep 8, 2015
Messages
171
May 19th. Now comes the big test. I tore this craft completely apart. Can I/we remember (or figure out) how it goes back together?
 

PikeHunter431

Petty Officer 2nd Class
Joined
Sep 8, 2015
Messages
171
No Title

Lets see. First the gunnel sides and the infamous cross board under the bow plate. I decided to just wrap and staple it in black vinyl.
 

Attachments

  • photo267746.jpg
    photo267746.jpg
    179.1 KB · Views: 2
  • photo267748.jpg
    photo267748.jpg
    145.3 KB · Views: 2
  • photo267749.jpg
    photo267749.jpg
    138 KB · Views: 2

PikeHunter431

Petty Officer 2nd Class
Joined
Sep 8, 2015
Messages
171
No Title

Next come the two top plates on each side. Time to play "Rosie the Riveter". Can I interest anyone in some war bonds? Getting that air powered rivet gun was such a good investment. I don't know who's posts I read about that in, but thank you, thank you, thank you.
 

Attachments

  • photo267752.jpg
    photo267752.jpg
    193.2 KB · Views: 3
  • photo267753.jpg
    photo267753.jpg
    207.2 KB · Views: 3

PikeHunter431

Petty Officer 2nd Class
Joined
Sep 8, 2015
Messages
171
No Title

Time for the bow plate supports. Hmmm, we have a lot of stuff up there - better add a piece of 3/4" plywood under it. And since I have been known to occasionally, stand on places like that to cast, I better put some plywood in between the original supports to give even support across the bow plate. And then the bow plate itself.
 

Attachments

  • photo267754.jpg
    photo267754.jpg
    219.6 KB · Views: 2
  • photo267755.jpg
    photo267755.jpg
    198.2 KB · Views: 2
  • photo267758.jpg
    photo267758.jpg
    211.7 KB · Views: 2
  • photo267759.jpg
    photo267759.jpg
    212.7 KB · Views: 2

PikeHunter431

Petty Officer 2nd Class
Joined
Sep 8, 2015
Messages
171
No Title

Next the inside gunnel trim on the top gets riveted, the outside trim is fitted on, and the passenger console is installed. We had to raise and re-drill the console holes to the gunnel since I used 3/4" plywood on the floors and 80 mil vinyl. Then the outside trim is reattached with screws, along with wiring brackets on the screws on the inside.
 

Attachments

  • photo267760.jpg
    photo267760.jpg
    197.1 KB · Views: 2
  • photo267761.jpg
    photo267761.jpg
    150.1 KB · Views: 2
  • photo267762.jpg
    photo267762.jpg
    206.2 KB · Views: 2
Last edited:

PikeHunter431

Petty Officer 2nd Class
Joined
Sep 8, 2015
Messages
171
No Title

May21st. Time to get the front panels of the consoles done. The plan was to cover (and staple) the front with light grey vinyl, mount the panels and staple some black vinyl on the backs for a more finished look when facing the consoles from the back. I am going to be putting in a casting deck later in the summer. We wanted to have some foam padding on the front side of the panels above the casting deck, so passengers could lean against them when just cruising and not fishing (I guess such a thing could theoretically happen.) This was my attempt at that. I ran into a number of problems. I had to angle cut the foam down at the top and sides to be able to get the rivets in. I didn't have rivets long enough to grip the console. The only ones I could find locally were some stainless steel ones and they didn't have any large flange ones. I didn't have time to order online, so I bit the bullet and bought them. They still barely are catching and I will need to replace them as I am sure the vinyl will rip out around the rivet head with use. I am not looking forward to replacing them as drilling out stainless will be a pain. After attaching the passenger side, we decided to not put the foam in on the driver side. But the panels were on and we could proceed with putting the dashes in.
 

Attachments

  • photo267763.jpg
    photo267763.jpg
    110.6 KB · Views: 2
  • photo267764.jpg
    photo267764.jpg
    191.8 KB · Views: 2
  • photo267765.jpg
    photo267765.jpg
    207.8 KB · Views: 2

PikeHunter431

Petty Officer 2nd Class
Joined
Sep 8, 2015
Messages
171
No Title

Next came the dash installations, as well at the items mounted underneath on the back of the console panels. I had wrapped the dashes in black vinyl before mounting the switches and gauges. The trim I had sprayed with the gunnel trim.
 

Attachments

  • photo267766.jpg
    photo267766.jpg
    218.3 KB · Views: 5
  • photo267767.jpg
    photo267767.jpg
    171.9 KB · Views: 5
  • photo267768.jpg
    photo267768.jpg
    205.4 KB · Views: 5
Top