1989 Skeeter SD-125 [bass boat]

fmjnax

Chief Petty Officer
Joined
Jul 21, 2011
Messages
457
About 3 years ago I took the plunge and fully restored an old 1984 Skeeter. I kept the boat for a while and loved every minute of it. I then took a new job in Colorado and sold the boat (for quite a bit more than I had in it, at that). After a year and a half in Colorado, I took another new job back in Texas.

Now, this initial post is going to be looong and may not have pictures. It probably won't be very entertaining either, but it is a necessary evil. The reason being is that I have a story behind this and I am still not 100% positive just how much "restoring" I am going to do with this. I want to have record of my progress, if for nothing more than posterity.

It didn't take long before catching wind of my next boat. A friend had a boat that he wanted to get rid of. The boat was a 1989 Skeeter SD-125. His dad was the original owner, making me the second owner (on paper) of this 25 years old boat. The boat was well cared for, but still, it's a 25 year old boat.

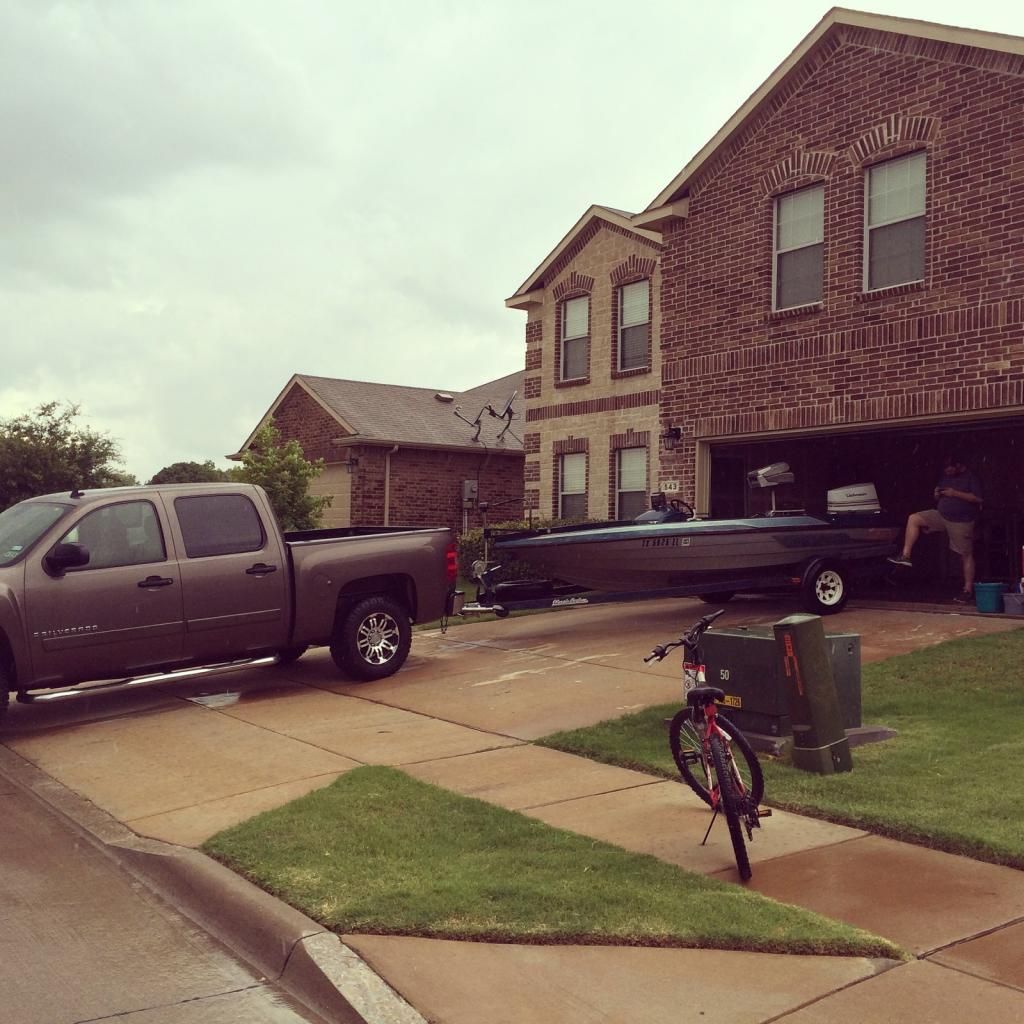
The boat came with a 1984 Johnson 115hp outboard. It originally had a Suzuki on it, but it blew up many years ago so they put the Johnny on it. At some point a couple of years ago, the lower unit went out. My friend pulled the LU and never got the cash or time to do anything else. The wood seemed OK and the transom seemed ok. I offered my friend $700 for it, knowing that I would need at least a LU. I would have bought the boat regardless to help the friend out, but I secretly hoped it didn't need a restore. I drove away later that evening with boat in tow.

Back in the garage, I started to give a better inspection. Sure, it needs new carpet. Sure, the gelcoat has knicks and scrapes and could use some elbow grease. The floor feels solid, but might have a soft spot by a drain. The trailer needs new bunk boards and a new spare. The motor fired up on the muffs. No obvious structural problems found. I decided to go ahead and get moving on a lower unit rebuild.

I snagged a deal on a banged up lower unit housing here locally and purchased all new internals. I think at that point I was at about $900 total, plus $100 or so on the required stuff (life jackets, rope, etc). We'll call it a $1000 boat. Still fired up fine on the muffs so away we went to the lake for the true test. This is where the indecision for me really starts.

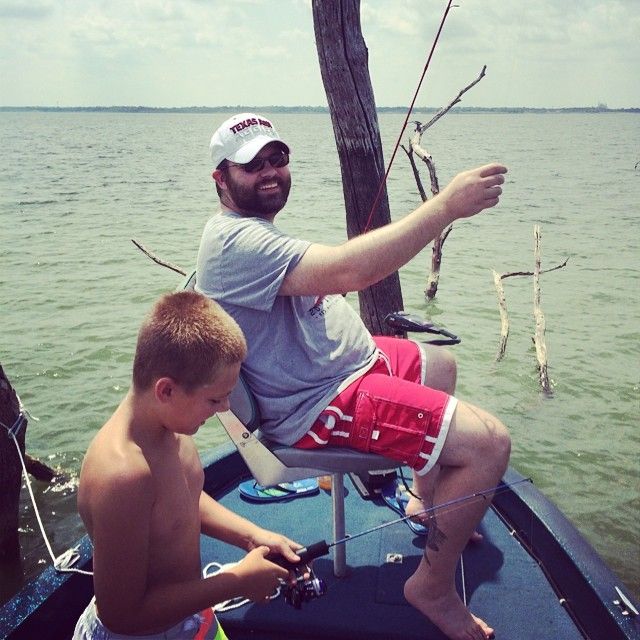
The motor fired up and we had no problem getting on plane. We died a couple of times and idle ended up having a nasty sneeze. I also noticed the bilge took on more water than I care to admit (but not nearly enough to worry about sinking; the pump could handle the volume fine). Steering was rough, and I noticed more spots in the floor that may be soft. I noticed the backs to the seats were in poor condition (I can almost lay straight back in the captains seat). We still had a blast, caught some fish, and had a good swim. Loading the boat back up proved to be interesting. The bunk boards were in worse shape than I thought. Apparently the hardware was rusted out and the bunks were floating as I was coming up. I ended up having to hop in to the water, hook up the bow strap, and hold the bunks down in the right position as I manually pulled the boat in.

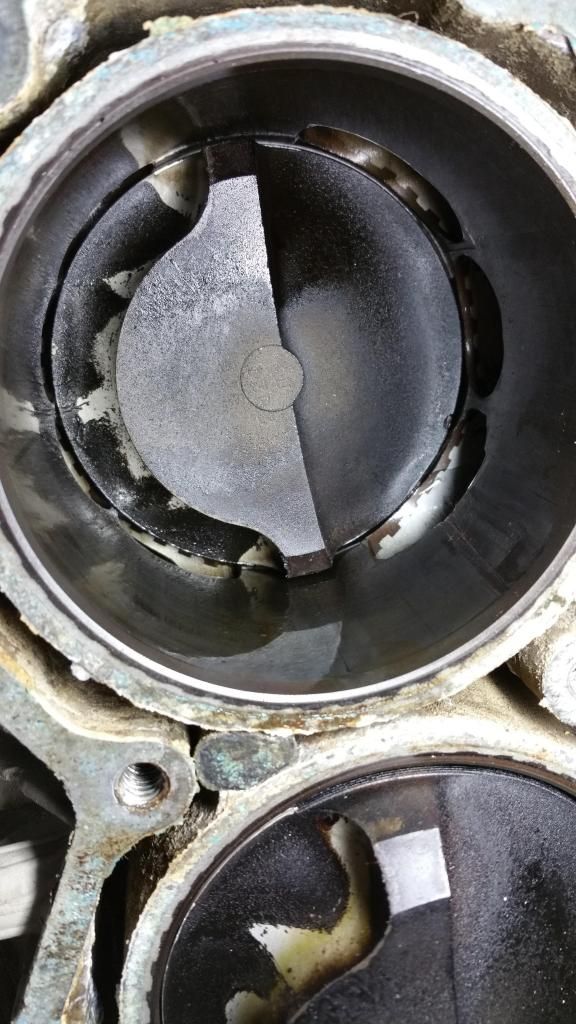
So back at the garage I made a temporary solution for the bunk boards and turned my attention to the easy stuff. I cleaned the carbs and tweaked the settings. I lubed up the steering cable. I tightened some fittings around the 2 livewell system. We used the boat a few more times, each time I would tweak a little more. By the end of summer, I had decided it was a keeper so I dropped another $1000 on electronics and I rewired behind the helm and at the bow. I never did get to the bottom of my idle issue, though. In August, I had stripped down most of the engine to try and find the issue, and that is where my progress stopped.

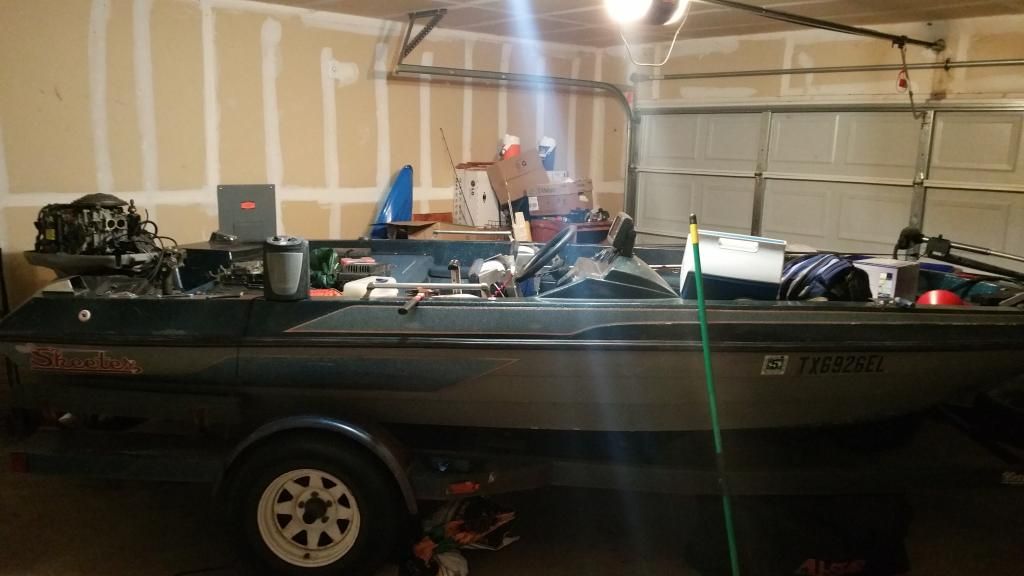
I haven't touched the boat since then. It has sat in the garage, collecting dust and cobwebs. With my busy work schedule, my kids now involved in 2 sports each, and my wife working, I didn't think I would ever have time to fix or even use the boat. I contemplated just ditching the thing for what I have in it, but recently thought better of it and have decided to move on with it. This is where I am going to begin my journey with all of my fellow iBoaters. As mentioned, I don't know just how must restoring I will do or how often I will be able to do it, but I do promise it will be something.

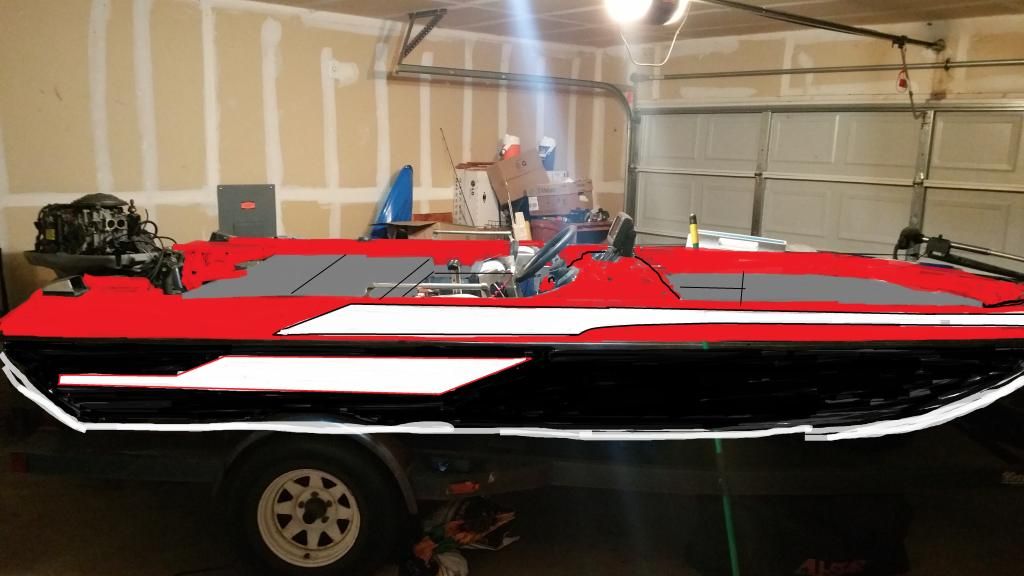
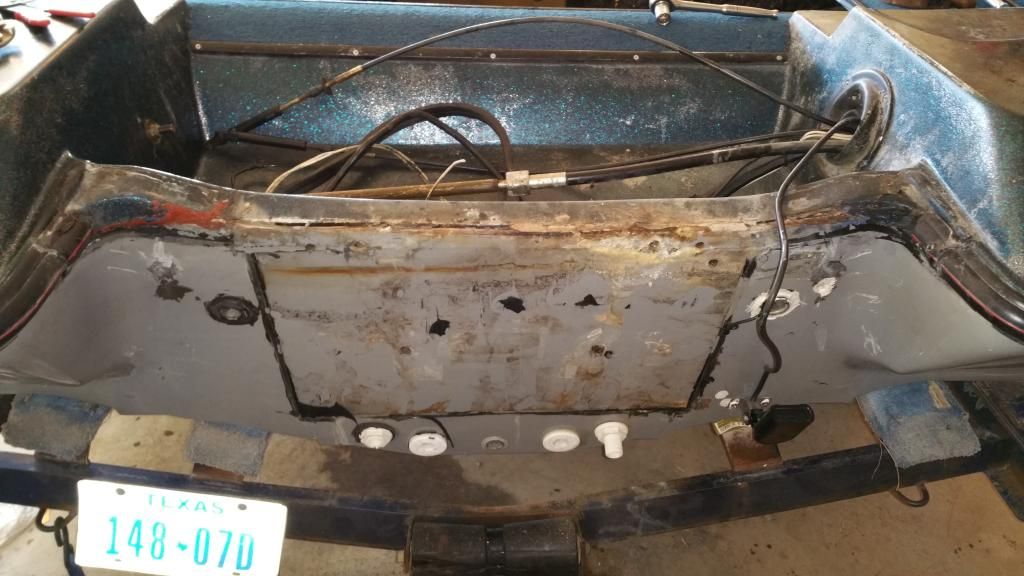
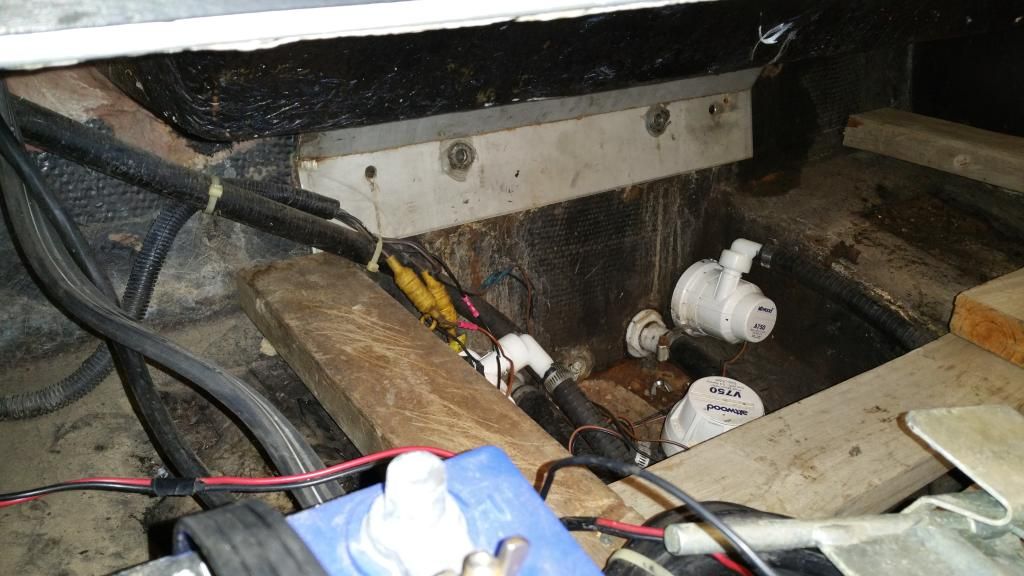
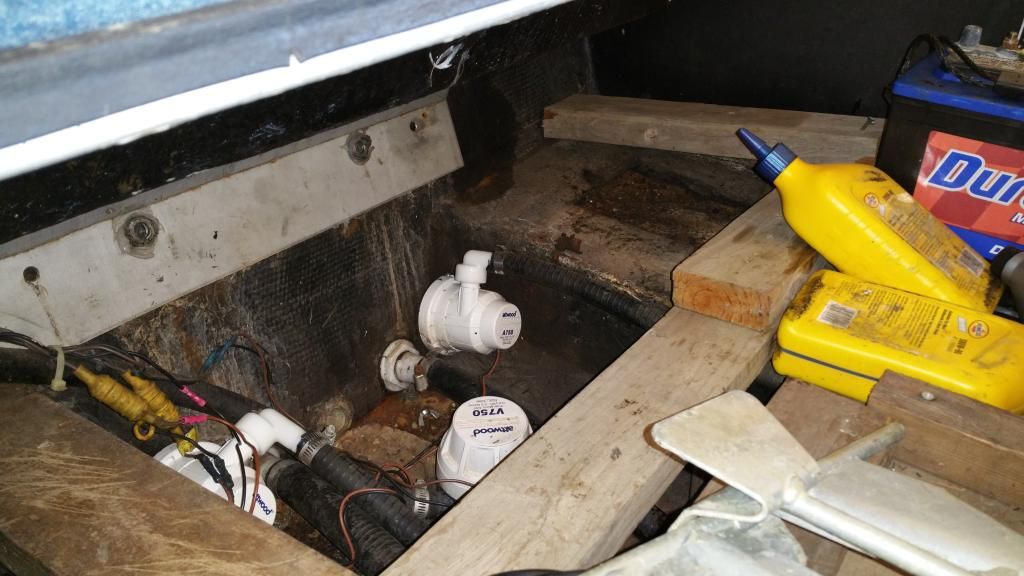
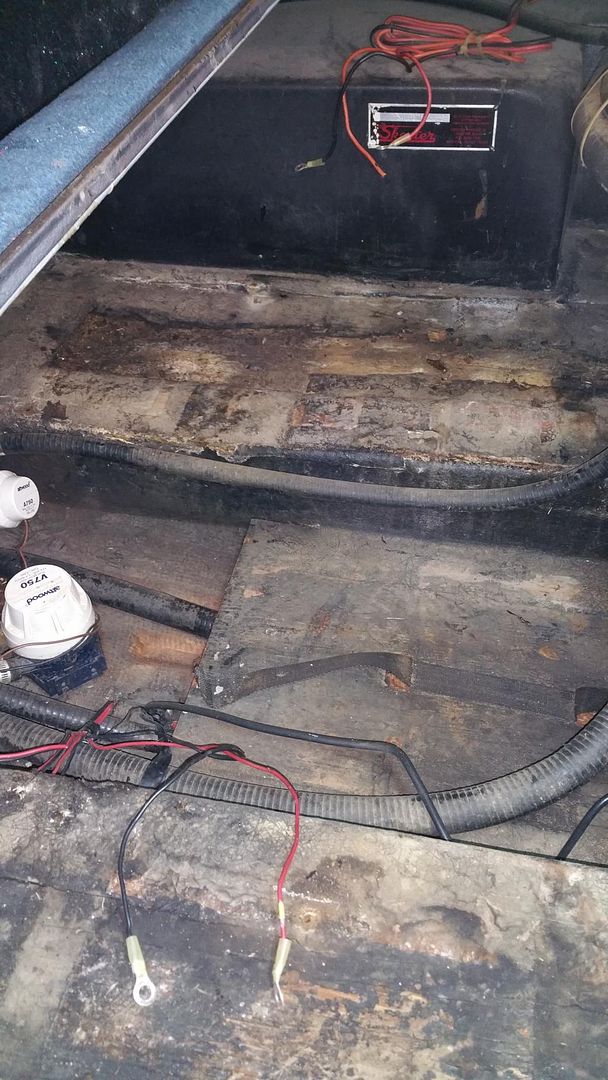
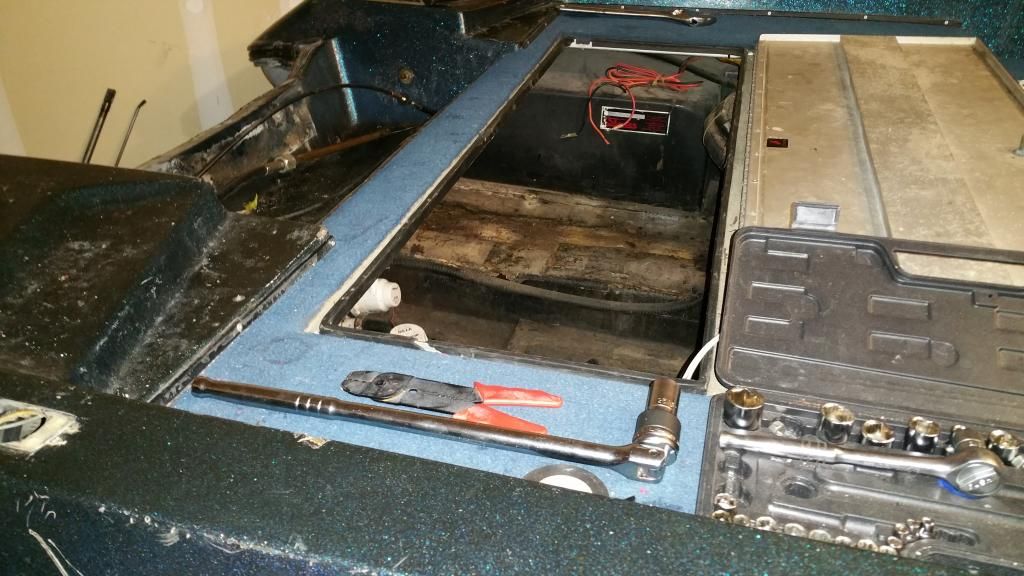
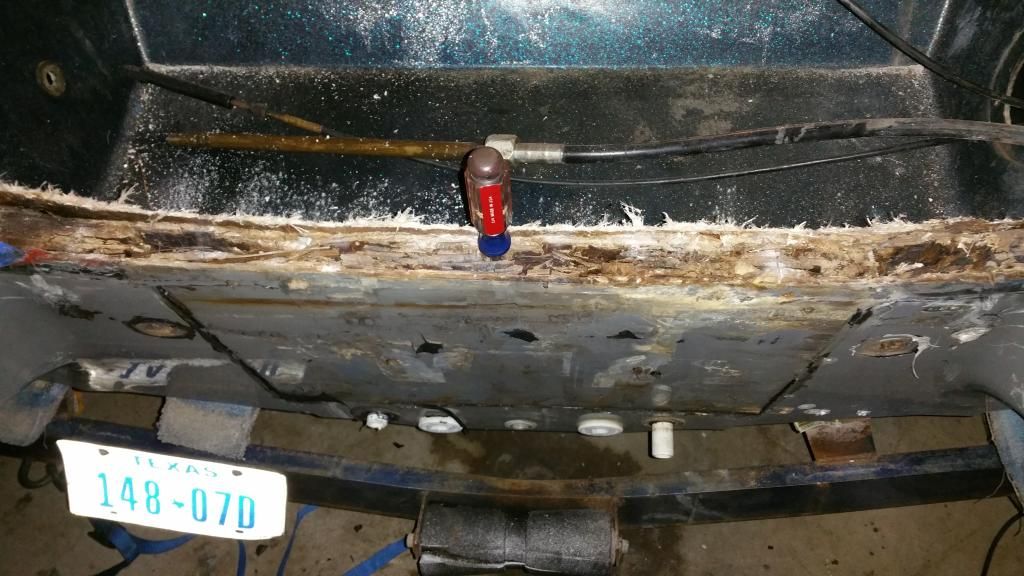
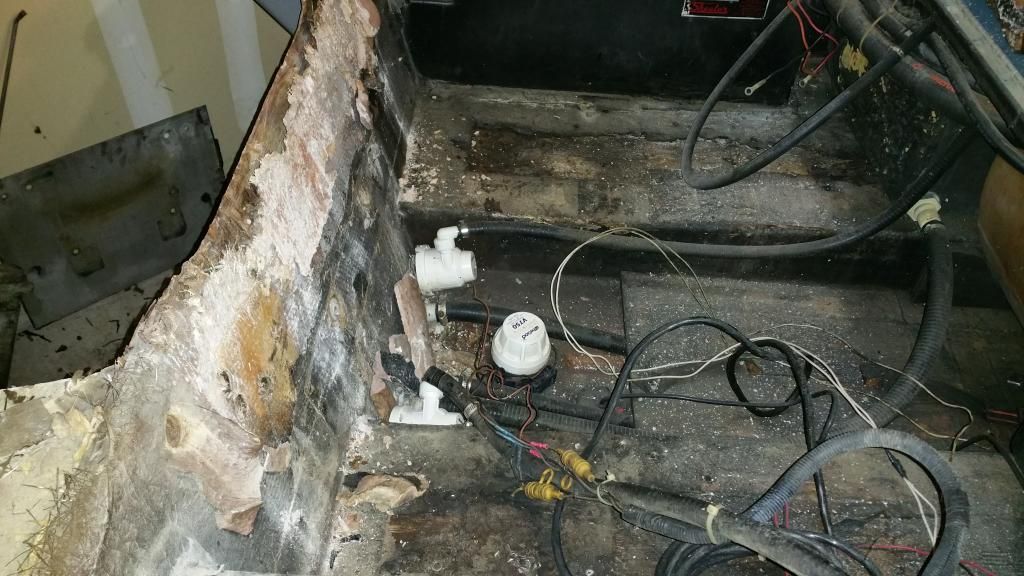
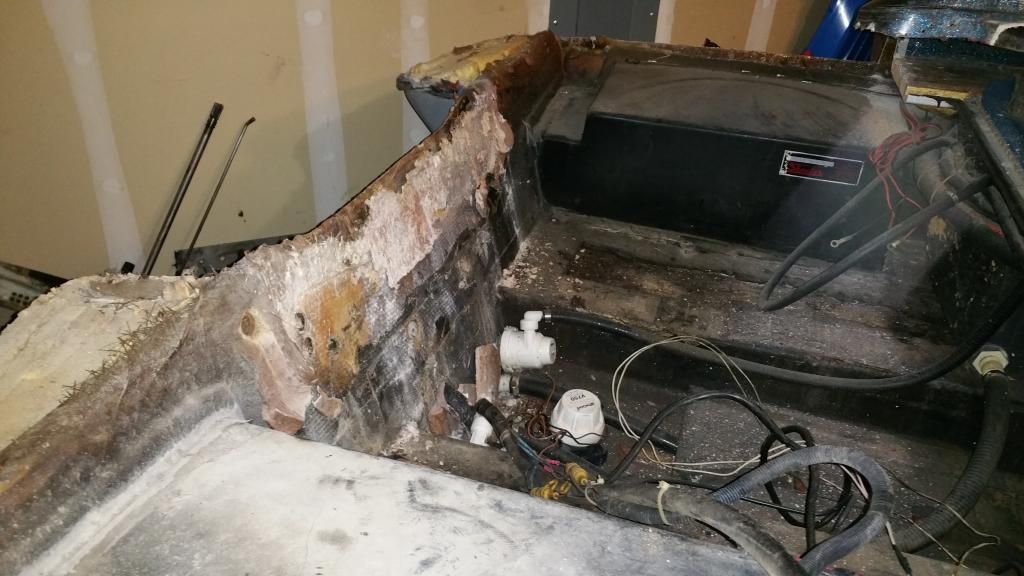
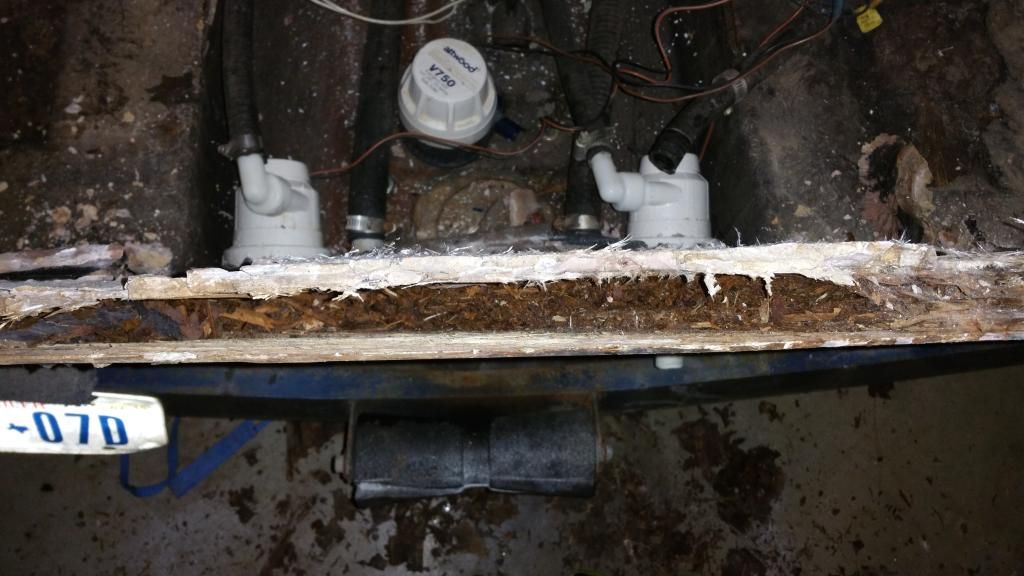
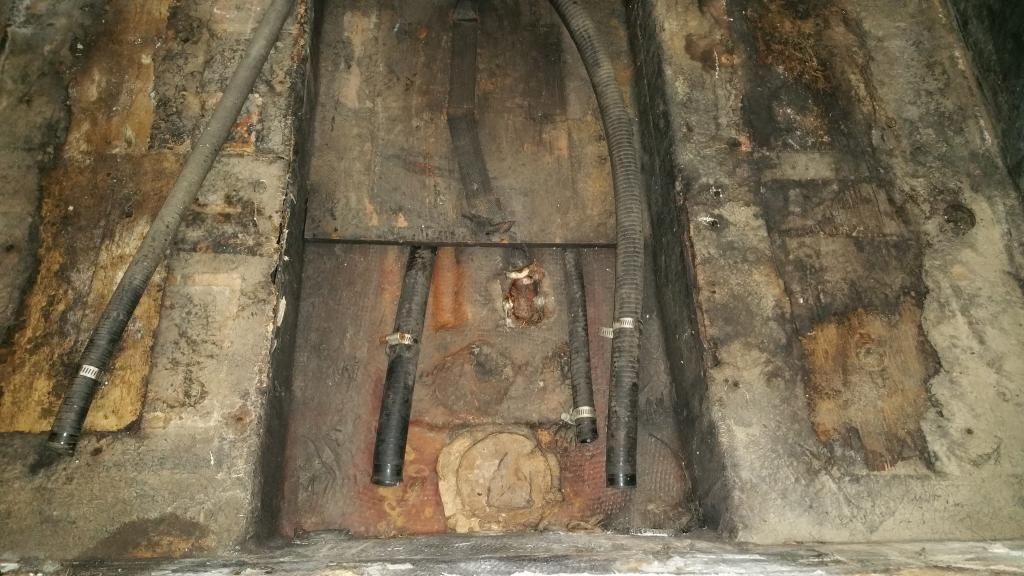
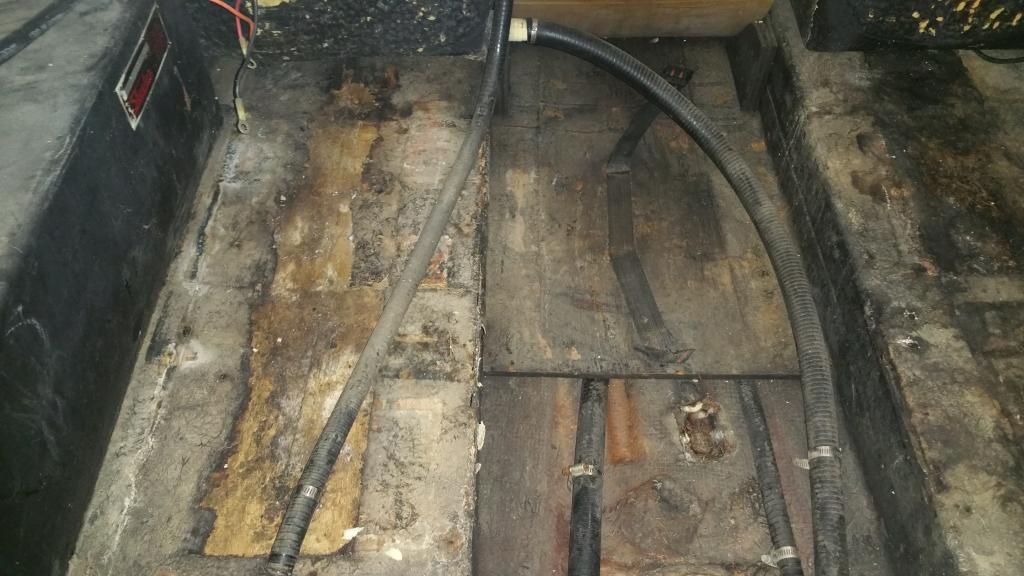
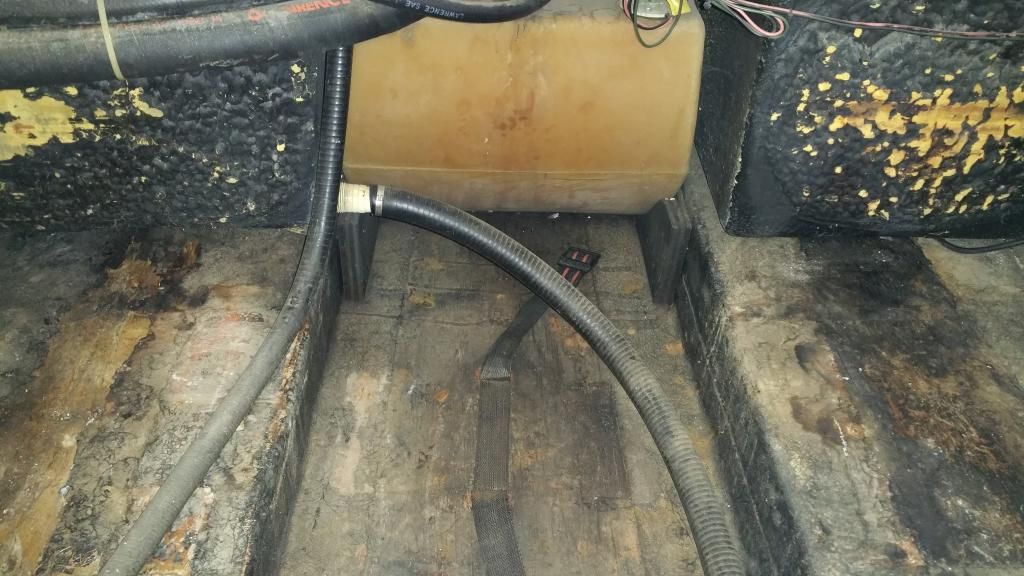
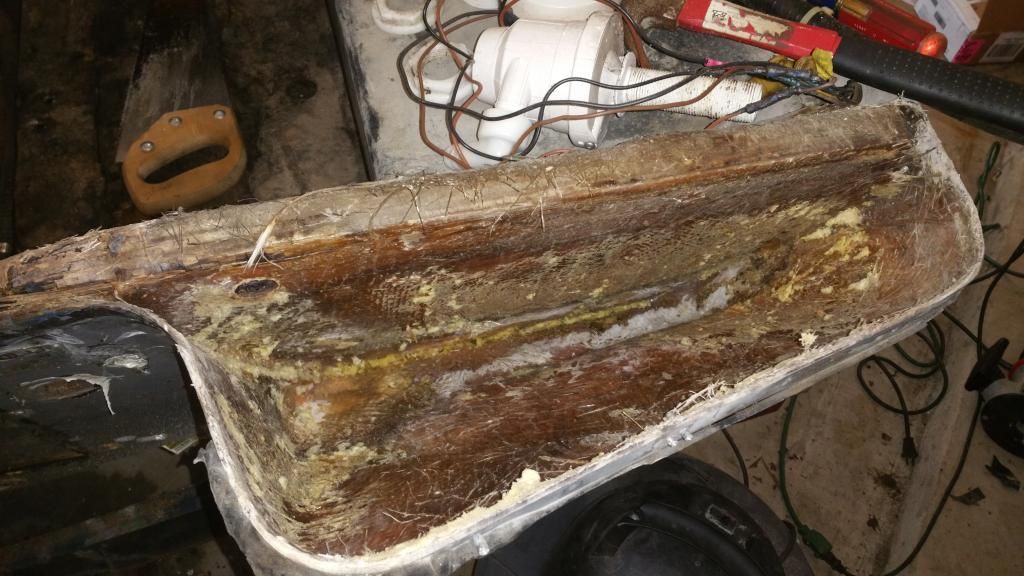
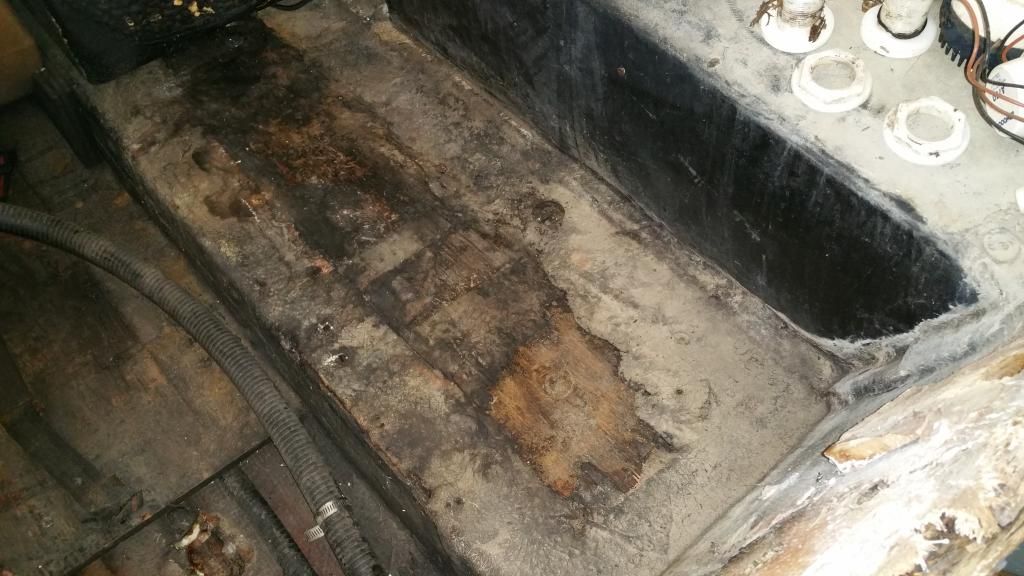
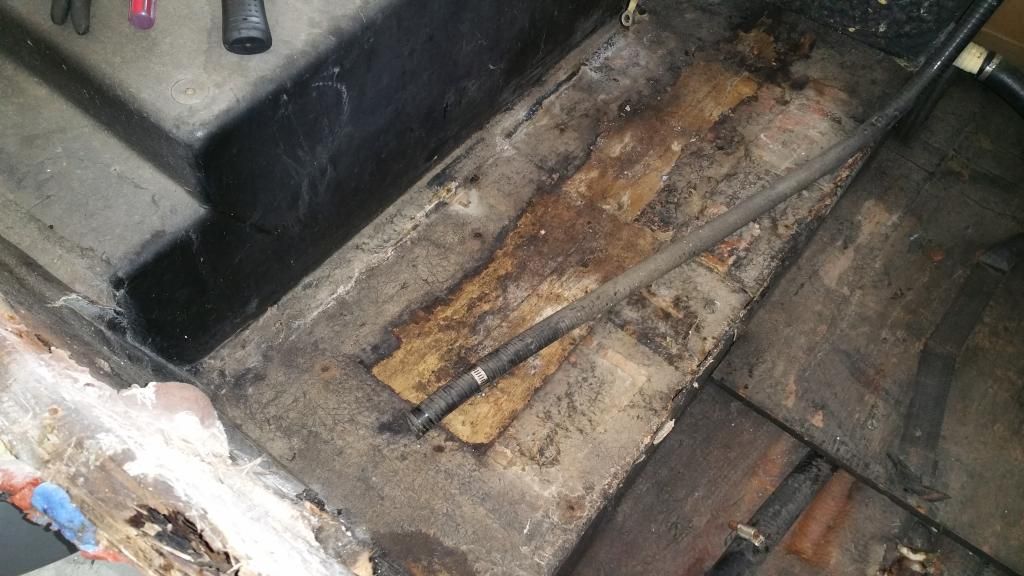
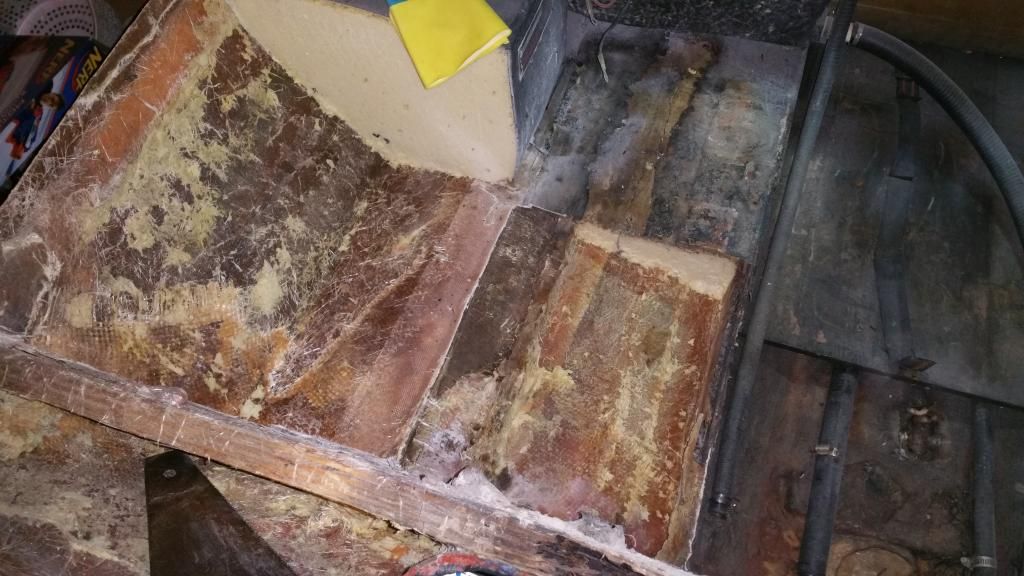
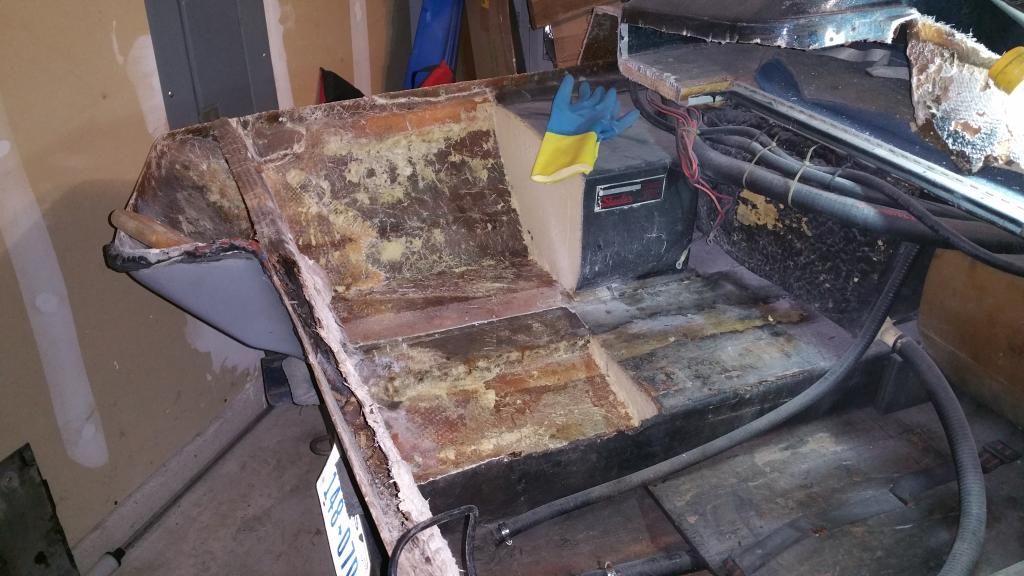
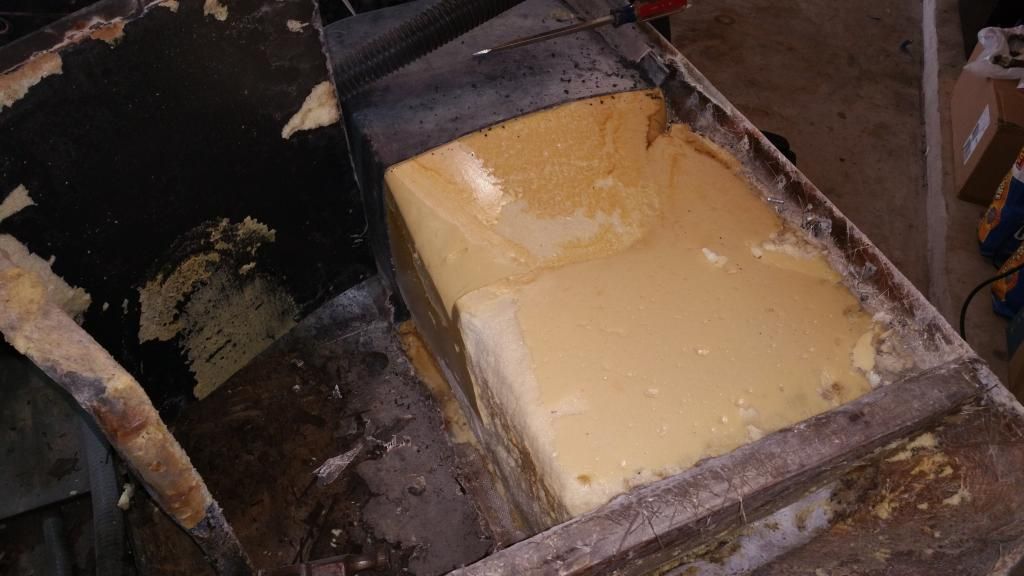
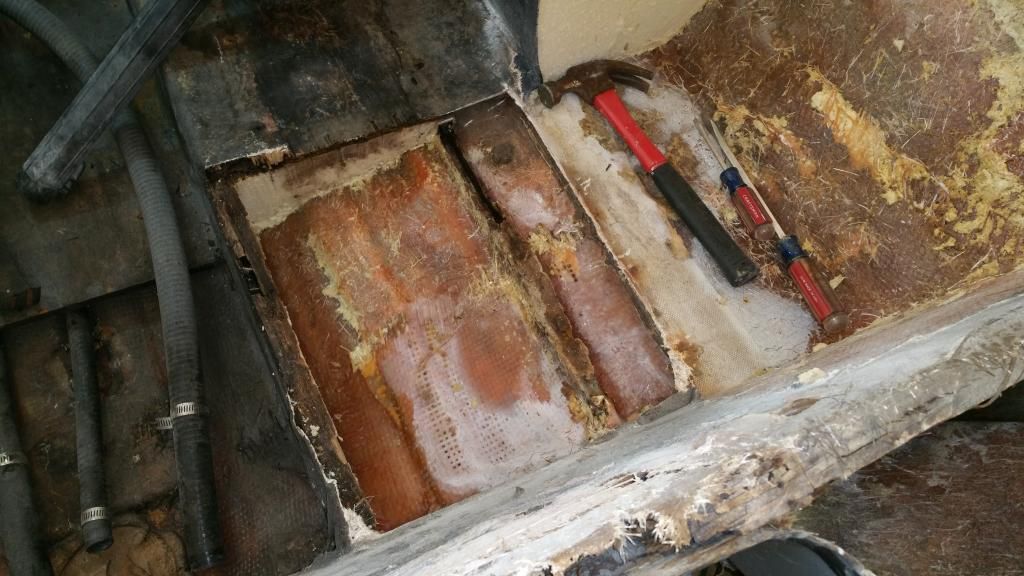
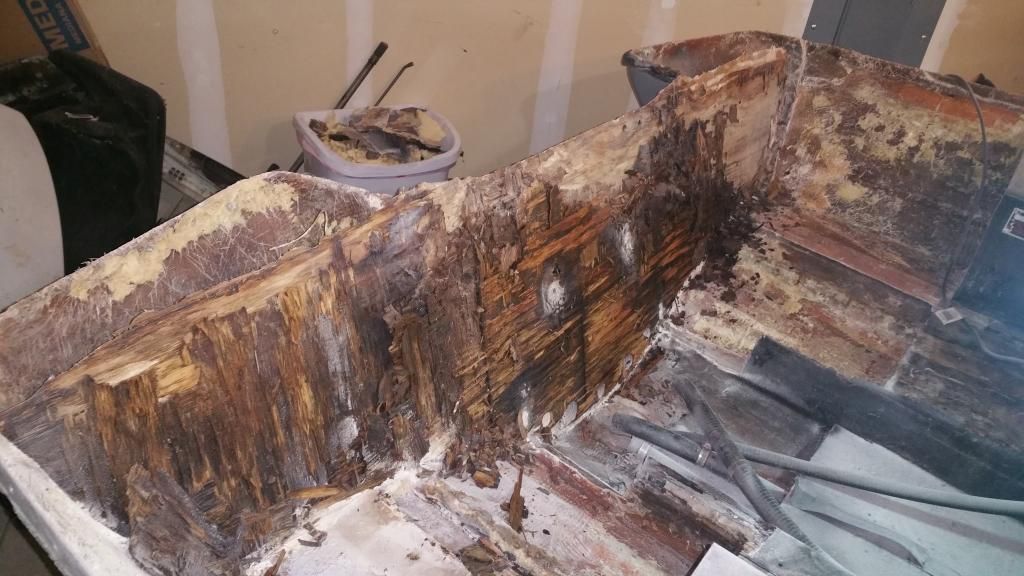
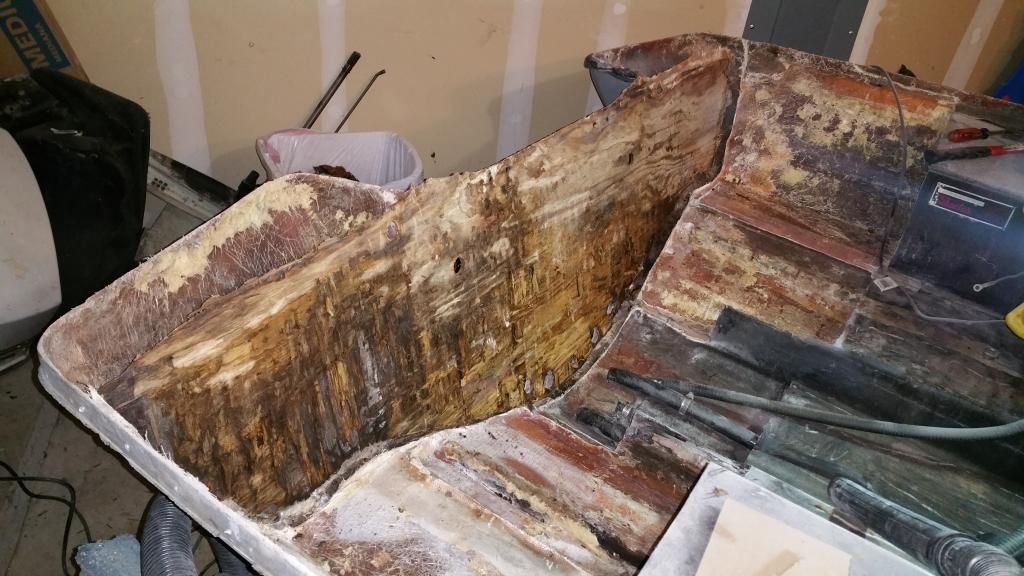
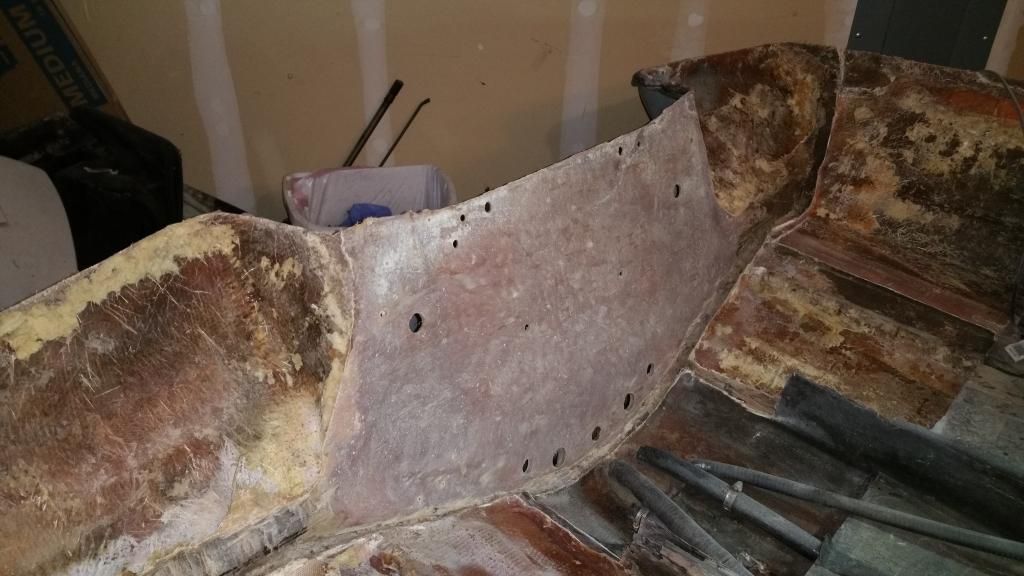
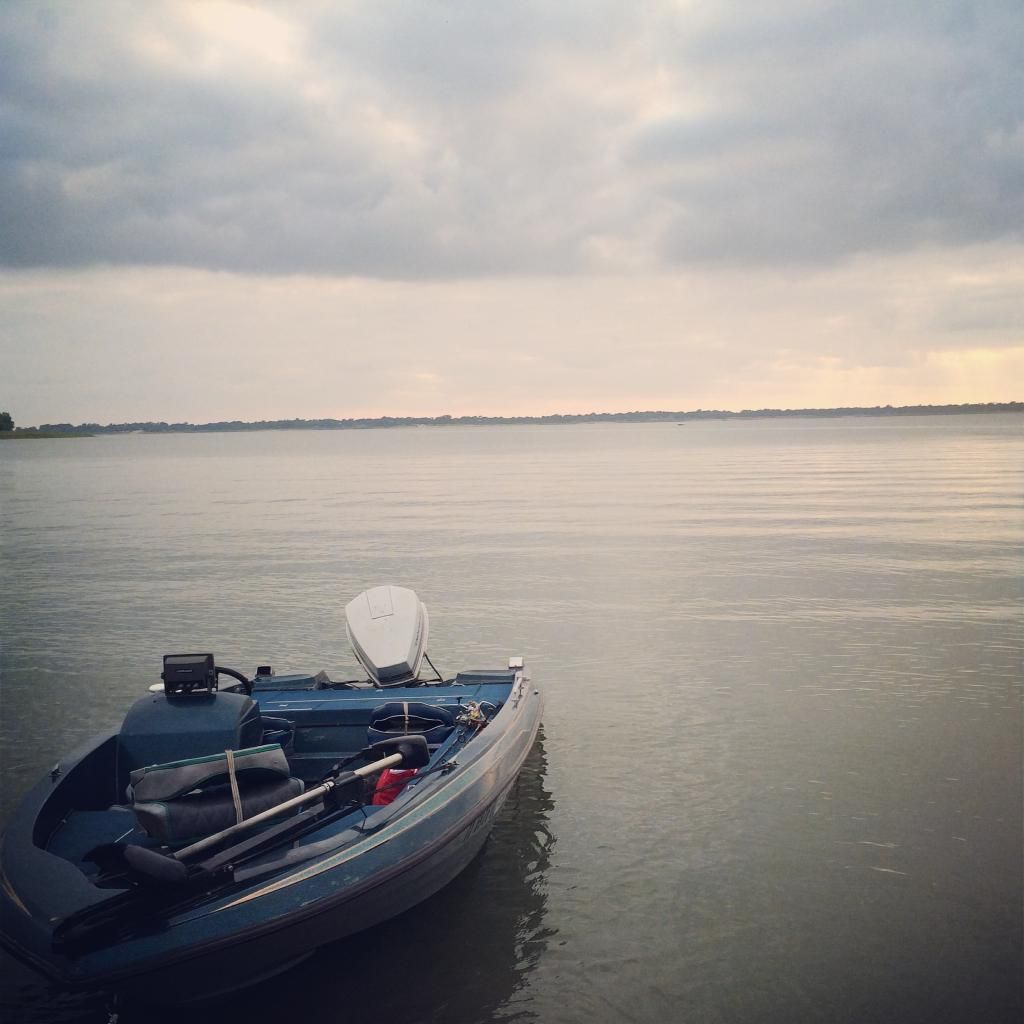
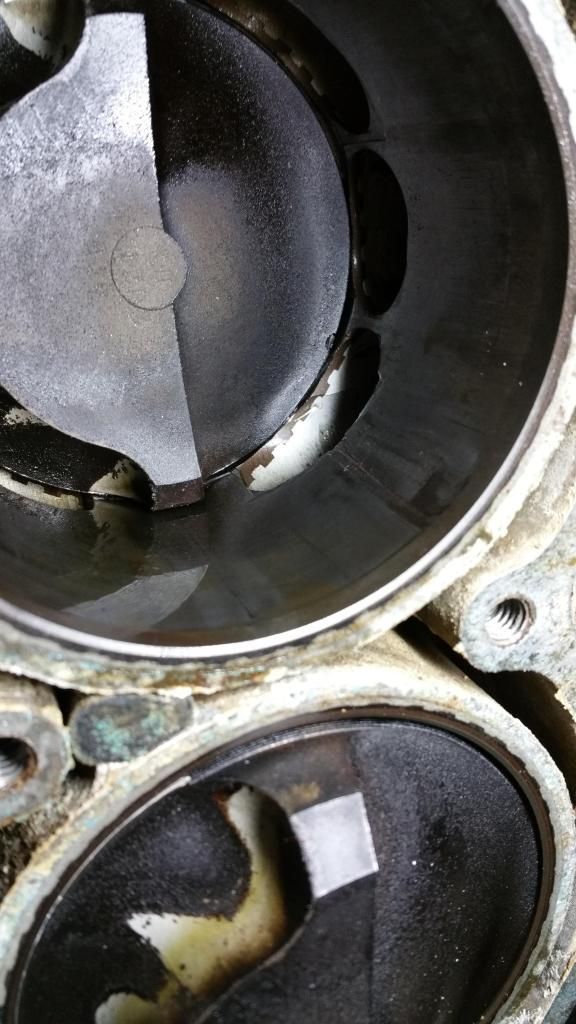
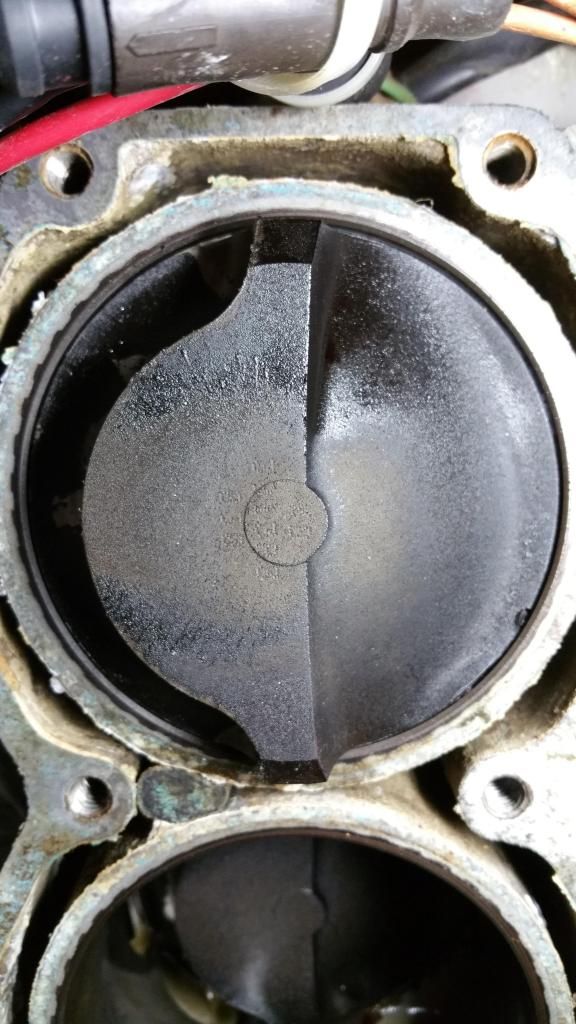
Because I know iBoaters like pictures, here are the only ones I have of the boat.
27092.jpg

27093.jpg

10420025_10204188108365354_5441073534395405374_n.jpg

27095.jpg
 

fmjnax

Chief Petty Officer
Joined
Jul 21, 2011
Messages
457
This post will identify my initial list for this project. As you can tell it's quite trivial and not exactly "restore" worthy. The main reason for this is that I won't really know the state of the deck and stringers until I get to the point of putting in new carpet, which I estimate to be around March. It is always subject to change as I go, but as it sits right now this is what I am working from, in top-down order:

- Clean up the garage so that I can actually get to the boat (it had become sort of a catch-all lately. Unacceptable)
- Clean up the boat; remove dust and cobwebs, organize tools sitting on it
- Put the motor back together (after soaking the carbs and draining the fuel again)
- Finish wiring up/debugging the tachometer. Purchase a new one if it doesn't work
- New fuel gauge
- New bunk boards (will have to install at the lake)
- Fill knicks and dings in the gelcoat below the water line
- Rhino line the trailer
- New carpet (at this point, the restore will either continue as planned, or it could get much more detailed. This is where I will finally check the stringers and deck)
- Clean and repaint motor (LU, mid, cowling)
- Remove old/unused gauges (like the tilt/trim, speed, etc). Fill/repair the holes left and gelcoat/paint/cover aesthetically
- Buff/repair gelcoat on topside wherever possible
- Machine, or new prop
- New seats
- New steering wheel
- Hot foot
- Recessed trolling motor tray
- New trolling motor
 

poppop51

Petty Officer 2nd Class
Joined
Feb 18, 2013
Messages
131
Hey fmjnax, Nice Skeeter you have there. I'm currently doing a full restoration on a 77 skeeter wrangler with a 150 merc. Having a blast working on it. My post shows what I started with. I'll be following along on your build so good luck and have fun. POPPOP
 

fmjnax

Chief Petty Officer
Joined
Jul 21, 2011
Messages
457
Sorry for the delayed response poppop. I wasn't sure if this was going to get off the ground, but it finally has.


So I told you the garage and the boat was a mess! Here's how it looked as of last week. I really need a workbench of some sort at this place (I miss my old workbench). Working out of rubbermaid totes isn't cutting it.
20150109_173225.jpg

20150109_173209.jpg


My son and I got the garage cleaned up enough to where we could start working. We then got busy, only to quickly have the wind taken from our sails. I started with a compression check. 3 of the 4 cylinders read right at 90. The 4th was a weak 50. So off came the head and confirmed the diagnosis of a rebuild.
20150115_212223.jpg

20150115_212159.jpg

20150115_212301.jpg


The wife and I discussed our options extensively. No matter what the outcome, we've lost money. I can probably rebuilt the engine myself for $1200-1500. I have a lead on a semi-local marine rebuild shop and I am waiting to hear the quote from them. I'm guessing right around $2000. I can also purchase a rebuild on-line for right at $2000. The decision has been made to go that route and save myself the trouble. The wife also made the statement that really kicks this project off. She said "if you're going to put all that in to the motor, you may as well do the rest".

We are a go! I won't be able to do the engine work until mid-February, but I'll at least get started on pulling carpet and such. I'm extremely limited on space at this house so I can only do as much as will fit in the garage. Perhaps I will look in to renting out some space somewhere, or I will have to haul it down to my parents house and work on it every few weekends.
 

fmjnax

Chief Petty Officer
Joined
Jul 21, 2011
Messages
457
Now how did you know I was in Dallas WOG? :) Going that route was certainly an option, but a couple things turned me away.
1 - I don't want to be burned on a Craigslist buy. If I am going to put more money than it is really worth in to it, I would much prefer a set of new parts.
2 - I have no clue how I would load and unload an engine from my truck myself (dumb reason, I know).

It would be nice to have a donor engine, though, no doubt about it.
 

Woodonglass

Supreme Mariner
Joined
Dec 29, 2009
Messages
25,924
The GREAT and POWERFUL WOG SEES ALL AND KNOWS ALL!!!!! (Besides that, It's in your Profile!!!!) I understand your concerns. It's always a Gamble on CL!!! Compression Checks don't always tell the entire story. Just thought I'd throw it out there. It's good to see you back on the forum with another project. We'll be there to help when and where we can!!!:D

Since you're back and gunna be messin with another project you Might as well PIN yerself on our Members Map so everyone KNOWS where yer AT and you KNOW Where They all are too!!!!

If you'd like to do so, here's the link...Click Here To Enter Your Location on the iBoats Member Map
 
Last edited:

fmjnax

Chief Petty Officer
Joined
Jul 21, 2011
Messages
457
We have an official plan! Now, I know it's not the ideal and preferred way of doing things, but it's what I have to work with for the time being. Still no pictures since I haven't really started much of anything, but we're close.

I spent the last week or so stripping down the engine to get the block ready for the machine shop. It'll be on its way in a couple of weeks, with new parts to rebuild it coming in around the same time.

With that now out of the way, I turned my attention to the transom. Since the block is off the rest of the motor, and the lower unit is dropped, I just had to remove the midsection from the hull. Piece of cake, really (except for the trouble of tearing down the PH, HA!). Ripped off the steel plates that the previous owner put on (which we all know is a tell-tale sign of transom problems). I was expecting to see the outer skin deformed or broken. I was surprised to see it in-tact, albeit gunked up with silicone and crap that the PO stuck the steel on with.

Moving on, I pulled the metal bracket and the side molding to confirm my suspicion that the transom is, in fact, a goner. Unfortunately, I simply do not have the space to be able to pull the top cap. The driveway is at a decent slope and the HOA says that nothing unsightly can be kept in view, nor can boats be stored in view. No way to access the back yard, either, so I am just stuck with what room in the garage I have.

I initially thought about using SeaCast or the likes, but then realized that the design of this bass boat won't make that a feasible option. About the only option I have at this point is to partially remove the cap, just at the rear, and to do it all as it sits on the trailer. I haven't decided exactly where I will cut the cap off, but I think I will allow myself 2-3 feet; probably right at the fuel tank. This will allow me access to get in and have ample work room. I will do the transom as normal, but will only be able to run the stringers as far as I can reach. I have not yet assessed them yet, so I am secretly hoping that there is something solid to tie in to, but we all know those possibilities are very slim. I am just going to have to make due for now until we move next summer to a place where I can pull the entire top cap.

The current gel coat is ok. It's not horrible, but it's not great either. Initially, I was just going to wet sand, compound, and buff it back to life the best I could. Since I am now cutting the top cap and will have to glass it back together, I have decided I am going to paint it. Since I am doing this, I will also fair out the hull and top cap, fill the unneeded holes, and make it smooth again. Luckily, there is no damage on the underside of the hull, so it should be fairly easy this time around. I do have to roll/tip this time around, though, as I won't be able to spray. It's going to be a tedious process, but I have nothing but time this year.

The trailer will be coated with bed liner and will be given new wiring and hardware. It's nothing fancy, but deserves to at least look refreshed. I was going to do the trailer first, but I think that would be a bad idea; in case I drop resin or paint on it.

Sorry for the ramblings here. I know it's boring. My posts after this one will start to have picture progress, but for now here is the rendition of the paint scheme I am going with (rather, that the wife picked out). Be jealous of my awesome MS Paint skills! We are thinking about making the white accents with vinyl, instead of having to mask and paint, but still on the fence about it. The white border on the bottom of the hull is simply to outline the hull in the picture. The paint will be Rustoleum, using Regal Red, Black, and White. The carpet will be a darker gray, I'm thinking. It should be a fairly standard Skeeter color scheme.
paint_option_2.jpg
 

Teamster

Lieutenant Commander
Joined
Nov 8, 2010
Messages
1,923
Maybe build a frame around and over the boat to lift the top cap straight up and work under it???

I'd rather do that than cut into the cap,......
 

fmjnax

Chief Petty Officer
Joined
Jul 21, 2011
Messages
457
That was an idea, among others, that I had passed around Teamster, but it's just not a possibility at this place. I don't have the space or ability to pop the entire cap. I thought maybe cutting it in to thirds or quarters, but figured that wouldn't be a good idea at all. I had also thought about taking it down to my parents house, but that is a few hours away and I would only be able to work on it one or two weekends a month. I could rent shop space, but the wife shot that down. I did my first restoration the complete and proper way, so it pains me as much as it does all of you to hear and see that it's not going to be a complete restoration. Still, it will be better than not having a boat and when we are able to get out of here in a year and a half, I'll crack it back open and do [re-do] it the right way. For now, this will be enough to get me back on the water.

Anyway, with mid-70 degree weather today, I hit the garage after work. The goal today was to get a better visual of the area. I removed most of the hardware at the back, pulled most of the wiring, and got rid of the make-shift battery tray that the previous owner put in.

Here is the external side of the transom. You can see the black silicone that the previous owner used to attach a steel plate. It was like a rubber diaphragm behind the plate, and released about an ounce of water when I peeled it back (and the boat hasn't seen an ounce of water since August). There were two plates on the outside and one on the inside (still there). I was expecting a broken or cracked skin, but it's remarkably intact.
20150127_164233.jpg


Here is what the internal side of the transom looks. You can see the make-shift battery tray that was put in. It simply pulled right out, despite being screwed in a dozen places. You can also see the internal steel plate that was put in. Otherwise, it was cleaner back here than I thought.
20150127_164255.jpg

20150127_164302.jpg


Pulled that stupid wood junk to see what is underneath. It's obvious the old floor is gone and you can also see the port side stringer is compromised. The starboard side appears intact and still feels hard, but that is just an initial check. If the port side is rotted out, I am assuming the starboard side is as well. Everything up to the livewells and gas tank will be replaced.
20150127_173649.jpg


And here is where I plan on making the cut. About where the socket end of my breaker bar is at on the deck, just inside of the hatch opening. This will give me clear access of everything up to the fuel tank. Again, not ideal, but it's what I have to work with right now.
20150127_181846.jpg


Based on what I found today, I think the plan is to completely clean out that back area. New transom (duh), new stringers tied in as far as I can, new foam and bilge floor, and perhaps new foam in the boxes (still to be determined if that foam is logged, but I am almost positive it is).

Knowing that this is all I can do at this moment in time, how best should I go about tying new stringers in, assuming that the existing ones are rotten up further than the fuel tank? It's probably premature to ask that, until I know for sure what I'm looking at with the stringers, so I'll ask it again when that time comes.
 

fmjnax

Chief Petty Officer
Joined
Jul 21, 2011
Messages
457
I double and triple checked my intended cut location (to make sure I wasn't going to cut through wire or anything of the such). I thought about cutting out the metal channel for the hatch altogether, but figured it would be more difficult to glass it back in than to just bolt up a bracket on the two sides I cut. So I peeled back the carpet, taped the cuts, and got busy. The side cuts were a breeze. The splashwell, not so much.

I cut off the splashwell cap over the transom and immediately wondered how the heck the engine was even still on. The wood was such a goner that I wouldn't even pass it for mulch. No effort needed at all for a screwdriver to plunge in to it. The picture here doesn't show just how bad it is...
20150129_214558.jpg


To be able to remove the cut top cap, I had to separate the splashwell skin from the transom skin. A big of wedging with the screwdriver and she was free. It was getting late, so I just moved the cut top cap out of the way to snap some pictures. This weekend will be cleanup and maybe some more demo. These pictures don't show much, other than a mess, but the transom picture better shows just how bad the wood it. Just mush as far down as I can reach in the center. It's a bit more solid on the sides, but it's still safe to say that it is impossible to use as a template for the new one. I also wish I had cut forward a little bit more, but I know that would have caused more trouble putting it back on than the extra convenience.
20150129_224953.jpg

20150129_224944.jpg

20150129_224931.jpg


And now that I am off and running, it's time to really measure down on material needed. I have WoG's awesome stringer and deck diagrams for 'glassing, but I can't remember what I did for the transom. I believe I glued the two pieces together with Titebond 3, then gave them a resin soak, then a couple layers of CSM, and a layer of 1708 as the new inner skin. Of course, I used PB fillets and overlapping tabbing. I can't remember if I used resin, glue, or PB to glue the transom to the outer skin, though. Would someone care to refresh me on the transom process?
 

Woodonglass

Supreme Mariner
Joined
Dec 29, 2009
Messages
25,924
Building a Transom is in my link...Fabricating Decks, Stringers, and Transoms

It's been edited a bit since you've last seen it possibly. If you have questions Let me know! The ooze holes are MY personal preference and NOT required and have been the topic of some debate lately. I like em and use em and stand by their principle but again you don't have to use em. The other methods described are what's been used by every boat restoration I've seen done on the forum. You can use any Glue of your choice and I've seen em all. CSM is NOT required IF you use Epoxy and if you use Poly and 1708 you don't have to use any Additional CSM. The amount stitched to the 1708 is sufficient to create a good bond. Make sure to precoat the wood and fill any voids prior to laying any fabric.
 
Last edited:

jigngrub

Fleet Admiral
Joined
Mar 19, 2011
Messages
8,155
So how has your assessment of how well the boat was taken care of and how good of shape it's in changed in the past 22 days?

As you have learned, added metal plates on any boat transom should be a huge red flag for any prospective buyer.
 

fmjnax

Chief Petty Officer
Joined
Jul 21, 2011
Messages
457
Excellent point jig!!! Long story short, the "friend" I got this from is no longer a friend of mine. EVERY statement he made about the boat was nowhere close to the truth. The biggest lesson learned is that sometimes you can't even trust a friend; and probably never when it comes to boats.

That said, I am no stranger to old Skeeters or restores. I had a gut feeling I knew why the plates were on there from the day I first saw them. But again, I trusted a friend when I was told 'wood is solid'. Not much I can do about it now, except to fix it and move on with life. :)
 

fmjnax

Chief Petty Officer
Joined
Jul 21, 2011
Messages
457
Busy day today. I began by cleaning up the area and getting a good look at things so that I could formulate a plan of meticulous demolition and inspection. I removed the pumps, the thru-the-hull transducer, and set aside all the wiring. Aside from a round glob of something, grinding down where the tth transducer was, and needing to replace the square mount pad, everything down the center is good. The gas tank supports are solid and the "deck" running down the middle is solid. No plans to do anything here, unless someone sees something suspicious.
20150131_110336.jpg

20150131_152951.jpg

20150131_110353.jpg


I started to remove the foam from the sponsons (I think that's what they're called). I was happy to find that it was completely dry on each side.
20150131_122111.jpg


Now, to the left and right of the stringers, the original floor was gone. The previous owner must have pulled it up when they decided to make their half-azzed battery tray thing. All that remained was a "film" of wood and the foam underneath.
20150131_110342.jpg

20150131_110347.jpg


Now, as you can see from the above pictures, the stringers are exposed and in rough shape. I started to work on the left side to see the extent. I quickly realized that the foam boxes were in the way. Unfortunately, they travel further up the hull than I had cut. I made the decision to just cut it in half. I was fully expecting saturated and nasty foam, but was again surprised to find that every last bit of it was dry. Not a single piece, aside from the exposed top, looked brand new. It sure made my life easier for digging it out. The foam box half came out with ease, only leaving a small layer of foam on the hull (I ran a hand saw along the perimeter to separate the foam from the hull; just couldn't get the bottom). I'll be able to put it back in place and run some tabbing to reinstall it. For the floor foam, I cut a grid with a hand saw and simply used a screwdriver to pop each grid piece out.
20150131_214055.jpg

20150131_214106.jpg


Suspicions confirmed, the wood in the stringer was mulch. I was very careful in my demolition so I have the skin left in place. This will help immensely for building templates. I am quite sure the wood is rotted much further up the hull, but due to the circumstances I am only going to be able to run new wood as far as I can reach. I will tie it in to the hull and the center wood as best I can. Something is better than nothing.

As for the transom, the inner skin is in excellent shape. Since I cannot use the wood to make a template for the new one, my plan is to carefully cut out the inner skin, trace it to cardboard, and shape the template from there. That is probably the best chance I have at it.

With tomorrow being SuperBowl Sunday, I likely won't get any work done, but hopefully I will have time after work during the week to do something.
 

fmjnax

Chief Petty Officer
Joined
Jul 21, 2011
Messages
457
Managed to get some work done this morning. Since I better knew the layout, the work was much quicker. I won't bore with too many pictures, since it's practically the same as yesterday. The foam box didn't want to cooperate, though. Instead of coming out with the foam intact, only the shell came. I will be changing my strategy and replacing the both side with pour foam.

On the right side, the stringer is in better shape (still not good, though), but the tiny stringer is gone (on the left side, it seems to be intact, for the time being). Again, I will leave the shells as much as I can in order to template them out and I will tie the new ones in as far as I can. Makes me cringe knowing that I'm not doing it 100% right and will be doing re-work in a year and half when I have the ability to do it all, but I'd rather be on the water sooner than later.

20150201_114025.jpg

20150201_130342.jpg
 

Woodonglass

Supreme Mariner
Joined
Dec 29, 2009
Messages
25,924
When it's time to remove the transom use a circ saw and set it to about 1/16" less than depth and cut a 1" grid across the transom both directions. You can then use a wood chisel to remove the 1" blocks and you'll be amazed at how easy they'll pop off. You can then use your grinder to finish cleaning the transom down to fresh glass.
 

jigngrub

Fleet Admiral
Joined
Mar 19, 2011
Messages
8,155
For your demo work like removing the transom core and foam, this 24" wrecking bar is a badazz tool:
http://www.homedepot.com/p/DEWALT-24...5129/202985576
For $15 you can't beat it, it'll save you lots of time.

It made short short work of removing the transom in my current project:

I had it out and on the ground in like 15 minutes after cutting the inner skin off.

Drive the bar down carefully from the top between the outer transom skin and the wood core and pry carefully, remove the bar and slide over a few inches and repeat until you've worked the entire length of the transom if it takes that long before it pops off. That bar has a sharp chisel point and will separate the wood cleanly from the skin. One of the best 15 bucks I ever spent. It'll do the same thing when driven between foam and the fiberglass hull popping off big hunks of foam.
 
Last edited:

fmjnax

Chief Petty Officer
Joined
Jul 21, 2011
Messages
457
Started the day today by pulling up the main deck carpeting to check status on the wood there. I was relieved to see that it is in good shape, so I won't be touching it. I do have two drains in the deck that allowed me to get a visual inspection of the stringers further up the boat. They are intact and feel/sound solid, not that it really matter much at this point.

Anyway, I got to work cutting off the inner transom skin. Nothing special here. I tried to cut it out as close to the hull as possible since this will be what I use for my rough template. It came off with a simple tug. VERY rotted transom. This is supposed to be mostly fiberglass, but half the rotted wood came with it.
20150203_142256.jpg


And this is what was left on the hull
20150203_142306.jpg


No need for a pry bar or a circ saw here. It all practically fell off as mulch. Only the lower center needed coaxing to come out, but nothing a hammer and screwdriver couldn't handle.
20150203_171321.jpg


And what the screwdriver and hammer couldn't get off, the grinder with a 24 grit disc made quick work of. She's all ground down, but need to do a little cleanup around the edges still.
20150203_181340.jpg
 
Top