1967 16' Fiberform Rebuild

guitarkev77

Seaman Apprentice
Joined
Jun 26, 2009
Messages
49
Hello fellow IBoaters.

After joining the I Boats Forum a couple of years ago, and reading all the informative threads posted here, I am finally getting started on my own project.

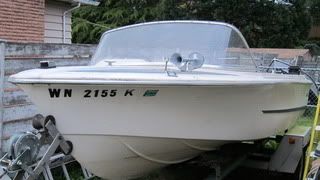
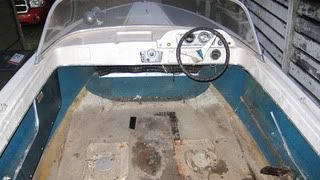
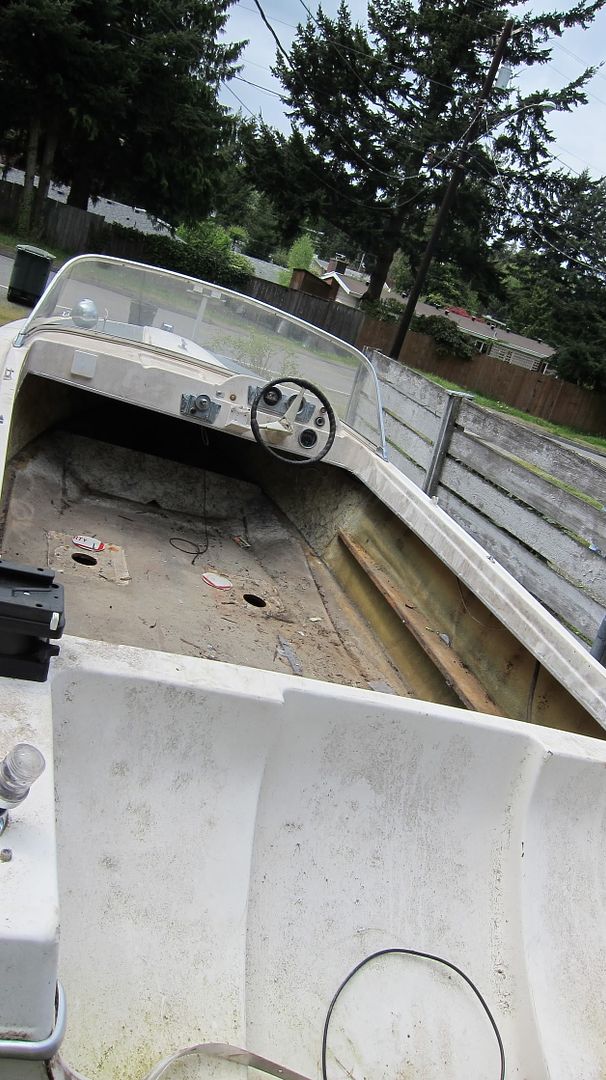
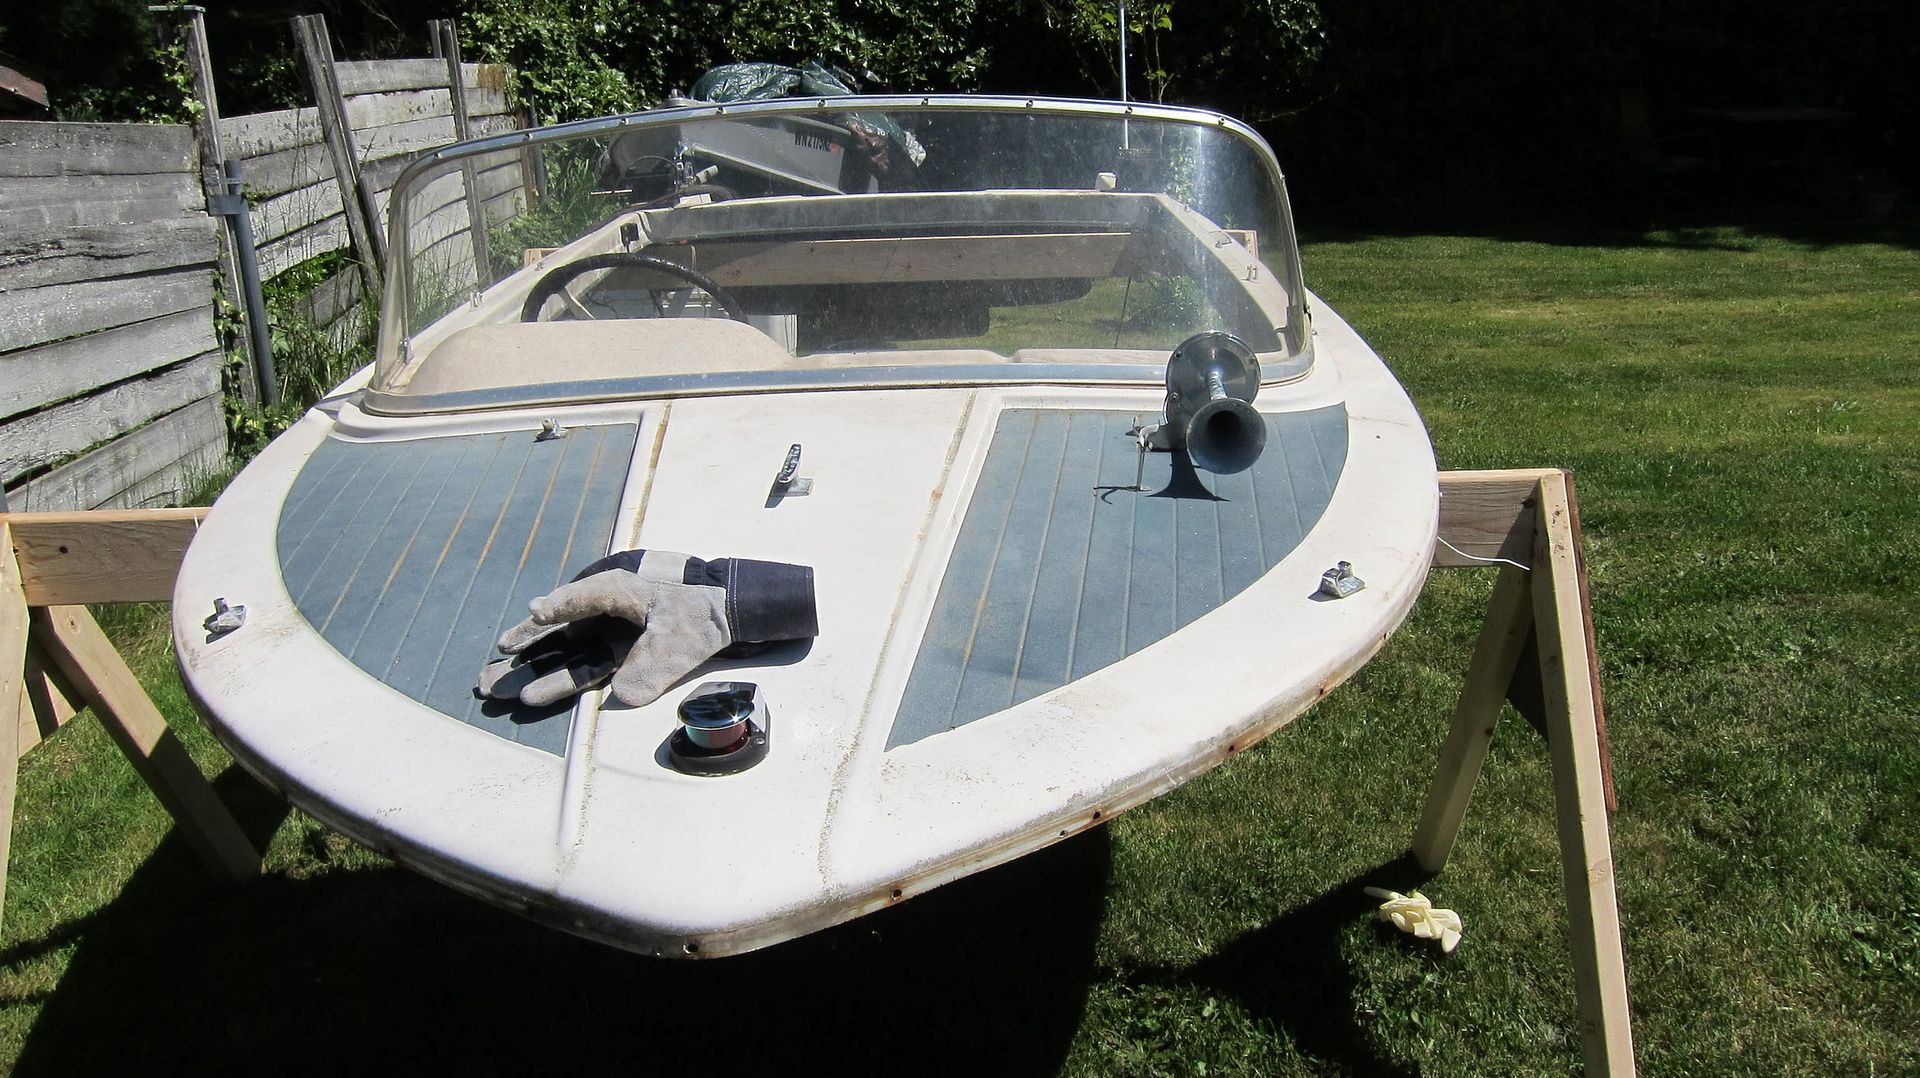
The boat is a 1967 Fiberform 16' runabout/fishing boat. Pics will be coming, but the picture in my avatar was taken off of the boat while out on Puget Sound.

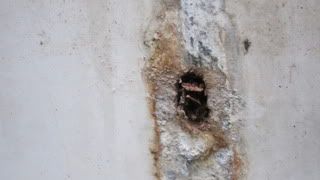
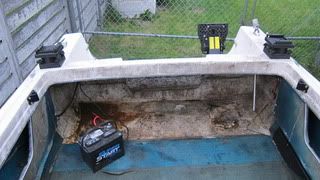
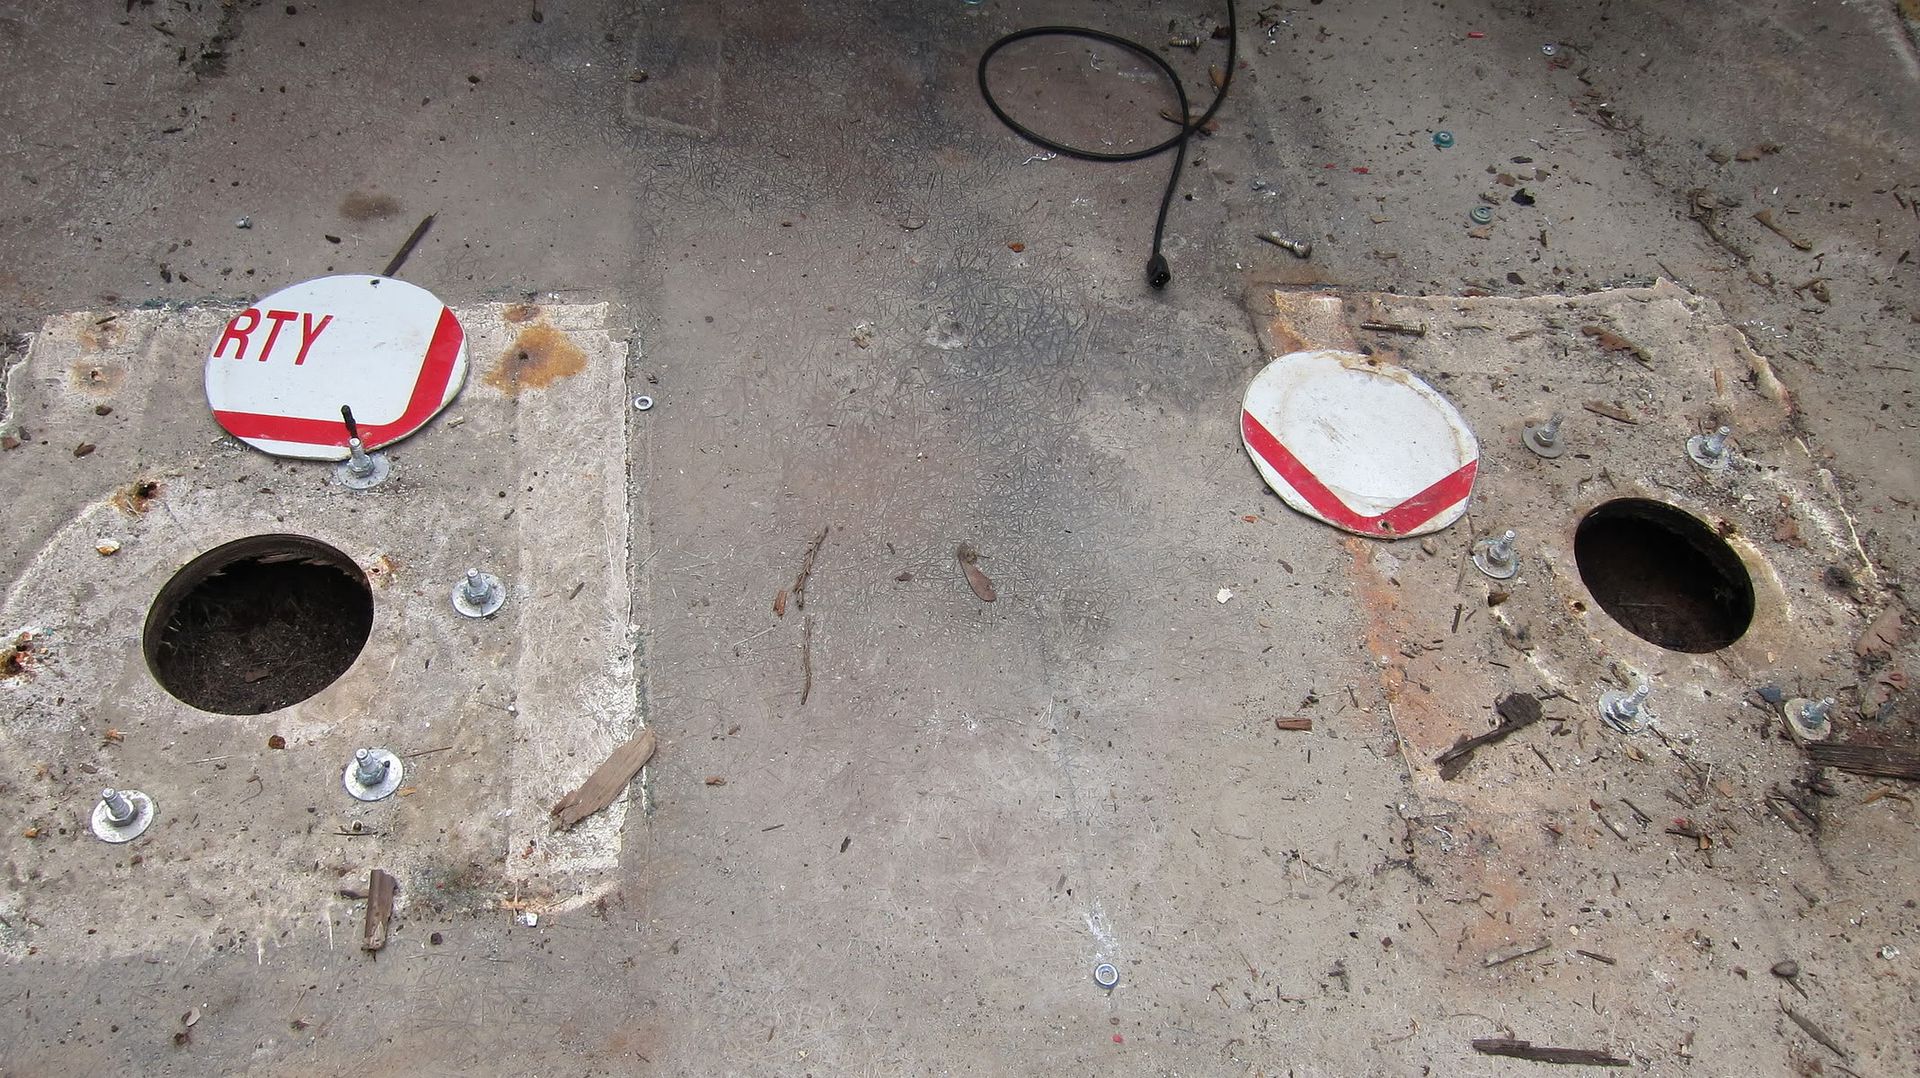
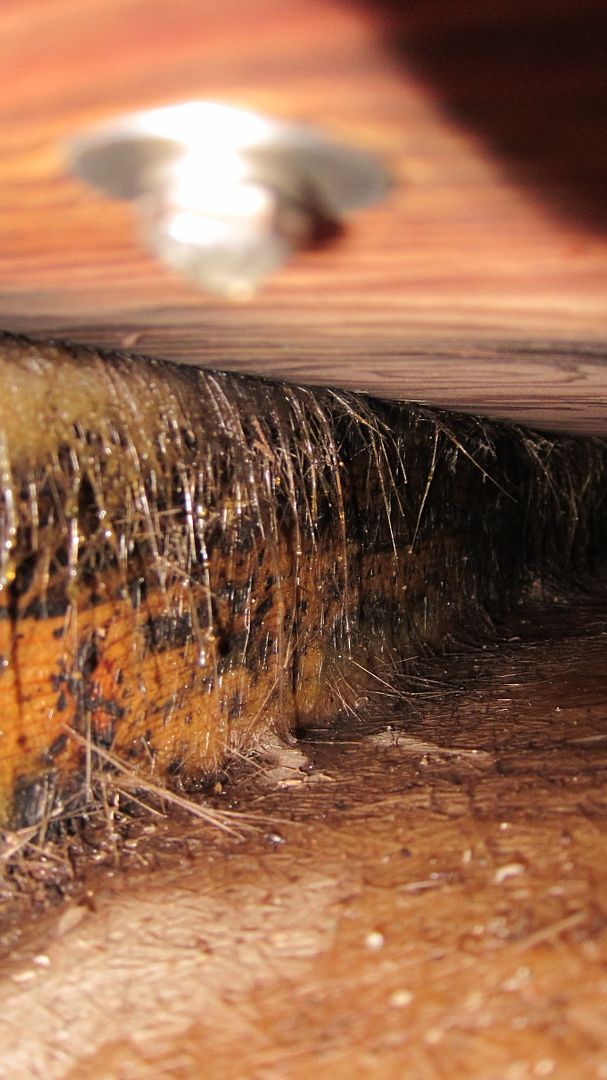
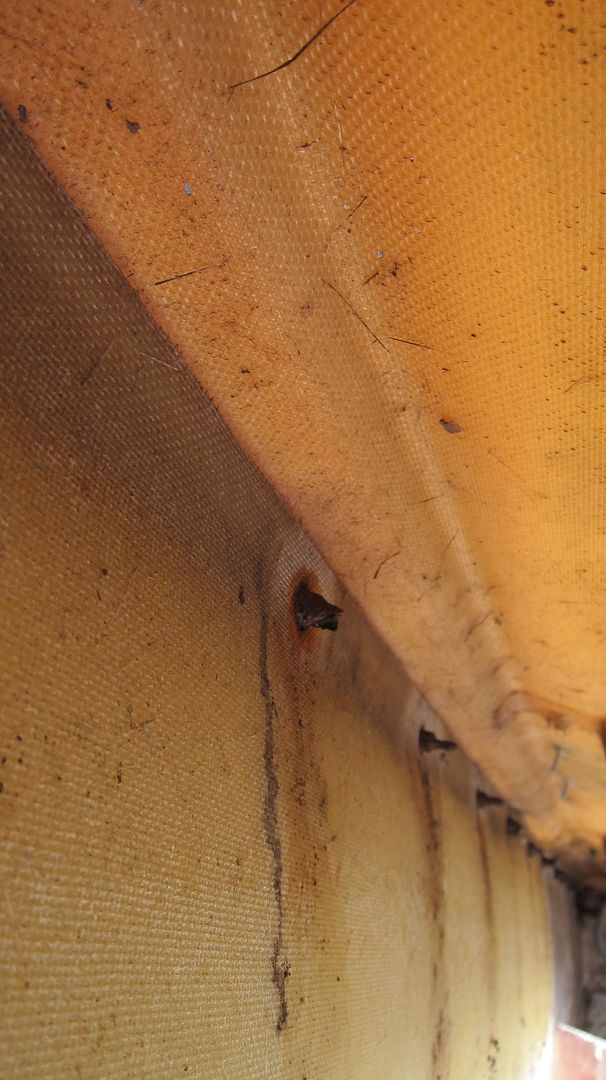
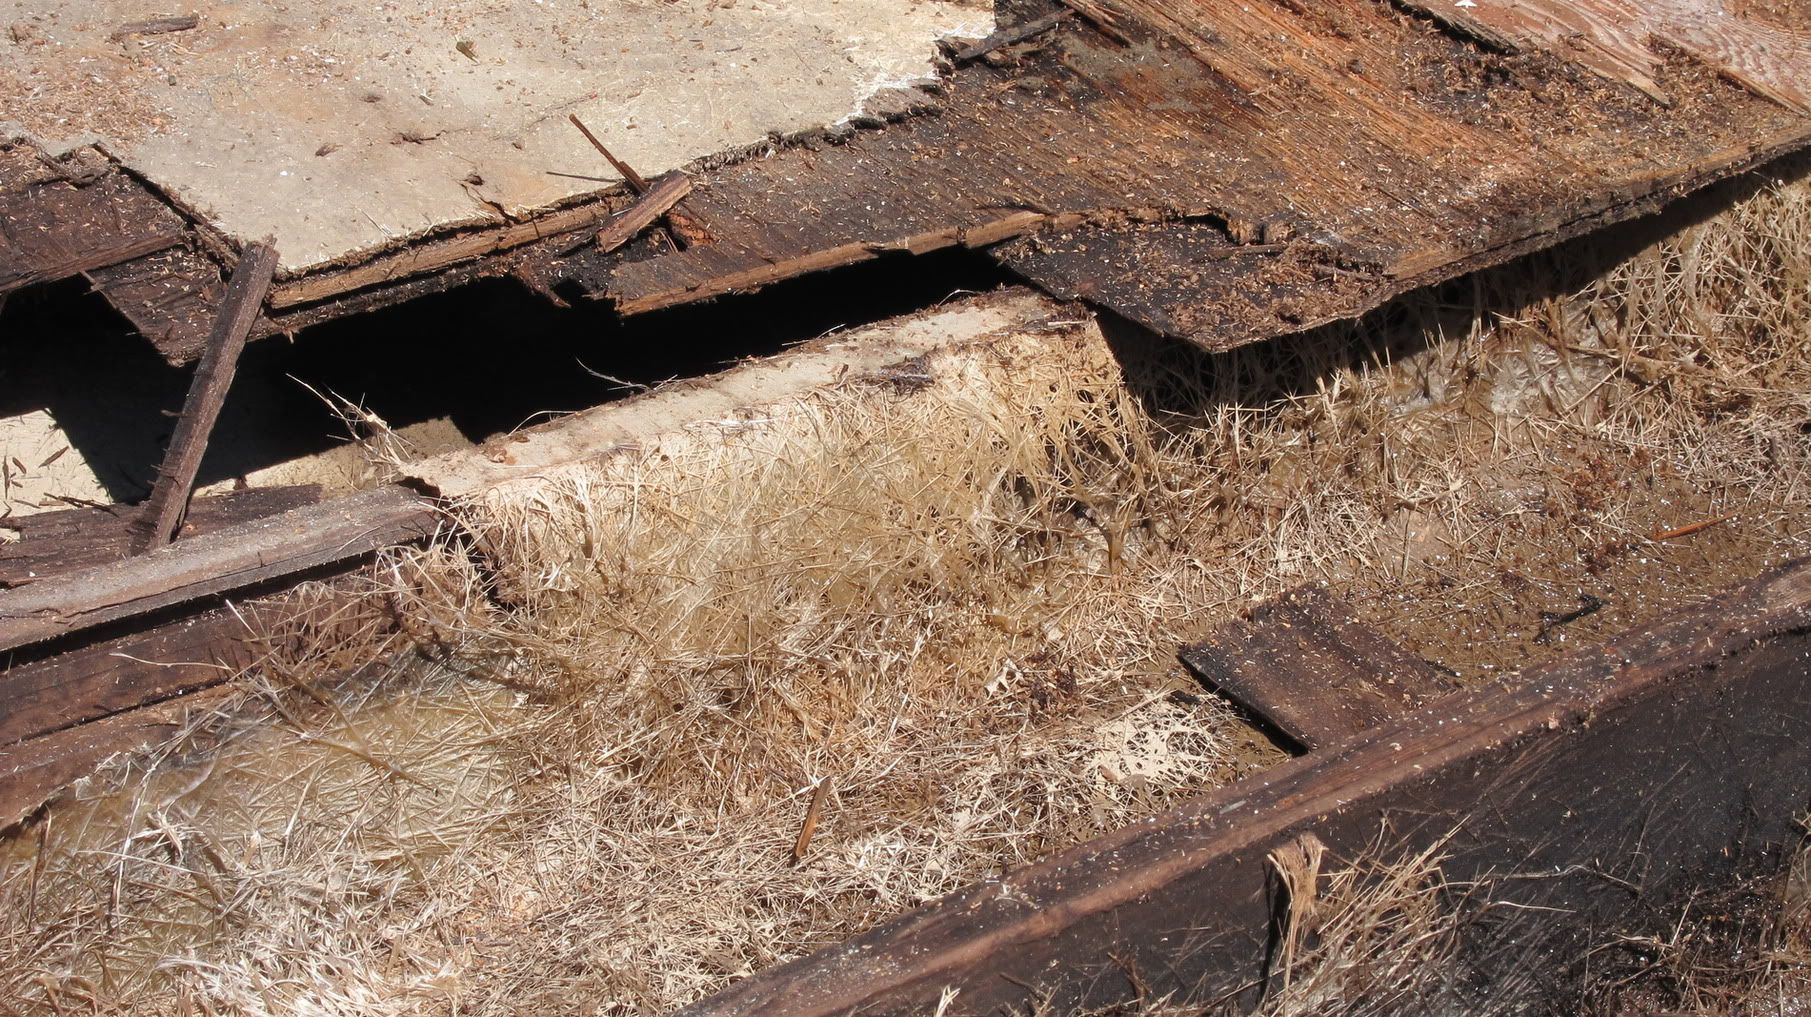
A little bit of back-story: I bought this boat a couple of years ago for a pretty decent price. After reading the forum for awhile, and given the boat's age, I was pretty sure that it was going to need some work. My suspicions were confirmed when I found some soft spots in floor by the battery. The PO had screwed a piece of wood down to the floor to stop the gas tanks and batteries from sliding around, I guess. Water wicked down the screws and rot started.

I bought this boat for salmon fishing and crabbing in the Sound, and didn't want to miss the season, so I put down some PT plywood on the deck and fished the season. The boat did well in the salt, and the motor, an early 80's Mercury 850, ran great.

Last season, I didn't really want to chance an accident happening and so the boat stayed in the driveway. Now it is ready for a rebuild.

I'm not looking to do a classic restoration, I want to make this boat a utilitarian fishing boat where I can take a hose to the floor when I get fish blood on it.:D

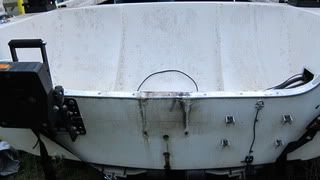
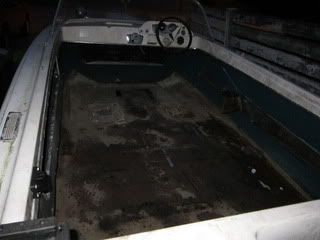
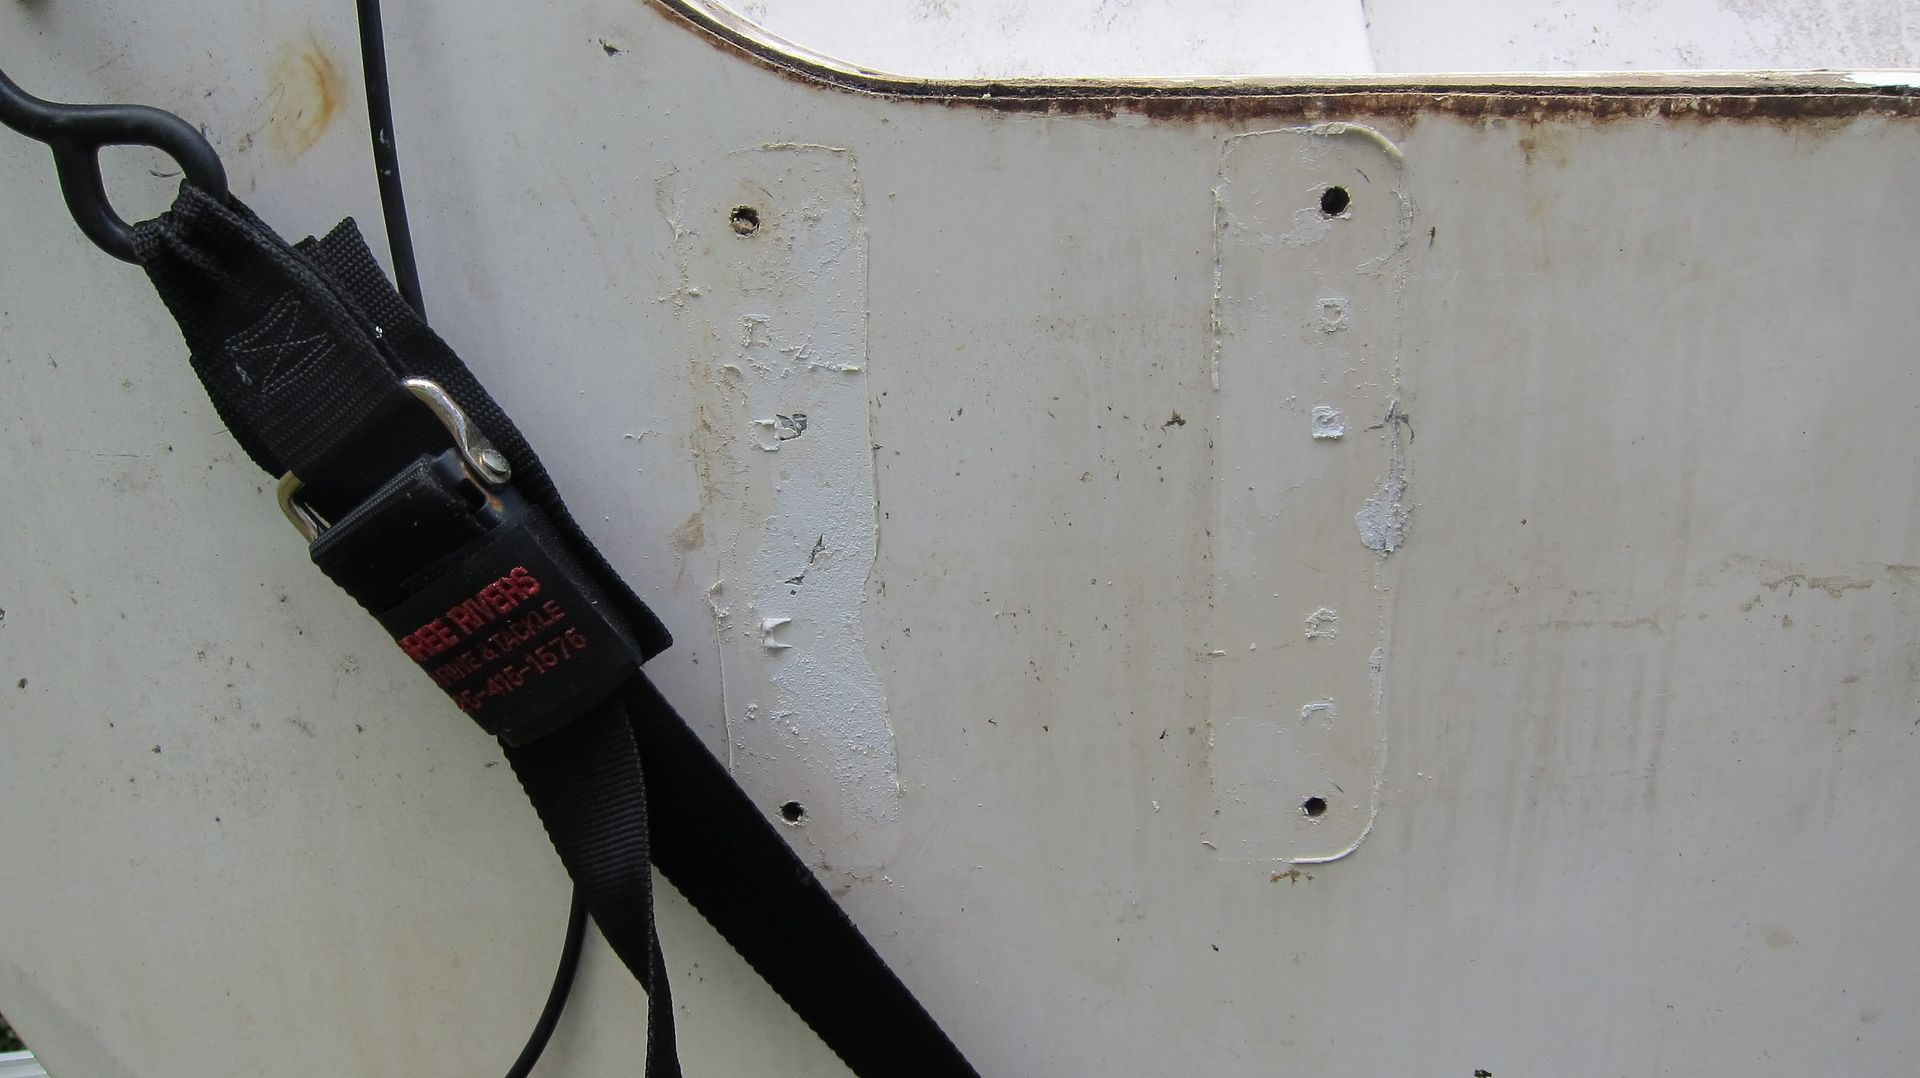
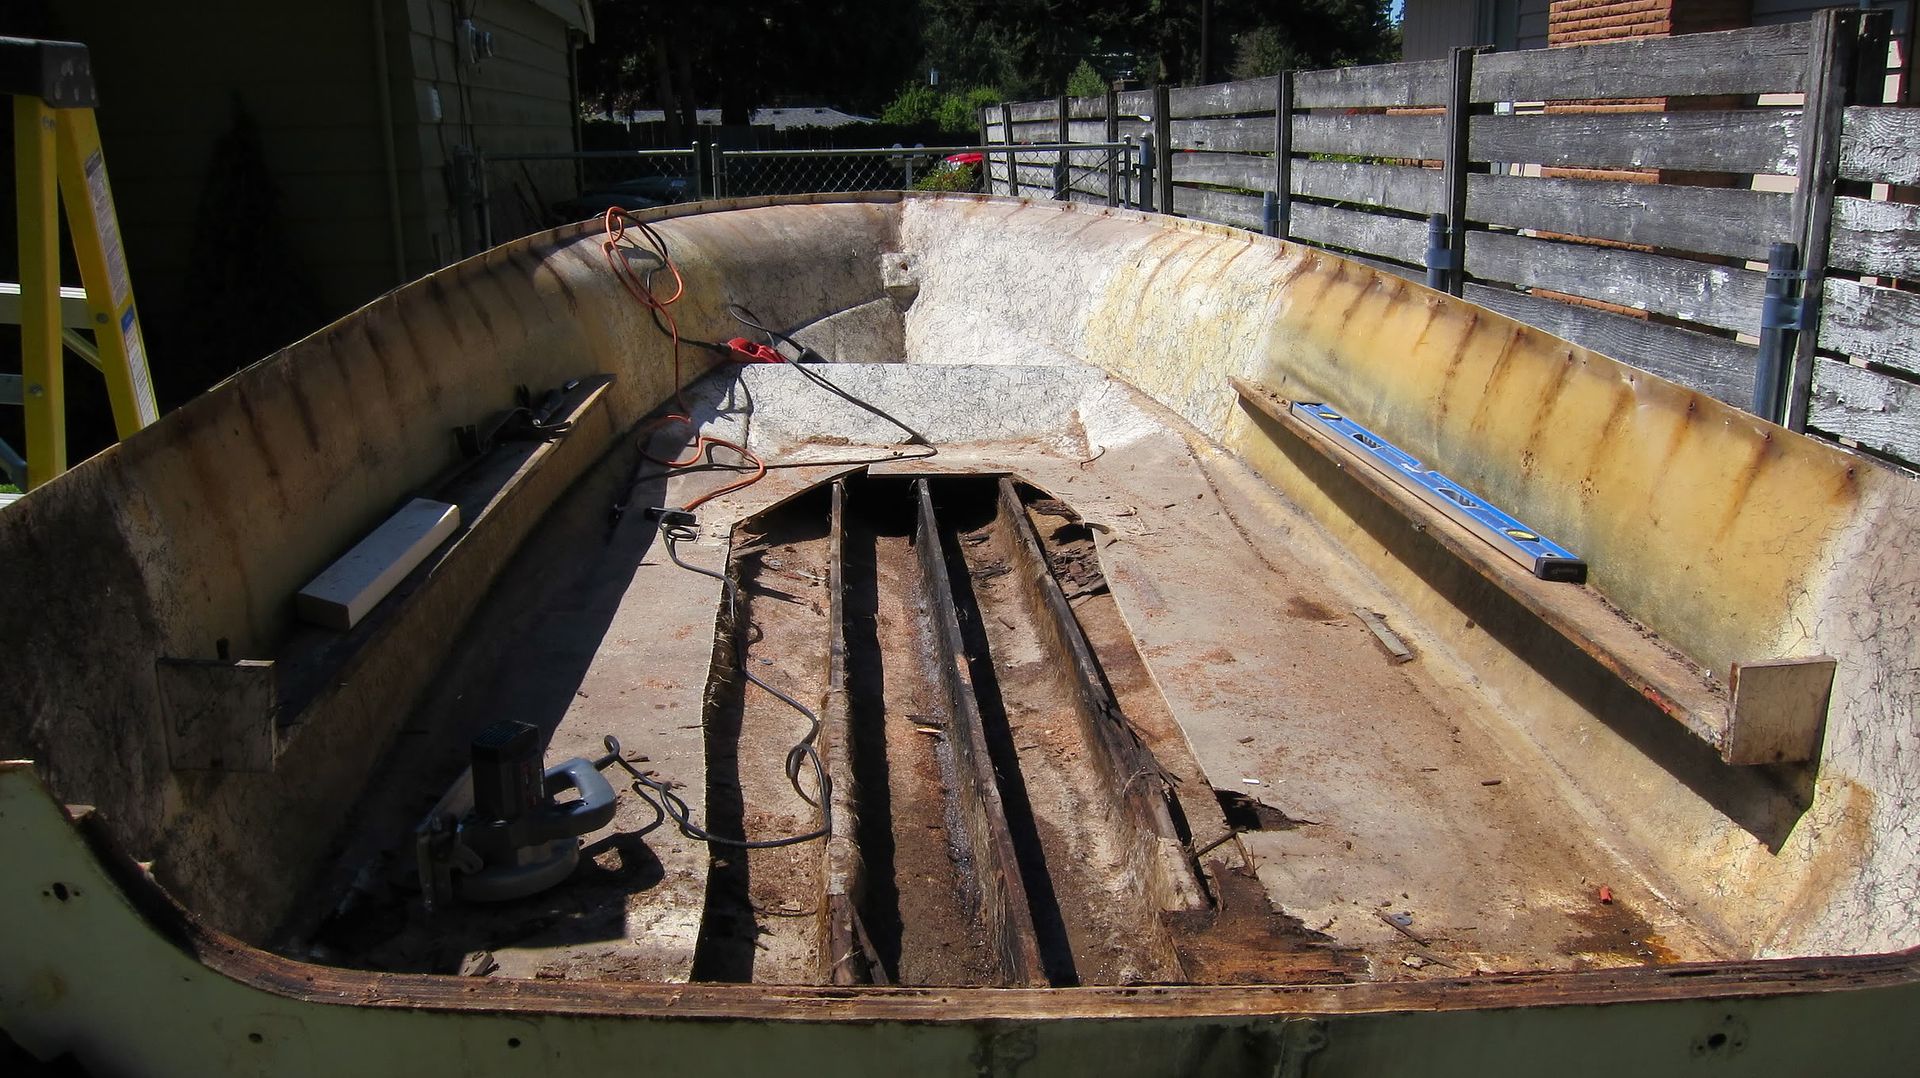
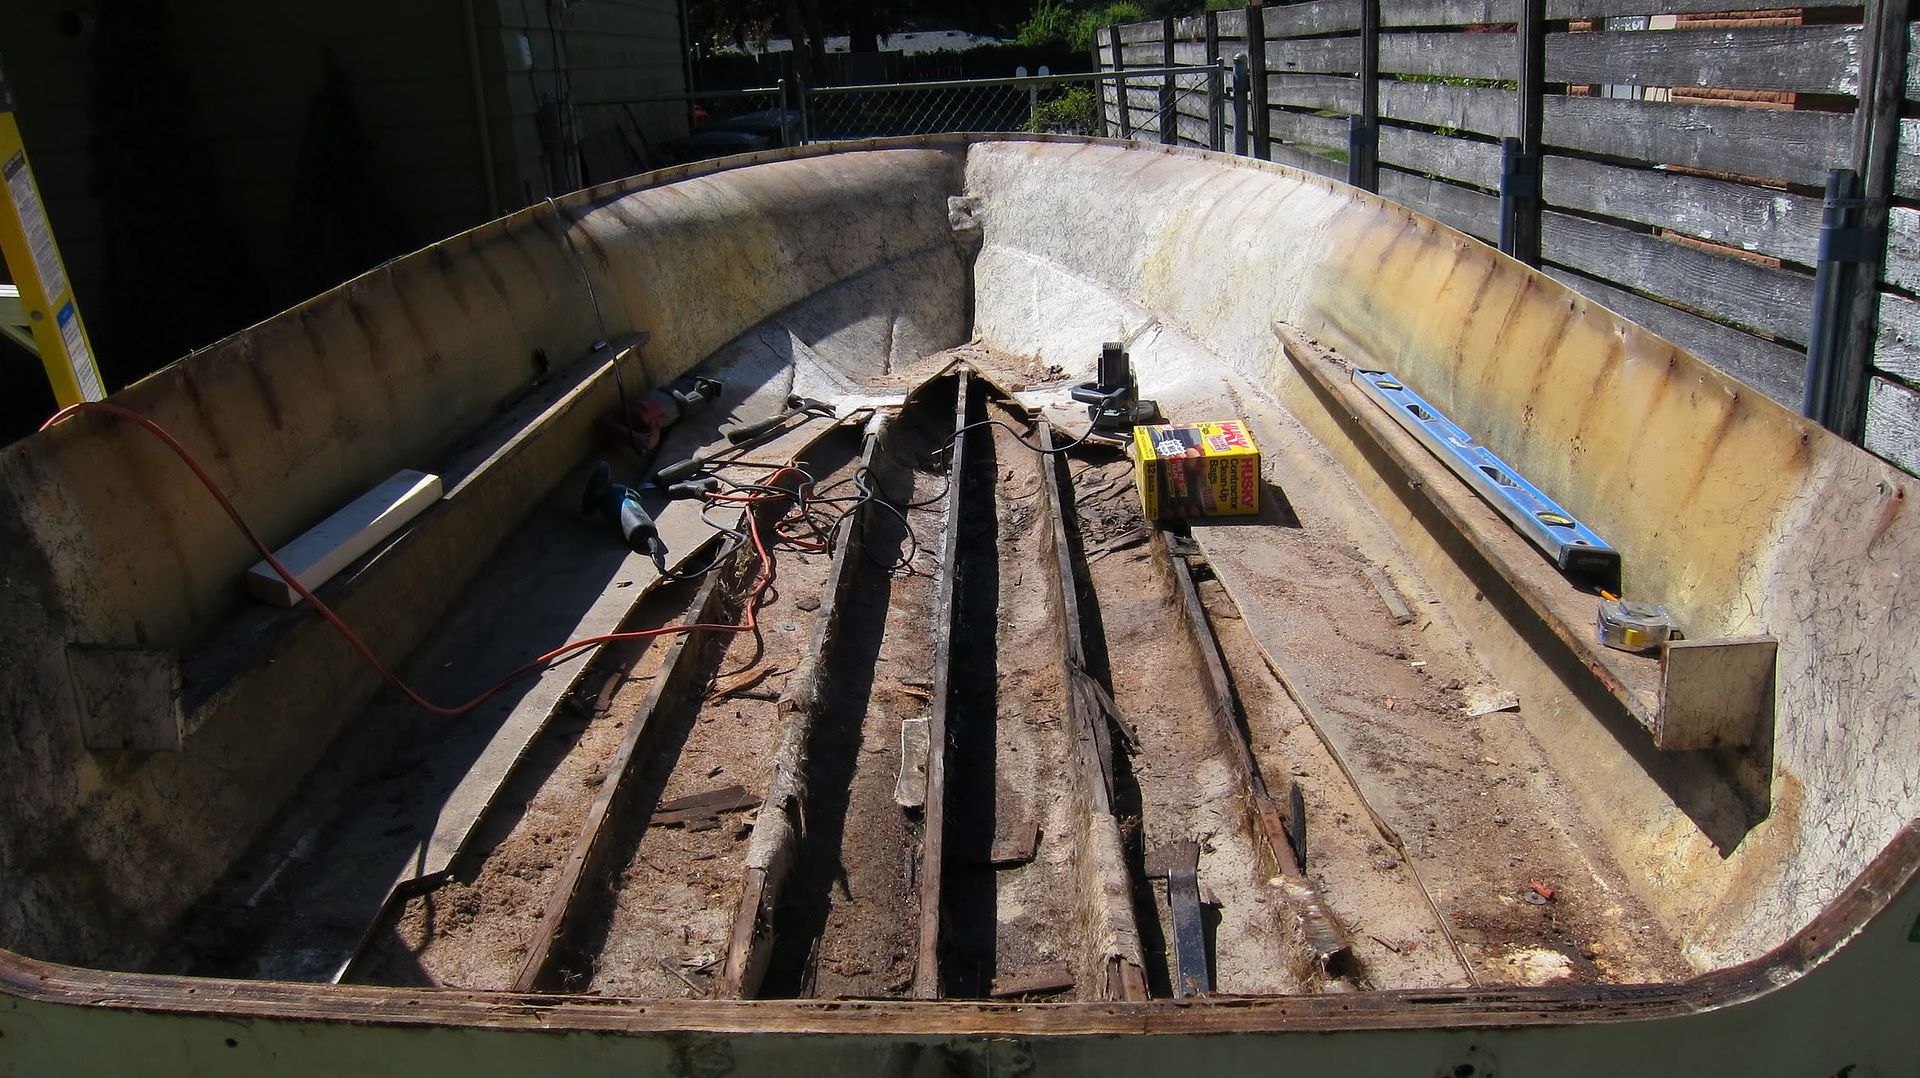
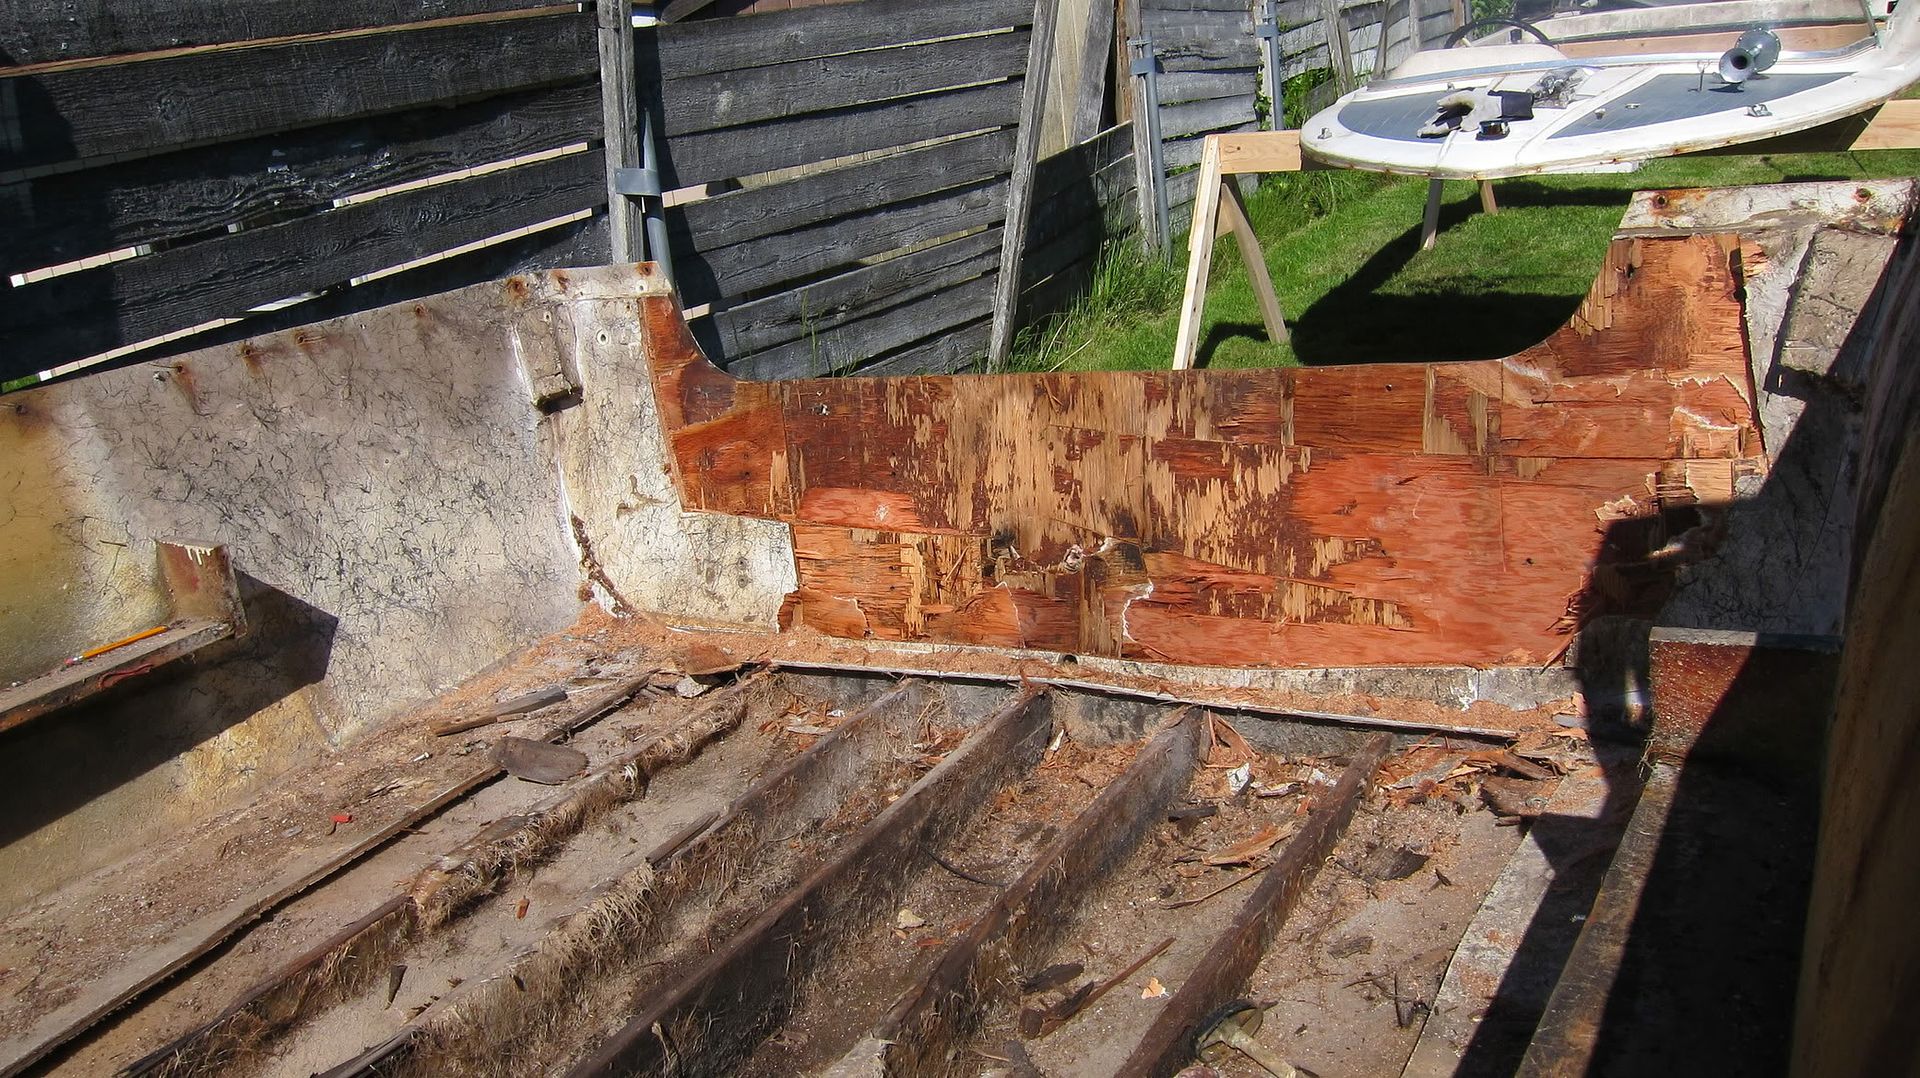
I know that the floor needs to be done, as well as the transom (I found wet shavings when mounting an kicker bracket on it a while back), so I am guessing it needs stringers, too.

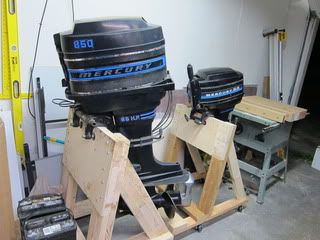
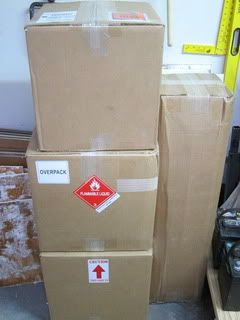
A buddy came by today with a cherry picker and helped me pull the motor off the back and we put it on a stand I built, so it is sitting in my garage. My fiberglass supplies arrived from US Composites on Friday (I went with poly for the rebuild after a recommendation from WoodonGlass), so I feel like I'm ready to go to work on this thing.

I have never done any fiberglassing before, but I am pretty good with wood and I am looking forward to the project.

My goal is to be fishing by salmon season, which opens in July. I know that's not too far off, but this boat isn't that big.

I am going to try to tear everything out this week after work, and will take a lot of pictures.

Well, off to bed for the night.

-Kevin
 

oops!

Supreme Mariner
Joined
Oct 18, 2007
Messages
12,932
Re: 1967 16' Fiberform Rebuild

hi kevin......

in that era....fiberforms ruled the waters.

looking forward to this.

cheers
oops
 

guitarkev77

Seaman Apprentice
Joined
Jun 26, 2009
Messages
49
Re: 1967 16' Fiberform Rebuild

hi kevin......

in that era....fiberforms ruled the waters.

looking forward to this.

cheers
oops

Right on, thanks Oops! I am pretty stoked about fixing this boat up, too. I have probably read your entire thread at least 3 times, and all I can say is AWESOME!

This little boat seems pretty tough for an old boat. I got into some pretty gnarly water with it a couple of times, and it handled it like a champ.

I haven't been able to find too much info on Fiberform, except that they were a Washington based boat company and that they were bought by Bayliner in the late Seventies/ early Eighties. I would love to hear any info you have on the company. I dig stuff like that.

-Kevin
 

guitarkev77

Seaman Apprentice
Joined
Jun 26, 2009
Messages
49
Re: 1967 16' Fiberform Rebuild

Well, I got a later start on the boat today than I wanted to, but I have still been able to get a few things done.

I am still in the tear-down stage, which basically means, at this point, taking all of the stuff out of/off the boat to get ready for restoration.

After removal of the main motor on Sunday (Merc 850), yesterday I built a stand for the kicker and now it's next to it's big brother in the garage.

Today, after a quick dinner, I got to work on getting all of the other things out of the boat and organized in my storage space above the garage. Five portable gas tanks, two batteries, seat pedestals and seats, and a bunch of miscellaneous boating gear. It all had to come out. (I know, pretty exciting stuff.:))

The carpet also came out, at least on the floor. There is still carpet on the gunnels. After watching the nightmare that was the carpet removal job on Frisco Boater's Sea Ray, I think I might go right for the MEK. (thanks, Jay!)

The PT plywood I put down over the deck a few years ago came out, as well.

I think that I am ready to take some measurements while the boat is still together so that I can make sure the hull retains its shape. Then it's demo time!
 

guitarkev77

Seaman Apprentice
Joined
Jun 26, 2009
Messages
49
Re: 1967 16' Fiberform Rebuild

Hmm. I am doing something wrong uploading pictures. Hopefully, I will have something up tomorrow.
 

guitarkev77

Seaman Apprentice
Joined
Jun 26, 2009
Messages
49
Re: 1967 16' Fiberform Rebuild

Okay, now some pics:

Here she is, I think the boat has some pretty classy lines.
IMG_0713.jpg


The transom after I pulled the motors. A couple of holes to patch.
IMG_0712.jpg


The 850 and its little brother hanging out in their temporary home.
IMG_0723.jpg


Here is a pic of one of the bolt holes that was used to support the motor. You can see the "transom" poking out of the fiberglass. Rotten? Maybe just a little.
IMG_0711.jpg


Here is a pic of the splash well/transom area. Notice the strip of wood at the edge of the carpet. It was used to keep the batteries and gas tanks from sliding around. It was installed by the PO.
IMG_0705.jpg


The PO attached the strip with screws through the strip of wood directly into the deck, no sealant. Needless to say, there are soft spots in the deck around this whole area.
IMG_0706.jpg
 

guitarkev77

Seaman Apprentice
Joined
Jun 26, 2009
Messages
49
Re: 1967 16' Fiberform Rebuild

I guess this battery cable needs to be replaced.:D
IMG_0709.jpg


Seats out and carpet (some of it) out.
IMG_0714.jpg

IMG_0719.jpg


Can you guess whats in these boxes? That's right, a little present from the good people at US Composites. 10 gallons of 435 Layup resin, 15 yards of CSM, 15 yards of 1708, Gelcoat, Cabosil, 1/4" chopped fibers, and finishing wax.:) This should be enough to get started.
IMG_0722.jpg


I'm going to try and get some more done today.
 

guitarkev77

Seaman Apprentice
Joined
Jun 26, 2009
Messages
49
Re: 1967 16' Fiberform Rebuild

Today I got a few more hours in on the boat, as I had a half day at work.

I started by removing the rest of the carpet. I thought that I would be in for a project, but the PO must have used some kind of cheap spray adhesive because it came out fairly easy with only a little yellowish glue residue. It looks like I should be able to sand that off with out too much trouble.

When I removed the seat pedestals yesterday, I noticed that there were these white raised circles in the center of the screw patterns. It was getting dark and late, though, so I didn't really do too much investigation.

IMG_0714.jpg

You can sort of see them in this picture.

Today, in better light, I saw that they were actually caps of some sort. I popped them off with a pry bar and this is what I found:
IMG_0725.jpg

Yep, those are pieces cut out of a "private property" sign. Pretty classy. The PO had told me that he had installed new seats, and you can see the patch job where he added in some new glass. I am guessing that he thought he needed these holes (4" diameter) so that he could have access for the pushing the pedestal bolts through the deck.

But hey, if you cut a hole in the deck, you've got to cover it up, right? And why use glass and resin when you've got an extra sign around that you can silicone? I mean, they're outside in the elements year round and they hold up sooo..... It'll never leak!

Needless to say, the deck in this area is pretty soft. No big deal, I just think it's interesting seeing peoples' thought processes. He went to the trouble of patching in new glass (poorly), around the seat area, then decides to cut a hole and seal it up a piece of road sign and a bead of silicone. Ha! It did give me good access to stick my camera down under the deck and snap a quick picture.
IMG_0727.jpg


I still had the kicker bracket on the transom that I needed to remove, so I went to work on that. I remembered that when I was installing the bracket and a few other things on the boat, that I had used 4200 and 5200, but I couldn't remember where I had used the 5200. Well, it was on the kicker bracket.

I have read posts where people talk of the permanent nature of 5200, and they are NOT kidding. I removed the bolts holding the bracket on the transom, but had to pound them through the rotted transom to get them out. I was thinking that with a few pops of a putty knife and a mallet around the edges of the bracket, that it would just fall off. Nothing doing. That bracket was as strongly tied to the transom without the bolts, as with them.

When I installed the bracket, I had applied a generous bead of 5200 around every mating edge of the bracket and had a small amount of squeeze out on every surface where it met the fiberglass skin. This was good, as it did not leak, but jeez, it made removal a little interesting.

IMG_0724.jpg


I think in total, I probably worked on just removing the bracket for about half an hour. I had to use naptha to soften the 5200 enough to work a putty knife in. Then pour a little more naptha in that area and work the putty knife a little more. It was this way around the entire bracket. I can positively say that I am sold on 5200, and 3m products in general. They are not messing around.

With pretty much everything out of the hull of the boat, I took a few measurements of the boat with everything still tied together, and then decided to work on removing the cap.
IMG_0729.jpg


This is where I kind of ran into a wall. The rub rail on my boat doesn't have any exterior fasteners other than one on each side of where it returns into the splash well. It is a really a piece of channel metal with a t slot engineered into it. This slot in the rubrail accepts 1/4" T headed bolts that are fastened on the inside of the joint of the boat. These bolts run the entire edge of the boat on a 7" layout schedule. Pretty freakin' burly.
IMG_0730.jpg


I hit each bolt with a little PB Blaster, but as you can see in the pic, the bolts are pretty rusty, and are not taking sockets well. I tried cutting them off with a cutoff wheel on a grinder, but there are many spots, especially in the bow, where the grinder won't fit. Some of these bolts I am able to break, but most are a little more stubborn. I like that the connection is so strong, but it has made the cap removal a little more difficult.

Has anybody had to deal with this before and have a good method for removal? Any suggestions would be awesome!
 

guitarkev77

Seaman Apprentice
Joined
Jun 26, 2009
Messages
49
Re: 1967 16' Fiberform Rebuild

I think I am going to try a long metal cutting sawzall blade.
 

guitarkev77

Seaman Apprentice
Joined
Jun 26, 2009
Messages
49
Re: 1967 16' Fiberform Rebuild

I got home from work too late to work on the boat tonight. I did have a chance to stop by Home Depot and pick up some new sawzall blades to finish removing the cap.

So, my plan is to finish demoing out the boat this weekend. This means cap off, transom out, floor out, and stringers out.

I picked up some lumber to build a wide set of sawhorses to set the cap on.

It is supposed to be nice all weekend and might even reach 80 degrees here on Sunday, so it's GAME ON!

-Kevin
 

guitarkev77

Seaman Apprentice
Joined
Jun 26, 2009
Messages
49
Re: 1967 16' Fiberform Rebuild

Tonight I got home kind of late from work. I still managed to work on the boat for a few hours, though. Nothing really too exciting, just cutting the old bolts holding the cap together. I am about 2/3 the way there and have all of the bolts removed under the bow section.

I am glad that I don't suffer from claustrophobia. I am not a little guy, and I was squeezed into the tiny bow area for about two hours.:eek: The bolts are so old and rusty that sockets don't really work on most of them. The angle of the bow is too steep to get most tools into (my sawzall idea didn't work up there), so I used a dremel with a cutoff blade to weaken the bolt, then beat it back and fourth with a hammer till it broke off. This worked okay, but I probably went through about eight or so dremel disks. They wear out pretty quick.

It's funny, I have owned a dremel for years, and other than using it like a rotozip for cutting circles in drywall, this is the most I have used it since I got it. I guess now I know why it just sits in my garage. I wasn't super impressed with the performance. Maybe for intricate hobby work, I could see its use, but I couldn't see myself ever bringing it to a job.

More to come tomorrow.

-Kevin
 

Woodonglass

Supreme Mariner
Joined
Dec 29, 2009
Messages
25,924
Re: 1967 16' Fiberform Rebuild

They sell 12" metal cutting Sawzall blades. that should be long enough to reach up there.
 

guitarkev77

Seaman Apprentice
Joined
Jun 26, 2009
Messages
49
Re: 1967 16' Fiberform Rebuild

WoodOnGlass,

Thanks for the response. You are right about the sawzall blades. I purchased those same blades just the other day, and they work great on the flatter gunnel sections. The hull flairs out quite a bit at the seam in the bow section, and with the cross members on the underside of the cap, it was just too skinny to get the sawzall blade close to the work.

It should be smooth sailing from here, though. I figure that I have gotten the hardest sections out of the way.

Thanks again for the poly recomendation.

-Kevin
 

oops!

Supreme Mariner
Joined
Oct 18, 2007
Messages
12,932
Re: 1967 16' Fiberform Rebuild

yeah,,,,,thats a flange joint.....tough to cut......but the sawzall will do it.

but are you sure this thing is rot?......it sure looks great in places
 

guitarkev77

Seaman Apprentice
Joined
Jun 26, 2009
Messages
49
Re: 1967 16' Fiberform Rebuild

yeah,,,,,thats a flange joint.....tough to cut......but the sawzall will do it.

but are you sure this thing is rot?......it sure looks great in places

Ha ha, as I was looking at the pictures I was thinking the same thing:). The deck is rotted, though. Just not everywhere.

As I was moving around the deck to cut the seam bolts, the deck was cracking in several places. I think this is partly due to the fact that I had it covered with ply for a couple of years while I used the boat. It seems that it probably sped up the decay process, as I don't remember the deck being that weak when I bought it.

I know the transom is shot, but I think only in places, because though the top wood seems wet, it still looks fairly solid. Around the penetrations it seems pretty gone.

I got more progress done today on the boat, but had to stop. I finished cutting the seam bolts holding the cap to the hull. I was then able to remove the rub rail, which revealed rivets.

I drilled these out the went around the entire seam joint of the boat, tapping a putty knife along the joint to cut the bead of adhesive/ sealant that held the two pieces together. I'm not sure if they ever wanted this thing to come apart....

But it is!:eek:

I was able to lift one end of the cap at a time, while my girlfriend stuffed a piece of scrap wood in between to keep the joint separated.

I then built a couple of wide sawhorses to set the cap on while I work on the hull.

This is pretty much where I am at now. I am pretty much working on this thing alone, and I wasn't able to find anyone to help me lift the cap, so I had to stop for the day. I would have liked to have gotten farther, but I still have most of the day tomorrow before family obligations.

I will post more pictures tomorrow.

-Kevin
 

guitarkev77

Seaman Apprentice
Joined
Jun 26, 2009
Messages
49
Re: 1967 16' Fiberform Rebuild

Hello I Boaters!

Well, today I was back at it. I got a late start, but had a buddy come over around noon and help me lift the cap, that I had detached the other day, onto sawhorses.

Everything went pretty smooth. I backed the boat up close to the sawhorses with my truck and we set the cap on one horse, move the boat, and then set the cap on both horses.
IMG_0741.jpg


My buddy took off, as he had early Mother's Day obligations, and I got to work on the boat.

With skillsaw and pry bar in hand, I started in on the deck. There was a decent amount of rot in the plywood, as it was not sealed on the bottom side. The ply is 1/2".
IMG_0736.jpg


As the stringers were exposed, it was pretty easy to see that they were also rotted. They were tabbed in at the hull, and capped, but the fiberglass was very "hairy" and didn't look like it offered a total seal. The stringers were made of 3/4" dimensional lumber and there are five in total. I haven't started removing them as I wanted to take some layout measurements before removal.
IMG_0739.jpg

IMG_0743.jpg


I removed the bulkhead in the bow section, and cut the deck close to the edges of the hull. I played it kind of safe when cutting the deck today, as I wanted to get the bulk of it removed without damaging the hull, and I had a limited amount of time with family obligations. I will fine tune and cut close to the hull on my next time working on the boat.

My plan is to leave a "lip" of the deck around the hull as a reference for the stringer height, which I will grind down after they are installed. I also am leaving the "shelves" on the sides of the hull as supports while the cap is off. Right now, the plan is to redesign the sides to be more fishing-equipment friendly, but I think that they will help the hull retain its shape through the build. I plan on rebuilding this section after the cap is reinstalled.

Next, I moved to the transom. When I saw the pieces of plywood sticking out of the bolt holes after the motor removal, I figured that the whole transom was rotten. When started removing the transom, I found that is was much more intact than I had expected. The plywood was very wet, and there was some rot, but much of the plywood was still very strong.

The transom was made up of two layers of 1/2" plywood, and one layer of 3/8" plywood. There was a layer of glass in between each lamination.

IMG_0745.jpg


I am about 2/3 finished with the transom removal. I have been making relief cuts with my skilsaw, then removing material with a pry bar. The removal has been slow going because the ply is fairly intact.

I have to say that, on the whole, I am pretty impressed with the build quality of the boat. Fiberform apparently had a high level of craftsmenship at their factory, and, for an almost 50 year old boat, it wasn't horrible shape.

I hope to be back on the boat after work in the evening this week.

-Kevin
 

Woodonglass

Supreme Mariner
Joined
Dec 29, 2009
Messages
25,924
Re: 1967 16' Fiberform Rebuild

Please tell me you have taken A LOT of measurements of the hull prior to De-Capitation and recoreded them, so you will be able to ensure that you keep the hull shape while doing all the replacement restoration build????? It is very important in order for the CAP to go back on the boat and fit properly!!! You did do that Right???
 

guitarkev77

Seaman Apprentice
Joined
Jun 26, 2009
Messages
49
Re: 1967 16' Fiberform Rebuild

Please tell me you have taken A LOT of measurements of the hull prior to De-Capitation and recoreded them, so you will be able to ensure that you keep the hull shape while doing all the replacement restoration build????? It is very important in order for the CAP to go back on the boat and fit properly!!! You did do that Right???


Ha ha, yes, I have a full sheet of measurments taken at incremental values along the cap/hull seam, and where the deck meets the hull length-wise and laterally. Hopefully, I did my homework on this one and everything works out.:)

-Kevin
 

Woodonglass

Supreme Mariner
Joined
Dec 29, 2009
Messages
25,924
Re: 1967 16' Fiberform Rebuild

Alrighty Then!!!! That's a REAL Good thing!!! If I don't hurry up and get the BF in the water, you're gunna beat me!!!!
 

guitarkev77

Seaman Apprentice
Joined
Jun 26, 2009
Messages
49
Re: 1967 16' Fiberform Rebuild

Alrighty Then!!!! That's a REAL Good thing!!! If I don't hurry up and get the BF in the water, you're gunna beat me!!!!

Ha! If I can get this boat back in the water some time during salmon season, I will be a happy camper. :D
 
Top