Restoring my MFG

Jon Sob

Master Chief Petty Officer
Joined
Jun 11, 2011
Messages
827
Re: Restoring my MFG

Thank you my friend ...... I appreciate it.
 

*EdC*

Senior Chief Petty Officer
Joined
Oct 31, 2007
Messages
661
Re: Restoring my MFG

Yesterday of course was Easter Sunday, and I spent most of the day with the family. Later in the afternoon, the Admiral gave me a 4 hour pass, I immediately hit the work shop. :D Time to get the aluminum edge trim in order. I spent the next several hours bending, twisting, banging and beating it into submission. Finally got it looking pretty good. I'm no stranger when it comes to working with aluminum extrusions, but this one put me to the test.


0014.jpg


Once I was satisfied with the shape, I begain the process of bringing the finish back from a life of 40 years exposure to the elements. More on this later, so stay tuned ;)
 

sphelps

Supreme Mariner
Joined
Nov 16, 2011
Messages
11,436
Re: Restoring my MFG

I gotta see this part I know you can make that aluminum shine! I have a carp load to clean up!:( :)
 

SteveMFG_Oxford

Petty Officer 1st Class
Joined
Nov 22, 2011
Messages
207
Re: Restoring my MFG

I thought that "dull" look was original! Do you all think it was bright? Mine actually appears like it has a naturally dull finish. I didn't even think to try an brighten it.

I'll be curious to see how you make out shining it up! I'm not sure I need something else to polish!
 

*EdC*

Senior Chief Petty Officer
Joined
Oct 31, 2007
Messages
661
Re: Restoring my MFG

OK Guys here we go.

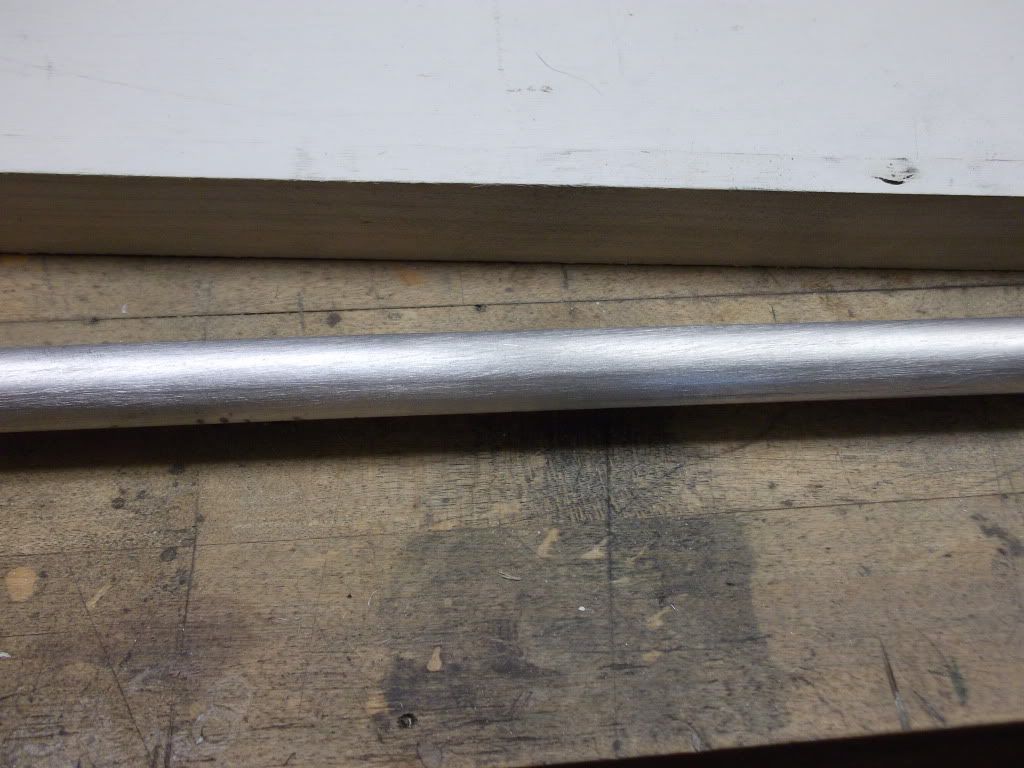
Now that I have this piece, (first of four) straightened out, I need to decide on a finish. Aluminum extrusions like these come in a verity of finishes. Some of the more common ones are..

1. Mill finish. Standard, raw aluminum from the factory.

2. Brushed finish. Usually brushed with a wire wheel to add a grain.

3. Bright finish. Polished or plated.

There are others, like anodizing, powder coating,etc., but that's a story for another day. For restoration purposes, A Mill finish would be ideal. But this finish takes the longest to achieve. A Brushed finish is the easiest to do, but not very original looking. If the aluminum is in good condition, a light pass on a fine wire wheel, can remove minor scratches and improve the look considerably. Lastly is the Bright finish, and this is what I've chosen to do. If money was no object, I'd send it out and have it plated. But hey, that's a bit extreme. So, it's going to be polished.

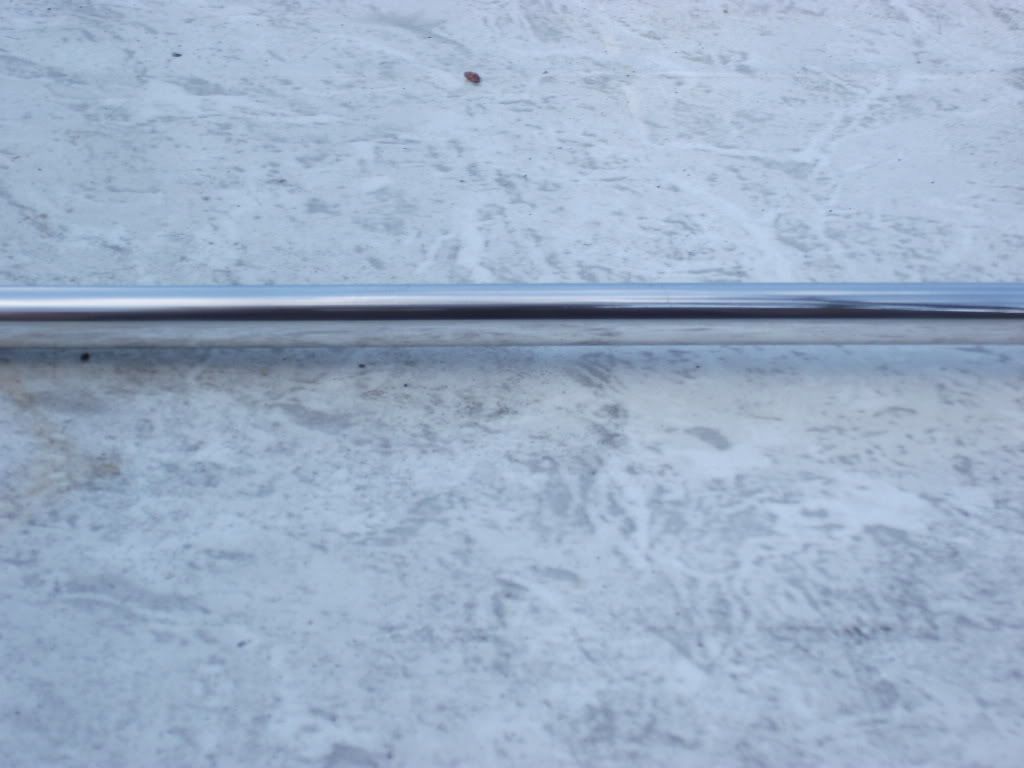
My aluminum trim was not in very good condition. Several hours were needed just to get it back to it's original shape. Once I got that, it was time to inspect the surface of the metal. I found lots of scratches and gouges. These would need to be removed, if I wanted an original looking trim.
I've done my fair share of this kind of work, and there is no magic wand here. ( I wish there was) The process is step, by step, by step.
Miss one, and you'll work harder on the next.
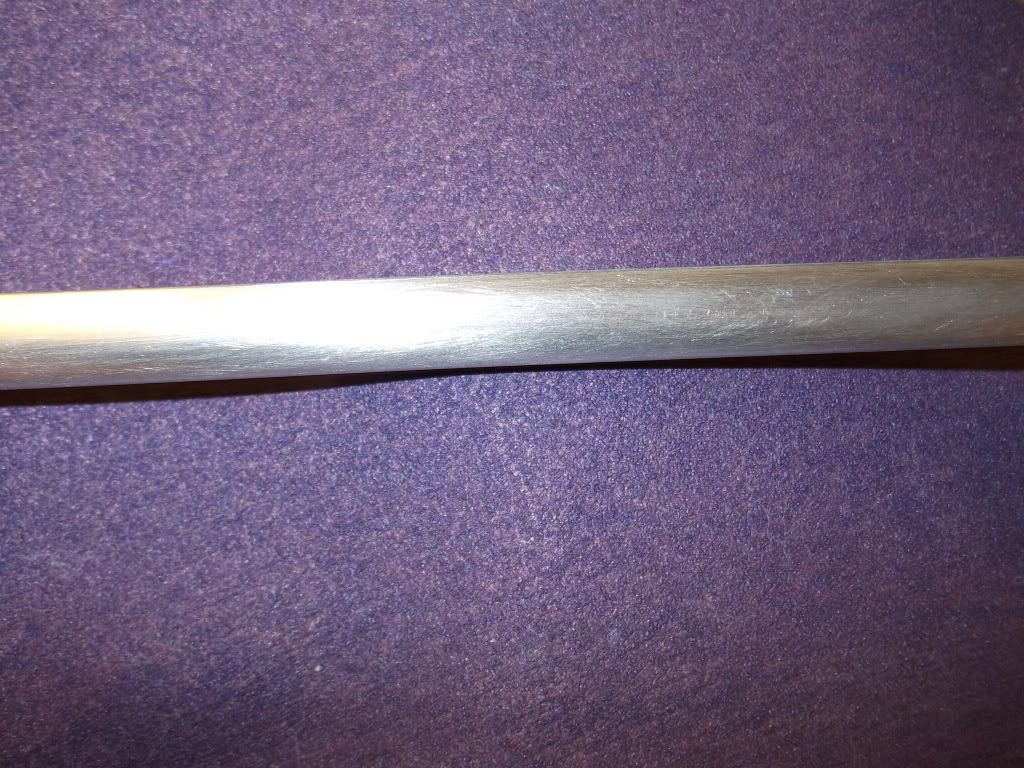
First, get the surface prepped. Clean off all the crud! very important, you no not want to grind any contaminates into the surface. A wash with acetone works well. Next, get the surface even. In other words, remove all of the gouges and scratches. I use 100 grit sand paper. (dry)The starting grit depends on the condition of the surface. You can start with 220 or 320 grit if the surface doesn't have a lot of flaws. Sand evenly, and flair the deep ones out to what looks good.
Next, go over the entire piece with your starting grit. Again mine was 100 grit. This is were things get boring and tedious. It's a long process, so pace yourself. Below is my trim, that has had all the dings and gouges removed. I'm just about done completing the initial pass of 100 grit. It has taken me a couple of evenings to get this far. A good start will yield good results. The first step is the toughest.

0015.jpg


0062.jpg


008.jpg


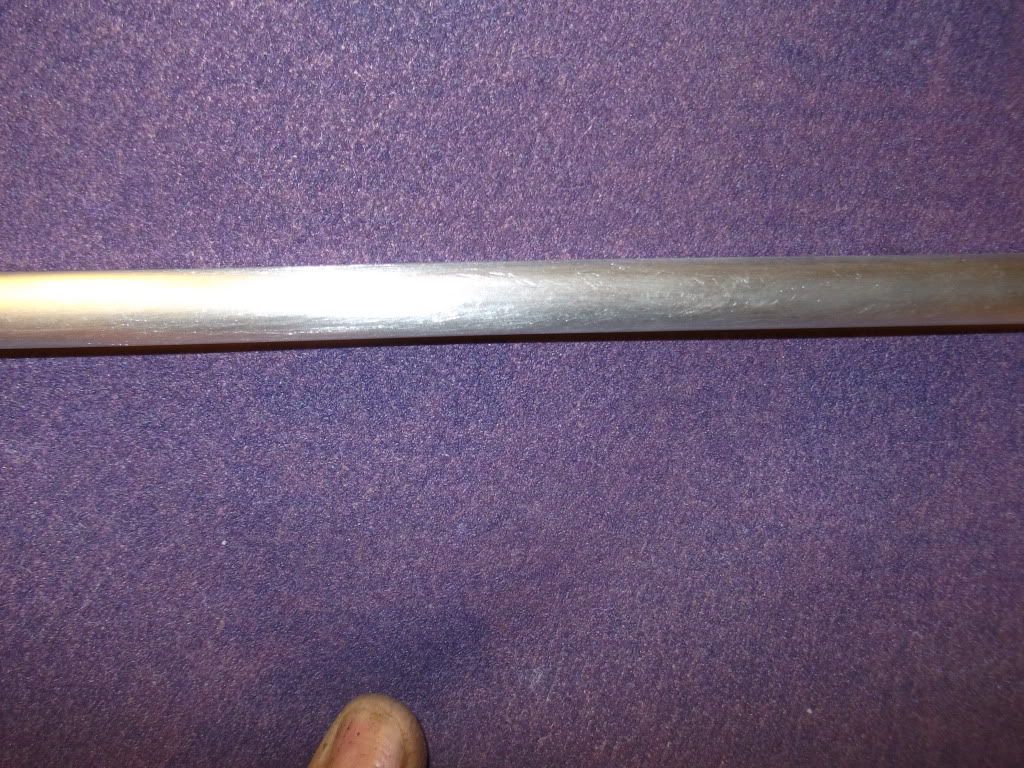
The flash from the camera has made it difficult to see the surface, but you can see how I have the aluminum sanded to a uniform finish. It's coarse but it's a start. In the next couple of evenings, I'll go to 320 grit. If it doesn't come down easily, I'll go to 220 grit over the entire piece. From there, I'll work my way up to 600 grit and do so wet from there on. I hope 1000 grit will get me to the point where I can start the polishing wheel.

So guys I'm gonna be busy! I'll try to post my progress on Sunday night. Stay tuned.
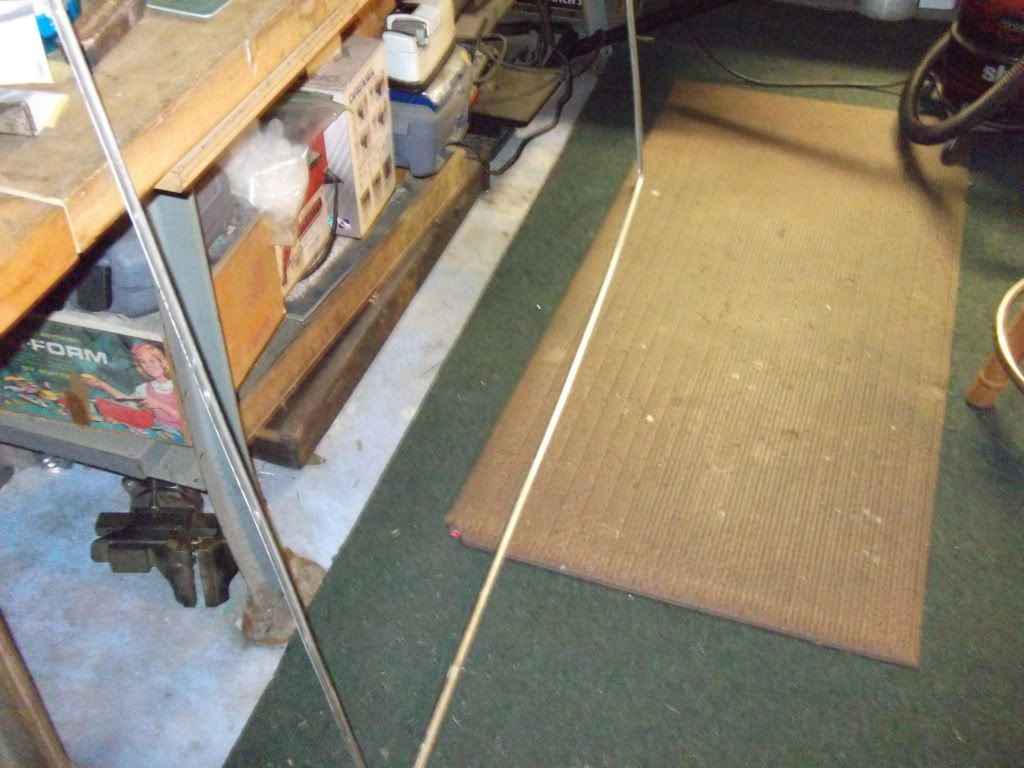
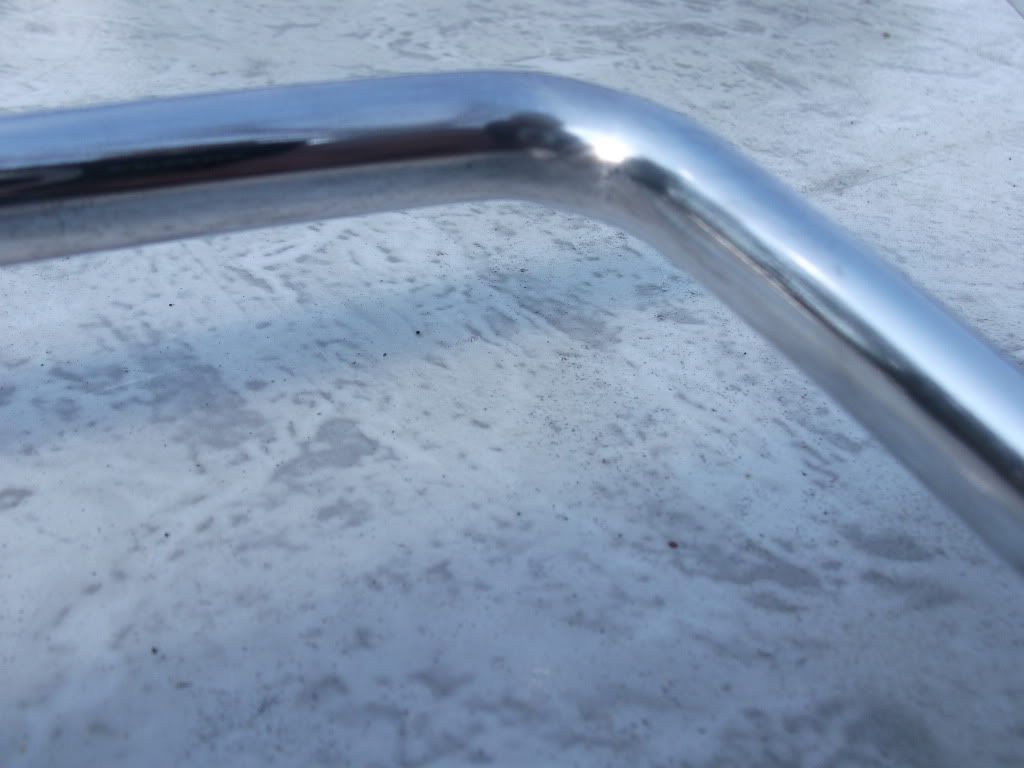
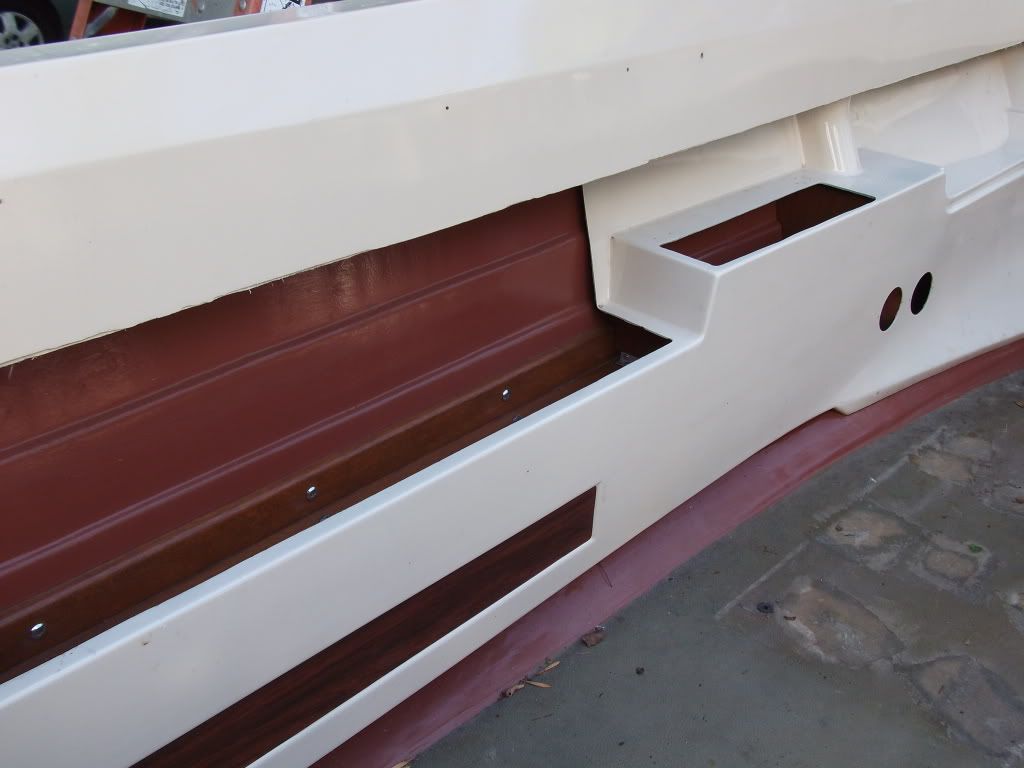
 
Last edited:

woosterken

Lieutenant
Joined
May 18, 2005
Messages
1,431
Re: Restoring my MFG

Ed,
looking good , when you get them sanded down a bit ,if there is a truck stop near you , pick up a jar of blue magic aluminum polish.
this stuff if fantastic ,I used it on my semi fuel tanks and wheels to make them look like chrome.

woosterken
 

sphelps

Supreme Mariner
Joined
Nov 16, 2011
Messages
11,436
Re: Restoring my MFG

How did you straighten the rub rail ? I have a pretty bad bend on the peice that wraps around the bow. Can heating with a heat gun make it easier ?
 

*EdC*

Senior Chief Petty Officer
Joined
Oct 31, 2007
Messages
661
Re: Restoring my MFG

Thanks Ken!

I use Mother's products. But I'll poke around this area and see if I can find some Blue Magic. Always willing to try something new!
 

*EdC*

Senior Chief Petty Officer
Joined
Oct 31, 2007
Messages
661
Re: Restoring my MFG

How did you straighten the rub rail ? I have a pretty bad bend on the peice that wraps around the bow. Can heating with a heat gun make it easier ?

SPhelps,

To get things straight, I use several different tools. I have a set of metal working "Dollies" which come in handy, but really aren't needed. (Link below) I find myself useing my bench vice alot. Of coures a small hammer is needed. But, bit and pieces of plate steel do most of my grunt work. For long sections I use a wood block. In this case, I cut a grove into it to match the size of the trim. I then hammer it to the grove. It's hard to explain. It seems everytime I do this kind of work, I end up making jigs and fixtures for the particular piece I am doing. All I can say is ... I have a bunch of hardwood blocks and lenghts of steel bars , rods, and plates. that I hammer on.
As far as heat goes... I only use it if I am making tight bends. I use a torch. But I rarely need to do that. Hope that helps!


http://www.google.com/url?sa=t&rct=...cl4y99EpO4_yTPRRw&sig2=hz_yvlTEa_5B5F58TyvnDQ
 

sphelps

Supreme Mariner
Joined
Nov 16, 2011
Messages
11,436
Re: Restoring my MFG

Thanks Edc , I will start collecting some scrap hard wood and stuff around the job site. And I guess I finally have a good reason to mount my bench vise and bench grinder that's been sittin in the corner for about 2 years!:facepalm: :D
 

*EdC*

Senior Chief Petty Officer
Joined
Oct 31, 2007
Messages
661
Re: Restoring my MFG

Thanks Edc , I will start collecting some scrap hard wood and stuff around the job site. And I guess I finally have a good reason to mount my bench vise and bench grinder that's been sittin in the corner for about 2 years!:facepalm: :D

Sounds like you are in construction... I am too, although currently unemployed. Anyways... That's were I got all my steel from. Amazing what Iron workers throw away. I also grab any scraps of hardwood kicking around. Oak blocks make nice dollies to hammer against:D
 

sphelps

Supreme Mariner
Joined
Nov 16, 2011
Messages
11,436
Re: Restoring my MFG

Yep, i've worked for the same construction company for almost 30 years now. It's been real slow down here also. We have had just enough work to keep most of the regulars somewhat busy for the last 3 years. The boss when there wasn't much work at all kept a few of us busy at his hunting camp building pole barns and things. He's a good guy to work for!
I sure hope things pick up for you up there!!
S.P.
 

*EdC*

Senior Chief Petty Officer
Joined
Oct 31, 2007
Messages
661
Re: Restoring my MFG

Hey Guys..

A quick update..... Wish I could say, I have my aluminum edge trim all done, but I don't. The weather here has been great! So, I've been outside working on the boat. Happy to report, the pesky rot problem on the starboard side is now completed. I'll give the wood a quick coat of resin and put that little side project to rest. Luckily, the forward section was good enough to keep. I made up some PB and coated the under edge of the plywood. That took care of the minor dry rot there.

At night, I've been in the shop working on the trim. So far, I have completely sanded everything with 100 grit paper. With all the gouges and scratches now taken care of. Also, I've completed all the 220 grit. Thought I could get away with going from 100 to 320, but that was not to be. Anyway... I've started the 320 grit today. Starting to look pretty good. with any luck, I'll be putting the polishing wheel to it by the end of the week.

As always... stay tuned :)
 

*EdC*

Senior Chief Petty Officer
Joined
Oct 31, 2007
Messages
661
Re: Restoring my MFG

Here we go guys....


Today, I did a marathon sanding and buffing session getting this trim piece done. It's a small thing, but so important. Without it I can't mount the side panel, controls and wiring etc. I'm very pleased to have this all polished up. Here are a couple of pics......

Here is were I started

0015.jpg


Here is a couple of finished ones


0026.jpg


0017.jpg


Will have more soon!


Some more.


002-1.jpg


001-1.jpg


Now, if I could only get my neighbor to clean up the mess his Crabapple tree leaves.. I'd be able to spend more time doing the fun stuff!:rolleyes:
 
Last edited:

*EdC*

Senior Chief Petty Officer
Joined
Oct 31, 2007
Messages
661
Re: Restoring my MFG

Hi Guys

Well as I mentioned in an earlier post, It's hard to get things accomplished on the boat with so many other springtime projects needing attention.
I did however, manage to get some small, but necessary things done. The rot problems I encountered on the starboard side, inner gunnel and forward section under the dash, are all resined and completed. YEA! I was hoping to be a bit luckier with the port side, but that was not to be.To fix this properly, I had to remove the inner cockpit side panel. Something I really didn't want to do. Especially after putting so much effort getting it installed.

003-1.jpg


So today, I got all the rot removed and the new stock fabricated to go in. No pics of this 'cause it's pretty mundane stuff. With any luck, this repair will be completed this week... And finally get these sides done so I can mount the aluminum trim..:facepalm: Geeze I still got the aft half to do :( I'll just keep pluggin'
 

sphelps

Supreme Mariner
Joined
Nov 16, 2011
Messages
11,436
Re: Restoring my MFG

Any step's is better than no step's Ed ! Nice work on the chrome trim. Mine had white vinyl trim on the edge . I like the chrome better!
 

SteveMFG_Oxford

Petty Officer 1st Class
Joined
Nov 22, 2011
Messages
207
Re: Restoring my MFG

The trim looks terrific! You have the technique perfected.

How will you keep the aluminum from returning to the "gray" look over time? Wax? Clear coat?

Aluminum cleaner makes a nasty black residue that's not fun to clean up. It inevitably gets on painted surfaces.
 

*EdC*

Senior Chief Petty Officer
Joined
Oct 31, 2007
Messages
661
Re: Restoring my MFG

The trim looks terrific! You have the technique perfected.

How will you keep the aluminum from returning to the "gray" look over time? Wax? Clear coat?

Aluminum cleaner makes a nasty black residue that's not fun to clean up. It inevitably gets on painted surfaces.


Hey Steve

Thanks for the complement. I am pleased with the way it came out. If I leave it alone it will turn gray as you mentioned. This would more accurately depict the original factory trim. But, I am going to coat it with a special coating from a company called Everbrite. I like shiny, so, I hope the coating will keep it that way for a long time.
http://www.everbrite.net/


Any step's is better than no step's Ed ! Nice work on the chrome trim. Mine had white vinyl trim on the edge . I like the chrome better!

Sp

Thanks for the encouragement. After all I've been through with this trim, I kinda wish I had the vinyl like you! ;)
 

*EdC*

Senior Chief Petty Officer
Joined
Oct 31, 2007
Messages
661
Re: Restoring my MFG

Rain, Rain, go away........... Eight out of the last ten days :mad: Meeze need to work on my boat!
 

*EdC*

Senior Chief Petty Officer
Joined
Oct 31, 2007
Messages
661
Re: Restoring my MFG

Hey Guys,

Just a quick update....... Progress was slowed the last couple of weeks due to the all the rain we had. I did manage to get almost all the rotted wood from the forward, starboard and port sides taken care of. I need to resin the port-side wood to seal it. Then that's done... WHEW! All that is left to do, will be the underside at the splash well. That should go easy.

I dug out the aft trim today..... Same deal as the forward section. Looks like I'll be sanding and buffing the next several days :facepalm:
I'm feeling confident, once past the trim stuff, I can make some real progress.... I sent my deck fittings out for re-chroming this week. should take about six weeks to get back. So, with that said....I'm going to go out on a limb here....and shoot for a July 4th splash day! Fingers crossed! :eek:
 
Top