68 Offshore restoration

SHSU

Lieutenant Junior+Starmada Splash Of The Year 2019
Joined
Mar 8, 2017
Messages
1,670
Well, thanks to some inconsiderate people injecting some well reasoned points in this thread, reinforcement tabs are on pause until 2117 rivets arrive.

This is why I love this site. People sharing knowledge to help each other on completing their projects right.

SHSU
 

Sharpie223

Petty Officer 2nd Class
Joined
May 24, 2021
Messages
159
Here was my thought process for rivet selection, not to convince anyone on my choices, but to gives others in the future some more to think about.

The originals in my case are dimpled, indicating a 2117 alloy (or at least a hardened aluminum alloy). These have lasted 50+ years on this boat without loosening, so I will trust them to work. This is also the safest bet for rivets that are part of the original structure.

I'm not convinced that the 18-8 (not sure about 3xx series stainless) stainless would lose their grip/elongate over time. Their rated tensile is close to that of the solids, so they theoretically shouldn't be any worse off. That said, vibrations can do weird things to different materials, and this is untested from what I've seen. My guess is that the reports of closed end blind rivets being loose may have been from aluminum rivets, which are much weaker than solids.
I also ran a few thermal contraction stress equations and from that I don't see differential expansion/contraction causing anything near yield levels between -15 to 130 F for stainless rivet/aluminum sheet. On the cold end the aluminum should tighten on the stainless. On the hot end these could possibly become slightly loose, but I will also epoxy coat before install, and the epoxy expands at a higher rate than either metal, so should continue to seal.
There also seems to be as many report of loosening blind rivets as there are reports of the opposite.

For 100 solid rivets and the air hammer setting tool, it cost the same as 100 closed end 18-8, I already have the air compressor and air hammer. It would be cheaper if I was installing more. I decided the aluminum closed end rivets would be too weak for anywhere with a load, so they needed to be replaced in my planning. Since it made sense to replace the original solids with the same type, then the stainless blinds could tie the tabs to the hull bottom and sides. The blinds are less tested in my mind so safer to use in a location of lesser stress. If I hadn't already bought the blind rivets, I would use solids all around now. If someone doesn't have access to the air compressor and air hammer already, or absolutely cannot find help, it might make sense to use closed end blind rivets, but ONLY if they are 18-8 stainless and you plan to coat them before install.

I probably have repeated myself on some of this, sorry about that. Hopefully it can be beneficial to future restorations, though.
 

Sharpie223

Petty Officer 2nd Class
Joined
May 24, 2021
Messages
159
Also, I greatly appreciate the advice/experience. As an engineer I like to check further into recommendations, nothing against the person giving them, just interest in the subject. And I definitely have the tendency to push the bounds of accepted wisdom.
 

Moserkr

Chief Officer + Starmada Splash Of The Year 2021
Joined
Nov 23, 2020
Messages
848
Id love to see it work using stainless blinds. Thats some deep thinking and diving into uncharted territory, hence the skepticism here. You’ve definitey given it some good thought. I briefly glanced back through your thread, thought someone mentioned using dissimilar metals. I know we all use stainless steel on our boats, but usually bolts, not rivets that Ive seen. Any worry about it rusting in the next 50 years?

The rusty zinc bolts I pulled out of my transom from both the PO’s caused a lot of pitting from years of neglect. Id assume SS buys a lot more time. Thanks God mine never was in saltwater.

If SS blind rivets are basically as strong as AL solids, that would have saved me some time in the past. I was using solids for the interior structure of my boat too. Also a lot of the factory AL blinds on the boat had broken over the years. Upgrading to a SS blind would have been interesting and probably much, much stronger.
 

Sharpie223

Petty Officer 2nd Class
Joined
May 24, 2021
Messages
159
My thru-hull stainless rivets will be getting epoxy coated,so should create a barrier from galvanic corrosion, which with stainless should be limited anyway. If some moisture does seep past, I think it will still be less than uncoated. I live in eastern Washington, not desert dry but dryer air, certainly not a salty marine environment, so fasteners on the inside of the hull I am much less worried about. I might even consider zinc'ed rivets for underfloor structure, though since this can be a moister environment I may at least epoxy coat them. Everything topside will mostly be screws, I'll probably just use a low grade of stainless, they're cheap enough and not highly stressed.

The stainless rivets, while researched, are a test on my part. I think they will work out just fine, but again, vibrations can cause weird effects on different materials. If they loosen and leak, I will be sure to let people know.
 

Sharpie223

Petty Officer 2nd Class
Joined
May 24, 2021
Messages
159
Got deck boards rough cut today. I will still need to jigsaw out the center of the transom, too tight of an inside curve for a skilsaw. I will use a belt sander to sand the edges the last 1/8"-1/4", and then a router to cut the bevel in the edges of the front deck panels.

I havent yet cut any clearance for the knee brace. Obviously the brace itself will need a notch, and I need enough room to drop a bilge pump hose, is there any good reason to cut more access than that? I have seen where some have cut a large 1-1.5' square around the knee brace, and I am considering if this would be useful or not. Any thoughts?
 

SHSU

Lieutenant Junior+Starmada Splash Of The Year 2019
Joined
Mar 8, 2017
Messages
1,670
I havent yet cut any clearance for the knee brace. Obviously the brace itself will need a notch, and I need enough room to drop a bilge pump hose, is there any good reason to cut more access than that? I have seen where some have cut a large 1-1.5' square around the knee brace, and I am considering if this would be useful or not. Any thoughts?

I think most do it because that is what factory did. It allows plenty of room to access bilge pump, pump auto switch, livewell intakes, and easy view if water is in bilge. I created a piece that I could put in the hole to cover it, but in the end did not use. I am paranoid about water in the bilge so want to know if we have any as soon as possible. As of yet, only water that enters bilge is from spray and pulling fish/wet children into the boat.

SHSU
 

Sharpie223

Petty Officer 2nd Class
Joined
May 24, 2021
Messages
159
That makes sense. I think I will leave only enough clearance for knee brace and pump hose. I was already planning to install a leak detector both fore and aft, so I should know if there is significant water getting in, and where.

Since my deck will be screwed down and not riveted, I will still retain easy enough access for maintenance, plus with how I plan to build up seating/storage in the back, it may be difficult to access a panel like that without removal of seats/decks anyway.
 

SHSU

Lieutenant Junior+Starmada Splash Of The Year 2019
Joined
Mar 8, 2017
Messages
1,670
Since my deck will be screwed down and not riveted, I will still retain easy enough access for maintenance,
Besides the ease of maintenance, why screws vs rivets? Screws have a tendency to back out on the thin aluminum and the secured deck helps with the structural integrity.

SHSU
 

Sharpie223

Petty Officer 2nd Class
Joined
May 24, 2021
Messages
159
The original spars I will use rivnuts in, so I will be able to torque screws down tight. The edges will be 1/8" thick aluminum angle, I will likely use rivnuts there as well, but might also just tap it. I'm considering using aluminum bushings glued into the deck as well, which would allow higher torque with less yielding of the wood. Screws will probably be countersunk, but I might use short bushings to make a kind of counterbore instead. I just don't like the idea of rivets in a panel like that. At some point in time I will want to gain access underneath and screws will be much easier than drilling rivets.
 

Sharpie223

Petty Officer 2nd Class
Joined
May 24, 2021
Messages
159
Not much happens during the week since it would be difficult to fund this without employment, but I do a lot of thinking through the designs.
Current topic in mind is the bow deck. I like how the center is open as it allows better security/comfort of any passengers up there, sitting upright although sideways vs half laying down. That said, I also like the idea of closing off the center like on many newer fish/ski boats, the advantages being in a larger casting deck, potential bed for boat camping, and better security of any cargo below. This boat is planned in part for salmon fishing, so anchoring and anchor retrieval ability is a concern. I can see advantages of both configurations for this, better leverage with a full deck, better security in rough(er) waters with a deeper open bow (really open bow?)

Anyway, I am thinking of making this configurable to the conditions at hand. I want a system that will store on the boat when not in use without taking up much space. I am thinking of making a folding center deck, probably half folding down to either side with some kind of locking mechanism in the middle. If any of this makes sense, has anyone made something similar before?
 

redneck joe

Supreme Mariner
Joined
Mar 18, 2009
Messages
10,458
Not made one but thought of it.

Folding, yes.

Support would be a stick of wood to span the outward edge (the edge facing stern) The stick supported by (insert 100 ideas here). It should have the type of support and the location of the support to be free from skinning shins and stuff.

My first thought is actually aluminum tube (round has great strength) with a hole drilled very close to the ends. Tube is ~2" longer than needed and you have drilled an appropriate sized (half**) hole at the top of the storage areas so 1" sticks into each side storage. Drop a pin of some flavor into the holes which are inside the storage so nothing slides out.

**Half (or 3/4 holes). This puts the tube all the way up to support with no sag. Additionally I would take some wood and make four pieces of rounds at least an inch larger than the holes for the tube. Then drill same size hole as the ones you did for the tube in the center of that. Sandwich the storage metal with the wood - thru bolt or rivet and trip the top as needed. This will allow proper support as the thin metal would quickly waller out.

my 12 pesos worth of thoughts (was two, now adjusting for inflation)
 

redneck joe

Supreme Mariner
Joined
Mar 18, 2009
Messages
10,458
oh, and tube that size stores easily anywhere on the boat, with pins in it so you don't lose them. I've heard.....
 

Sharpie223

Petty Officer 2nd Class
Joined
May 24, 2021
Messages
159
Maybe I'll use aluminum tube mounted under the driver's console on the back, and when the center deck is folded up into position, the tube slides toward and lock into the passenger console, under the two deck panels to support them. The tube would slide similar to the latch on a public bathroom stall door. Then the edges would likely need some support in the form of aluminum stock, and hinges be sufficiently heavy duty.

I already plan to add a hinged center to the windshield, I might also add a panel that can close the gap between windshield and deck. With a decent cover/enclosure I could probably have a reasonably heated space for cold mornings.

Lots of time to plan these mods, enough other tasks in line right now. Taking the deck wood from rough cut to finish cut tomorrow and will start sealing. Transom should be glued and clamped as well (I am laminating from two layers of 3/8 and two layers of 1/2, due to nominal dimensions I calculated that this will get me closest to 1.5"). New solid rivets should be in the mailbox soon, if they aren't already, maybe reinforcement tabs can be installed this weekend, leak check boat, and rebuck anything loose.
 

Sharpie223

Petty Officer 2nd Class
Joined
May 24, 2021
Messages
159
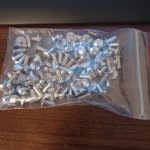
Presents came in the mail today, now I'll have to figure out the riveting process.
20230112_131053.jpg

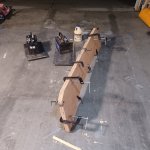
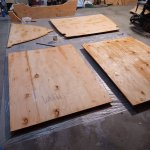
I managed to final cut the deck pieces with a jigsaw and angled the edges with a table saw and a rip fence as a block to keep me from doing anything more than beveling. Finished with a belt sander in the spots too tight to cut. Glued up my transom laminations tonight. I didn't have enough weight for the main piece so it's drying with all my clamps. The small side pieces are under batteries as weights.
20230113_204749.jpg

I tried to remove the denting from the port side spray rail, used a piece of 1/2 conduit smashed to proper radius as a form. No luck. I will try a wood form with only a 1.5" section width and see how it does. Otherwise I think I am stuck filling or fairing with pc-7 putty, as much as I hate to do so.
 

Sharpie223

Petty Officer 2nd Class
Joined
May 24, 2021
Messages
159
Weekend progress.

Managed to sell parts from the old trailer that won't be used, as well as old seats and pedestal parts. Hurray for extra funds, and garage space.

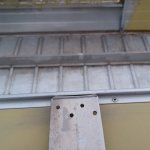
I employed my 4 year old to help me mark rivet hole locations on tabs. Wasn't sure if she'd get it but she did a great job!
20230114_152421.jpg

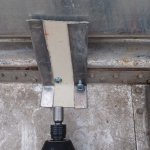
The marker couldn't quite reach some, so I had to use my very best clecos to match drill.
20230115_133402.jpg

These were just about the same size, so they didn't open the holes any. I've decided that I will use 5200 on all the new rivets, I was going to use epoxy but I think I trust the 5200 to fill in any gaps better. That wil be next weekend, ideally less rainy. Does anyone know the effect of moisture on the surface when using 5200?

The edges of the deck board got a coating of epoxy. I also coated any cracks/knots on the bottom.
20230114_210658.jpg

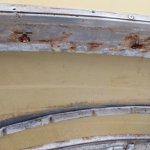
I finally took the threaded inserts off the bow trim. I even managed to avoid tetanus! Decided it needed to be done sooner rather than later with kids wanting to play in the boat.
20230115_140524.jpg
 

Sharpie223

Petty Officer 2nd Class
Joined
May 24, 2021
Messages
159
I'm guessing it can't be applied underwater though as a moisture cure product? I suppose the question is how dry the mating surfaces need to be? If I can leave a streak in the condensation with my finger, is that too much or should I heat the aluminum to drive out the moisture? Also, will acids harm the cure like they do epoxies? If not, I might acid etch the surfaces prior to use.
 
Top