1978 SS 16 restoration

Siva283

Petty Officer 1st Class
Joined
Aug 28, 2022
Messages
226
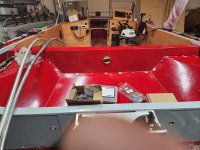
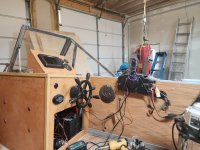
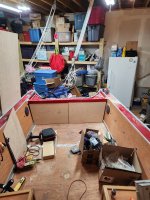
Well took it kinda easy today. Cleaned up tools we didn't need vacuumed it for the elevinty billionth time and installed the splash well then vacced it again. I am waiting on a new boot wlforbthe splash well where everything comes through and new fuel fill and vent lines then the consoles can be finished.
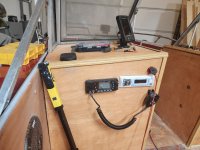
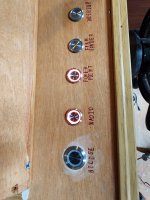
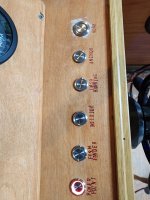
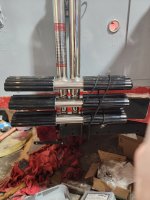
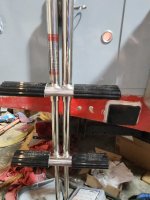
I was able to get the wood console tips to flex and match the curve on the windshield which was nice.
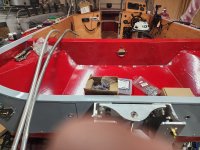
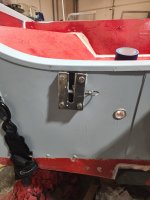
It was a fight to get that splash well in I ended up taking it apart so now I need to repaint it. I also got the wooden sides secured for the final time.
Next week is 4200 since it'll be above freezing so my heater can keep up and some odds and ends. The following week is touch up paint and floor. Then make new bow cushions then put in the floor and put the motor on so I can find which wire I need for the tach and keyed power for the gauges and she will be done.
 

Attachments

  • 20230205_160700.jpg
    20230205_160700.jpg
    2 MB · Views: 16
  • 20230205_160654.jpg
    20230205_160654.jpg
    2 MB · Views: 16

Moserkr

Chief Officer + Starmada Splash Of The Year 2021
Joined
Nov 23, 2020
Messages
839
Great progress Siva! For some reason my notifications were off so Im catching up on a lot!! That walk around when shes all done will be well worth all your effort.
 

Siva283

Petty Officer 1st Class
Joined
Aug 28, 2022
Messages
226
Great progress Siva! For some reason my notifications were off so Im catching up on a lot!! That walk around when shes all done will be well worth all your effort.
Hopefully 2 or 3 more weeks I'm in the home stretch. Thankfully I'm in month 6th of working on it most evenings and all weekend every weekend. I'm starting to get burnt out on it. But 6 months start to finish seems to be pretty quick so I guess I should be proud of that. I have added ALOT along the way that wasn't in the original plans.
Can't wait to be sitting out in the sun on it
 

Moserkr

Chief Officer + Starmada Splash Of The Year 2021
Joined
Nov 23, 2020
Messages
839
I remember being in your shoes, feeling a bit burnt out. But seeing the light at the end of the tunnel, thats when you double down and just hammer it out!! 6 months is pretty quick and shes looking good. The home stretch will be here before you know it.
 

Siva283

Petty Officer 1st Class
Joined
Aug 28, 2022
Messages
226
I just keep telling myself less than a month(hopefully) to go. I am now keeping a mental list and it feels good as things are getting marked off.
The thing that killed me the most though is I cant hook up the tach till the motor is one. I need to be able to power the controls to find my keyed ignition and I am still not sure how to find tach signal. I know the colors mercury used but I dont have mercury controls.
I also cant find the tach harness from mercury for this version which would give me the exact colors too.
I am hoping I can find the pulses with my multimeter or osciliscope. Ill probably need the osciliscope since the pulses will be to fast for a multimeter
 

Siva283

Petty Officer 1st Class
Joined
Aug 28, 2022
Messages
226
Fuel line ran back to the motor through a fuel filter\fuel water seperater. Bow rail installed windsheild finally installed. Tomorrow I'll be putting the fuel filler neck in and mounting the second fish finder, working on some trim and for the buttons I have the metal stamps you smack with a hammer to imprint in the wood and then with a fine paint brush the letters will be painted red. And whatever other odds and ends we can get done.
Next weekend it'll be cabinet doors.
Decided to hold off on the 4200 for the moment. I have a big tube so I am trying to get everything ready and go through and do everything at once.
Pics coming tomorrow
 

Siva283

Petty Officer 1st Class
Joined
Aug 28, 2022
Messages
226
oh wow guess i forgot they make big tubes.
Yeah I have alot to reseal so it's much cheaper to get the big ones. I had the splash well completely apart so that all needs resealed. I got to reseal the windsheild.
When I took the bow rail off the moron has mild steel bolts on it so it corroded the holes out bigger to the point I had to use stainless fender washers to put it back so I am sealing those up too. I am going to use it to seal the consoles. I am using it as a glue to put the hdpe blocks on the back to mount the transducers too and I am sure I am missing a few things too. I'm gonna go through a lot. Hopefully I won't have to rebuild this thing again in my lifetime.
 

redneck joe

Supreme Mariner
Joined
Mar 18, 2009
Messages
10,362
yeah I remember now buying a couple big tubes when I was working on the Carver.

I'm also going to glue on mounting plates for anything on the transom.
 

Siva283

Petty Officer 1st Class
Joined
Aug 28, 2022
Messages
226
Not much to show got about half the trim done so far. Got the dash buttons labeled. My girlfriend hand punch and painted them got the bow rail on but forgot pics. Got the fuel system finished it seems to have no problem at all pulling fuel from the tank. Adjusted the windsheild and put the tops and sides on the console and mounted the second fish finder.
This coming weekend is garage clean up to get all the stuff I am done with moved out to the shed. I need to make room to bring the motor in and freshen it up. I'll probably order intake gaskets and take the intake and carbs off the 90 on my other boat I am selling and swap them with my 75hp to make it a 90hp.
 

Attachments

  • 20230212_135134.jpg
    20230212_135134.jpg
    2.1 MB · Views: 16
  • 20230212_135143.jpg
    20230212_135143.jpg
    1.5 MB · Views: 17
  • 20230212_153930.jpg
    20230212_153930.jpg
    1.1 MB · Views: 17
  • 20230212_153934.jpg
    20230212_153934.jpg
    1.1 MB · Views: 17

Siva283

Petty Officer 1st Class
Joined
Aug 28, 2022
Messages
226
yeah I remember now buying a couple big tubes when I was working on the Carver.

I'm also going to glue on mounting plates for anything on the transom.
Yeah I put 5200 coated rivits in all the transducer holes from what's been mounted on it. No more holes through the hull.
 

Siva283

Petty Officer 1st Class
Joined
Aug 28, 2022
Messages
226
I think I am going to take a break this weekend and get my green house built. I'm so close to being done but so far it seems. I need a short break though
 

SHSU

Lieutenant Junior+Starmada Splash Of The Year 2019
Joined
Mar 8, 2017
Messages
1,668
I remember the burn out too. A short break it needed, plus you still got some time before Summer Splash.

SHSU
 

Siva283

Petty Officer 1st Class
Joined
Aug 28, 2022
Messages
226
I remember the burn out too. A short break it needed, plus you still got some time before Summer Splash.

SHSU
It's been 6 years of projects. Next weekend I'll pick back up I got probably 2-4 weekends left and it'll be done.
This will be my last for awhile. Before this I restored and built 4 jeeps and some other building projects. When this is done I'll be on the water every weekend fishing and camping till it gets cold.
The weather is starting to break here so I should have it done just in time for the nice weather.
 

Watermann

Starmada Splash of the Year 2014
Joined
Jan 12, 2013
Messages
13,753
Looking super nice! Just about there.

My rebuilds took over a year and that was working on them every free minute. When I started getting a bit burned out, I took off some time from work and did a resto blitz week rather than stopping progress and that put me over the hump for just finishing touches.
 

Siva283

Petty Officer 1st Class
Joined
Aug 28, 2022
Messages
226
Looking super nice! Just about there.

My rebuilds took over a year and that was working on them every free minute. When I started getting a bit burned out, I took off some time from work and did a resto blitz week rather than stopping progress and that put me over the hump for just finishing touches.
For the most part that's where I am just odds and ends. The major stuff is done.
Unfortunately taking off work isn't happening my mother's health isn't what it used to be so I use my pto to get her to her doctors appointments and stuff.
I'll be back on it this weekend. After this weekend it'll be mount a couple cabinet doors you up paint put the vinyl flooring down and bolt the seats in. Oh and I am recovering a few bow cushions. The. Mount the motor and run it so it's the home stretch
 

Siva283

Petty Officer 1st Class
Joined
Aug 28, 2022
Messages
226
Mostly stuff you don't see got done today. I needed to make some struts for the front seat as the aluminum was crushing. Finished up the trim up high. Down low will go in after the flooring. Got the cabinet doors made. I'll get them sealed tomorrow.

But pics yay!!!!!! Here is a pic of the test fit of the rear doors

Also light sanded the red paint in a few areas for touch up. Got everything sealed and got the swim ladder bracket on. Pics of that will come tomorrow. Another weekend of work and the boat could be on the water and being used. But I am putting battery boxes in the rear for the 2 12v lithium batteries for the electric motor and mounting it. I need to mount the chargers for both battery banks and replace the auto isolator I am using for the starting battery and accessories battery. The lithium ion batteries are electric motor only. As the others need replaced they will get lithiums as well. And I need to make the new bow cushions still.

That should finish it up till I am ready to slap the motor on which should only take an hour or so. And I need to find the tach wire and keyed power at the controls. I know keyed fused power should be pink I think and tach signal should be grey if my Chinese controls used Factor mercury colors
 

Attachments

  • 20230225_131644.jpg
    20230225_131644.jpg
    1.6 MB · Views: 11

Siva283

Petty Officer 1st Class
Joined
Aug 28, 2022
Messages
226
Swim ladder mounted. It clips into the block and secured with a pin. I won't have it in underway. It'll be stowed since it's in the water off plane
 

Attachments

  • 20230226_124646.jpg
    20230226_124646.jpg
    1.9 MB · Views: 9
  • 20230226_124153.jpg
    20230226_124153.jpg
    1.5 MB · Views: 10
  • 20230226_124127.jpg
    20230226_124127.jpg
    1.4 MB · Views: 8
Top