1995 Chaparral 2550 SX Refit and Restoration

drewm3i

Petty Officer 1st Class
Joined
Dec 31, 1969
Messages
288
This thread was originally posted on THT, but I'd like to share it here as well as I think this audience would appreciate it more. I think I'm done signing the praises of sterndrive pleasure boats to outboard cultists anyway :ROFLMAO:...

Hello folks, here is my boat...she is a 1995 Chaparral 2550SX in my favorite color with my favorite layout that I hauled home to Edgewater, MD from upstate New York. I love her classic lines and knew when I saw her that she was the perfect boat for my boating style and interests.


She came with a trailer, snap in carpet, a cockpit cover, a mooring cover, a bimini, and a camping enclosure.


attachment.php


attachment.php


attachment.php


attachment.php


attachment.php


attachment.php


attachment.php


attachment.php


attachment.php


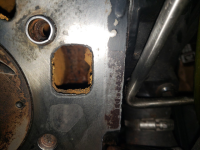
Here goes the refit...
 

drewm3i

Petty Officer 1st Class
Joined
Dec 31, 1969
Messages
288
Started the arduous process of buffing the boat the other day and also took some more pictures!

attachment.php


attachment.php


attachment.php


attachment.php


attachment.php


attachment.php


attachment.php


attachment.php


attachment.php


attachment.php


attachment.php


attachment.php


attachment.php


attachment.php


attachment.php


attachment.php


attachment.php


attachment.php


Stay tuned...
 
Last edited:

drewm3i

Petty Officer 1st Class
Joined
Dec 31, 1969
Messages
288
At this point, you may be wondering where is the need for a refit? Well, unbenownst to me the 7.4L Mercruiser (we came to learn) had a blown head gasket that was allowing a little bit of water into two starboard cylinders, causing a popping noise that occurered because water does not compress...so I started taking the motor apart. Even with the blown head gasket, the motor ran fairly well on the sea trial and the symptom was intermittent.

At first I thought it would be a stuck exhaust valve causing the rattle back through the carb which could clearly be heard from the upper end of the motor while accelerating during our first trip out post sea trial. A compression test showing 30 psi in two cylinders on starboard side confirmed a problem beyond exhaust flappers. At this point, I took the top end apart and found a blown head gasket. Both heads are now off and are being rebuilt by a local machinist.

Port Exhaust Manifold

attachment.php


attachment.php


Before tear down


attachment.php


attachment.php


Starboard side (bad side)

attachment.php


attachment.php


Starboard head

attachment.php


attachment.php


attachment.php


Starboard side off

attachment.php


Port side

attachment.php


Both heads off

attachment.php


Starboard exhaust manifold

attachment.php


attachment.php


attachment.php


attachment.php


attachment.php
 
Last edited:

tpenfield

Moderator
Staff member
Joined
Jul 18, 2011
Messages
17,985
Drew,

Something went wrong with your pictures on the second post. You should import your pictures to iBoats using the 'Attach Files' and then Insert features
 

tpenfield

Moderator
Staff member
Joined
Jul 18, 2011
Messages
17,985
BTW - in you opinion, which boat was better built? The Searay 27 or the Chappy 25?
 

drewm3i

Petty Officer 1st Class
Joined
Dec 31, 1969
Messages
288
BTW - in you opinion, which boat was better built? The Searay 27 or the Chappy 25?
Not even close. The Chappy SX was a premium line for its era. It is comparable in quality with Cobalt and Formula, with three exceptions: the hull/deck joint is riveted which sucks, there is some sloppy glasswork in places, especially hidden areas, and also Chaparral did not do a good job sealing fastener holes in the 90s. One other minor gripe: the fiberglass deck liner is not self-bailing, but the tradeoff is a very deep, secure cockpit.

The SX is superior to those premium brands in these ways: quality of vinyl and cabin fabric (36 oz. cockpit vinyl and very durable cabin fabrics/cushion foam), pressure treated wood for transom and cockpit panels (and stringers and bulkheads starting in 1996 which was the last year for the 2550 SX), plastic seat bases, cabin design/ergonomics (the 2550 SX had optional with shorepower a fridge, a stove, head compartment, and two sinks--albeit these are not electric), utility (opening windshield with step and anchor locker are two great examples vs. Formula's 252 SS). The 2550 SX's one-piece hinged doghouse is also not cored and neither is the deck hatch, so these don't rot. Another major perk of the 2550 SX: the drain plug was not drilled through the transom wood and transom penetrations from the factory were kept to a minimum. Trim tabs were optional. The rear bulkhead drain also extends about 4 or 5 inches off the hull bottom and is huge, so this doesn't typically rot on Chaparrals. On top of this, the deck near the deck hatch for the skylight is part of the molded fiberglass liner and thus completely seals the edges of the balsa deck with finished fiberglass. Just thought of another premium feature: the dash panels for the VDO gauges are actually aluminum or stainless with a plastic coating over it so the panel doesnt crack when fastening. I have never seen a more robust removable dash panel on any boat. I like the 2550 SX so much that I actually just bought another lol!

I realize you asked about Sea Ray, but that 270 was built laughably bad...all structural members were standard plywood stapled together and had ZERO fiberglass. They then did not seal any bilge fasteners and drilled massive, unsealed drain holes through the engine mount stringers and rear bulkhead. If that weren't bad enough, the transom drain plug was drilled right through the (rotten) transom and left unsealed. The trim tabs also weren't properly sealed and leaked.

The cockpit upholstery was decent, but thin. The engine hatch was cored and rotten. The foredeck had poorly sealed fasteners and had rot around the windlass. The steps up to the foredeck were very nice, but the helm was very succeptible to chalking and the cheap plastic panels were cracked garbage. The cabin was the only part of that boat that was nicely finished and well-laid out. Hope that helps, but as someone who now works on boats all the time, I really don't like Sea Ray's design philosophy, with the exception of the SLX line. Honestly they're probably the most overrated boat brand of the 90s and 2000s.
 
Last edited:

tpenfield

Moderator
Staff member
Joined
Jul 18, 2011
Messages
17,985
Nice write-up. I've often considered Sea Ray as the 'Chevrolet' of boats.

Chappy has always been on my short list of boats, but never owned one. I did take a look at a 327 SSX when I made my recent upgrade, but the boat had raw water cooled engines w/ CAT exhaust in the ocean . . . :cautious:
 

drewm3i

Petty Officer 1st Class
Joined
Dec 31, 1969
Messages
288
Nice write-up. I've often considered Sea Ray as the 'Chevrolet' of boats.

Chappy has always been on my short list of boats, but never owned one. I did take a look at a 327 SSX when I made my recent upgrade, but the boat had raw water cooled engines w/ CAT exhaust in the ocean . . . :cautious:
Nice, the 327 SSX is a nice boat. I had a client with one, but it was grossly underpowered with twin 5.7s. Only hit about 42-45 MPH tops.
 

drewm3i

Petty Officer 1st Class
Joined
Dec 31, 1969
Messages
288
Motor turning over by hand: I think the lower end has been spared.


Before:


drewm3i

Petty Officer 1st Class
Joined
Dec 31, 1969
Messages
288
While waiting for the heads to be rebuilt and machined by the machine shop, I took the liberty to do the following:

Enjoy the view at the marina LOL

1686530563395.png


1686530594589.png

Design and order the new name!

1686530624079.png

1686530634027.png

1686530650186.png

Fix a few gelcoat dings, inside and out. For example:

1686530665076.png

Install a new proper drain plug. Despite having all SS thru-hulls, Chap used a plastic drain plug on our '95.

1686530701111.png

Re-bed the engine mount stringer lag screws with 5200, in addition to bedding all other hardware in the bilge with butyl tape--no rot yet and I plan to keep it that way!


1686530723210.png

Installed the grease fittings for the steering pin...hope to make this one last a long time!

1686530737121.png

And then I got the refurbished heads back, which looked brand new!

1686530755284.png
 
Last edited:

drewm3i

Petty Officer 1st Class
Joined
Dec 31, 1969
Messages
288
Continuing on...


A look inside the block water passages:


1686530935901.png

Starboard side all cleaned up for re-installation (scraped and sanded):

1686530950353.png

New Fel-Pro head gasket fitted:

1686530964843.png

1686530979539.png

Anyone know what this loose pan under the intake manifold is???

1686530992350.png

Starboard head resting on dowel pins:

1686531010767.png

1686531021202.png

Starboard piston:

1686531036810.png

A few superficial dings in the corner of one piston...

1686531049651.png

Starboard side torqued down and valve train reassembled:

1686531063555.png


1686531072976.png

1686531102396.png

And then for the port side...which I did the same procedure and was following the torquing process when one of the last (brand new by the way) bolts snapped on the final round of torque (75 ft./lbs.)!!!

1686531112930.png

1686531120725.png

1686531162660.png
 

Attachments

  • 1686530915508.png
    1686530915508.png
    463.4 KB · Views: 0
Last edited:

drewm3i

Petty Officer 1st Class
Joined
Dec 31, 1969
Messages
288
The last few days have been very productive...I got the broken bolt out which was fortunately not flush with the block after taking the cylinder head off. I was able to twist it off with a pair of vise grips. After chasing the threads with a bolt, I then reinstalled the head and was able to get it all torqued down to spec without anything else breaking! Feeling relieved and think we will be on the water soon.

Our marina is beautiul:

1686699623788.png

1686699633127.png


The most difficult thing about old boats is all of the simultaneous projects going on at once...all gelcoat gouges are almost fixed as well.

1686699653314.png

1686699666032.png

Cylinder heads reinstalled, but pulled the intake to make sure I could get everything seated properly.

1686699683839.png

1686699694739.png

New gaskets ready to go, just waiting on new intake bolts!

1686699708529.png
 

drewm3i

Petty Officer 1st Class
Joined
Dec 31, 1969
Messages
288
Well, guys I was able to paint the intake and get it back on. While I was at it, I installed all new belts, new impeller, new plugs and wires, new distributor cap and rotor, new fuel line from the tank, replaced the fuel filter, changed the oil and filter as well as the gear lube. She is all back put together now and I started her up and carefully set base timing to 10 degrees BTDC.

Intake manifold back on:

1686699801751.png

Custom vintage Chap shirts:

1686699818380.png

Almost back together!!! New exhaust manifolds, risers, and flappers as well!

1686699842790.png

Simrek drive shower to hopefully make this Bravo 3 last forever!

1686699858995.png

1686699870761.png

1686699889595.png

Some more gelcoat repairs!

1686699899602.png

1686699908448.png

1686699917195.png

1686699927635.png

1686699937711.png

All cleaned up and ready to go!

1686699954414.png

1686699970764.png

And we are idling out of the channel...hope she runs well LOL!

1686699981862.png
 

tpenfield

Moderator
Staff member
Joined
Jul 18, 2011
Messages
17,985
Hi Drew,

You mentioned setting the ignition timing to 10˚ BTDC . . . IIRC, shouldn't it be 8˚ BTDC at idle?
 

drewm3i

Petty Officer 1st Class
Joined
Dec 31, 1969
Messages
288
Hi Drew,

You mentioned setting the ignition timing to 10˚ BTDC . . . IIRC, shouldn't it be 8˚ BTDC at idle?
Good question Ted! I believe the older Gen IV and Gen V 454s like this one are 10° BTDC. Whatever setting I set it to was on the engine cover.
 

drewm3i

Petty Officer 1st Class
Joined
Dec 31, 1969
Messages
288
Unfortunately, we were not able to leave for the test run until late in the afternoon as I was tying up loose ends at the dock, but we did get out and put her through her paces and I am happy to report that she seemed to run really well!


Here are some pictures of Saturday the 11th, 2020, the day we finally put Soul Rebel to the test:

1687209655884.png

1687209668886.png

1687209680060.png

1687209698345.png

1687209708932.png

1687209719677.png

And a couple of videos from the momentous day:


drewm3i

Petty Officer 1st Class
Joined
Dec 31, 1969
Messages
288
We also took her out the following day and she continued to run very well. Did a 50 mile cruise from Rhode River over to our home in Annapolis, before cruising almost the entire length of the Severn River and back. Seas were rough so we were really able to put her to the test. In the middle of the bay, we faced 3' chop with an occasional 4-5'er. The boat did pretty well. No leaks--water nor oil. She is very bow light with the big block so I have some trim tabs on the way to help with keeping the boat more level when I am forced to slow down due to water conditions. Also have a Garmin 74 CV on the way!!!
I did also replace the fuel sender so now the fuel gauge works as well. We burned a decent amount of fuel (~30 gallons) running over the weekend due to the sea state and the captain opening up the secondaries a bit much. Did hit 51 on GPS without pushing her too hard at around 4500 rpms so the motor is purring now and all seems to be working properly!

Here is a video from that day at high cruise:


1687210879090.png

1687210890744.png

Cute street in downtown Annapolis!

1687210911872.png

Annapolis inner harbor:

1687210927790.png

1687210942596.png

St. Mary's Parish:

1687210955678.png

1687210966675.png

This pictures doesn't do those seas justice...LOL!

1687210976909.png
 
Last edited:

drewm3i

Petty Officer 1st Class
Joined
Dec 31, 1969
Messages
288
After a few weekends of leaving the boat in the water and using her, I had noticed that the drive and transom assembly paint was chipping further and the metal was corroding a tad bit. And so, I decided to clean, sand, clean, prime with zinc chromate, and paint the drive. I also wanted to replace the old anodes that were no longer doing their job, in addition to adding the prop anode.

Here is the prep work:

1687381246533.png

1687381260406.png

1687381272434.png

1687381283380.png

1687381293595.png

Using the Quicksilver Phantom Black over the Moeller zinc chromate gave HORRIBLE results so I decided to sand this down and recoat with Rustoleum Acrlyic Enamel.

Quicksilver:

1687381306581.png

1687381317326.png

Finished product with new decals and aluminum anodes (brackish water).

1687381331726.png

1687381340987.png

1687381351050.png

Not boating in South Florida where we can see bottom, means a good depth sounder and chartplotter is imperative. Here is how I have installed a Garmin Echomap 74 CV and accompanying transducer. A custom ram mount helped me not hack up the dash or block the view of the other gauges.

1687381368767.png

1687381379331.png

1687381387640.png

1687381397692.png

1687381406979.png

I have some holes to fill now as I had to move the transducer inboard to avoid a lifting strake.

1687381437370.png

New stainless trim pump bracket...old one was rusted out.

1687381450262.png

These 1290-80 nauticus smart tabs with retracting brackets are going on very soon...already mounted and installed them, but left the 4200 at home LOL!

1687381463449.png

Drive shower back on...all new anodes fitted.

1687381475405.png

Trim pump reinstalled:

1687381486223.png

One issue I was having was rusting terminals (automotive I believe). I installed new tinned copper marine eye terminals in addition to these lead lugs with covers. Should do the trick until I re-waterproof the old and leaky cover.

1687381500846.png

I don't think I ever got around to posting a picture of the cleaned up and put back together engine!

1687381510928.png
 
Last edited:

drewm3i

Petty Officer 1st Class
Joined
Dec 31, 1969
Messages
288
Time for an update...after a number of successful boating trips, we began to have fuel problems in subsequent trips (hard starting and stalling out while on plane). Our last time out ~two weeks ago, ended in a tow back to the dock: our first on-water breakdown ever. Since the tank level had dipped, I thought at first it was bad gas and drained the fuel filter and found lots of debris (odd). Anyway, I removed the drain plug for the mechanical fuel pump which is mounted in an oil-filled cavity that is bolted to the raw water pump and straight gasoline poured out! It seemed our fuel pump seals had failed, so I replaced the fuel pump with a new one. Went out today and ran~40 miles and she ran great. This was our first trip with the smart tabs and they have totally transformed the boat in every way!!! No bow rise, turns are level, and the boat now knifes through 2-3' chop at speed without needing to slow down (no more bouncing over waves). The Garmin GPS and sonar I added is also working flawlessly and is such a great addition! Here are some pictures:

Smart tabs and new transducer mounted:

1689023142651.png

1689023152001.png

Old transducer sealed with epoxy and then gelcoated:

1689023166323.png

1689023175433.png

Fuel filter contents--fresh gas will be added next trip!

1689023193753.png

1689023206838.png

1689023216222.png

How is this for a 25-year-old engine and bilge?

1689023227388.png

New fuel pump

1689023250990.png

Back at the dock after a wonderful outing!

1689023263559.png

1689023275992.png

1689023291263.png

Up next: a new throttle!

1689023305895.png
 
Top