1977 StarCraft 18' SS restore

Decker83

Commander
Joined
Apr 5, 2011
Messages
2,592
Thanks again gentlemen for the cudo's..
I have to give all the credit for the backer boards to DozerII.. He did this in one of his restores (maybe more than one),

I am going to order the Springfield 9" seat base and need to know what size stainless steel bolts I need? What type of head did you guys use?

Have a great rest of the week>>:yo:
 

Watermann

Starmada Splash of the Year 2014
Joined
Jan 12, 2013
Messages
13,753
I used beveled flat head machine screws 1/4" diameter on my pedestal bases.
 

nrf414

Chief Petty Officer
Joined
Feb 16, 2008
Messages
573
My t nuts in doubler are 3/8 @ so I'm going to use the truss head SS screws in 3/8ths.
I'm planning on taking a Tnut to the hardware store and making sure I have the right size 👍
 

Watermann

Starmada Splash of the Year 2014
Joined
Jan 12, 2013
Messages
13,753
My t nuts in doubler are 3/8 @ so I'm going to use the truss head SS screws in 3/8ths.
I'm planning on taking a Tnut to the hardware store and making sure I have the right size 👍

Yeah they make a couple different thread pitches too.
 

MNhunter1

Ensign
Joined
May 12, 2014
Messages
980
I'm using 5/16" phillips oval head on mine, primarily because the 5/16" tnuts were already installed. The Springfield base does have the recess for the head, not just a flat mounting surface. Not sure if you can tell by the picture or not.

On another note, I realized the previous pedestal holes were drilled for different bases. I had to enlarge the opening on all four locations, but the installed tnuts and associated holes lined up perfectly for the Springfield bases for the two aft locations, but were completely wrong for the two forward console locations. I guess those two will be getting some 5/16" screws rather than the thru bolts.
 

Attachments

  • photo286435.jpg
    photo286435.jpg
    159.9 KB · Views: 1

Watermann

Starmada Splash of the Year 2014
Joined
Jan 12, 2013
Messages
13,753
Be sure to use blue locktite when you assemble them too, just to be sure they stay tight.
 

Decker83

Commander
Joined
Apr 5, 2011
Messages
2,592
Thanks for all the help.. Looks like I have a multiple choice. 1/4, 5/16 and 3/8.. :laugh:
I am thinking I will use 2 pedestals that or solid base to go behind the consoles and 2 that or removable for the passengers.
I don't want to cut anymore holes in the deck than I have too.

Will do Watermann on the blue locktite..

Went to work this morning and the gas company was digging up the street in front of our building.. One of the workers came into the office and said we have to evacuate.. So I had the day off..:clap2:
Flipped all the deck pieces over and gave them 2 coats of the spar.. I think I will use one more coat on the top side of the deck. Looked like the plywood really soaked in the spar..
 

Decker83

Commander
Joined
Apr 5, 2011
Messages
2,592
It's been a couple of weeks since the last post.. Went over to the big box store HD and bought 3 sheets of the
pink foam board. 48x96x2. One of the sheets had a very small damaged edge and they sold it half price..
I started cutting the foam standing on its 2" edge on one starboard side and part of the way on the port side.
I got tired and started to lay them in length wise.
Either way it's a PITA!! I used my band saw to do the cutting. It has a tilt table so I could make my bevel cuts..
I'm going back the way I started with them standing on the 2" side.

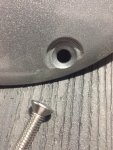
I put in the first sheet of the deck that's close to the transom.. I used the LF all aluminum pop rivets and counter sunk them
on the stringers. Used the quick dry 3m 5200 under the flange and down the hole..

Have a question about the rivets on the outer ribs. Do I need to counter sink them as well?

Couple of pics.
100_4015.JPG100_4018.JPG

I also put some strips of neoprene rubber down on top of the gas tank to help keep it from rubbing on the deck when the tank is full..
 

mbroughton02

Petty Officer 2nd Class
Joined
Jan 17, 2015
Messages
198
I didn't counter sink my deck rivets, other than a few that needed to be in order to have enough length to catch the aluminum (I should have ordered one size longer). I can feel them under the vinyl if I'm trying to, but they aren't really noticeable per se.
 

classiccat

"Captain" + Starmada Splash Of The Year 2020
Joined
Dec 20, 2010
Messages
3,405
it's really coming along Decker!

I think as long as they're not interfering w/ the side-panel's z-bracket and your rivets are long enough, you should be good to go on that one.
 

BWR1953

Vice Admiral
Joined
Jan 23, 2009
Messages
5,852
Looking really good, Decker! Keep up the great work! :encouragement:
 

66Holiday924

Chief Petty Officer
Joined
Aug 21, 2017
Messages
525
Very nice work Decker. You guys are getting me fired up to do a complete floor rebuild with the installation of a belly tank as a future project. I'm taking notes. I like how you installed the pink foam board. Usually I see people lay it horizontally and you know there are a lot of unfilled cavities. I'm sure it was a PITA to cut it the way you did but it is really nice! :encouragement:
 

Watermann

Starmada Splash of the Year 2014
Joined
Jan 12, 2013
Messages
13,753
The rib end deck rivets will be behind the side panels and not visible so it's your call on the countersink.

Lookin good :thumb:
 

Decker83

Commander
Joined
Apr 5, 2011
Messages
2,592
I didn't counter sink my deck rivets, other than a few that needed to be in order to have enough length to catch the aluminum (I should have ordered one size longer). I can feel them under the vinyl if I'm trying to, but they aren't really noticeable per se.

Thanks for your input on the rivets. I was following what Watermann did on his deck.. It made good sense to me..
 

Decker83

Commander
Joined
Apr 5, 2011
Messages
2,592
it's really coming along Decker!

I think as long as they're not interfering w/ the side-panel's z-bracket and your rivets are long enough, you should be good to go on that one.

I'm not sure where the z-bracket will go. My floor was already tore out when I got the boat.. I think I will just counter sink
them all to be on the safe side..
My rivets have a 7/8" grip range..
 

Decker83

Commander
Joined
Apr 5, 2011
Messages
2,592
Very nice work Decker. You guys are getting me fired up to do a complete floor rebuild with the installation of a belly tank as a future project. I'm taking notes. I like how you installed the pink foam board. Usually I see people lay it horizontally and you know there are a lot of unfilled cavities. I'm sure it was a PITA to cut it the way you did but it is really nice! :encouragement:

Thanks Holiday, I do the same thing. I see all the great work everyone is doing and get all excited. Then I go out and start working and the excitement slows down.. :violin:

I do like how much more foam you can get in by standing it on the 2" side but it's a lot of cut and fit..
 
Top