New Silverline owner/refurbisher

MTJames

Seaman
Joined
Jun 24, 2017
Messages
51
Hello everyone.

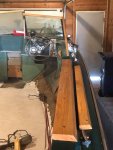
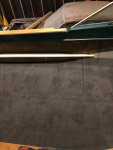
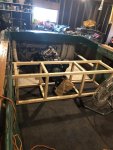
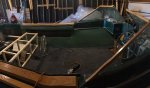
New here, and new Silverline owner. It's a 1971 Samoa 19' I/O. Has the Chrysler/Volvo 171AQ with the 280 stern....originally was a 270, but that was replaced with the 280. The new stern has about 100 hours on it. It sat in the weather for literally 17 years, before I and my brother picked it up.......for free. First thing we checked even before we said ok was that the motor wasn't froze up.......it turned just fine via wrench....so we went ahead and took it. Been restoring it throughout the winter and present, hoping to get her out on the water before the boating season ends.

(I would add a pic of it here, but the file is too big :) )
 

southkogs

Moderator
Staff member
Joined
Jul 7, 2010
Messages
14,792
Two more posts and you can post photos. Tutorials HERE.

Samoa's are beautiful. I love the layout on them. If Silverline had managed to put themselves in the market position they had wanted, that boat would be a popular one.
 

MTJames

Seaman
Joined
Jun 24, 2017
Messages
51
Very little info on them, that's for sure. Had plenty of seating with the original set up....the previous owner turned it into more of a fishing boat and took out the port and starboard side/rear seating. No biggie for me, since I am rebuilding them (well at least the rear seat) anyways. I like the look of that deep V, and now that I have her polished/waxed up, that emerald color pops out pretty nicely.
 

southkogs

Moderator
Staff member
Joined
Jul 7, 2010
Messages
14,792
Silverline was an intersting story in terms of a business legacy, and the design of some of their boats is outstanding. You can read some about them HERE and there's some information HERE as well. They were a boat that was well built and designed to compete at the level of Chris Craft, but the brand never really took hold and eventually they fizzled out.

I used to own a Comoro. Great boat, built like a tank and cruised really smooth.
 

MTJames

Seaman
Joined
Jun 24, 2017
Messages
51
Hulk Before.jpg 15181139_10211269126544584_5796909809600386014_n (1).jpg 15259669_10211269113544259_3638235979985965558_o (1).jpg 19055783_10213276976459577_8274274415802318848_n.jpg 19420369_10213359374799484_2483839669079967424_n.jpg 19424240_10213383940693616_8594157870583775744_n.jpg

These are just some of the photos I've taken during the process. Now, it's about the wiring (lights, starter, and trim, all else works), oil change, grease up the prop/hub,making rear bench seat and engine cover, and buying up a captain's chair and passenger back to back lounge seat.
 

MTJames

Seaman
Joined
Jun 24, 2017
Messages
51
Sorry with the large pics, I am sure I hit the "thumbnail" when uploading.
 
Last edited:

MTJames

Seaman
Joined
Jun 24, 2017
Messages
51
Well it's been nearly a year later now......almost done (minus the seats engine cover). Been too bloody cold this past winter to work on the boat. Wiring done (with new blade style fuse block and new grounding block). Ended up getting new oil light, ignition switch, and spot light switch. Minor adjustments to the dash to make them work. Completely redid the wiring under the dash. The previous owner had a bird's nest of wires connected to each other and random power/ground wires connected together. I am surprised it actually had all things working without it burning up. Picked up carb rebuild kits. Since it has the trip carbs (AQ170), had to obviously get 3 of them. LOL

Only issue I have now is for some reason the hot wire going into the ignition switch is "hot" when key "off" but not when key "on". When key "on" the power is coming from starter wire, but nothing from the 'hot" wire. The "ignition" has no power coming from nor going to when the key is "on". Something that has to be on the motor side going into the ignition switch that is goofy. Just need to look into that more. The ignition switch is new so that can't be the problem. Had same issue with the old ignition switch which is why I though it was the switch.

Still need to somehow lube up the screw for the trim, I have a feeling that it will be needed to be taken apart to do that. Didn't see any zerk fittings to grease it up.
 

southkogs

Moderator
Staff member
Joined
Jul 7, 2010
Messages
14,792
Might wanna' post something about the zerks over in the Volvo forum. I don't know much about 'em.
 

MTJames

Seaman
Joined
Jun 24, 2017
Messages
51
Rewiring complete. Each gauge/instrument now has its own power supply and ground. Restarted the polishing work until i get more stuff for the ole girl. more to come soon
 

Attachments

  • photo295975.jpg
    photo295975.jpg
    500.1 KB · Views: 0
  • photo295976.jpg
    photo295976.jpg
    526.5 KB · Views: 0
  • photo295977.jpg
    photo295977.jpg
    307.4 KB · Views: 0

MTJames

Seaman
Joined
Jun 24, 2017
Messages
51
Wood trim/"step plates" done (old vs new). Next up, carpet. That should have been here today, but a no show. Hopefully tomorrow. Seats (front) should be here Friday. So will be doing that when they show up. Saturday start framing up the rear bench. It will have a livewell, cooler, and storage built in. The drain tubes for the live well and cooler will be draining to the back where the plug is at.
 

Attachments

  • photo296995.jpg
    photo296995.jpg
    262.8 KB · Views: 0
  • photo296996.jpg
    photo296996.jpg
    257.6 KB · Views: 0
  • photo296997.jpg
    photo296997.jpg
    312.3 KB · Views: 0

MTJames

Seaman
Joined
Jun 24, 2017
Messages
51
Carpet laid down. Wasn't as wide as I expected it to be, but still did the trick. I left the engine area with no carpet, since when doing maintenance on it, i don't want to mess up the carpet, like oil or other fluids.
 

Attachments

  • photo297162.jpg
    photo297162.jpg
    368.2 KB · Views: 0

MTJames

Seaman
Joined
Jun 24, 2017
Messages
51
Thank you. It is definitely getting close.. Started framing up the rear seat. Almost everything is put back together. Have one side to screw in. I have to double check the measurements of the lounge seat fully extended so I don't screw myself when I install that. LMAO
 

MTJames

Seaman
Joined
Jun 24, 2017
Messages
51
One side in, rear bench framed up, front "step/storage" in.

Just need to figure out the throttle cable. Went to put it back on for the other side, but for some reason not getting the full throttle availability. When attaching it to the "square" in various ways, either it won't shift into reverse like it should, or not getting the full ability of the throttle cable when it does shift in gear. So working on that before I reinstall that side. Other than that, it's coming together real quick. LOL

Reordered the front seats so they will be here by the weekend.
 

Attachments

  • photo297252.jpg
    photo297252.jpg
    351.5 KB · Views: 0
  • photo297253.jpg
    photo297253.jpg
    210.6 KB · Views: 0

southkogs

Moderator
Staff member
Joined
Jul 7, 2010
Messages
14,792
A suggestion: make sure you can remove that rear bench, or at least create an opening. I can't tell you how often I wind up on my belly staring at a boat engine. I'm always glad when I can clear out the back of the boat easily.
 

MTJames

Seaman
Joined
Jun 24, 2017
Messages
51
6 screws and she comes right out. I was figuring that into the equation as well. LOL And as far as the throttle cable went, was an easy fix. Had the two cables (throttle and gear select) switched around when I pulled it out last year, and forgot about that. LOL
 
Top