18' Starcraft SuperSport restoration

ezmobee

Supreme Mariner
Joined
Mar 26, 2007
Messages
23,767
Re: 18' Starcraft SuperSport restoration

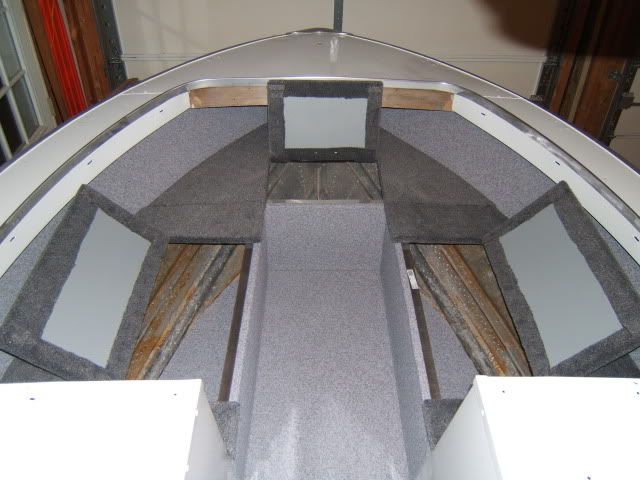
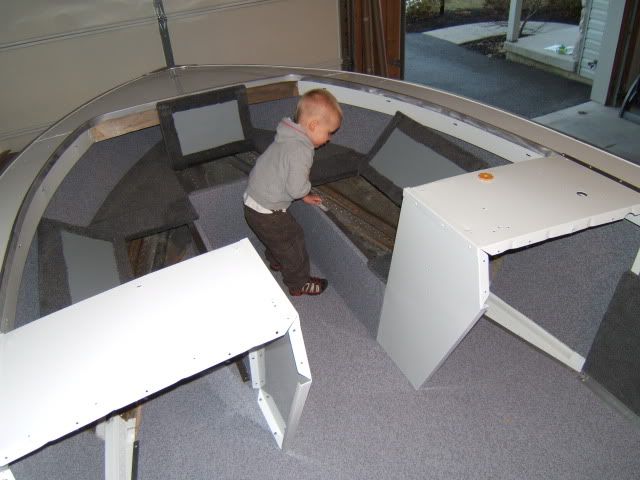
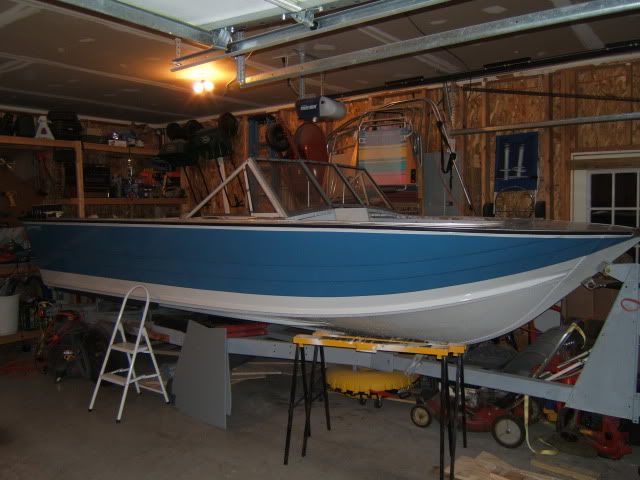
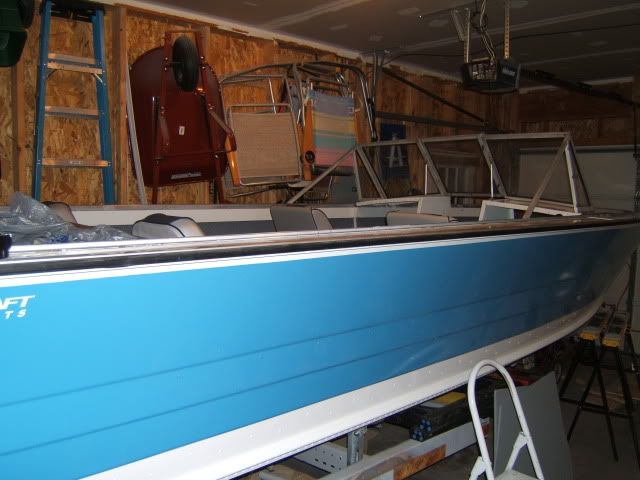
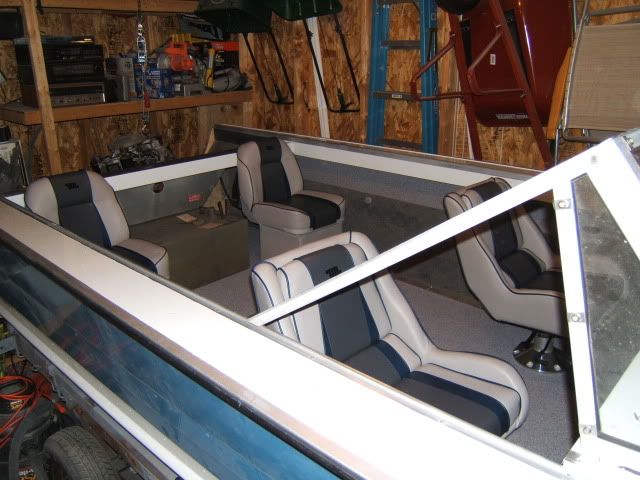
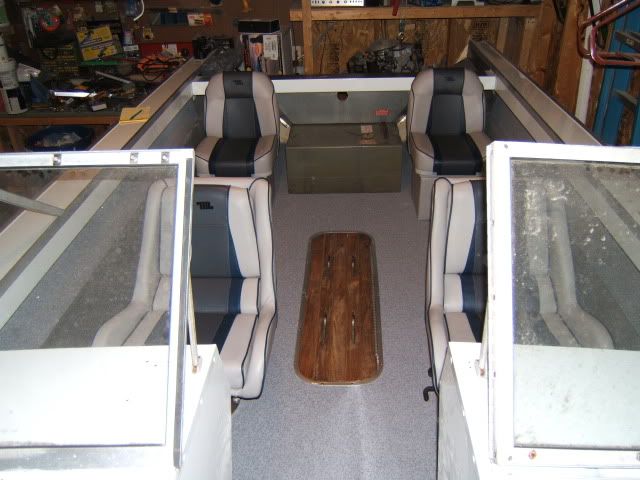
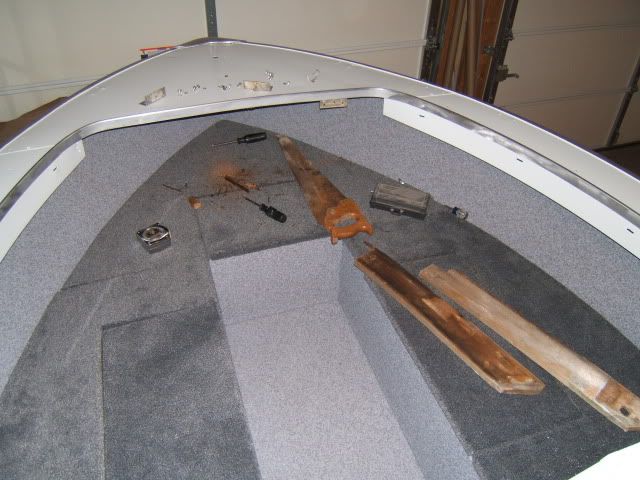
Thanks guys. Yes the bow is very roomy in the 18' SS. As I've said before, the 18' is much bigger in every way than my 16' was. I think this boat will meet my needs for a very long time.

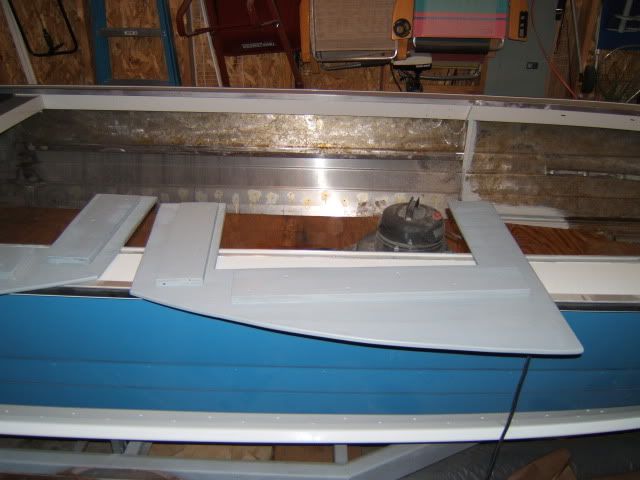
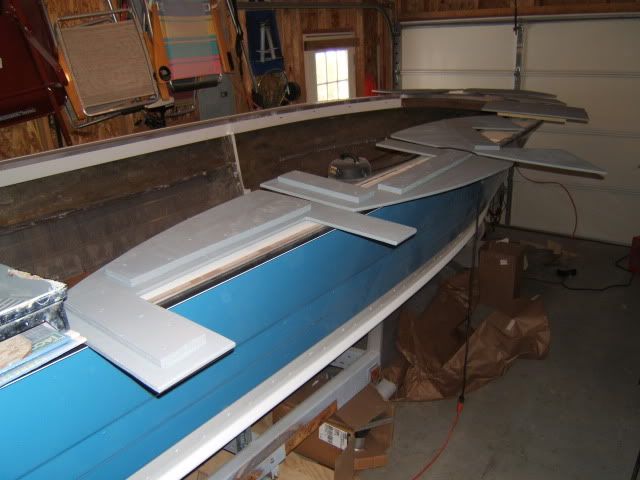
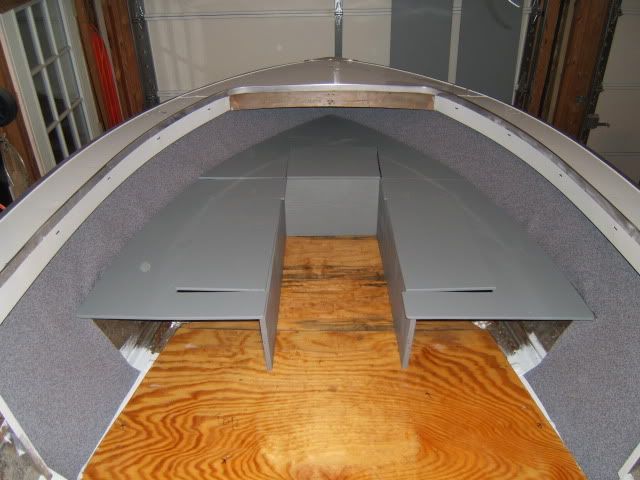
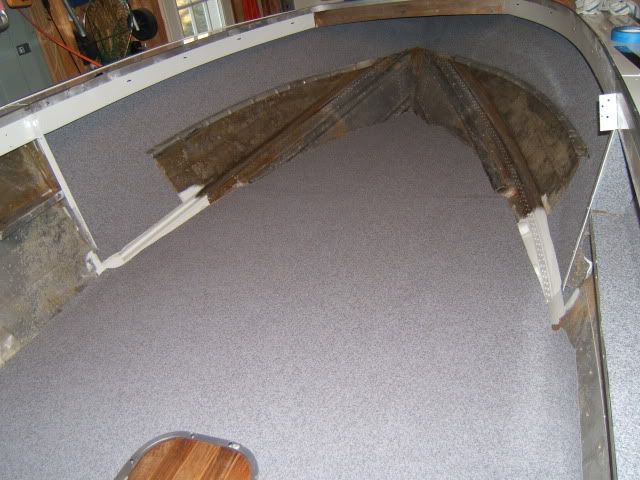
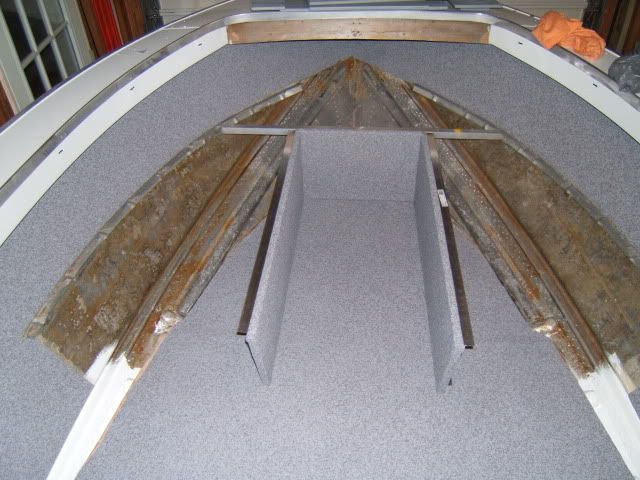
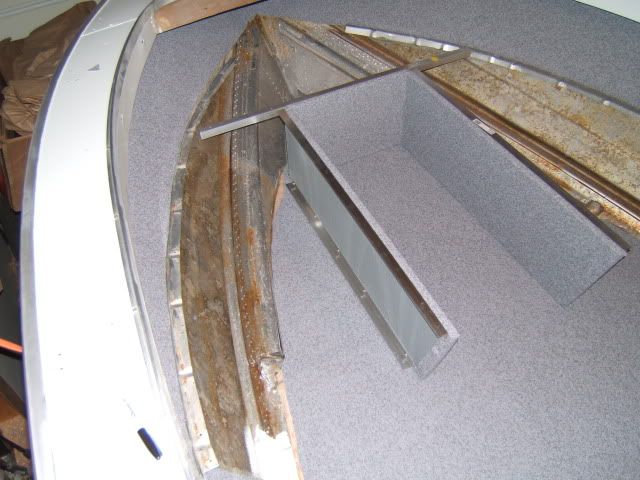
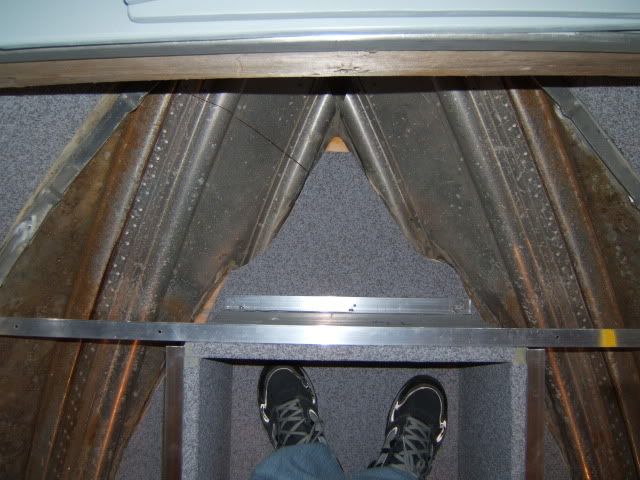
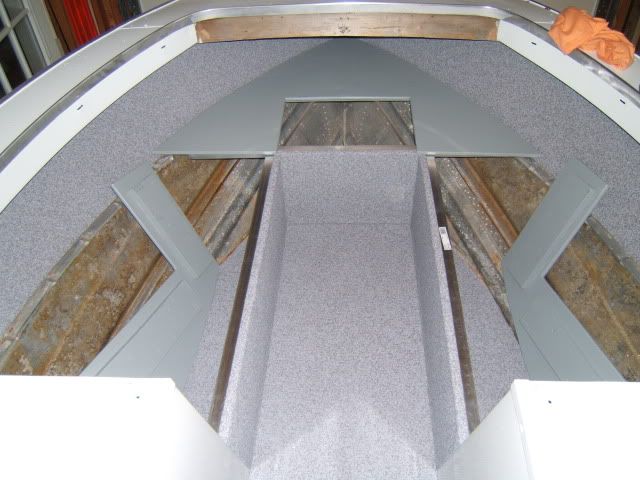
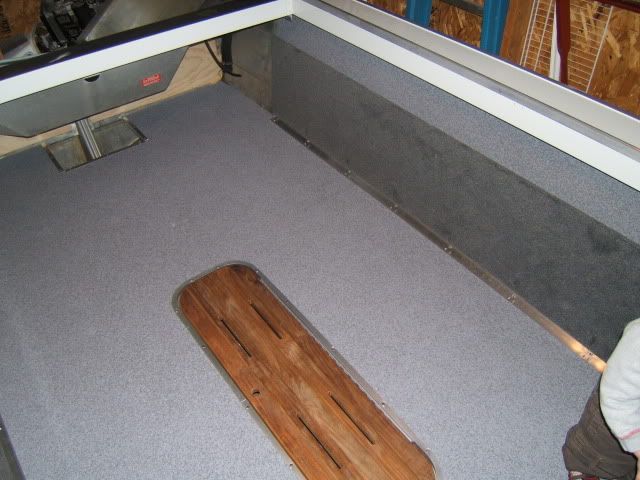
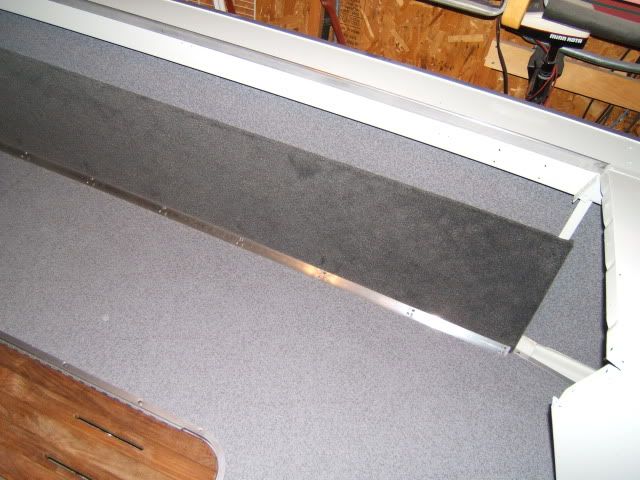
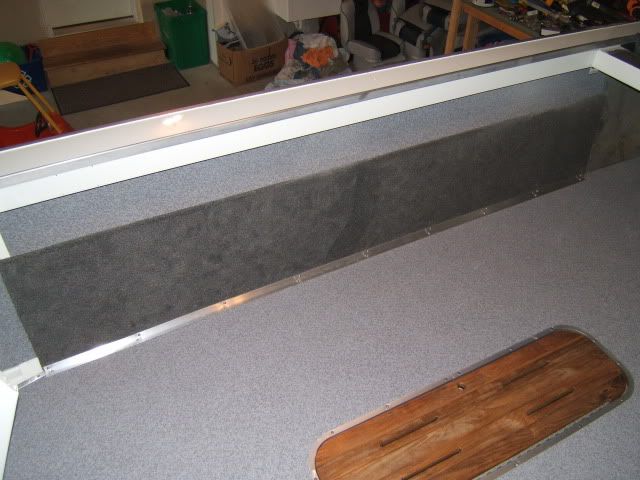
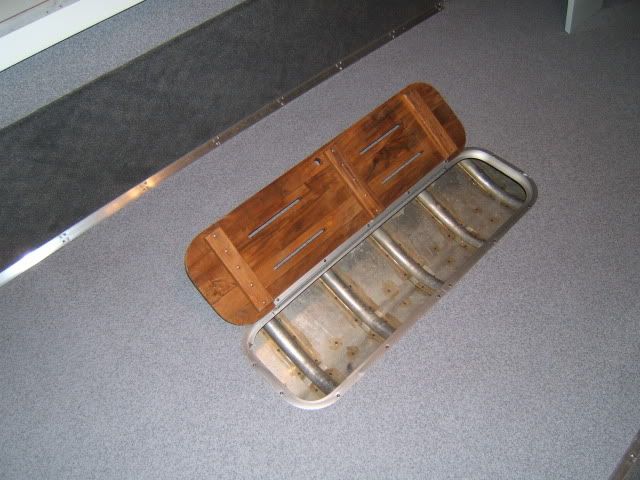
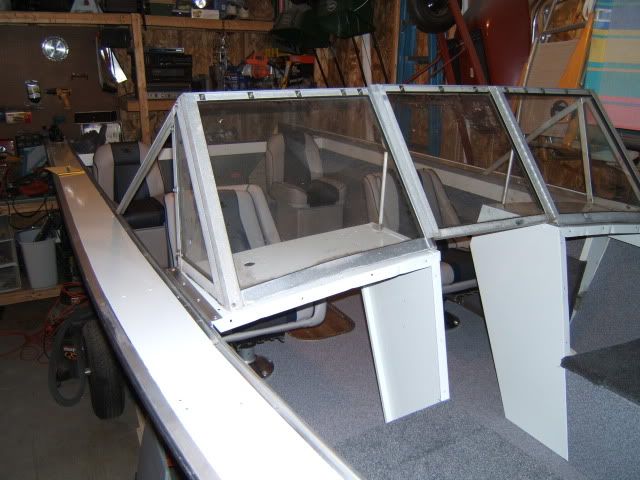
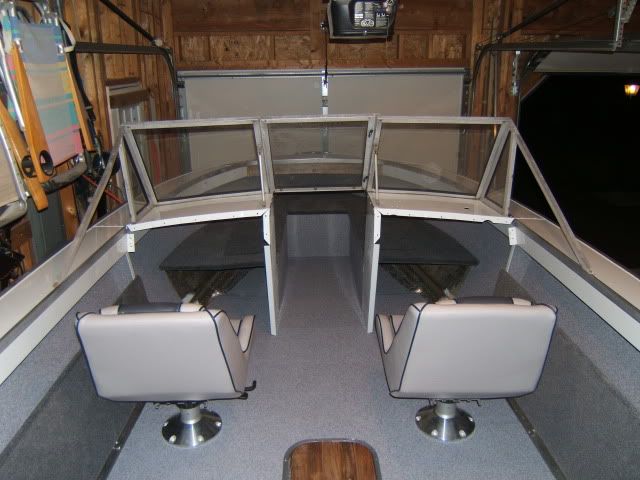
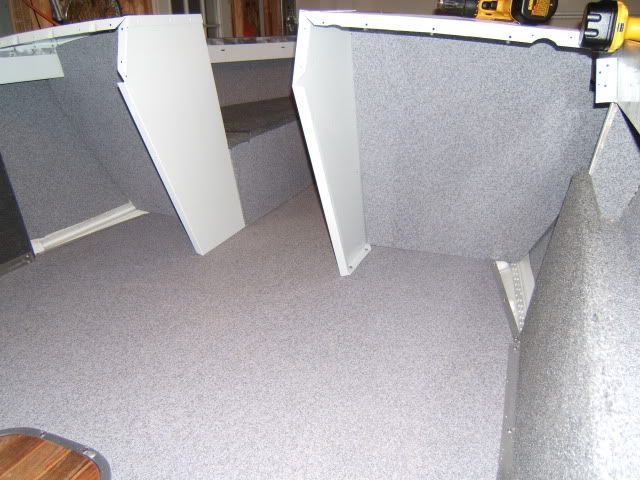
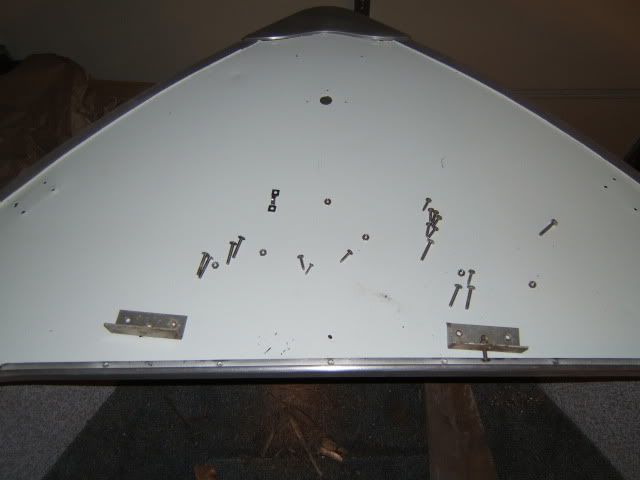
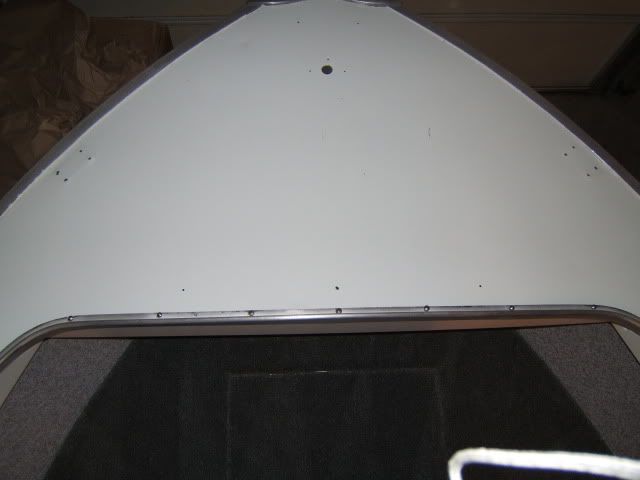
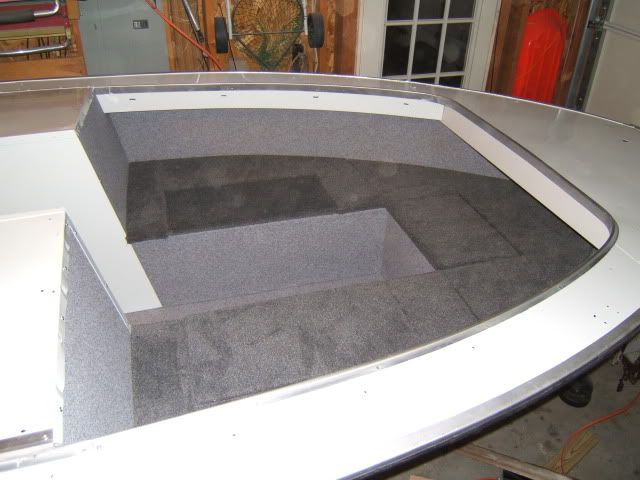
This bow structure stuff has been a giant PITA and the pain is long from over. I'm not really too happy with how the bow deck can out. It doesn't continue all the way to the point of the bow basically because I botched cutting the first half. I have to figure how how to cut my hatches, how to hinge them, how to reinforce everything, how to carpet it and reinstall it without visible screws all over the place. I'm still pretty overwhelmed and just want the bow to be DONE because all the rest will be easier. I have a feeling I'll be buying yet another sheet of plywood and recutting the bow deck.

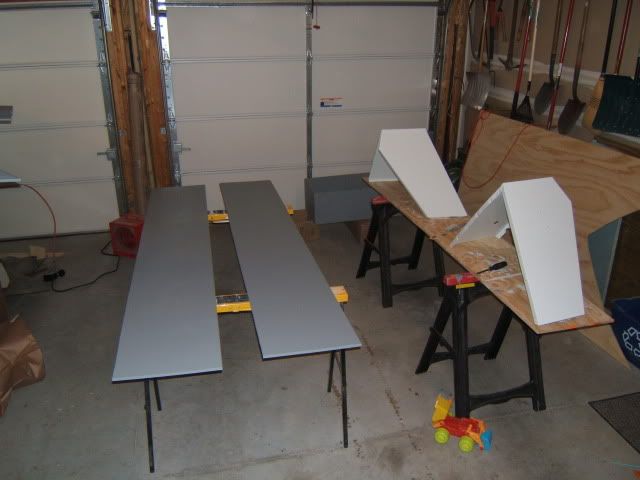
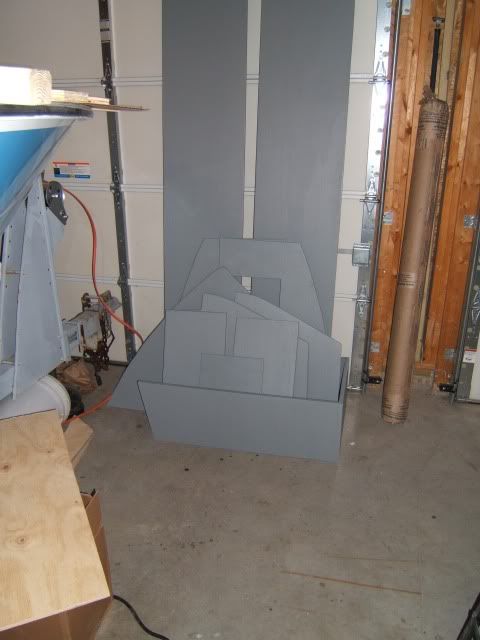
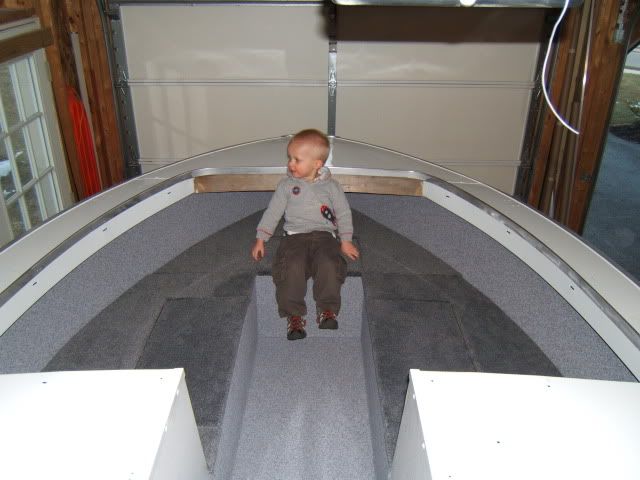
My plan for the hatches is this:
Superfish170_BowLivwell.jpg


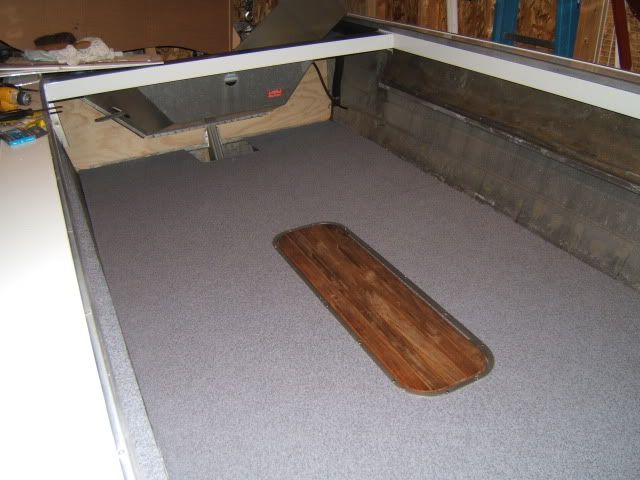
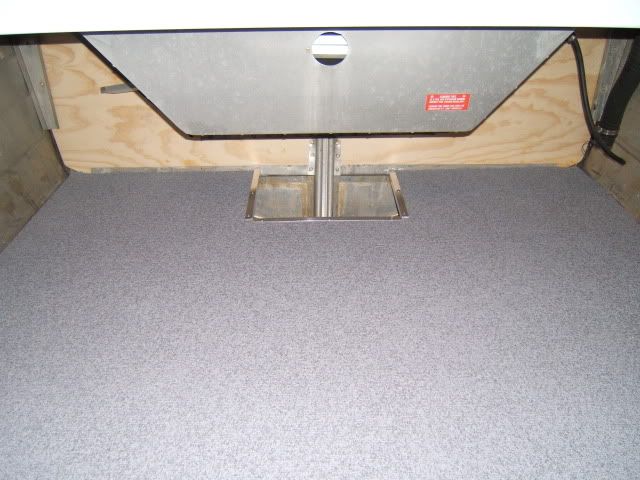
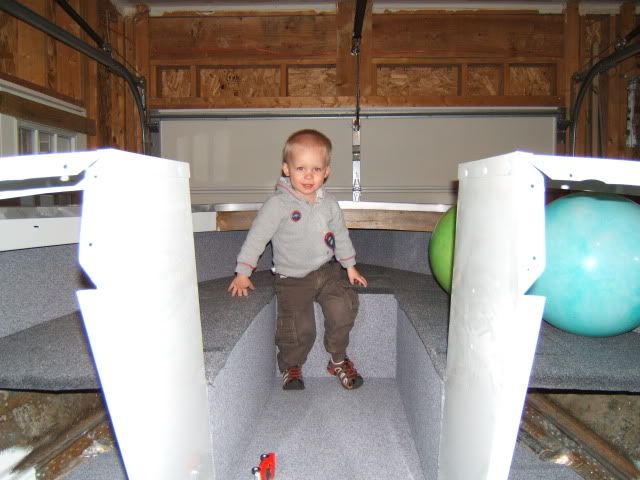
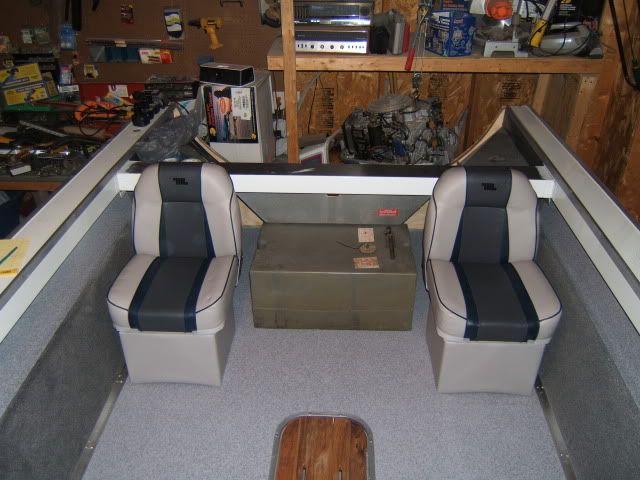
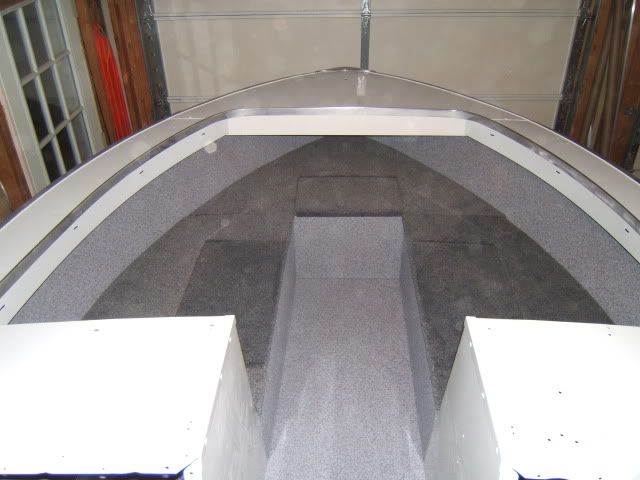
I really don't want to cut a hatch for the center section due to the logistics of it but there's a bunch of potential storage under there. Can you tell I've pretty well had it with this part yet?
 

ezmobee

Supreme Mariner
Joined
Mar 26, 2007
Messages
23,767
Re: 18' Starcraft SuperSport restoration

Good lord I just spent a pile of money. Fortunately this should be about it except for a steering system, fuel tank, and the fishing chair pedestals and of course incidentals.

I ordered this carpet from HD for the bow deck, side panels and rear casting deck http://www.homedepot.com/webapp/wcs...D23X-_-100661374&locStoreNum=4125&marketID=68

This adhesive (cuz it was shown on the same page and was hella cheap http://www.homedepot.com/webapp/wcs...langId=-1&catalogId=10053&productId=100117949

Enough of this vinyl for the deck and side metal areas http://www.defender.com/product.jsp?path=-1|10918|311409|311410&id=23740

This vinyl adhesive http://www.defender.com/product.jsp?path=-1|10918|311409|311410&id=23803

2 of these pedestals for the bucket seats http://greatlakesskipper.com/produc...ch-boat-seat-pedestal-w-swivel-and-slide.html

and a bunch of these hinges for my hatches http://greatlakesskipper.com/produc...4--aluminum-10-x-12-inch-boat-hinge-pair.html

Total $626. OUCH!

Did a tiny bit of work on the boat tonight. As I said I wasn't happy with the bow deck cuz it didn't go all the way to the tip of the bow. so I cut the triangle off the deck piece, kept the two side pieces and I bought another sheet of plywood tonight and cut a larger triangle which goes all the way forward. The deck is now 3 pieces. I'll cut a hatch into each piece. I've got a pretty good game plan now and am no longer feeling overwhelmed. :)
 

ezmobee

Supreme Mariner
Joined
Mar 26, 2007
Messages
23,767
Re: 18' Starcraft SuperSport restoration

I think that's what I'm going to do fishrdan.

I am keeping a running tally of all the expenses for this project which I will reveal when it's done. Can't wait till all this stuff shows up.

I'm going to have to take a little break from the boat for a few days because I'm hosting my model train club on Wednesday night and my basement and layout are a mess. It's bad enough that I won't have any progress to show on the layout as the boat has taken precedence this winter. In addition to cleaning up, I want to run a 220 line down there so I can use my garage heater (my basement has insulation in the ceiling so it's COLD) and buy enough carpet to cover the majority of the concrete. I'll take some pics when it's done.
 

ezmobee

Supreme Mariner
Joined
Mar 26, 2007
Messages
23,767
Re: 18' Starcraft SuperSport restoration

Big weekend on the boat. First thing I did was disassemble everything I had mocked up in the bow area. Then I cut out all my hatches. I then added 3/4" stiffeners around the hatch areas. Then I painted everything with 2 coats of Valspar porch and floor paint. I went this route because it would have cost me too much $$ and time to do all this in epoxy. Painting the wood will add some level of waterproofing plus it will keep the wood from soaking up the carpet adhesive.

Here you can see the stiffeners
DSCF2482.jpg


I also painted the consoles
DSCF2483.jpg


Bunch 'o painted parts. This paint cut me a break by drying super-quick thus allowing me to get 2 coats on each side in short order
DSCF2484.jpg


Side panels and consoles
DSCF2485.jpg


All my painted stuff
DSCF2487.jpg


I ended the day working with my wife to cut out the vinyl to be installed in the bow. This was a quite a challenge but we got them done and fit. It looks so great that I couldn't resist dry-fitting everything just to see sorta what it will look like. The vinyl is not glued yet.
DSCF2488.jpg
 

ezmobee

Supreme Mariner
Joined
Mar 26, 2007
Messages
23,767
Re: 18' Starcraft SuperSport restoration

Next steps are to get the vinyl cut for the side storage areas, glue all the side vinyl in, drop some epoxy in some sunken screws holes in the deck, sand the deck then install the deck vinyl.

As some of you may remember, my drivers console had a ratty carpeted plywood dash panel on it. The passenger one, however, had a thick aluminum dash panel in excellent shape. It had a huge cutout in it though for a glove box that I won't be using. I double check the fit of that panel today before dissassembling everything and it fits and looks great. So I dodged a small bullet in that I have an excellent aluminum template for my new King Star Board dash panels. I have the material I just need to get it cut out.
 

ezmobee

Supreme Mariner
Joined
Mar 26, 2007
Messages
23,767
Re: 18' Starcraft SuperSport restoration

Thanks guys. bankfisher, I used the gray deck screws from Lowes. Don't use those though. They suck and have regular phillips heads. Get the tan ones from HD that come with the drill bit. They're way better. But basically....deck screws. They worked great. The only issue I had was in the stern where my deck board was a little warped. The ones I got weren't long enough to get down to rips back there and get it pulled down. I ended up stabbing a bunch of extra holes. But I eventually got it and it sure isn't going anywhere. I added construction adhesive to the stringers and ribs for good measure. I think PL premium would be best for that if you want to do that as well.
 

ezmobee

Supreme Mariner
Joined
Mar 26, 2007
Messages
23,767
Re: 18' Starcraft SuperSport restoration

So I came in here to vent....

There has been a LOT of progress. :) The vinyl is all in, the consoles are installed, the support structure under the bow deck is installed, the bow deck is carpeted. Then I hit a speed bump. My hatches are too big :mad: And I mean like not even close big. :eek: Apparently the carpet adds a good bit more thickness than I allowed for. Of course I had already glued carpet to them when I realized this. I was hoping I could just peel the carpet back and trim them but the glue I'm using is apparently really awesome and basically ruins the carpet when you try to peel it. So I have to cut 3 new hatches. Argh. At least I have plenty of carpet, wood, glue, etc. so it's only a time and aggravation thing. I'll have pictures tonight. I'm home alone again with my 2 yr old so not much getting done at the moment. My wife will be back soon though and I'll head back out.
 

ezmobee

Supreme Mariner
Joined
Mar 26, 2007
Messages
23,767
Re: 18' Starcraft SuperSport restoration

Here's the update. Friday night I was just going to install the vinyl up in the bow. But the adhesive wasn't going as far as I would have thought so I was really worried about whether or not I was going to have enough to get everything done, especially the floor. So I decided to keep working and see how far I could. Got the bow and floor done and one of the side storage areas. I have a little left but not enough for the remaining panel. I think I will just use the carpet adhesive for that as it is some seriously good stuff.

DSCF2490.jpg


DSCF2491.jpg


Went to Lowes yesterday morning and spent about a zillion dollars on aluminum angle and stainless steel fasteners. Still didn't get enough and will probably go again tomorrow. When I got back I applied vinyl to the visible part of my "bow structure" for lack of a better word. Then I installed aluminum angle along the bottom and the top of it to us to fasten it to the floor and then to the bow deck.

DSCF2492.jpg


DSCF2493.jpg


DSCF2494.jpg
 

ezmobee

Supreme Mariner
Joined
Mar 26, 2007
Messages
23,767
Re: 18' Starcraft SuperSport restoration

Then I got the consoles riveted to the hull, screwed to the floor and screwed to the bow structure.

DSCF2494.jpg


I took all three bow pieces and put them in place. I drilled for 4 bolts for each of them. The bolts would then be countersunk an carpeted over.
DSCF2496.jpg


I then roughly cut carpet to fit each piece and the hatches and glued it down and left it overnight to dry. Today....the nightmare began. I started trimming the carpet and stapling it around the edges. That's about when I realized the hatches didn't fit. So I had to make new ones, throw a crap coat of paint on and try again. Then even more troubles. The hinges I bought weren't exactly suited to the purpose. I spent a ton of time screwing with those trying to get the hatches to line up height wise. I did eventually get it and they do look decent and have a full range of opening. Then more troubles. The same situation with the carpet that jacked up my hatch fit, also then messed with my fit of the main pieces. So I really had to smash 'em in there and then none of my carefully placed bolt holes lined up. So I had to re-drill all of them and beat the thing into submission. It's done. It's not the greatest but it isn't bad.

DSCF2498.jpg


DSCF2499.jpg
 

ezmobee

Supreme Mariner
Joined
Mar 26, 2007
Messages
23,767
Re: 18' Starcraft SuperSport restoration

That unfinished piece of wood in the bow sure is glaring ain't it? I haven't figured out what I'm doing with that yet. I wanted to get the panels that go in the consoles installed this weekend but I think I want to vinyl them and of course I don't have enough vinyl. So I have to order another yard or two. Tomorrow I think I'll button up the side panels, cut out the StarBoard dash panels, and maybe start building the rear box/platform.
 

ezmobee

Supreme Mariner
Joined
Mar 26, 2007
Messages
23,767
Re: 18' Starcraft SuperSport restoration

I took off work today to work on the boat. Slept in a good bit though. Had to make a Lowes run first off so it was pretty much 11:00 by the time I got started working :p

The main order of business was the side panels. I took and laid a piece of carpet on the floor (I wasn't going to make THAT mistake a THIRD time!) then lined up the board with the storage ledge. Marked where that was. Then drilled holes for my bolts. Then put it back and drilled the ledge. I dropped all the bolts in and carpeted it. Then I put it back in. All the bolt lined up great and actually torqued down nicely instead of spinning. I then install my "baseboard" of aluminum angle. As some of you may remember that was the one thing my boat was missing when I bought it. I think I made out pretty good. These look great and are ROCK solid.

DSCF2504.jpg


DSCF2503.jpg


DSCF2502.jpg


I also trimmed out around my bilge access hole. No I didn't miter the corners. No one will see this anyway.

DSCF2505.jpg


Then I installed the hinge for the rod locker. It was previously just laying there. I had to shim it with a thick piece of aluminum flat stock as there was a good amount of space around the hatch edges.

DSCF2506.jpg
 

ezmobee

Supreme Mariner
Joined
Mar 26, 2007
Messages
23,767
Re: 18' Starcraft SuperSport restoration

I then cleaned up my garage and cleaned up the boat for pictures. Picked up my son from daycare and we tried it out.

DSCF2501.jpg


DSCF2510.jpg


DSCF2508.jpg
 

ezmobee

Supreme Mariner
Joined
Mar 26, 2007
Messages
23,767
Re: 18' Starcraft SuperSport restoration

Oh I forgot to add....I am going to replace that dumb board in the bow with a PVC trim board. They had 4' lengths at Lowes. Only reason I didn't buy it was cuz I didn't measure the width of it ahead of time. But that is definitely the route I'm taking.

HA, I don't have any tips on the vinyl. I got a few air bubbles in mine and they are pretty well impossible to get out. I'm not entirely a huge fan. It seemed to lay down awesome on the sides but the floor has issues. Maybe it works better in smaller sections. Who knows. I tried to roll it out with a rolling pin but that didn't seem to help much.
 

ezmobee

Supreme Mariner
Joined
Mar 26, 2007
Messages
23,767
Re: 18' Starcraft SuperSport restoration

Alrighty fellas, exciting update even though little actual real work was done tonight (except doing a little seat assembly)......I dry fit just about everything and it looks AWESOME! I am so excited. I LOVE this boat!!!!!!

Windshield on:
DSCF2514.jpg


As you can see I have a smidge bit of an alignment issue. I need to raise the port console a little bit. No biggie.
DSCF2515.jpg


You can see the seating here. My console panels are not intalled cuz I want to vinyl them and I ran out of vinyl. I ordered 2 more yards this morning. Should be here Friday and I'll get those done.
DSCF2517.jpg


Jump seats and fuel tank. As you can see I have just enough room to build my casting deck/box around it. Should be great.
DSCF2519.jpg


Buckets. They are the PERFECT height as far as line-of-sight through the windshield goes. I'm thrilled. In the Jupiter I sat a good bit above the windshield which I always though kinda silly.
DSCF2520.jpg


Overall view of the cockpit seating. Very roomy! Glad I returned those back-to-backs.
DSCF2525.jpg
 

ezmobee

Supreme Mariner
Joined
Mar 26, 2007
Messages
23,767
Re: 18' Starcraft SuperSport restoration

One more for fun:
DSCF2524.jpg
 

ezmobee

Supreme Mariner
Joined
Mar 26, 2007
Messages
23,767
Re: 18' Starcraft SuperSport restoration

Another great job ez! My question is how are your seat pedastal bases attached to the deck?

Currently? Gravity :p Just fitting everything right now.

I added an additional block of 3/4" to the deck in the general areas where I knew the pedestal seats would go. I intend to install them with lag bolts.
 

ezmobee

Supreme Mariner
Joined
Mar 26, 2007
Messages
23,767
Re: 18' Starcraft SuperSport restoration

Mostly family stuff today but I did get some time to do some work this evening. I finished the panels that go in/under the consoles and installed them. I also removed that piece of wood in the bow in preparation for it's PVC trim board replacement.

DSCF2529.jpg


DSCF2533.jpg


ATTENTION STARCRAFT SS OWNERS! Apparently this board is the KEYSTONE of your entire boat!!!!!!!!! Look at all the friggin' fastners they used on this darn thing? I fully expected my entire boat to split in half and fall to the ground when I removed this board.

DSCF2531.jpg


I think it took me like 40 minutes to get that stupid board out. Got all the fastners out and then still had to cut it in half to remove it as it was flush to the hull. Must have been installed before the cap aluminum. It's replacement won't go all the way to the sides of the boat.

DSCF2530.jpg
 

ezmobee

Supreme Mariner
Joined
Mar 26, 2007
Messages
23,767
Re: 18' Starcraft SuperSport restoration

Haha nice one Kenny!

Guys, I had to laugh when I was installing the replacement.....there were 7 more fastners involved that weren't even pictured! These were removed when I first got the boat as they were kinda just hanging there since the underlying wood was rotted. So add these to the tally. Sheesh!

DSCF2536.jpg


Here's the new piece installed. These PVC trim boards are great to work with. I highly recommend them to anyone who may have a potential application for them in their projects.

DSCF2534.jpg


The bow area is finally pretty well buttoned up. I'm not 100% happy with it but it's pretty good. Someday I will probably rebuild it using aluminum for the base (like was OEM), bump up the deck wood thickness to 5/8" ply, and just have overall better planning as far as the hatches, hinges, etc.

DSCF2539.jpg


Unrelated note, we were at Target today and I picked up this step ladder for $24 on clearance. Notice how much higher it is than my old one. My nards are thanking me already! (I should have bought one of these MUCH earlier in the project. Getting in and out of the boat has been a b%&^h.

DSCF2540.jpg
 

ezmobee

Supreme Mariner
Joined
Mar 26, 2007
Messages
23,767
Re: 18' Starcraft SuperSport restoration

I was wondering what you used, and what is the general opinion on the best way to re-attach the deck? SS screws, rivets....?
Did you pre-drill and seal the holes with resin, or something?

I used those tan deck screws. I had used them successfully on the Jupiter as well. I put my second coat of epoxy on the deck after it was installed in the boat to seal the holes. Others have used rivets and they've worked well also.
 
Top