18' Starcraft SuperSport restoration

ezmobee

Supreme Mariner
Joined
Mar 26, 2007
Messages
23,767
Re: 18' Starcraft SuperSport restoration

Vegas, I'm using Easypoxy. It will be my first experience with it. I used Rustoleum on the last one. I would have had no issue using that again but Easypoxy had better colors. I'm heading down to the garage now to start painting. Space heaters are running. I should be able to keep it in the 60's in there.
 

ezmobee

Supreme Mariner
Joined
Mar 26, 2007
Messages
23,767
Re: 18' Starcraft SuperSport restoration

Alright you animals, here's your pictures of a scuffed boat. It had already been dusted off at this point so it looks like I really didn't do anything. That could not be further from the truth. I put like 3 hours into prepping this thing. I used a couple different grits of sanding sponges but I think what really worked the best was those immitation steel wool scotch brite-type pads. I paid special attention to the areas where the burgundy and the gray met to knock down the tape lines.

DSCF2266.jpg


DSCF2267.jpg
 

ezmobee

Supreme Mariner
Joined
Mar 26, 2007
Messages
23,767
Re: 18' Starcraft SuperSport restoration

Here's the first coat of gray finished. This took a lot longer than I thought it would. I worked on it for like 4 hours. I am VERY PLEASED with this Easypoxy paint. It goes on nicely, covers well, and lays down awesome. I swear to god, in the right temperature you could paint a car with this stuff with an old paint brush and you'd be happy with it. I have the garage at 65 degrees which is perfect. I brushed the keel and the chines and which took forever then rolled everything else. I was initially worried because it bubbled real bad with the foam roller. I thought I'd actually have to do the tipping part of roll and tip.....but nope. It laid down after a few minutes. The paint also remained workable for a LONG time so if I found any runs I could fix them. Good thing because this paint will run. I don't think it will be perfect but I am very pleased thus far. I think after just a thin second coat it will be good to go.

DSCF2269.jpg


DSCF2270.jpg
 

ezmobee

Supreme Mariner
Joined
Mar 26, 2007
Messages
23,767
Re: 18' Starcraft SuperSport restoration

Got the 2nd and final coat of the light gray on over the weekend. It looks great. I hope to throw some blue on it this week.

DSCF2269-1.jpg


DSCF2270-1.jpg
 

ezmobee

Supreme Mariner
Joined
Mar 26, 2007
Messages
23,767
Re: 18' Starcraft SuperSport restoration

I just scored a MotorGuide bow mount trolling motor (foot controlled) for $75 off of CL. Best I can tell you can't get one of these new for less than $4-500 at the cheapest. I don't know what pound thrust it is but for my needs I'm sure it will be fine. I pick it up tomorrow. My new bucket seats are also scheduled to arrive tomorrow. And tonight.....PAINT! (it's practically 60 friggin' degrees here today so I gotta take advantage of it)
 

ezmobee

Supreme Mariner
Joined
Mar 26, 2007
Messages
23,767
Re: 18' Starcraft SuperSport restoration

Blue is on (1st coat) looks amazing. Pic at some point today. The trolling motor is super nice, 43lbs of thrust. Plenty for my boat I think. To buy the same motor new would be around $450! Pretty pumped about that deal. Even came with the manual. The seats didn't come yesterday but are supposed to come today. I'll update you all with pics of those and the paint when they come.
 

ezmobee

Supreme Mariner
Joined
Mar 26, 2007
Messages
23,767
Re: 18' Starcraft SuperSport restoration

Here's the paint:
DSCF2281.jpg


DSCF2280.jpg


DSCF2279.jpg


And here's one of the bucket seats that came:
DSCF2278.jpg


And here you can see my luck continues with this seat thing. Came this way right from Wise with no visible damage to the box. Nice quality control there. Obviously this will be going back.
DSCF2277.jpg
 

ezmobee

Supreme Mariner
Joined
Mar 26, 2007
Messages
23,767
Re: 18' Starcraft SuperSport restoration

After conferring with my personal paint adviser (Rickairmedic) I have decided to not do a 2nd coat on the blue. The first coat came out perfect with complete coverage so the only thing a 2nd coat would accomplish would be a little thicker paint job and chance for more runs. There are no runs on this coat and if I got some on the 2nd I'd be homicidal. I just went out and pulled the tape and WOW. Pics on that later. GREEN TAPE RULES BLUE TAPE DROOLS!!! Seriously people, if you're doing any kind of masking, spring for the green tape. it ROCKS.
 

ezmobee

Supreme Mariner
Joined
Mar 26, 2007
Messages
23,767
Re: 18' Starcraft SuperSport restoration

iboatds surprised me today and said they are sending me a whole new seat and I don't even have to send the old one back. I sure wasn't expecting that!
 

ezmobee

Supreme Mariner
Joined
Mar 26, 2007
Messages
23,767
Re: 18' Starcraft SuperSport restoration

Little low on fundage here at the moment with the holidays approaching. I need to put new bunks on my trailer before I can flip the boat back over and put it back on there. And it would really make sense for me to take the axle off (it needs to be moved back anyway) and take it the RV shop to have the bearings re-done. I wouldn't expect much progress for a little while.

My replacement seat came from Wise and is in perfect condition. I'm happy to have all 6 of my new seats in my possession and ready to go.
 

ezmobee

Supreme Mariner
Joined
Mar 26, 2007
Messages
23,767
Re: 18' Starcraft SuperSport restoration

Thanks Bill.

I did some work on the trailer yesterday. Got the old roller bunks removed and moved the axle back a few holes. That should solve my tongue weight issue. I also did some ghetto body work on my one fender which was pretty beat up and got it reshaped pretty nicely. I was hoping my new bunk brackets would come today but it's looking like tomorrow. If all goes well I'll have the boat right-side-up and back on the trailer this weekend.
 

ezmobee

Supreme Mariner
Joined
Mar 26, 2007
Messages
23,767
Re: 18' Starcraft SuperSport restoration

Did some more work on the trailer yesterday. I installed the new bunk brackets and made up some bunks. I had purchased 2 new PT 2x4's for this purpose but oddly enough, I had 2 PT boards that have been in my garage for a while that were already the perfect length. No cutting at all. Strange (and convenient).

DSCF2352.jpg


DSCF2353.jpg


You can see in this picture how far back I moved the axle. I have no idea why it would have been that far forward and it had clearly been that was for a long time. The fenders will be reinstalled later.

DSCF2355.jpg


New winch installed as well
DSCF2356.jpg


I am very happy with this trailer and set up. It fits the boat well, has a good amount of adjustability to it to make it even better, and is structurally in fantastic shape. I know it needs a paint job and maybe if I wasn't already fighting the cold to get anything done I might have painted it. For now that can wait till later.

Here's a pic of the paint job with the tape removed. I don't think I'd posted any of those:
DSCF2354.jpg
 

ezmobee

Supreme Mariner
Joined
Mar 26, 2007
Messages
23,767
Re: 18' Starcraft SuperSport restoration

fshngho, my bearings are currently SHOT. The axle is just loosely bolted in place right now. Once the boat is back on the trailer, and positioned where I want it in my garage, I'm jacking it up and dropping that axle and taking it an RV shop to have the bearings replaced.

I had absolutely NO tongue weight before so that's why I felt I had to move the axle back that far. It was so bad that once I had the interior out of the boat but the motor still on, it would fall on the stern. If I went too far, it's easily adjustable forward.
 

ezmobee

Supreme Mariner
Joined
Mar 26, 2007
Messages
23,767
Re: 18' Starcraft SuperSport restoration

She's right side up!!!

DSCF2357.jpg


DSCF2358.jpg


It wasn't even too big a job. I had 4 guys, we flipped it over onto the grass, lined it up to the trailer, lifted and winched it on. No damage to the paint :)
 

ezmobee

Supreme Mariner
Joined
Mar 26, 2007
Messages
23,767
Re: 18' Starcraft SuperSport restoration

Thanks guys. More work done last night. I fought with the transom for a while last night and finally got it out. It was swelled in there pretty good. It turned out to be fairly damp and rot was starting so I'm glad I decided to replace it.
 

ezmobee

Supreme Mariner
Joined
Mar 26, 2007
Messages
23,767
Re: 18' Starcraft SuperSport restoration

My opinion of Easypoxy is it's fantastic. Seems very hard. Amazing coverage. I painted my boat like you'd paint your living room. Cut in with a regular paint brush and rolled with a 4" foam roller. Lots of brush strokes and roller bubbles and they ALL laid right down. Only caution is that the paint will run so you have to keep a watchful eye on it.

I need to take some updated pics of my train layout. Here are a couple I took most recently of a specific area we finished http://s176.photobucket.com/albums/w200/ezmobee/WFF/
 

ezmobee

Supreme Mariner
Joined
Mar 26, 2007
Messages
23,767
Re: 18' Starcraft SuperSport restoration

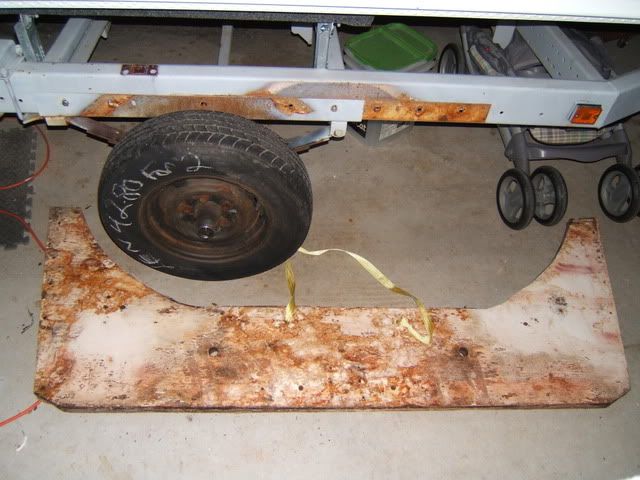
Little bit of an update. As I mentioned previously I got the old transom out.

Here it is. Pretty wet and rot starting. Good thing I decided to go ahead and replace it. Doesn't appear have been properly sealed.
DSCF2363.jpg


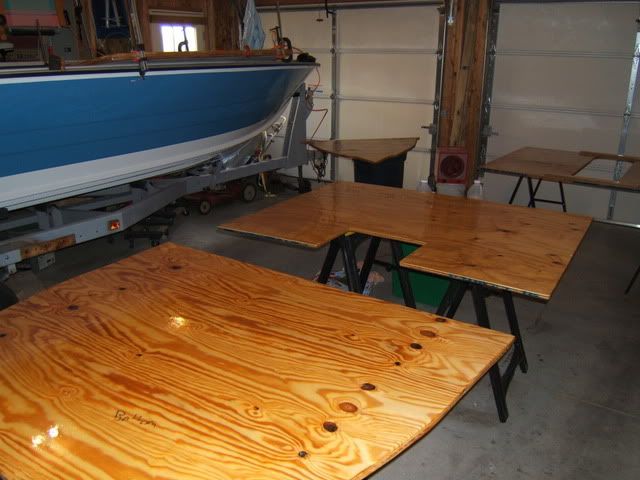
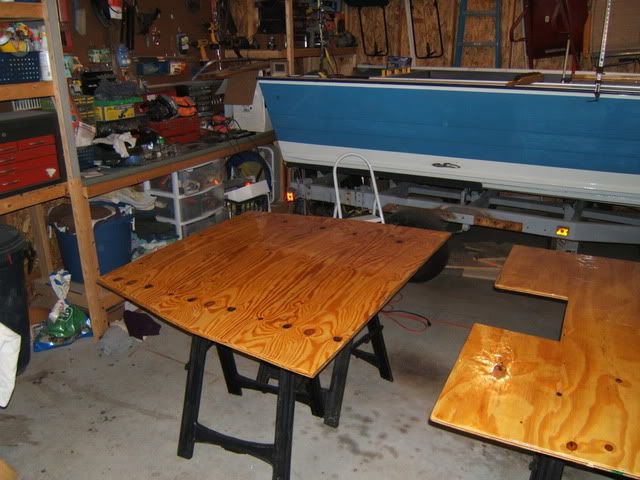
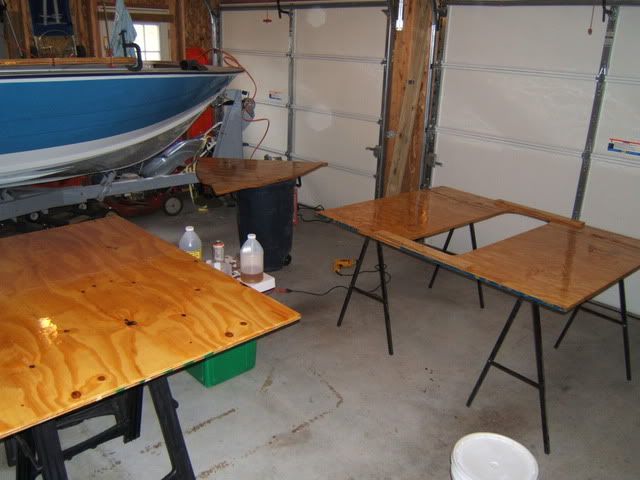
Yesterday I went and picked up a sheet of plywood for the new transom. Ended up buying a sheet of that ACX Arauco plywood from Lowes simply because I was by myself and the top 4 sheets of the regular BC stuff were warped to heck and it was worth the extra $3-4 to me to not have to lift them off :p Seems to be very nice wood. I got both layers of the new transom cut out, matched up and the edges sanded for a closer match. I haven't test fitted it yet as the boat it pretty well smashed up against the back wall of my garage and I didn't feel like moving it out.

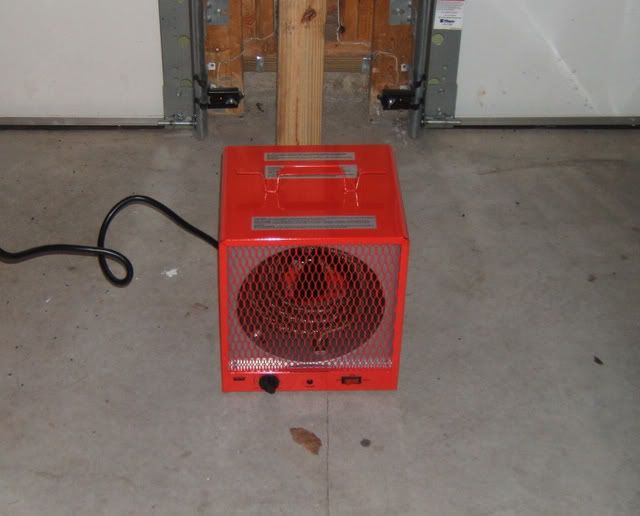
I used my new heater for the first time yesterday. It worked pretty well considering how FRIGGIN' FREEZING it was outside. It took the garage from 34-54+ in the hour or two I was out there. I'm pretty confident that with a little more time and perhaps a little higher starting temp it should be able to keep the garage warm enough for epoxying.

DSCF2360.jpg


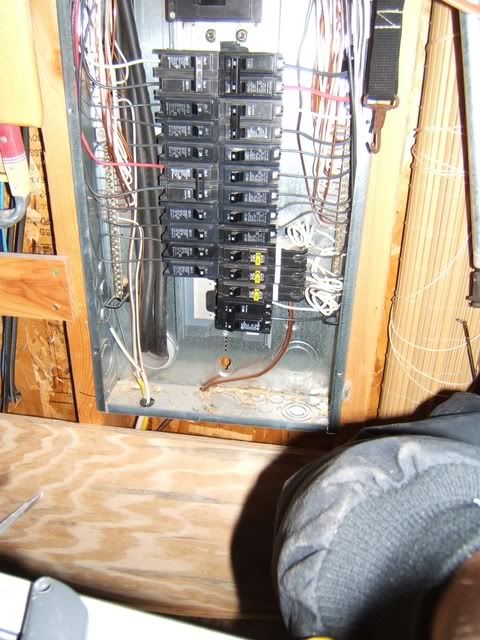
Wired a new 30A 240V circuit in the panel (which is conveniently in the garage). My first time working in an electrical panel. I felt the best way for a newbie to tackle this was to do it with the power on. :p I didn't die and it wasn't very difficult.

DSCF2361.jpg


I ordered my epoxy just now. Hopefully it arrives soon so I can start getting this dang deck put in.
 

ezmobee

Supreme Mariner
Joined
Mar 26, 2007
Messages
23,767
Re: 18' Starcraft SuperSport restoration

My epoxy is supposed to be on my porch tonight when I get home from work. Now the fun begins! I have a three day weekend so I hope to get a lot done. I want to get the transom finished completely and all the deck boards sealed with 2 coats. I may paint the topside while I'm heating the garage at least until I run out of paint and have to order some more.
 

ezmobee

Supreme Mariner
Joined
Mar 26, 2007
Messages
23,767
Re: 18' Starcraft SuperSport restoration

Been real busy on the boat last night and today. I'm a quasi-gov't employee so I'm off today :)

Last night I fit the transom in the boat. Had to break out the belt sander to get the fit perfect. While I was at it I did some sanding on all the deck boards. Not sure if that was necessary but I thought I'd just smooth them out a smidge. I angled and rounded all the edges for a better fit. I laid out my ski locker door trim and cut out for that so that's ready to go. I officially decided to abandon my sorta-infloor gas tank idea. I measured how far out into the boat it would come and it turned out to be fairly ridiculous. The 8 inches I had to add to accommodate the knee brace just pushed it out too far into the cockpit. Even though the box I'm going to build for a casting platform would cover it, I decided it was just a dumb idea and will be installing the tank above deck under the splashwell as it was OEM. Now I'm sorta wishing I'd just kept the original steel tank instead of giving it away. However who knows really what condition the inside of that tank was in so maybe it's for the best.

Before I went to bed I epoxied the two transom half together. This morning I got up and cleaned all the sawdust off the floor and set up all my deck board to be coated. The epoxy was very nice to work with. My heater is keeping it in the upper 60's-70 out there so it should set up nicely per the instructions. Pauly I haven't decided on that cloth or mat I'm putting in the top deck. Anyone have any advice? I may start a new thread in resto asking about that.

DSCF2370.jpg


DSCF2368.jpg


You can see my transom is sitting up on top of the boat clamped.

DSCF2367.jpg

Here's the piece with the ski-locker cut out. I added some support to the thin edges around it.
 
Top