Glastron Sportster 1977

Glastron Sportster 1977

  • .

    Votes: 2 100.0%
  • .

    Votes: 0 0.0%

  • Total voters
    2

jcsercsa

Captain
Joined
May 21, 2007
Messages
3,401
Hi all and Welcome !!

This is my Glastron Sportster 1977 . It has taken 1 1/2 year to finish , and Man is she worth all the Blood sweat and tears !!

Hope this helps someone else ! That was my goal ! I tried to document it all .

If someone is asking them self was it all worth it , all I got to say Is Heck yea !

How hard was it ? On a scale of 1 to 10 , I would have to give it 6 ,

How scary was it to start !! very , but with all the help from the great guys here I was soon over it and all Itchy !!! lol

This thread has been edited fot the completed projects forum and is greatly condensed form the main thread....the main thread contains tons of input from the iboats gang. lots of good info.
This is the link.
http://forums.iboats.com/showthread.php?t=231007

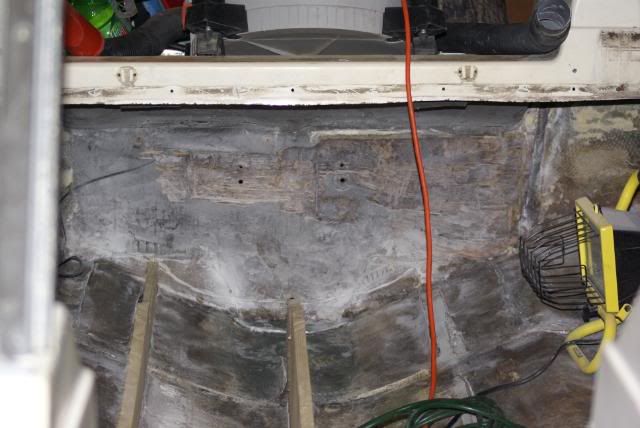
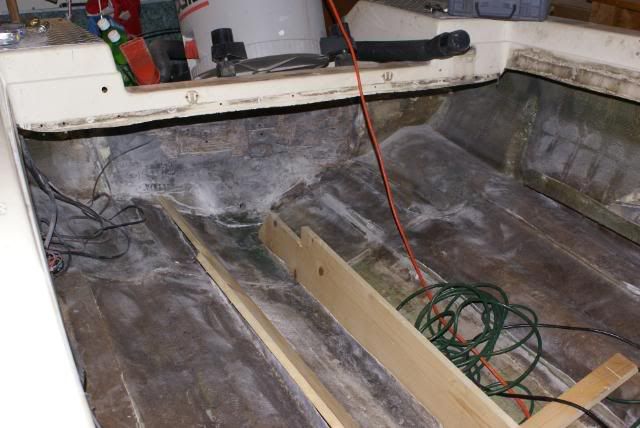
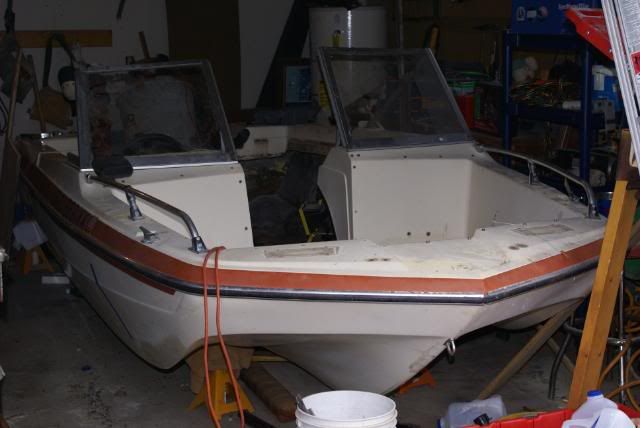
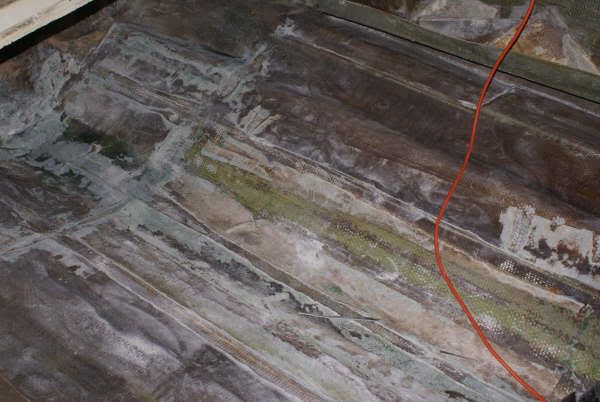
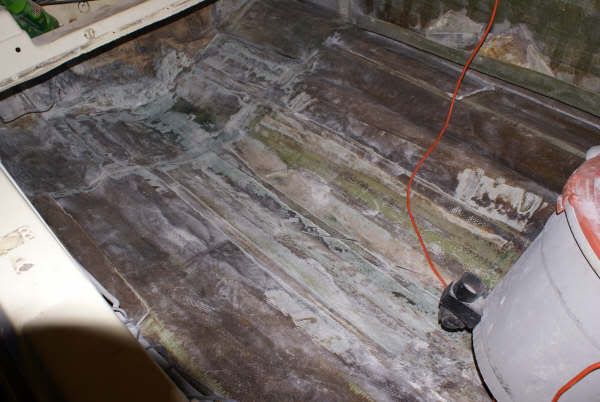
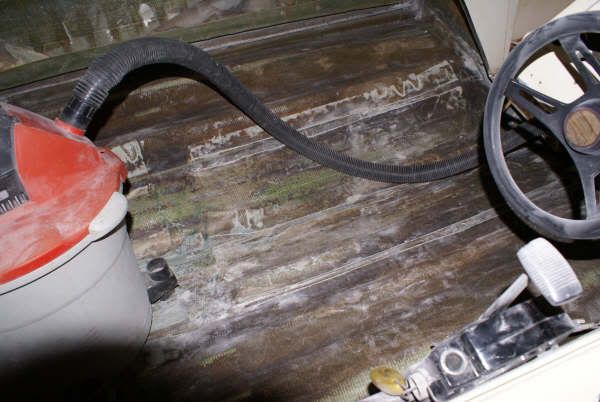
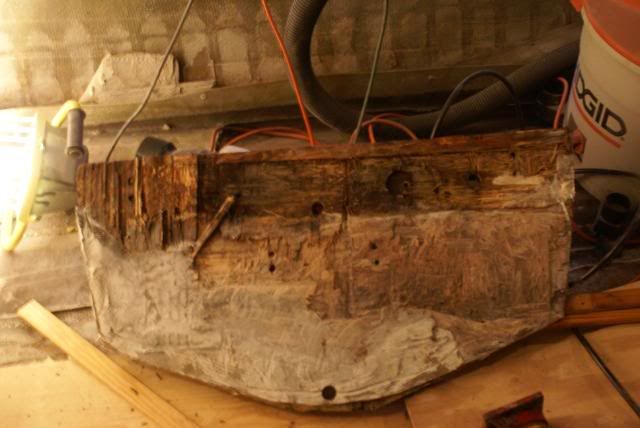
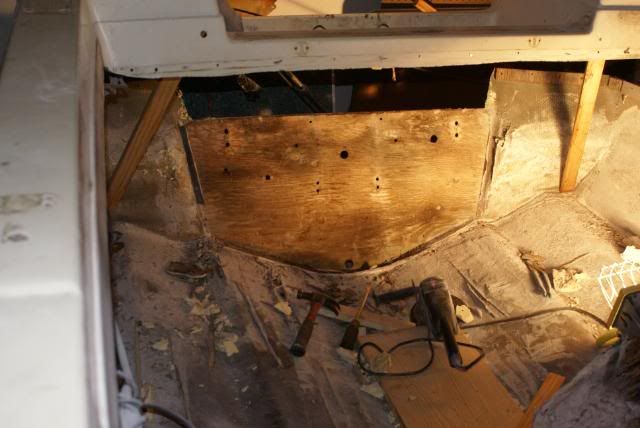
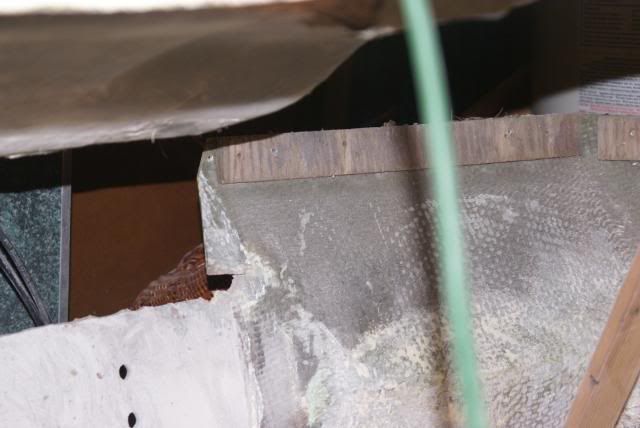
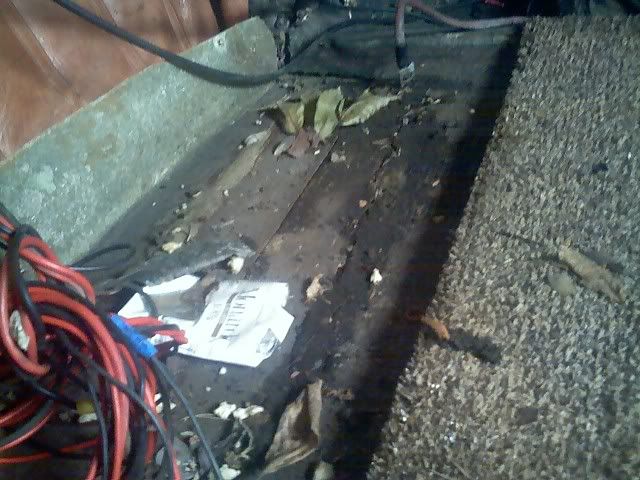
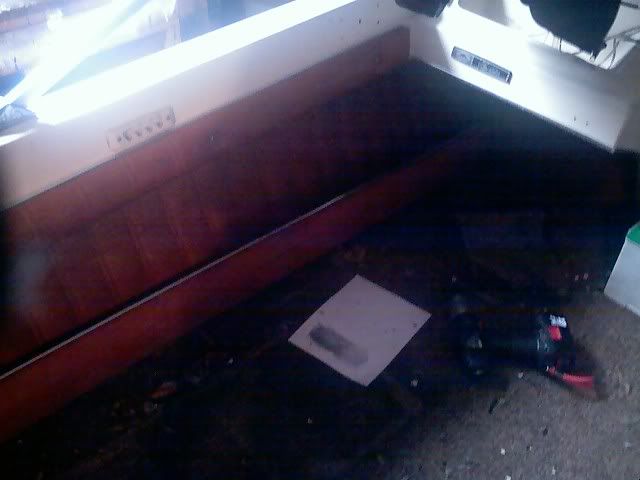
This is the boat in my garage when I started the project.


http://forums.iboats.com/showthread.php?t=543161


Picture118.jpg


Picture119.jpg


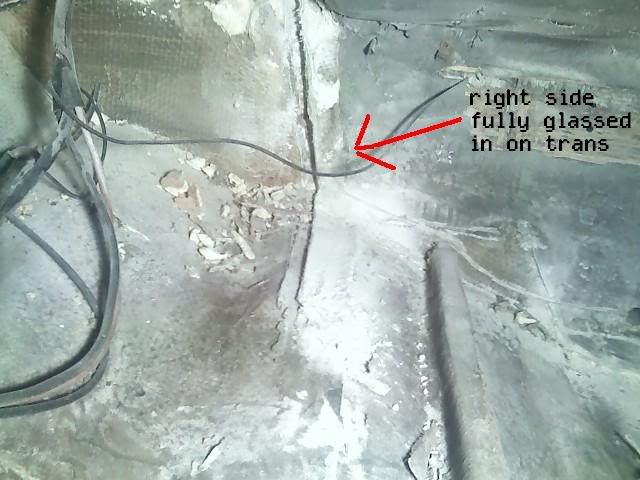
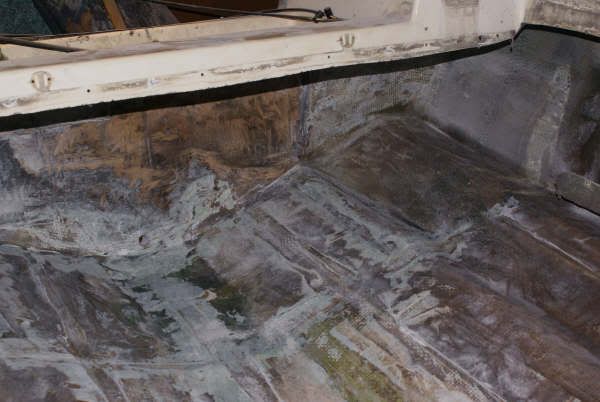
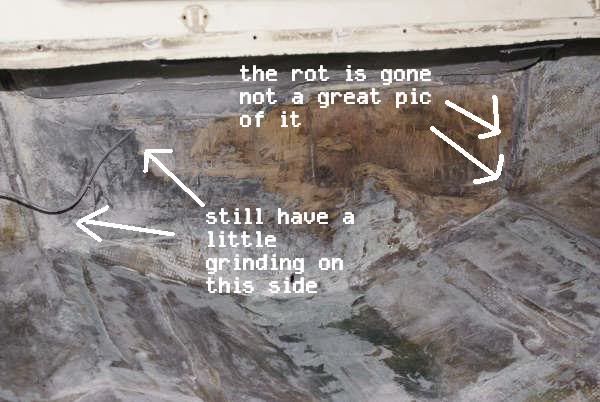
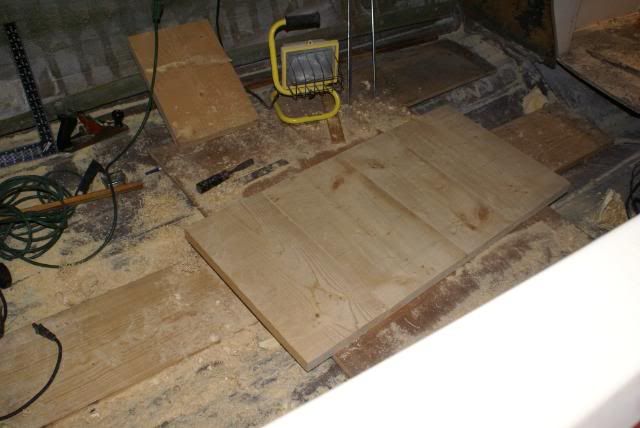
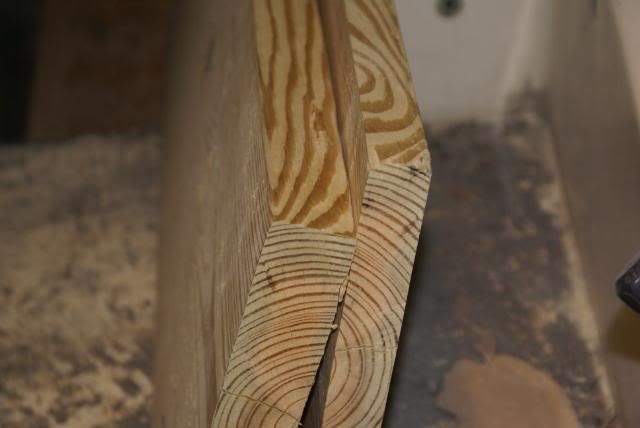
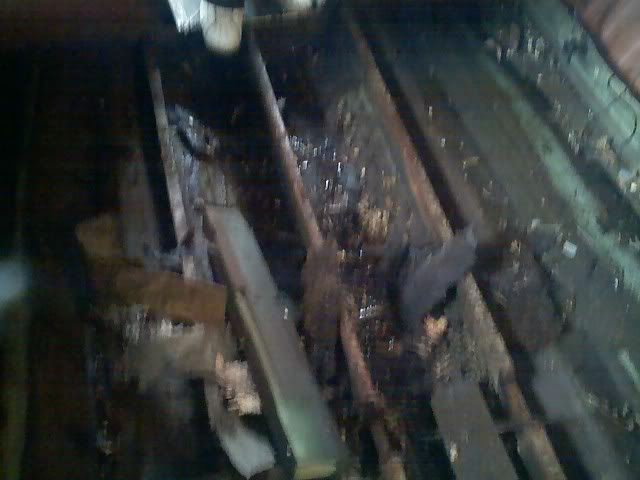
this pics is where someone put plywood over the deck ,


Picture116.jpg


Picture113.jpg


Picture121.jpg


Ok guys and gals here we go !! John
 
Last edited by a moderator:

jcsercsa

Captain
Joined
May 21, 2007
Messages
3,401
Re: pic of work so far

Re: pic of work so far

Hi all , well here are some of the pics so far the 1 pic is the left side looking toward the back of the boat !! There is rotten foam and the back brace to the stringers !!!

Pic 2. Is the back 3 stringers and the rotten foam, there also isn't drainage to the back of the boat !!! plus there not all glassed in !!

Pic 3. Is the right side. There is small rotten spot about the size of a baseball , maybe a little smaller, I am going to use gulvit on it then re-glass over that with the braces in !!

Pic 4. Is where the stringer weren't glassed into the transom !!!!

Pic 5. Is the transom and this side is fully glassed in !!!!


Picture2012420and20one20half.jpg


Picture2012520and20one20half.jpg


Picture2013120and20one20half.jpg


Picture2013220and20one20half.jpg


Picture2013420and20one20half.jpg


Ok the last two pics, I was hoping that the transom was going to be saved , but we find out later she is shot !
 
Last edited by a moderator:

jcsercsa

Captain
Joined
May 21, 2007
Messages
3,401
Re: pic of work so far

Re: pic of work so far

Morning, Well what is seacast??? I was going to use Gluvit on the trans, it is a resin that soak in to the wood, then I was going to reglass that and the new braces in , with the braces I am useing marine plywood and I was going to get them cut and fitted and then put some Gluvit on them before glass them in !! over kill !!! and was going to do that to the stingers also before re-glassing them in, what do you guys think ??? that sould work pertty good dont you think ??? ok I am going to go take some pics I well be back in a few !!! John
 

jcsercsa

Captain
Joined
May 21, 2007
Messages
3,401
Re: pic of work so far

Re: pic of work so far

Ok guys here are a few more pic !!! hope these help give some depth to the others, john OHHH yea My back is not to bad today !!!! lol


Boat001.jpg


Boat009.jpg


Boat008.jpg


Boat007.jpg


Boat_002.jpg
 
Last edited by a moderator:

jcsercsa

Captain
Joined
May 21, 2007
Messages
3,401
Re: pic of work so far

Re: pic of work so far

Ok here are the pics of what i did yesterday !! all the grinding !!! what a mess !!!haha I had the kids shop vac it out or you guys wouldnt have seen anything except dust !!! I had to stop 3 times and shop vac it with all the dust !!!


Boat11low.jpg


boat10atlow.jpg


Boat12low.jpg


Boat14low.jpg
 

jcsercsa

Captain
Joined
May 21, 2007
Messages
3,401
Re: pic of work so far

Re: pic of work so far

Still have a little grinding here !!!


Boat15low-1.jpg
 

jcsercsa

Captain
Joined
May 21, 2007
Messages
3,401
Re: pic of work so far

Re: pic of work so far

OOOHHHHH Man I allmost left THIS in there, man am i really glad I didnt ! I would have been ripping in to it this falll , If it would have lasted that long ! Well as you guys can see it wasnt fun, took about 2 and a half hours to get it out , i guess thats really not to bad, and it came out in one piece, and can use it as a templete for the new one, just have a little bite more to clean up , so Demo is really done now ! yeaaa haaaaaaahhhhh lol john


christms2007112.jpg


christms2007115.jpg


christms2007113.jpg
 
Last edited:

jcsercsa

Captain
Joined
May 21, 2007
Messages
3,401
Re: pic of work so far

Re: pic of work so far

Ok guys here what I have been doing, Its nothing to what Ooop is up tooo . lol the first pic is the 2x12 glued togther , all that saw dust is where i was planing it again !!


christms2007118.jpg
 

jcsercsa

Captain
Joined
May 21, 2007
Messages
3,401
Re: pic of work so far

Re: pic of work so far

Ok I went to home depot and got the new stringer , the pvc boards for the two outer stringers and had to get a 2x12 that is pt , now just make sure i get them cut right this time ! and I have to plane down the 2x12. and then get to dryig it ! john


pvcboards.jpg
 
Last edited:

jcsercsa

Captain
Joined
May 21, 2007
Messages
3,401
Re: pic of work so far

Re: pic of work so far

yea I am going to use pvc deck boards, I read some where on here of someone else using them and I never heard anything bad about them , the only thing i dont really like is the 2x12 pt, that I have to plane down to about a inch, they didnt have anything thinner and in pt,the transom I am using ext,grade plywood and going to polyurethane them,
Heres a question will the epoxy adhere to the polyureathene,on the transom, or should I just use the epoxy on it ? I know I said epoxy all the way with it , but I have this poly , I use on the floor, there is about a half a gallon left, so what do you guys think will it work ? will it stick ?? John
 
Last edited:

jcsercsa

Captain
Joined
May 21, 2007
Messages
3,401
Re: pic of work so far

Re: pic of work so far

Ok guys what about this Idea I had on the transom where the holes are , can I pre-dril the holes bigger fill them with epoxy , then mount it then drill it the right size, does anyone see a problem with doing ??? John


christms2007116.jpg
 

jcsercsa

Captain
Joined
May 21, 2007
Messages
3,401
Re: pic of work so far

Re: pic of work so far

OK here's a start of my part list, can anyone think of something else
LIST 1] Epox-6355564 one and a half gallons thin $59,00
2 ] Epx -p11 1-1 ratio pump set of two $ 5.95
3] 150 Thick Epoxy System Epox-150313 3/4 gal $31.50 Heres where I'am not sure was thinking,
4] fiberglass cloth 4oz x 50' [all three ten yards} $ 49.00
5] 8.5oz 2x2 twill fiberglass e cloth or 10oz eglass $ 68.50
6] Woven Roving 18oz x 50' $46.00
7] Liquid Urethane Pour Faom 2-16lb kit 59.00ea $118.00 total $377.95

Well what do you guys think ?? am i going to have enought epoxy?? about 2 1/2 gal ?? Is this enought fiberglass, the two out side stringers are 3.5 tall and the center is 10 inchs tall , and the two out side stringers are 10 feet long and the center is 9 feet ... think I am going over board on the glass , the two out side stringers I can use one 10 foot piece and cut it in two , with it being 50 inchs wide , really only need it to be about 16 inchs in with, and thats with a 4inch layout on the hull on each side !!! the center has to be 22 inchs in with , I can allways use the extra on the deck , right !! man with the shipping it going to be over 500, Ok so I could use some input , Thanks John

I did end up changing my list , the right one is down in the thread !
 
Last edited:

jcsercsa

Captain
Joined
May 21, 2007
Messages
3,401
Re: pic of work so far

Re: pic of work so far

Ok guys how long will it take to dry like this ?? 120 on the light side and 90 on the other did a thermometer on both sides really on the one it was plus 120 , thats as far as it goes been doing this for a week now !!!!! john

PS and get a fan going on it will really get drying


transom008.jpg
 

jcsercsa

Captain
Joined
May 21, 2007
Messages
3,401
Re: pic of work so far

Re: pic of work so far

this is a pic of the 2x16 pt that I planed down to a 1x16


transom005.jpg


this next pic is where i was grinding to day and got a little carried away , the chip out !!


transom012.jpg


this next pic is one of the transom ground down


transom007.jpg
 
Last edited:

jcsercsa

Captain
Joined
May 21, 2007
Messages
3,401
Re: pic of work so far

Re: pic of work so far

OK guys what I got done today , had this last bit of grinding to go, and it gone now and was hopeing this was the last , BUT OOOPS had to bust my bubble and say that your not done grinding till its in the water ! he couldnt let me have a couple of days , shoot he couldnt let me have one day ? lol and help me still can get this mental pic of him running out of the shower to get a post on another thread !!! help me ! hahahahaha Ok heres the pic OHH this is a pic of the stern


transom010.jpg


Ok well I got tomorrow off and want to get the stringers cut again ! this time measure 2 and then measure again, the measure one more time , then maybe cut , nope measure one more time ! cant keep blowing 70 bucks ! lol ohhh yea today also got the third and the forth coats of poly on the boards one more coat on this side then flip them and 5 more coats on the other ! going to get 10 coats on the edges !
And I also just dumped a bunch of pics in my potobucket, so if anybody wast to check them out , be my guest there not in the right order yet but they will one of these days !! OK later guys John
 
Last edited:

jcsercsa

Captain
Joined
May 21, 2007
Messages
3,401
Re: pic of work so far

Re: pic of work so far

I made sure I fill those cracks in the boards I planned down.

and going to poly over the hole thing , 4 coats! John
 
Last edited:

jcsercsa

Captain
Joined
May 21, 2007
Messages
3,401
Re: pic of work so far

Re: pic of work so far

Now what i got done yesterday was a 3 hour nap after the kids went to school !!!!!! lol and after that well I did get the stringers, ruff cut !! and started to fit them !!! not going to make the same misstakes[ lol } i made last time !!!! and got the 5th coat of poly on the transom now starting the other side ... John
 
Last edited:

jcsercsa

Captain
Joined
May 21, 2007
Messages
3,401
Re: pic of work so far

Re: pic of work so far

OK OOOPS you were right !!! I'm not going to finish grinding till I get it in the water am I ???? Gal Dang it !!! putting it nicely !!! lol Man I spent 5 hours grinding today !!!!! got two of the 3 stringer cut and fitted yesterday , right this time , got started on the 3th one and there was some old glass that was still in the way , So i ground that clean and was thinking that I srill needed to ruff up all the glass where i am going to lay !!! So 5 hours later its 90 percent done still got a little left , but My hands were so sore I couldnt hang on to the grinder much more !!!! Well theres next week !!! John
 

jcsercsa

Captain
Joined
May 21, 2007
Messages
3,401
Re: pic of work so far

Re: pic of work so far

OOOOHHH yea as i was grinding off the old glass that held the old stringers on I noticed that glastron had only used matt on them ,thats all the just used matt twice?? why ?? John
 

jcsercsa

Captain
Joined
May 21, 2007
Messages
3,401
Re: pic of work so far

Re: pic of work so far

A friend was telling me about what they used to make boats with !

in the olden days.... they used just about anything to do build boats...from pallets to left over glass.

even matt is incredibly strong......any yes...with poly !

the matt is just there to hold the stingger in place and give some waterproofing.

the majority of stress in a stringer is longitudnally...that means there is not much side to side stress on the string...so a few layers of matt will keep it from flopping over....but the hull stability stress is transferred over a longer strech so less glass can be used.......because there is more hull contact.

but when re building.....i would do matt, cloth , matt with each layer overlapping to further contact the hull.If your using poly, epoxy just over lap cloth.
 
Last edited:
Top