Time to re-upholster - Formula 330 SS

tpenfield

Moderator
Staff member
Joined
Jul 18, 2011
Messages
17,705
I got the big order of materials and supplies yesterday.

The heavy Tenara is the right thread for the needle passes through and slides with ease. The tensioning is going to be a bit tricky. I ran a few test pieces which showed too much topside tension.

The Tenara being a lot thicker than the upholstery thread I was using seems temperamental.

One interesting thing about the sew foam that I ordered is that it comes ‘compressed’ and needs a week of sitting after you open the package in order to fully expand. :eek:

I’ll be starting on the sunbrella first, so not an issue waiting for the foam to come back to life.
 

Scott Danforth

Grumpy Vintage Moderator still playing with boats
Staff member
Joined
Jul 23, 2011
Messages
47,537
So when does Ted's upholstery shop open up and starts taking orders?
 

tpenfield

Moderator
Staff member
Joined
Jul 18, 2011
Messages
17,705
So when does Ted's upholstery shop open up and starts taking orders?

After he figures out to properly thread his sewing machine :facepalm:

Something must not be right, because the thread always seems to want to jump off the spring-loaded gizmo that is right below the tensioner. The Tenara thread, being thicker and stiffer, makes matters worse that the nylon thread I was using for practice.
 

Scott Danforth

Grumpy Vintage Moderator still playing with boats
Staff member
Joined
Jul 23, 2011
Messages
47,537
cant help you there, I sewed my fingers together once with mom's old singer..... dont ask how, and yes it hurt like hell
 

Reserector_

Chief Petty Officer" & 2021 Splash of the Year Win
Joined
Oct 15, 2019
Messages
592
Sounds like something is supposed to pull the thread at a particular moment, and is failing to do so. Did you miss a hole along the route?
 

tpenfield

Moderator
Staff member
Joined
Jul 18, 2011
Messages
17,705
Through the miracle of YouTube, I think I have it figured out . . . I was missing a crucial step on threading the lower tensioner (gizmo). Just got to try it out to see if that works.

I am finding the Tenara thread is a bit temperamental, jumping out of the tensioner and then snapping. . . but then again, I was snapping the regular nylon upholstery thread initially, before I got the tension on that thread sorted out. :)

Another thing is that the spool weighs a lot . . . and that in itself is causing some resistance, so I'll remedy that issue as well.

Maybe I'll post a YouTube once I got it sorted out. :noidea:
 

tpenfield

Moderator
Staff member
Joined
Jul 18, 2011
Messages
17,705
Update . . .

I got the sewing machine threading issue figured out. So, I practiced on the Sunbrella and some of the new vinyl w/ 'sew foam' backing . . .

Here are a couple of pictures . . . sewing through the Sunbrella (left) and the vinyl (right).

IMG_3533.JPG .

The v-138 Tenara is fine for the vinyl, but a bit too thick for the Sunbrella. The Tenara seems to like thicker materials.

Not sure if I should get the V-92 for the Sunbrella and use the V-138 for the vinyl. :noidea:
 

Attachments

  • IMG_3531.JPG
    IMG_3531.JPG
    176.1 KB · Views: 5

tpenfield

Moderator
Staff member
Joined
Jul 18, 2011
Messages
17,705
Tip du Jour . . .

The sew foam comes in a compressed package wrapped tightly in plastic with much of the air sucked out. After it is unwrapped and unfolded, there are still a lot of wrinkles and compressed areas of foam, which won't just come out over time. In its wrinkled state, it is pretty much unusable.

For anyone using this type of foam as a backing to their vinyl, I wanted to share a tip that I tried. I ironed the foam with a steam iron (synthetic heat setting) and the backing and foam flattened out nicely, making it quite usable. The compression in the foam was also relieved by the steam/heat.

Here are a couple of pictures showing the difference.
.
IMG_3535.JPG
.
 

Attachments

  • IMG_3534.JPG
    IMG_3534.JPG
    128.6 KB · Views: 0

tpenfield

Moderator
Staff member
Joined
Jul 18, 2011
Messages
17,705
That reminds me of headliner material.

Actually, I could have bought the vinyl with the foam backing as a headliner material. It is the same vinyl, but with the foam attached. The only problem with that route is that the 'headliner' version does not have the scrim fabric, so not as much of a benefit compared to the sew foam, which has scrim fabric adhered to the foam.

Of course, I have about 24 yards of vinyl fabric that will need to have the foam glued to it. I'm thinking of using a very light coating of water-based contact cement (thinned down of course) to adhere the sew foam to the vinyl.

The original vinyl had a scrim cloth layer on the foam backing, which had mostly disintegrated after 23 years of wear.
 

Reserector_

Chief Petty Officer" & 2021 Splash of the Year Win
Joined
Oct 15, 2019
Messages
592
When I did my seat panels, I laid up the scrim, foam and tweed fabric, pinned it all together and worked from the middle out. I can see how having the scrim attached would be nicer to work with. Some spray adhesive would have made life easier for the small panels that I had to do that way.
Was it very expensive compared to buying the materials separately?

CAM03277_zpsiiuvkluz.jpg
 

tpenfield

Moderator
Staff member
Joined
Jul 18, 2011
Messages
17,705
The headliner version was an $11/yard uplift over the vinyl alone. The sew foam is about $8/yard. So, slightly less expensive, but then you have to deal with the process of attaching the foam to the vinyl.

with the headliner material, you’d have to buy scrim and deal with attaching that to the foam backing.

Overall, I think the sew foam approach is the better of the two.
 

Reserector_

Chief Petty Officer" & 2021 Splash of the Year Win
Joined
Oct 15, 2019
Messages
592
You only need the sew foam in the pleated panels, correct?
 

tpenfield

Moderator
Staff member
Joined
Jul 18, 2011
Messages
17,705
I tried my hand at canvas work tonight . . .

Replaced the first of many zippers on the bimini top. It was not too bad, considering the size of the canvas . . . rough;y 8' x 8'.
.

IMG_3537.JPG
.
This particular zipper is one of four that hold the bimini to the frame ribs.

I think I have 8 zippers total that need to be replaced.
 

tpenfield

Moderator
Staff member
Joined
Jul 18, 2011
Messages
17,705
Quick Update:

I have 5 zippers done on the bimini (and its cover) and 3 more to go. The sewing machine was giving me a hissy fit for a while, because the tension was going in and out of adjustment during the course of a zipper. I think I got it sorted out, because I found that the tensioner for the top thread had become out-of-whack and the discs were not pressing together.

So I mucked-up 2 zippers a little bit, and will need to do some rework. Looks like I got the thread tension back under control now (I hope) :rolleyes:

I am surprised what a pain canvas work is vs. vinyl fabric :eek:
 

tpenfield

Moderator
Staff member
Joined
Jul 18, 2011
Messages
17,705
Canvas Update:

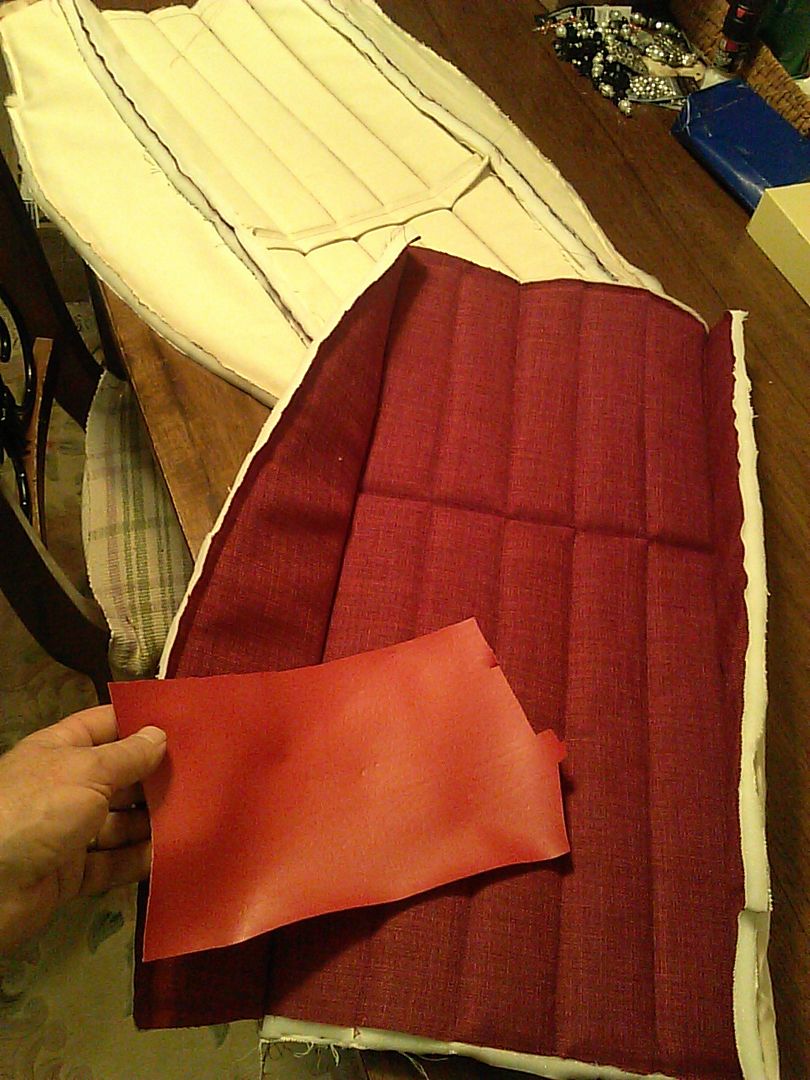
I finished off the zippers on the bimini and am now working on the bimini cover. The edging of the cover pretty much came off with the old zippers, so I made some new edging to sew in along the perimeter and with the zipper.

Here is one of the two zippers all done.
.

IMG_3657.JPG
.
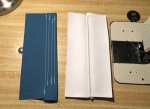
I am using a fair amount of basting tape as I sew the various seams together. It holds the fabric in place while I am sewing so there is one less thing to worry about.

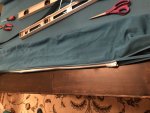
Sewing the edging that you see in the picture . . . the machine is going through 5 layers of Sunbrella PLUS the Zipper material. It does OK, but starts to complain after a while . . . not sure why . . . maybe it is just the impact of the needle going through the fabric. I am typically sewing at 1-2 stitches per second (60-100 per minute). The stitch length in the picture is 6mm. I used 7mm on the bimini itself.

I should be done with the canvas this week and then it is onto the upholstery. First things there will be cutting out new base material for the seats.
 

Attachments

  • IMG_3656.JPG
    IMG_3656.JPG
    184 KB · Views: 0
Top