Bravo 3 Thrust Washers Dont Fit New Lower Unit?

jws123

Petty Officer 1st Class
Joined
Jul 24, 2016
Messages
309
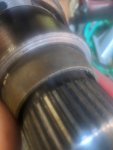
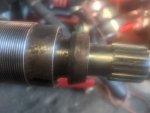
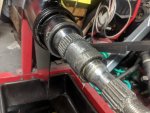
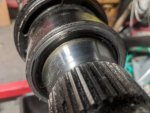
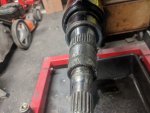
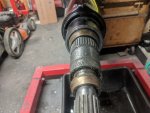
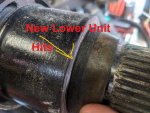
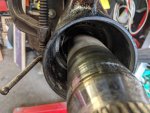
I just finished up painting and reassembling my bravo 3 after swapping out the lower unit with a good used non corroded one. When I went to put the props on I noticed the thrust washers didn't fit? the first one is to big/fits loose and the smaller one does not appear to go on all the way.. Props are quick silver 24P props. What ones do I need to get? they fit the old lower unit fine is there dif sizes or something?
Pics attached.
 

Attachments

  • photo325144.jpg
    photo325144.jpg
    233.4 KB · Views: 0
  • photo325145.jpg
    photo325145.jpg
    151.2 KB · Views: 0
  • photo325146.jpg
    photo325146.jpg
    207 KB · Views: 0

alldodge

Moderator
Staff member
Joined
Mar 8, 2009
Messages
40,750
Take a pic a bit further away but not to far. Have both the thrust washers installed and not installed. I looking for perspective
 

alldodge

Moderator
Staff member
Joined
Mar 8, 2009
Messages
40,750
The first pic isn't bad but would like to see same angle yet bit farther away. The second pic is not any good for me. My guess is one is older then the other, or more worn.

I'm not at home so don't have all my manuals to review.
 

jws123

Petty Officer 1st Class
Joined
Jul 24, 2016
Messages
309
The first pic isn't bad but would like to see same angle yet bit farther away. The second pic is not any good for me. My guess is one is older then the other, or more worn.

I'm not at home so don't have all my manuals to review.

Ik its hard to tell from pics here is few more i just took. I was trying to look up if there was dif sizes for dif years but I didn't get to far. I guess it could be worn but it would have to wear a lot to be this far off. I dont see any marks on the shaft either so idk.
 

Attachments

  • photo325172.jpg
    photo325172.jpg
    333.8 KB · Views: 0
  • photo325173.jpg
    photo325173.jpg
    329 KB · Views: 0
  • photo325174.jpg
    photo325174.jpg
    313.5 KB · Views: 0
  • photo325175.jpg
    photo325175.jpg
    323.2 KB · Views: 0
  • photo325176.jpg
    photo325176.jpg
    244.7 KB · Views: 0

alldodge

Moderator
Staff member
Joined
Mar 8, 2009
Messages
40,750
Will need my computer to look closer,but right now I don't think the new carrier has been installed correctly
 

jws123

Petty Officer 1st Class
Joined
Jul 24, 2016
Messages
309
Will need my computer to look closer,but right now I don't think the new carrier has been installed correctly

Uno now that you point that out it does look a bit off the shaft on the old one sticks out a few hairs more almost like someone didn't put the carrier all the way in on the new one or something.. guess I gotta order the tool for the carrier.

Also thanks for your help so far its my first bravo 3 drive I am use to alphas :D
 

jws123

Petty Officer 1st Class
Joined
Jul 24, 2016
Messages
309
Was the drive being used or just someone selling it

Bought the lower unit used off Craigslist from a guy that hauls boats paid $700 as mine was corroded/cracked besides this issue the thing is spotless no corrosion and feels fine otherwise.
 
Last edited:

jws123

Petty Officer 1st Class
Joined
Jul 24, 2016
Messages
309
Just got the tool but you know dam well the carrier is solid... and yes i know its reverse thread I been soaking it down with pb blaster probably wont do much but i really dont want to heat it much i dont want to crack the case. How do you guys break these things lose?
 

jws123

Petty Officer 1st Class
Joined
Jul 24, 2016
Messages
309
Ok i was able to get it off with a bigger breaker bar pic attached how much in and out and up and down play is there suppose to be on the shaft with carrier out? there is a fair amount at the moment trying to determine if maybe whoever had this open last maybe didn't tighten the inner nut or whatever you wanna call that?
 

Attachments

  • photo325331.jpg
    photo325331.jpg
    1.5 MB · Views: 0

alldodge

Moderator
Staff member
Joined
Mar 8, 2009
Messages
40,750
I'm out of town so unable to get to manuals. But there should not be much play with the bearing but in place. My guess is it was pulled apart and not preloaded correctly.

Will be back tomorrow afternoon if another does not respond
 

jws123

Petty Officer 1st Class
Joined
Jul 24, 2016
Messages
309
Ok thanks i am also going to take a vid of it tomorrow so you can see exactly how much play there is something is def not right. I also noticed one of the carrier seals was not installed right. Both where faced inward if i recall from another post they both go diff directions like on my old lower unit.
 

alldodge

Moderator
Staff member
Joined
Mar 8, 2009
Messages
40,750
If you have 2 seals, I would recommend using the new style seals which are a double seal, part numbers:
1 each Small inner seal 26-8M0033407 (replaces 2 each lip seals)
1 each Large outer seal 26-861694 (replaces 2 each lip seals)
Dimensions 3 - 3/8 OD, 2 - 1/2 ID, 13/16 wide

You need the manual, what year drive is yours?

Bravo Compatibility.jpg
 

Attachments

  • Slide1.JPG
    Slide1.JPG
    47 KB · Views: 0
  • Slide2.JPG
    Slide2.JPG
    52.1 KB · Views: 0
  • Slide3.JPG
    Slide3.JPG
    53.8 KB · Views: 0

jws123

Petty Officer 1st Class
Joined
Jul 24, 2016
Messages
309
At this point i think i am just going to drop it off somewhere i am also getting a manual.
 
Top