My first bellows job and nervous

ShoalSurvivor

Petty Officer 1st Class
Joined
Aug 1, 2012
Messages
217
This is good advice... if you forget the chaser string, you’ll be sorry...


I attempted to use the "replace cable with wire, use as guide for new cable jacket" approach. Didn't work for me because the wire was too short :)

but, for those who wind up having to thread a new cable, have no fear... it's easy.

I used a bent coat hanger with a loop on one side, wider than the cable housing, but smaller than the end housing brass. there is a perfectly clear path from the starboard side of the engine to the initial penetration of a shift cable housing. you can look directly down from above the transom entry point, and see the the end of the housing. Simply slide the coat hanger from the starboard side, level with the cable (the path is perfectly level with the cable entry point on the transom) and gently loop over the cable housing. Then pull lightly as someone else gently feeds the cable housing in. Once you clear the very first corner (3-4" in), it's trivial to route the cable.
 

hoot

Chief Petty Officer
Joined
Sep 8, 2002
Messages
434
Something I did to help the gimbal bearing go into the housing. Put the bearing in a sealable plastic bag, remove all the air from the bag, and put the bearing in the freezer overnight. This shrinks the outer race. i rubbed graphite inside the housing to help the bearing slide in. If your bearing has a grease hole, mark the outer race so it aligns up with the housing grease hole. Since the bearing is new, the inner race might not line up with the coupler. Have you thought of aligning the coupler to the bearing?
 

harringtondav

Commander
Joined
May 26, 2018
Messages
2,438
My $.02. Lots of exhaust bellows slippage stories here. I went thru it on my last bellows job. Root cause for me: too much adhesive and not letting it dry. I ended up using 3M black weatherstrip adhesive, applied a thin coat and let it get very tacky. Fixed.
 

Grub54891

Vice Admiral
Joined
Jun 17, 2012
Messages
5,911
When you get a new cable, the screw in end comes with it.
I take the old screw end, cut a small piece of it off, about 1/2" worth. Put a string through it, tie a small knot so it won't pull through. Screw it back in the cable before removing, and it follows the cable out. Screw it to the new cable and pull it in.
 

auger406

Seaman Apprentice
Joined
Feb 8, 2019
Messages
37
Hey gents,
All parts came in. I ordered everything, new flappers (both). trim sending units, shift cable, and tool, new oil hose, and impeller kit. I have been at work offshore on the rigs in the Gulf of Mexico. Headed up tomorrow to put it all back in. Thanks for all of the pointers and advice. Going to do one thing in at a time. Have a saying if was eating an elephant, one bite at a time. Looking forward to hearing it purrr again. Wont tackle the distributor cap as of yet. However, very interested in it in the future. I am a preventative guy and no fire ruins a day on the lake. I did prep the boat for everything before I left for the exhaust flappers and bring the wires for the trim sensor and sending units. Have a small 14 gauge wire to feed the shift cable through and back. Still will have to tackle this screw that broke off for the trim sending unit. Fun stuff. I figure with everything I am doing saving probbaly 1500.00 in labor for the shop to do it and I get a free education with it.
 

andrewterri

Chief Petty Officer
Joined
Jun 25, 2014
Messages
437
If your shop charges the way they do in Oklahoma you will save a lot more than 1500.
 

auger406

Seaman Apprentice
Joined
Feb 8, 2019
Messages
37
Hey update. I have been getting the time to work on the boat when I can. Today was a good day, installed the exhaust shutters, pulled the trim sending units through with wires (had to order the clips they grew legs and walked away) removed and installed new shift cable and bellows. Installed new oil line with clamps and water hose with clamps. Just going at it slow and verifying before proceeding. I know know why they charge $105.00 for labor, I'm worn out. I did do some checking around and this would have cost me $2,500 dollars at the local boat mechanic. As it was said on here before I at least will know everything is done right. Learning a lot big thing is I notice I make mistakes when I get in a hurry. Like putting the shift cable in the wrong way. I reached up and grabbed the shift cable end at the gimbal housing and it pulled off in my hand I said hmm that surly is not right. All good now slow but sure.
 

Alumarine

Captain
Joined
Feb 22, 2005
Messages
3,693
Sounds like you're doing a good job and gaining knowledge as well.
Always a good thing.
 

Mad Props

Lieutenant Commander
Joined
Jul 8, 2016
Messages
1,766
Looks like you got it all fingered out! I have the same boat as you and I'm doing a full gut/restoration over on my youtube channel, I haven't gotten all the new bellows/cable/bearings/etc installed yet, but I remember how much fun it was to remove... I think I'll be getting to it soon tho!

I was concerned about fishing the shift cable back through but its pretty easy on our boats, theres a good bit of access to get at it from the transom side. I could see on certain boats tho it would be very difficult to get to.
 

auger406

Seaman Apprentice
Joined
Feb 8, 2019
Messages
37
Well it took a while, however things are all back together and put the boat in the water started right up and ran great. Always good to do a solo boat trip after repair so not to add fustration if things don't go as planned. So two things are driving me crazy, water leak is still there. After replacing all of the bellows, shift cable, lube oil hose, gimbal bearing, trim sending sensor, exhaust shutters, and drilling out, tapping, installing heli coil in stripped out bell housing for hing pins. I am thinking that maybe it is coming from the hull. Also, now I have a knocking sound when turning hard to left and right. It is not there when driving ahead straight. It is there weather the engine is in gear or not. Man I love boating its worth the headache once we are on the water. Any thoughts other than U-joints, as if it happens in neutral as well as in gear should mean u-joints right?
 

auger406

Seaman Apprentice
Joined
Feb 8, 2019
Messages
37
Thanks Alldoge,
Was thinking that. In my original post I considered replacing them. However, time was pushing me to get the boat back in he water. I should have known better, had it out and could have done them right there. Talked myself out of it due to I replaced everything I could think of but the one thing that I should have still raising its head. Water leak really has me puzzled though. All bellows are still in tact going to did into it today.

Thanks for all of the feed back.
 

auger406

Seaman Apprentice
Joined
Feb 8, 2019
Messages
37
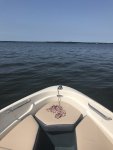
The work stinks but the view is worth it
 

Attachments

  • photo311847.jpg
    photo311847.jpg
    2 MB · Views: 0

alldodge

Moderator
Staff member
Joined
Mar 8, 2009
Messages
40,718
Didn't notice the water leak comment. I hope its not but their are 4 possibilities if boots are all good, and its coming from the stern.

The transom is soft
The exhaust pipe has a hole
The top steering pin (only will show if the top pin is under water when boat is sitting)
Speedometer tube

How much water you seeing?
 

Boater31

Petty Officer 2nd Class
Joined
Mar 18, 2017
Messages
129
I'm about to do this same job to mine. Can you give more details on the gear lube hose. Did you connect it at the same time as water hose. I assume you do the bell housing side first right. Did you use the actual Merc clips or zip ties.

Thanks and good luck with finding the leak
 

Grub54891

Vice Admiral
Joined
Jun 17, 2012
Messages
5,911
Check the trim manifold under the gimbal ring, the gasket under there can sometimes leak.
 

auger406

Seaman Apprentice
Joined
Feb 8, 2019
Messages
37
I'm about to do this same job to mine. Can you give more details on the gear lube hose. Did you connect it at the same time as water hose. I assume you do the bell housing side first right. Did you use the actual Merc clips or zip ties.

Thanks and good luck with finding the leak

Connected the gear oil first at the transom side, use a heat source to get it on the brass nipple and used Mec clips. Then the water hose then connect to the bell housing. Was tough but be patient it will go.


man i hope its not the a soft transom, I am not seeing anu water come from the engine and it leaks when it is sitting. I plan to pull the cover back off set it in the water and look all over for the source of the water. Wont get back to it for a couple of weeks though
 

auger406

Seaman Apprentice
Joined
Feb 8, 2019
Messages
37
Didn't notice the water leak comment. I hope its not but their are 4 possibilities if boots are all good, and its coming from the stern.

The transom is soft
The exhaust pipe has a hole
The top steering pin (only will show if the top pin is under water when boat is sitting)
Speedometer tube

How much water you seeing?

Bilge pump will kick on once a day with the float so a good bit. i guess
 

Boater31

Petty Officer 2nd Class
Joined
Mar 18, 2017
Messages
129
Thanks for the response.

You can test for a soft transom without water. You can try the jump test and see how much movement you get or the more accurate drill test and know for sure.
 
Top