Mannies & Risers, reuse or replace

Status
Not open for further replies.

AKJohne

Petty Officer 1st Class
Joined
Mar 26, 2017
Messages
220
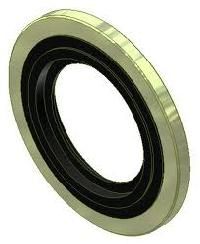
All my drawings are also showing no seal under the rocker cover screws... If they are weeping, I'd find a Dowty seal the right size and use a few of those...

"Dowty seal"...eh, I likes it... but WTH ..... is it....?
 

tank1949

Lieutenant Commander
Joined
Apr 4, 2013
Messages
1,767
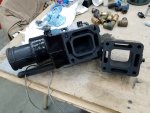
Ok, those elbows and manifolds look ok. Quite reusable. However, your waterline to top of elbow height is under spec. The spec is a minimum of 13" (as per the drawing below). You should add a 3" kit. A kit consists of two 3" risers, the required gaskets and fixing hardware. As you have a closed cooling HE, you'll need to put a block-off gasket between the manifold and riser on each side (part# 27-41811, and for those, I only use Merc). You will also need two new exhaust tubes (the ones between the end of the elbow and the top of the 'bull-horn' collector.

Risers for a 'wet-joint' V8 system is -93320A13 (1 required, 2 in the 'kit')
for the longer tubes, -14801A1 (1 required, 2 in the 'kit') They come as 6". To use with 3" risers, you remove the lower 3".

Chris...........


I am not real sure if this is MC I/O? If so, should flapper valves in y pipe aid in sea water backflow?
 

achris

More fish than mountain goat
Joined
May 19, 2004
Messages
27,468
"Dowty seal"...eh, I likes it... but WTH ..... is it....?

Washer with a rubber seal internal. Used on hydraulic systems, so a few oil drops aren't going to be a problem...

dowty-bonded-seals-1516265108-3589212.jpg

dowtyy seal.JPG


I am not real sure if this is MC I/O? If so, should flapper valves in y pipe aid in sea water backflow?

Yes, this is a Mercruiser, we've seen the photos. And yes, they have flapper in the Y-pipe. But those flappers aren't a full seal, they just SLOW a backwash wave as it hits the back of the boat. When the engine is stopped, the water level in the Y-pipe will be the same as the outside ocean/sea/river/lake/pond/puddle.... That's why Merc recommend a minimum height above the water level to the top of the elbow. And that's what we are achieving with the addition of 3" risers in this case.

It's all explained in the previous posts, so please have a read though all of the thread to see where we are up to.

Chris..........
 

rickasbury

Senior Chief Petty Officer
Joined
Jul 13, 2011
Messages
753
Having been through all this, listen to achris....! He da man!
 

AKJohne

Petty Officer 1st Class
Joined
Mar 26, 2017
Messages
220
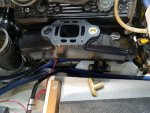
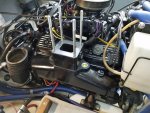
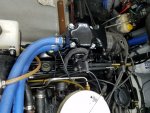
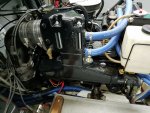
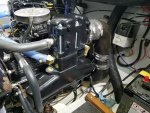
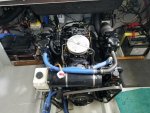
Some progress yesterday, SB side is reunited with the engine, waiting to do the Port side after I get a "in-hull" transducer situated. Much easier access with the mannie out of the way


. 20181223_111607.jpg C​​ompletion after the holiday,


20181223_110909.jpg20181223_112442.jpg20181224_100238.jpg20181224_100254.jpg


Merry Christmas to you guys. Thanks for the help
 

achris

More fish than mountain goat
Joined
May 19, 2004
Messages
27,468
Looks sweet. And those new tubes line up properly?
 

AKJohne

Petty Officer 1st Class
Joined
Mar 26, 2017
Messages
220
I think they line up at the top better than the old ones, the old ones caused the rubber boot to have a bit of a twist, although I believe they functioned OK in terms of water flow out of elbow. I have no way of knowing for sure. I did look at the diagrams in the merc book, the differences are subtle, they dont expand on the why are what happens, but I assume proper fit is all about water flow.....?

What happens when its wrong....?
 

achris

More fish than mountain goat
Joined
May 19, 2004
Messages
27,468
If it's wrong, you can get contact between the end of the elbow and the top of the pipe. That could cause wear and possibly, over time, a hole. If the old ones put a bend/twist in the rubber, then that's not right. The pipe should fit straight into the rubber when the rubber it properly fitted to the end of the elbow. Not twisting or bending.

When I fit pipes and rubbers up, I use a little grease on the contact surfaces. That enables the parts to find their best fit together, and also helps when it comes time to disassemble. The rubber isn't stuck to the metal...

Chris.....
 

AKJohne

Petty Officer 1st Class
Joined
Mar 26, 2017
Messages
220
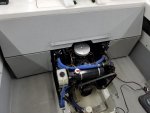
Port side back together, fired it up and let it warm up, then re-torqued everything once it cooled some. Got about 1/2 a turn. Checked compression 152/165.

20181228_102407.jpg20181228_102356.jpg

Then lowered the transom cover.......#$@%&!

Always 20181229_114515.jpg something.
 

achris

More fish than mountain goat
Joined
May 19, 2004
Messages
27,468
I thought you checked that.....

Nice work otherwise...

Chris......
(and those ali tubes look perfect. :))
 

AKJohne

Petty Officer 1st Class
Joined
Mar 26, 2017
Messages
220
I checked clearance under the doghouse, i forgot about the transom cover..! Its minor, a little trimming and it will clear. Worst part, all my resin and zolatone is timed out...
 

Pavetim

Seaman
Joined
May 20, 2019
Messages
72
Did you use straight muriatic acid or diluted? How long did you let it soak? What did you do to keep it in the passages in the risers and spacers
 
Status
Not open for further replies.
Top