68 Johnson 55HP (TRL-10R) not starting, just barking.

DWM76

Seaman Apprentice
Joined
Sep 4, 2018
Messages
47
Background: Motor came with boat and trailer I bought to get me and the boy out fishing. It was a bonus add on to the sale so I decided to try and rebuild it as a learning opportunity. (no outboard or mechanical experience)
There are other threads with the work I did to date from the lower unit and up. At this point I am trying to get the old girl to start.
Compression 90-92psi on all 3, good spark on all 3 (using inline tester), carbs removed and serviced, reeds look immaculate.

Might be doing something wrong but here is how I am trying to start it:
6 gauge positive (from starter solenoid) and negative wire (from ground) to marine deep cycle (750), load tested and on a tender.
Ignition lead to starter (red / 20A fused) and amplifier (purple) connected to positive battery post. I touch the ignition lead (white) to starter solenoid and starter motor cranks great but engine won't fire. I get some barks and coughs and some puffs of exhaust from the prop, 1 loud backfire, but no go. (new clean premium fuel 50:1 w/ 2stroke oil)
Ended up with oil/fuel (dark) in trash barrel water and fuel (clear) out the front of the carbs at the intake manifold.
I cleaned out the carbs and used kits to replace gaskets etc. Needle valves looked great, lightly seated then opened 1 turn.

Any tips on what I should look at? Should I go back to the ignition and check amplifier output to coil, coil output to HT lead, points trigger back to Amp? Or do I have a fuel/air mix issue? Or am I just way off and making things worse?

I have tried a few places in my area looking to get a knowledgeable outboard mechanic familiar with these old outboards to look at it but they all say it's not worth it without looking at it.

Maybe I should throw in the towel?

Thanks again,
 

F_R

Supreme Mariner
Joined
Jul 7, 2006
Messages
28,195
No doubt about it, you got ignition problems. Before you go any further, you need to realize that wiring errors can result in $$$$ damage to the amplifier. Nuff said.

You need to do an orderly troubleshooting on the ignition system to narrow the trouble down. But just a FYI, it could be a problem with the breaker points (under the flywheel). Or something else.
 

oldboat1

Fleet Admiral
Joined
Apr 3, 2002
Messages
9,607
sounds like it's not dead -- tries to start. Pull the flywheel and check the key. Sheared or partially sheared key will affect timing. Beyond that (or maybe prior to that), try opening up the idle mix needle slightly more. Initial setting should be 1 1/2 turns open from lightly seated.
 

racerone

Supreme Mariner
Joined
Dec 28, 2013
Messages
36,269
Oldboat ------Are you 100% sure that the flywheel key affects the timing on this motor ??----Remember this motor has cam lobes to open and close 2 sets of breaker points.
 

oldboat1

Fleet Admiral
Joined
Apr 3, 2002
Messages
9,607
Thanks. Should have checked before commenting. Correct me, but think a sheared key would cut off spark on that system.

Ah, I would pull off the flywheel anyway. Clean and tighten all leads, look for checking or cracking at distributor leads,
 

racerone

Supreme Mariner
Joined
Dec 28, 2013
Messages
36,269
A sheared flywheel key will not cut off spark on that motor !-----You could take the flywheel off.----Turn the crankshaft and see spark.------It is a battery powered / points / rotor / distributor cap system !!
 
Last edited:

DWM76

Seaman Apprentice
Joined
Sep 4, 2018
Messages
47
Definitely not the flywheel key...I already replaced it with a new one because I broke it cranking it over without torquing...and then I read not to do that. :-/
I did have the flywheel off and checked the points. Everything 'looked good' and was really clean so I didn't investigate as much as I should have likely.
I'll run through the troubleshooting tests in the service manual for the ignition. My mistake assuming good spark from inline spark tester would rule out ignition issues...at least as far as starting goes.
 

oldboat1

Fleet Admiral
Joined
Apr 3, 2002
Messages
9,607
Perhaps this CDI amplifier/powerpack: Replaces OEM 0389549.

113-7123 Battery Power Pack

Fits: 1968-1972 (55 -100 HP with points)

Replaces: 382579, 383299, 389549, 389550, 389551, 397123, 580849, 583579, 777647, 6CB2001, 6CB2004, 6CB2007, 6CB2009, 9G0M

*No Tachometer Output, For use with Points Triggering
 

racerone

Supreme Mariner
Joined
Dec 28, 2013
Messages
36,269
Well the 90 PSI compression is a joke.-----You should test with another gauge.-----If 90 is all you have you have there are serious problems with the motor.
 

Joe Reeves

Supreme Mariner
Joined
Feb 24, 2002
Messages
13,262
Keep in mind that the compression PSI is related to cranking speed.... a slow cranking engine will obviously have low compression.
***************
The point setting is critical.... As follows:

(Point Setting Of Battery Capacitance Discharge)
( Ignition Models - 1968 thru 1972)
(Some have points - Some do not)... (EDIT)... Yours does!
(Joe Reeves)

The points must be set to .010 but no wider than .010..... BUT in some instances due to a possible slight inaccurately machined crankshaft lobe or a slight offset of one set of points, a setting slightly less than .010 would be required as follows.

Whether the crankshaft has two or three lobes, when setting the points, check the setting of the points on each individual lobe by rotating the crankshaft by hand.

You may find that setting one set of points to .010 on one lobe, then turning the crankshaft to the next lobe, the gap measures .011 or .012 (too wide). This is where you would need to close that gap down to the required .010. A gap too wide can result in a ignition miss when throttle is applied.

Bottom line, pertaining to the point setting at the various lobe locations____ .010, .010, .009, is okay____ .010, .010, .011 is not!
********************

This "inline" spark tester..... If you're speaking of a neon light sort of tester, that's worthless.

Spark is to be tested using a tester whereas a adjustable air gap can be set (available at any auto part store, or you can build the following (somewhere below). On that model (Battery Capacitance Discharge) ignition, the sparks should be set to 1/4".

The spark should jump that 1/4" gap with a strong blue lightning like flame... a real SNAP! Does it?
*******************************
When rebuilding the carburetors.... did you manually clean the brass high speed jets that lay horizontal in the bottom center portion of the float chamber... way in back of the drain screw? If not, do so as they clog easily. Fuel must flow thru that jet before it can gain access to any other fuel passageway.

************************************
(Carburetor Adjustment - Single S/S Adjustable Needle Valve)
(J. Reeves)

Initial setting is: Slow speed = seat gently, then open 1-1/2 turns.

Start engine and set the rpms to where it just stays running. In segments of 1/8 turns, start to turn the S/S needle valve in. Wait a few seconds for the engine to respond. As you turn the valve in, the rpms will increase. Lower the rpms again to where the engine will just stay running.

Eventually you'll hit the point where the engine wants to die out or it will spit back (sounds like a mild backfire). At that point, back out the valve 1/4 turn. Within that 1/4 turn, you'll find the smoothest slow speed setting.

Note 1: As a final double check setting of the slow speed valve(s), if the engine has more than one carburetor, do not attempt to gradually adjust all of the valves/carburetors at the same time. Do one at a time until you hit the above response (die out or spit back), then go on to the next valve/carburetor. It may be necessary to back out "all" of the slow speed adjustable needle valves 1/8 turn before doing this final adjustment due to the fact that one of the valves might be initially set ever so slightly lean.

Note 2: If the engine should be a three (3) cylinder engine with three (3) carburetors, start the adjustment sequence with the center carburetor.

When you have finished the above adjustment, you will have no reason to move them again unless the carburetor fouls/gums up from sitting, in which case you would be required to remove, clean, and rebuild the carburetor anyway.

**************************************
Use Champion L77JC4 speak plugs with the electrode gap set to .030 .

********************
(Spark Tester - Home Made)
(J. Reeves)

You can use a medium size philips screwdriver (#2 I believe) inserted into the spark plug boot spring connector, then hold the screwdriver shank approximately 7/16" away from the block to check the spark or build the following:

A spark tester can be made with a piece of 1x4 or 1x6, drive a few finishing nails through it, then bend the pointed ends at a right angle. You can then adjust the gap by simply twisting the nail(s). Solder a spark plug wire to one which you can connect to the spark plug boots, and a ground wire of some kind to the other to connect to the powerhead somewhere. Use small alligator clips on the other end of the wires to connect to ground and to the spark plug connector that exists inside of the rubber plug boot.

Using the above, one could easily build a spark tester whereas they could connect 2, 4, 6, or 8 cylinders all at one time. The ground nail being straight up, the others being bent, aimed at the ground nail. A typical 4 cylinder tester follows:

..........X1..........X2

.................X..(grd)

..........X3..........X4

This can obviously be modified to a 6 or 8 cylinder setup tester.

********************
The above should keep you busy to lunch time! :)
 

Tim Frank

Vice Admiral
Joined
Jul 29, 2008
Messages
5,333
Had one of these for 35+ years.
Carb low speed setting was 3/4 turn open from a soft close.
It was fussy....at 7/8 turn it would stumble.

How is the wiring under the hood?
Check for corrosion and/or failed insulation on primary wiring side of ignition.
 

racerone

Supreme Mariner
Joined
Dec 28, 2013
Messages
36,269
There is a " key " on the rotor.-------So is the rotor in proper position , yes or no ?
 

DWM76

Seaman Apprentice
Joined
Sep 4, 2018
Messages
47
Hi Joe, thanks for your response. I will work through the steps you have listed.
The 'inline' spark tester mentioned tests spark with adjustable gap with the spark plug in place and torqued. It is between the HT lead and spark plug. With 1/4 gap or more I get good visible spark.
Also I did clean the carb as you suggested, I used kits an replaced all parts provided in the kit, making the float adjustments noted in the kit, and cleaned with carb cleaner and carb brushes.
The new sparkplugs I used were the replacement part number, they are surface gap (no electrode) L67V (#827M). Do you recommend I replace these with the L77JC4 spark plugs you mention?
Hi Tim, thank you for your reply. I replaced the entire wiring harness with new wire and terminal block. I eliminated the terminal housings (connectors) except where some existing wire was needed to connect to a part (i.e. Amplifier, Choke Solenoid, Vacuum switch etc.)
Hi Racerone, thanks for your replies. I replaced the woodruff key on the crankshaft under the flywheel. It is aligned and the flywheel nut properly torqued.
Hi Oldboat1, thanks for your replies. The motor has the original OEM 0389549 amplifier. I hope to rule out needing to replace it.

Based on everyone's feedback I believe it is wise to go back to troubleshooting the ignition system. I have a multimeter so I will test each component in the order listed in the service manual. There is one test, involving an M-80 tester that I do not have, that will be an issue for me though.

Thanks everyone.
 

F_R

Supreme Mariner
Joined
Jul 7, 2006
Messages
28,195
If you have 1/4" spark with the gap tester in series with the spark plug, (should clip it to ground) the ignition system is at least operating, including the amplifier. I never had any real problems with the surface gap plugs in the 55's, but sure did in the 60's that followed. The L77JC4 made a world of difference in those. I wouldn't hesitate to put them in a 55 also.

The M-80 was state of the art in 1968 but obsolete now. Tester of choice is a DVA meter or adapter.

I'm concerned about the low compression.
 

Joe Reeves

Supreme Mariner
Joined
Feb 24, 2002
Messages
13,262
(1) The 'inline' spark tester mentioned tests spark with adjustable gap with the spark plug in place and torqued. It is between the HT lead and spark plug. With 1/4 gap or more I get good visible spark
.
(2) Also I did clean the carb as you suggested, I used kits an replaced all parts provided in the kit, making the float adjustments noted in the kit, and cleaned with carb cleaner and carb brushes

.
(3) The new sparkplugs I used were the replacement part number, they are surface gap (no electrode) L67V (#827M). Do you recommend I replace these with the L77JC4 spark plugs you mention?


(4) I believe it is wise to go back to troubleshooting the ignition system. I have a multimeter so I will test each component in the order listed in the service manual. There is one test, involving an M-80 tester that I do not have,

1 - Have "all" spark plugs removed when testing the spark. Connection should be from HT lead to tester to powerhead ground.

2 - In cleaning the carb, did you actually manually clean the HS jet?

3 - The surface gap plugs are a cold running plug regardless of their heat designation L76, L77, whatever... and are prone to fouling. The L77JC4 plug, set to .030 is my choice.
 

oldboat1

Fleet Admiral
Joined
Apr 3, 2002
Messages
9,607
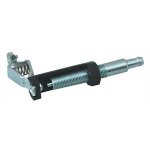
Get one of these testers ($10-$15 at an auto parts store):
xLIS50850_1200Wx1200H.jpg.pagespeed.ic.DpYWD8n9Ep.jpg
Can only do one at a time, but test with all plugs removed. You may have to extend the ground (e.g., wire with a couple of alligator clips). I suggest starting with 5/16 or so and adjust back until you get the strongest spark.
 

oldboat1

Fleet Admiral
Joined
Apr 3, 2002
Messages
9,607
As Joe mentioned, are you getting sufficient cranking speed? Should have about 300rpm for starting -- might try regular jumpers to your car or truck, just to test. Pos. clamp to post on the side of the outboard starter, neg. to starter bracket. Keep the truck engine running.
 
Top