2002 Tohatsu 140 2 stroke

CaptDuck

Seaman Apprentice
Joined
May 29, 2012
Messages
39
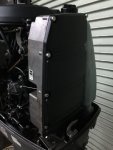
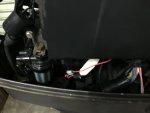
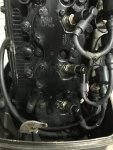
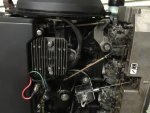
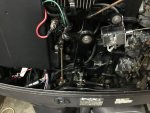
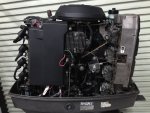
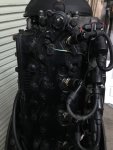
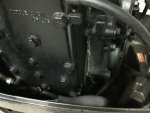
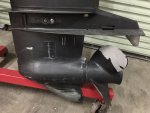
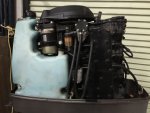
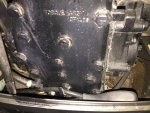
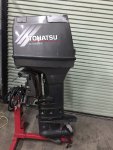
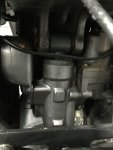
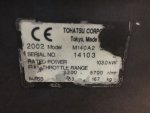
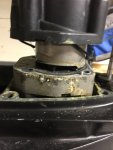
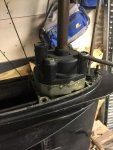
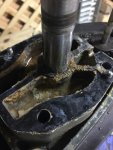
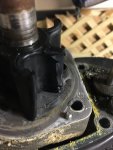
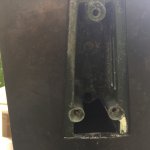
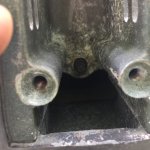
I have the opportunity to purchase a 2002 Tohatsu 140 25” shaft. Person is asking 1200. Looking to put his on my 2000 Sea Pro 190cc max hp is 150. I currently have a johnson 130 Ocean Pro on it that came with the boat. I know the Tohatsu will be about 17 lbs lighter than my johnson. The Tohatsu has been sitting for about a year. It has good compression on all cylinders at about 160-165 psi and she does start and pump water. However the carbs will need to be cleaned. Does it sound like it is worth it? Comes with outboard, key Jd key switch, complete wiring harness and the digital Tohatsu gauge. That is for any input
 

Sea Rider

Supreme Mariner
Joined
Sep 20, 2008
Messages
12,345
For $ 1200 would buy it, if you like round numbers fan 1 K in front of his face, you know money always talks. If seller accepts, go for a full maintenance to bring that nice 140 to life.

Happy Boating
 

CaptDuck

Seaman Apprentice
Joined
May 29, 2012
Messages
39
TG...yeah i have thought about that. But at this point it can't be any worse than my Johnson 130...that keeps sucking money out of my pocket. I know people talk about lack of tohatsu dealer network. But i guess i am lucky and have one about 5-6 miles from my house. I have called and verified that they do work on them. I am thinking that if i put a couple of hundred $$$ in it and get all carbs cleaned, new water pump, new filters, lower unit oil and all plugs changed out that it will last me for a few more years. And of course give it some proper maintenance and loving! I like the simplicity of the design and the horsepower to weight ratio of this engine
 
Last edited:

CaptDuck

Seaman Apprentice
Joined
May 29, 2012
Messages
39
Here are some photos of the motor
 

Attachments

  • photo284238.jpg
    photo284238.jpg
    615 KB · Views: 0
  • photo284239.jpg
    photo284239.jpg
    631.3 KB · Views: 0
  • photo284240.jpg
    photo284240.jpg
    991.6 KB · Views: 0
  • photo284241.jpg
    photo284241.jpg
    801.3 KB · Views: 0
  • photo284242.jpg
    photo284242.jpg
    885 KB · Views: 0
  • photo284243.jpg
    photo284243.jpg
    804.9 KB · Views: 0
  • photo284244.jpg
    photo284244.jpg
    654.4 KB · Views: 1
  • photo284245.jpg
    photo284245.jpg
    919.5 KB · Views: 0
  • photo284246.jpg
    photo284246.jpg
    812.8 KB · Views: 1
  • photo284247.jpg
    photo284247.jpg
    799.1 KB · Views: 0
  • photo284248.jpg
    photo284248.jpg
    717 KB · Views: 0
  • photo284249.jpg
    photo284249.jpg
    1 MB · Views: 0
  • photo284250.jpg
    photo284250.jpg
    851.7 KB · Views: 1
  • photo284251.jpg
    photo284251.jpg
    867.9 KB · Views: 1

TOHATSU GURU

Admiral
Joined
Jul 22, 2004
Messages
6,164
I hear the same thing about the dealer network. It's not true. It's about the same size as Suzuki or Honda's network. Dealers are usually 20 to 25 miles apart in water rich areas. In small Podunk towns where populations are small you will usually find a Mercury dealer who carries something else too. So in those areas outboard dealerships are usually limited to two brands and those are usually Mercury and Yamaha..
 

CaptDuck

Seaman Apprentice
Joined
May 29, 2012
Messages
39
Yeah the dealer who works on Tohatsu's here also does Mercury. And it is a small town where he is located at, but plenty of water around and plenty of commercial fisherman. Well i have talked the guy down $100. So i think it might be a done deal!!!
 

Sea Rider

Supreme Mariner
Joined
Sep 20, 2008
Messages
12,345
When buying second hand Tohatsu OB's for me that could turn into potential Pandora Boxes as won't know for sure how well previous owner mantained it, if flushed it regularly specially if worked on salt waters what usually like doing for my peace of mind and CC is :

Remove powerhead from base, remove water and exhaust covers, cylinder head, thermo. Remove carbon build ups on lower powerhead exhaust ports, piston heads, cylinder head, exhaust chamber and exhaust covers. Clean and smooth out all water passages, clean/replace internal anodes, trim tab. If thermo if in good shape clean it, if severely rusted install a new one. Clean all metal matting surfaces to be flat even, install new base, cylinder head and thermo gaskets.

Install new spark plugs. Check water pump liner and impeller condition. Service all carbs, check carb and timing advance synch, torque all bolts to factory specs. Once OB is running on muffs, barrel spray an overdose of Power Tuner, Carbon Remover through carbs throats to decarbon piston rings. Grease upper drive shaft ,prop shaft and swivel bracket.

This nice 140 OB is an interesting DIY project if sufficiently mechanically inclined...

Happy Boating
 

CaptDuck

Seaman Apprentice
Joined
May 29, 2012
Messages
39
Sea Rider... thanks for that to do list! It might be a little to much for a person like me. Who doesn’t know how to do some of that stuff. The smaller stuff like carbs, water pump and things like that I can handle. I would almost be afraid to take it apart and not be able to put it back together. Now I am not afraid to do it. Just wouldn’t want to mess anything else up.
I have already downloaded an owners manual and a service manual for the engine and have started reading about the procedure for the carb removal and rebuild as well as the water pump replacement procedure on this engine.
This I is a lot different from what I am used to being around. I am a Captain of a 100’ commercial fishing boat with a Caterpillar diesel engine and have had to do some work to it in the past. But always had the help of a mechanic there to guide me along.
but I would like to get the carbs, water pump, filters, plugs and lower unit oil changed as soon as I get it. Then install it on my boat and decarb and change anodes before the spring comes around for me here in Virginia
 

Sea Rider

Supreme Mariner
Joined
Sep 20, 2008
Messages
12,345
Is that a M140A or M140A2 version ? Was fresh or salt water used ? There's a visible while line formation seen on side of cylinder head on pic 8. will need to retorque head gasket and lateral exhaust gaskets back to specs to avoid corrosion of mating surfaces later if not addressed. Would advise to clean and polish if needed all bullet connectors and polish all electrical ground connectors to avoid electrical components failures and work spot on.


Happy Boating
 
Last edited:

CaptDuck

Seaman Apprentice
Joined
May 29, 2012
Messages
39
It is an M140A2. Thanks for pointing what i should do. Maybe i should just go ahaed and replace those gasket clean it up and re-torque to specs. I have a parts book for the engine. So i can get part numbers. And i have a service manual that i can refer to for the torque specs and sequence
 

Attachments

  • photo284478.jpg
    photo284478.jpg
    787.3 KB · Views: 0

Sea Rider

Supreme Mariner
Joined
Sep 20, 2008
Messages
12,345
It's important to know if OB was used on fresh or salt waters, if fresh all water passages will remain clean in comparison to salt water which will eventually reduce, narrow or clog water passages resulting for OB to work hotter as heated water passing through powerhead won't dissipate that fast as when all water paths are perfectly clean.

Generally speaking, gaskets can only be used once as are two sided coated gaskets that seals both mating surfaces once torqued to specs along heat when OB is put into operation. If plan replacing gsakets, go for new cylinder head, thermo and base gaskets, exhaust cover gasket is made of other material much thicker and solid, with care can be removed with a spatula, thin knife in one piece, cleaned and installed back. Old gsakets will be found dried, hardened so useless putting them back.

If going that route clean all visible water paths of the entire powerhead, it's a must do specially if salt water used. Anything you need to know, don't understand just ask. Love doing this type of restoration work.

Happy Boating
 

CaptDuck

Seaman Apprentice
Joined
May 29, 2012
Messages
39
sorry i have written in a while. I have been out at sea working. I am a commercial fisherman. I ordered up the parts today and should be here in a few days. I did start it up today and ran some fresh gas thru it. I was trying to figure out the wiring. Luckily i have the owners manual and service manual and was able to figure it all out!!!
 

Sea Rider

Supreme Mariner
Joined
Sep 20, 2008
Messages
12,345
It's an excellent idea to shoot pics of every component including electrical wiring before they are disassembled.

Happy Boating
 

CaptDuck

Seaman Apprentice
Joined
May 29, 2012
Messages
39
Yeah I have been taking pictures. They came in handy with the wiring. But all good now. Been cleaning all the electrical connections while I am waiting on parts. Luckily it is not nice enough to go boating yet! Want to get it all fixed up and mounted on my boat before the season starts.
 

CaptDuck

Seaman Apprentice
Joined
May 29, 2012
Messages
39
Well I got all the parts in. Just been real busy with work! I did clean the carbs already. Not that hard. Now I am trying to do the water pump. But I am problems getting the lower unit off. I took off all 6 bolts (3 on each side) then the plate underneath above the prop. But I do not see another bolt like it shows in the service manual. Now since it is a UL 25” motor do I also have to take off the 5 extension piece to get this lower unit off?
 

CaptDuck

Seaman Apprentice
Joined
May 29, 2012
Messages
39
I will look again. But I didn’t notice any other bolts. I will take some pictures later today. Maybe you guys will see something that I don’t
 

CaptDuck

Seaman Apprentice
Joined
May 29, 2012
Messages
39
Well I got the lower unit off. It doesn’t have a 7th bolt. Instead what it has is a stud that goes from the 5 inch UL (25” shaft)extension piece into the lower unit itself. It came off with the help of a BFH and a piece of 2x4. I discovered why it was overheating the other day when I took it out for a test spin. Part of the impeller broke and was lodged up in the water pipe! Glad I saw that. And glad I got the new pump on. Will take it out for a test spin hopefully tomorrow.
 

Attachments

  • photo291030.jpg
    photo291030.jpg
    250 KB · Views: 0
  • photo291031.jpg
    photo291031.jpg
    2 MB · Views: 0
  • photo291032.jpg
    photo291032.jpg
    2 MB · Views: 0
  • photo291033.jpg
    photo291033.jpg
    2 MB · Views: 0
  • photo291034.jpg
    photo291034.jpg
    2 MB · Views: 0
  • photo291035.jpg
    photo291035.jpg
    1.9 MB · Views: 0
  • photo291036.jpg
    photo291036.jpg
    1.2 MB · Views: 0
  • photo291037.jpg
    photo291037.jpg
    1.3 MB · Views: 0
Last edited:

Lightwin 3

Petty Officer 1st Class
Joined
May 18, 2010
Messages
300
Good eye catching that impeller piece!:D

If nothing else, I would "decarb"it with the product listed above.

Do it with the old spark plugs as the process tends to ruin them.
 
Top