


AstrongBoat22
Cadet
- Joined
- Jul 20, 2018
- Messages
- 20
Hey Boating Electricians,
Last summer I purchased a 1998 Chaparral 1930ss. I am in the process of installing a new Fusion MSra70 head unit and four kicker speakers. As of now, I have all of the speakers wired to the head unit harness (replaced all speaker wire with higher quality wire), but have not run new ground and power (+12v) wires. To power the radio, I will be adding a second battery (deep cycle). I was hoping someone could provide advice on the best way to wire the head unit to the new batteries while also installing the dual battery configuration. I have researched the Blue Seas system and think that will work for the dual battery configuration, but how do I incorporate the stereo power into the new battery setup? Will I simply just run the ground wire to the negative terminal on the deep cycle and the power wire to the + terminal, then add the dual battery system? Or do i need to go through some sort of grounding/circuit breaker to run the head unit power? I found a couple of distribution blocks during the install (i think that's what they are), but they are all connected to the current single battery configuration so i am not sure if i should be using them.
To test the head unit and speakers, I ran a quick connection straight from the ground wire and +12v wire to the single standing deep cycle battery (batteries are not connected yet). The speakers sound great. They are the KM6.5, which have incorporated LED lighting. I have also wired the LED lights to a remote and ran a quick connect to the deep cycle battery for testing.. they work great also. I am also seeking advice on how to incorporate the LED power to the new battery system.
I have plenty of 8 gauge wire to run the head unit ground and power wires. I have 16 gauge wire for LED power if i need it.
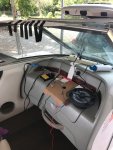
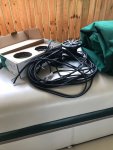
Below are random pictures I took during the first part of the install. They probably won't be all that helpful for my question..but I know people on here like pictures, so why not!

Poor man's soldering station.

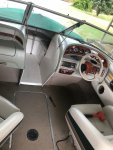
New boys installed (right cockpit)

Left cockpit
Last summer I purchased a 1998 Chaparral 1930ss. I am in the process of installing a new Fusion MSra70 head unit and four kicker speakers. As of now, I have all of the speakers wired to the head unit harness (replaced all speaker wire with higher quality wire), but have not run new ground and power (+12v) wires. To power the radio, I will be adding a second battery (deep cycle). I was hoping someone could provide advice on the best way to wire the head unit to the new batteries while also installing the dual battery configuration. I have researched the Blue Seas system and think that will work for the dual battery configuration, but how do I incorporate the stereo power into the new battery setup? Will I simply just run the ground wire to the negative terminal on the deep cycle and the power wire to the + terminal, then add the dual battery system? Or do i need to go through some sort of grounding/circuit breaker to run the head unit power? I found a couple of distribution blocks during the install (i think that's what they are), but they are all connected to the current single battery configuration so i am not sure if i should be using them.
To test the head unit and speakers, I ran a quick connection straight from the ground wire and +12v wire to the single standing deep cycle battery (batteries are not connected yet). The speakers sound great. They are the KM6.5, which have incorporated LED lighting. I have also wired the LED lights to a remote and ran a quick connect to the deep cycle battery for testing.. they work great also. I am also seeking advice on how to incorporate the LED power to the new battery system.
I have plenty of 8 gauge wire to run the head unit ground and power wires. I have 16 gauge wire for LED power if i need it.
Below are random pictures I took during the first part of the install. They probably won't be all that helpful for my question..but I know people on here like pictures, so why not!
Poor man's soldering station.
New boys installed (right cockpit)
Left cockpit
Attachments
-
 58110832020__A8D84B09-3CCB-4A3F-B579-ED0A32C9093F.JPG748.6 KB · Views: 1
 -
 58110832020__A8D84B09-3CCB-4A3F-B579-ED0A32C9093F.JPG748.6 KB · Views: 1
 -
 58110832020__A8D84B09-3CCB-4A3F-B579-ED0A32C9093F.JPG748.6 KB · Views: 1
 -
 58109946391__8C2B4A61-62A5-4109-9B25-32DB4DD599D2.JPG762.9 KB · Views: 1
 -
 58109946391__8C2B4A61-62A5-4109-9B25-32DB4DD599D2.JPG762.9 KB · Views: 2
 -
 58109905420__18D72B7E-FD8D-4705-8FF1-C8C7F04F8BFF.JPG628.6 KB · Views: 2
 -
 58109905420__18D72B7E-FD8D-4705-8FF1-C8C7F04F8BFF.JPG628.6 KB · Views: 1
 -
 58109905420__18D72B7E-FD8D-4705-8FF1-C8C7F04F8BFF.JPG628.6 KB · Views: 1