1977 Cruise Boats Restore

Status
Not open for further replies.
Joined
Aug 17, 2009
Messages
941
Re: 1977 Cruise Boats Restore

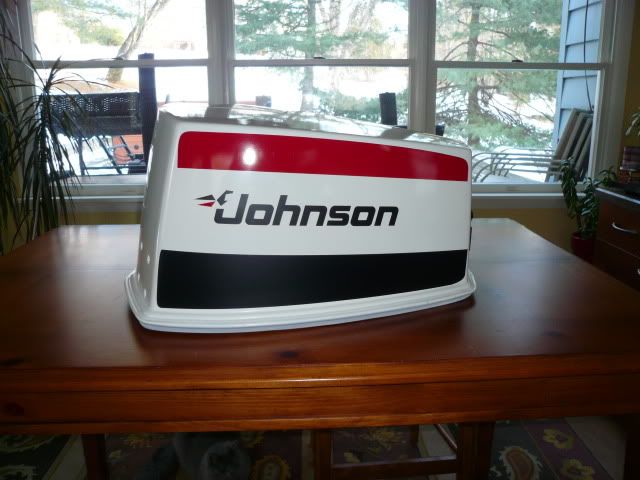
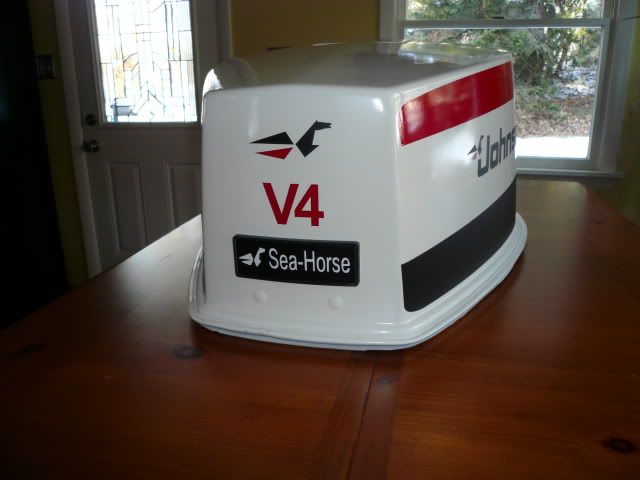
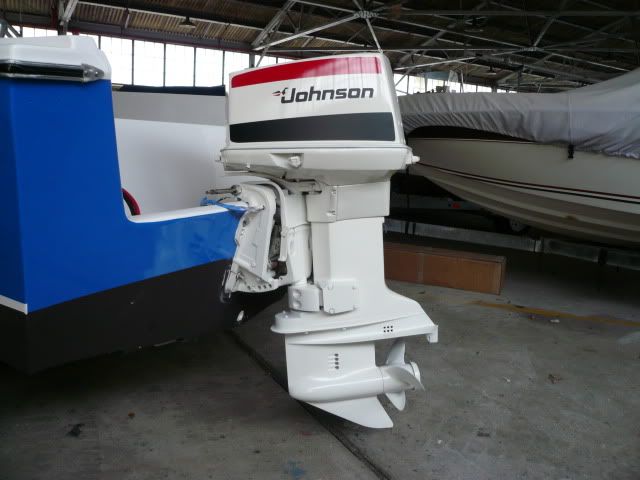
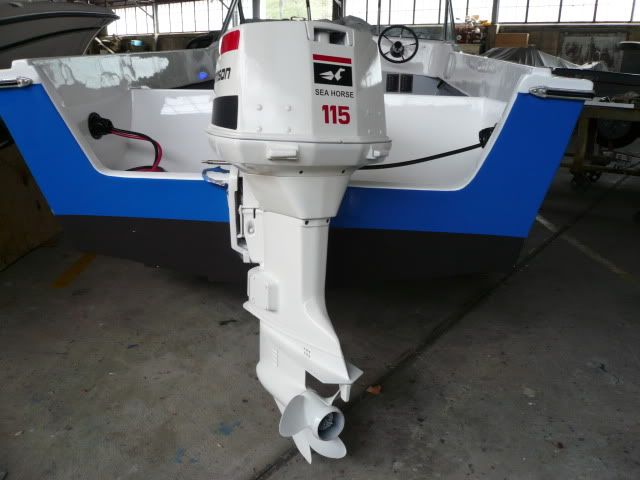
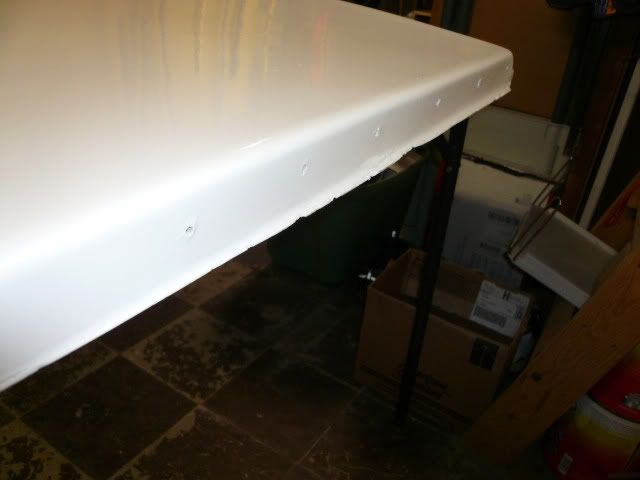
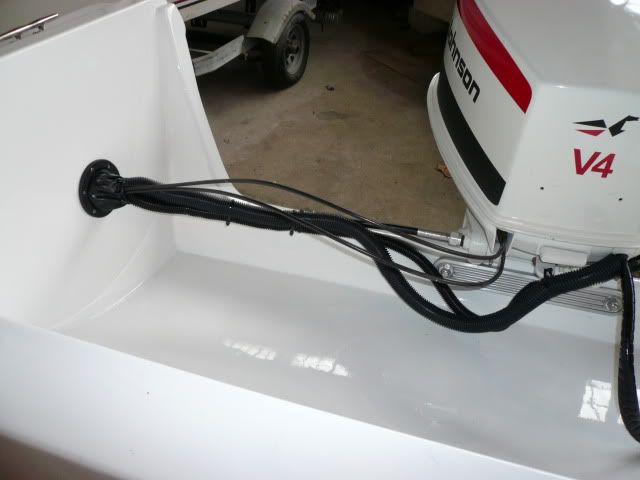
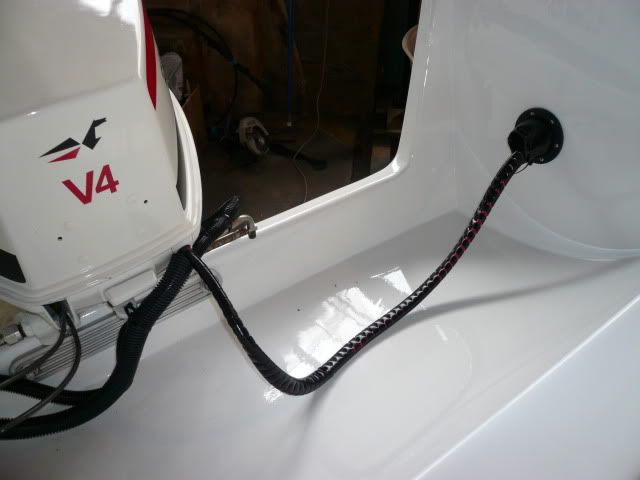
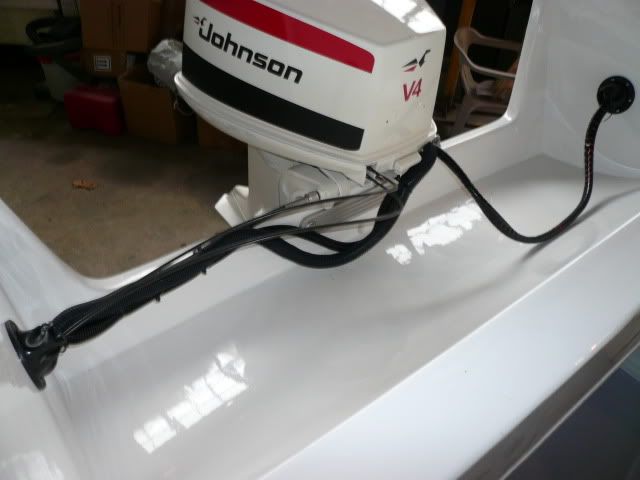
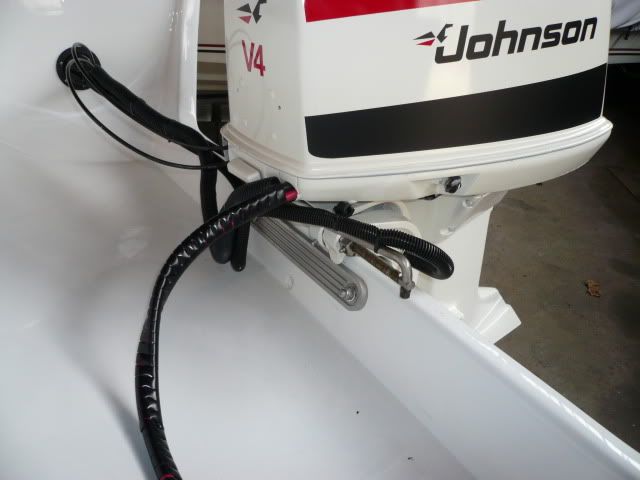
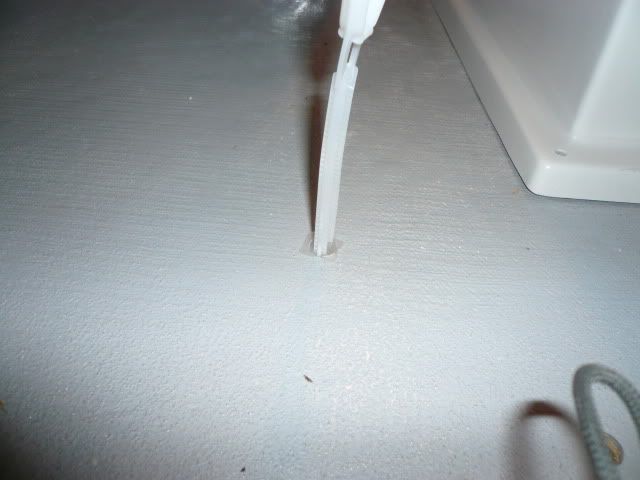
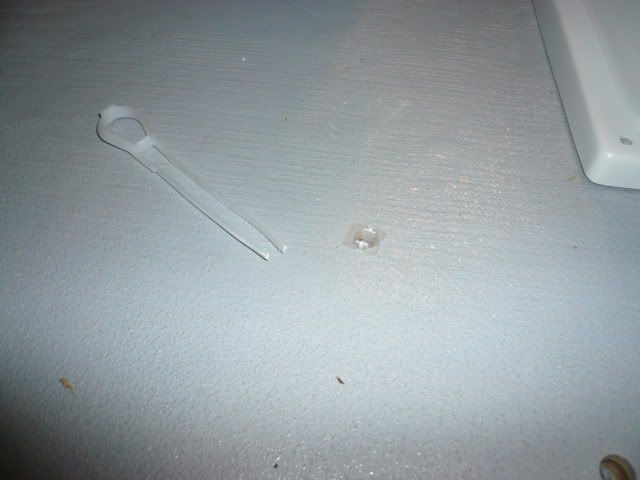
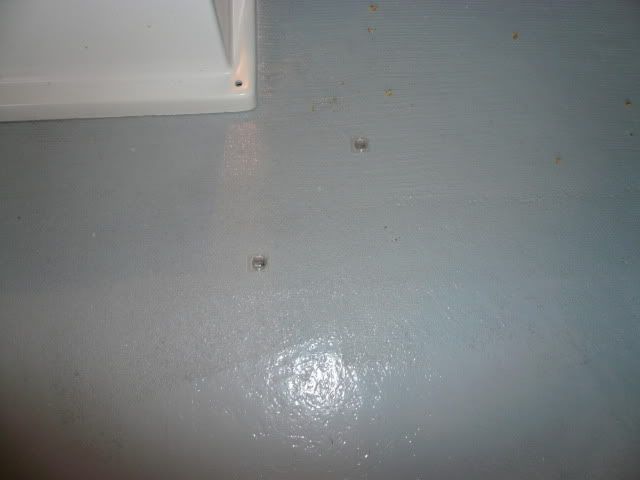
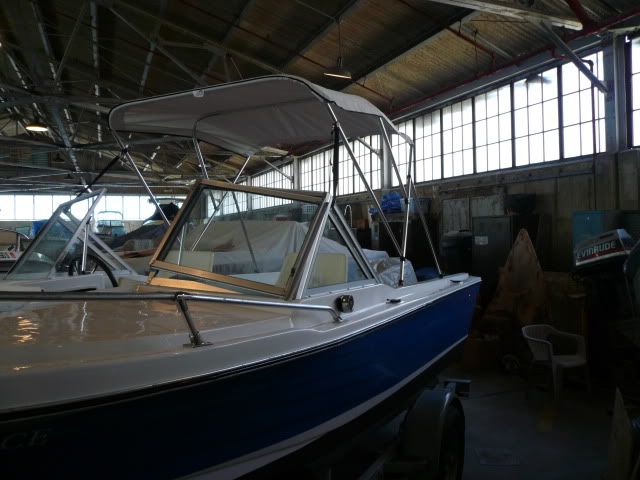
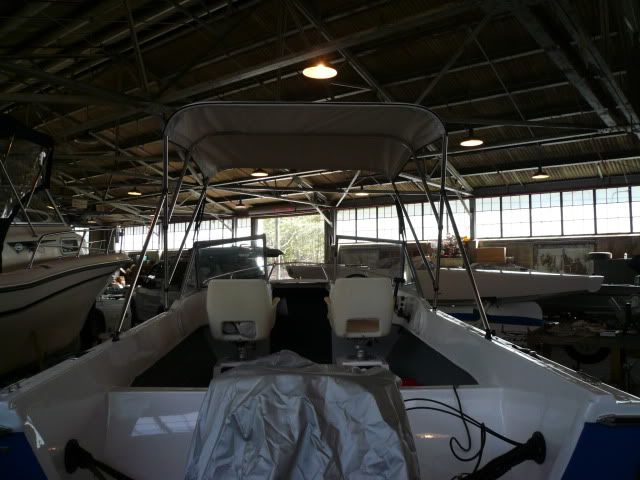
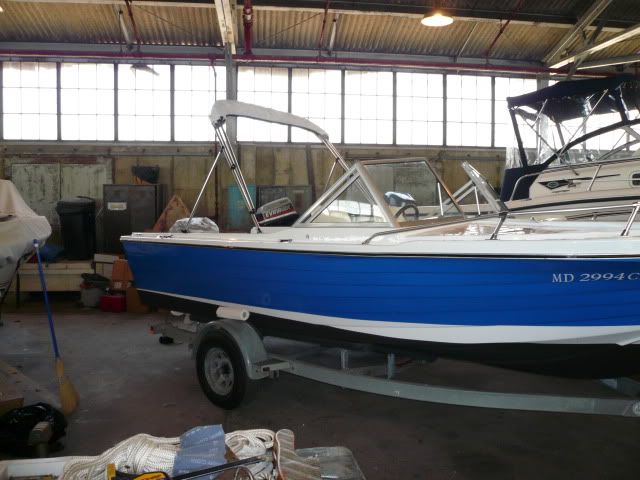
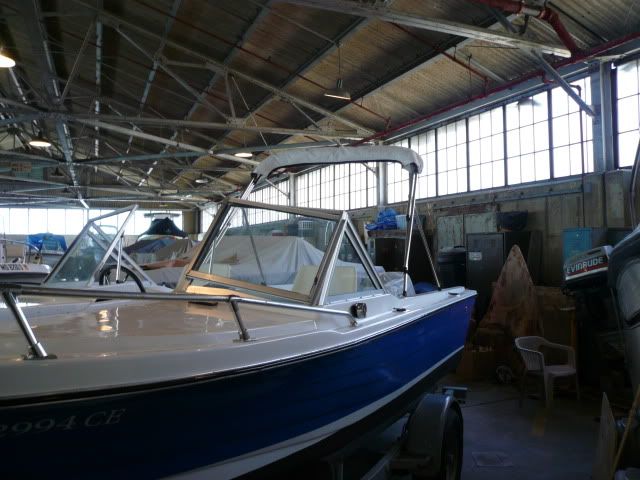
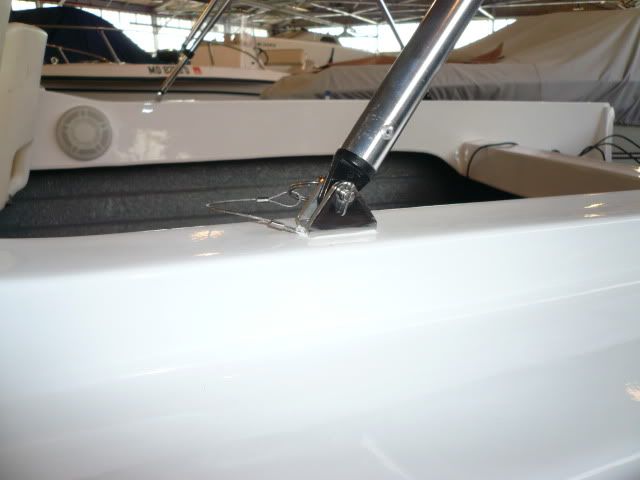
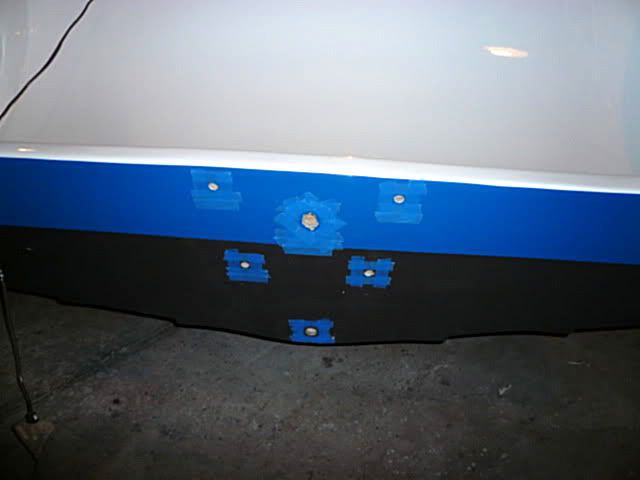
Next up is the mounting holes for the motor. In order to obtain the most accurate hole positioning, I decided to hang the motor on the transom and mark the hole placements. I first covered the area with a heavy grade builder?s paper. This helped protect the paint while I positioned the motor in place. I then hung the motor on the transom, aligned it to its proper position and then clamped it into place. I then marked the center location of the four bolt holes using a sharp punch. This allowed for easy centering of the drill bit afterwards.

P1020084.jpg


P1020087.jpg


P1020089.jpg


P1020090.jpg


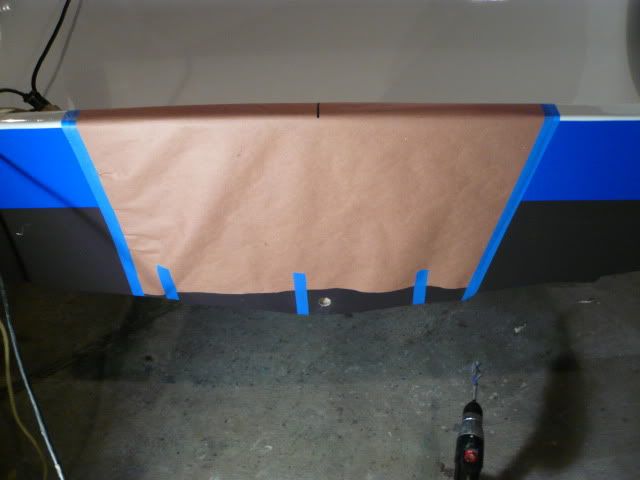
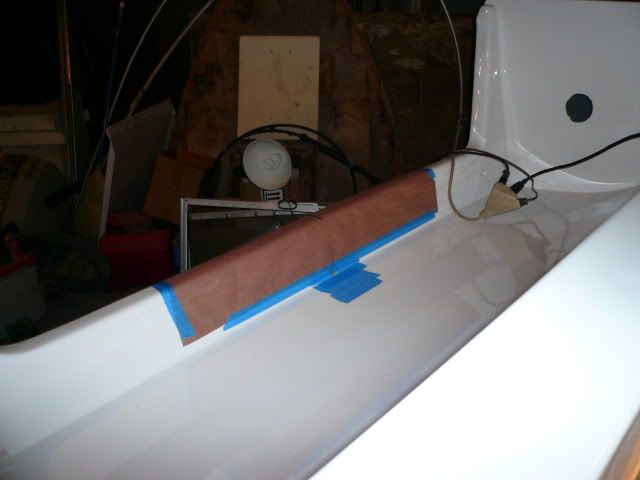
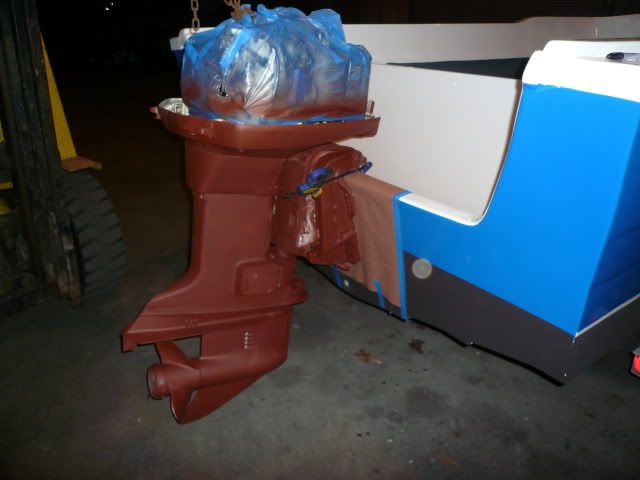
Once the holes where marked, I drilled them out making sure the drill bit stayed perpendicular to the transom. After that, I carefully taped off around each hole and mixed up a small batch of poly resin with ?? chopped strand. I then coated the insides of each hole with the resin mix to seal the wood and help slow down any future water intrusion.
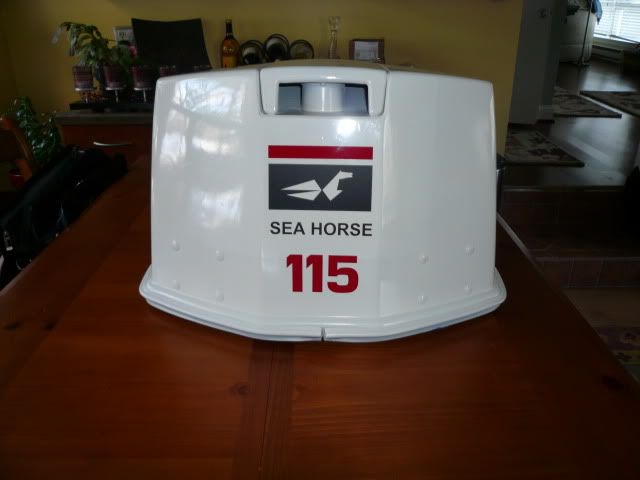
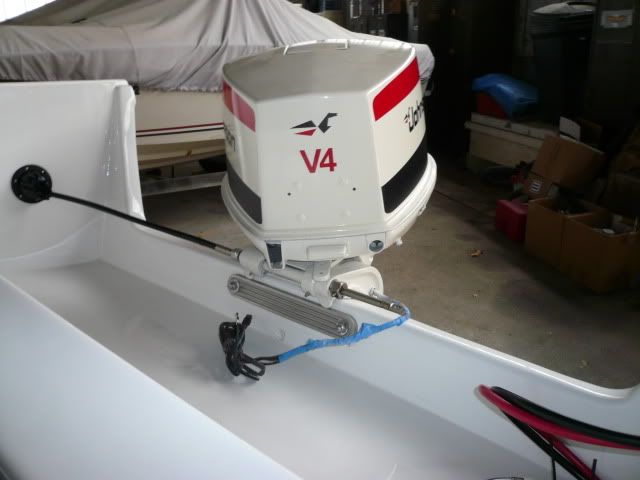
P1020099.jpg
 
Joined
Aug 17, 2009
Messages
941
Re: 1977 Cruise Boats Restore

Well winter sucks. Although we have missed several snow storms the temps won't warm up. Since working on the boat in the warehouse is tough because it is so cold I decided to bring home a few odd jobs to finish off. One was the engine cowling. In a previous post I decribed the repainting of the engine. When I repainted I got a small wrinkle on the back side of the cowl on the final coat...ggrrrrrr! So I touched up that spot and compounded the entire cowling to remove some slight over spray. I used a Meguars Ultimate Compound. This stuff worked very well. It was sort of between a polishing compound and a polish but it was a one step product that left a great smooth and even shine.

P1020359.jpg


P1020360.jpg


Now it was time to apply the new decals to finish this baby off. Here is the finished cowling ready to go back onto the motor. The decals turned out really nice. This thing looks brand new.

P1020370.jpg


P1020371.jpg


P1020373.jpg


P1020374.jpg
 
Joined
Aug 17, 2009
Messages
941
Re: 1977 Cruise Boats Restore

One of the other small jobs I brought home was the remote control. The remote was pretty beat up and the tilt/trim switch on the throttle level wasn't working correctly. Here it is before:

P1020100.jpg


P1020101.jpg


P1020102.jpg


I carefully disassembled the unit so that I could work on the separate halfs:

P1020103.jpg


Once I had the unit emptied, I sanded, primed and painted each half of the remote casing. Once that was done I reassembled the body of the remote. Looking nice and clean now.

P1020270.jpg


P1020269.jpg
 
Joined
Aug 17, 2009
Messages
941
Re: 1977 Cruise Boats Restore

Next part of the remote rebuild was to replace the tilt/trim switch and clean up the throttle handle. I ordered all new components for the throttle handle - five new pieces and I cleaned up and repainted the shift lock piece. One of the previous owners split the throttle handle apart, breaking it, to get to the tilt/trim switch. And then when he put it back together, he used sillycone. There was no way I could remove all of the sillycone in order to repair and repaint so that is why I obtained all new pieces. Here are the side by side comparision shots:

New outer plastic throttle handle w/new TnT switch and OMC placard (on right):
P1020352.jpg


New metal throttle handle body, painted black, w/new top piece and painted shift lock lever (on left):
P1020354.jpg


Final throttle handle assembly:
P1020355.jpg


And then the final remote assembled and ready to go:
P1020361.jpg


P1020362.jpg
 
Joined
Aug 17, 2009
Messages
941
Re: 1977 Cruise Boats Restore

I didn't do a complete disassembly and repaint. I was just looking to freshen up the overall appearance. Here is a rundown on what I did:

1. Cleaned the entire motor to remove wax, grease, grime and oil from the outside.
2. Wire wheeled the metal parts to remove any loose or flanking paint.
3. Sanded the surface to smooth out any rough spots and scuff the surface. I had some rusty parts like the steering leg that I really couldn't get to so I did the best I could to remove as much rust and scale as possible.
4. I taped off electrical, grease and fuel fittings. I also completely covered the powerhead to prevent overspray from getting on anything.
5. I applied two coats of Rustoleum metal primer (red). There was very little bare aluminum showing so I didn't use any zinc chromate primer. This primer also can be used on rusty metal (steering leg). I sanded lightly between coats of primer and after the final coat.
6. I then applied 2-3 coats of the Moeller Marine's Johnson/Evinrude Engine Paint. This paint forms a thick coating (almost plastic like) so go easy with it when applying, and definitely apply light tack coats first to control running and checking. I sanded lightly between coats but this particular paint doesn't sand very easily. No sanding on final coat. It will buff out fairly nice if you decide to do that.

The engine cowling is fiberglass so you know how to handle that.

Most of this stuff you already know but I hope this was helpful.
 
Last edited by a moderator:
Joined
Aug 17, 2009
Messages
941
Re: 1977 Cruise Boats Restore

Well even though we got 6'" of new snow last night, I was able to get down to the boat this weekend and get some things accomplished. First thing I wanted to do was finish up the electrical installation. I got the bilge pump installed and wired.

P1020381.jpg


I also got the new stereo and passenger grab bar installed.

P1020380.jpg


P1020388.jpg


Once all the wiring was completed I installed covers to protect the back sides of the switch panels and make everything look nice.

P1020378.jpg


P1020384.jpg
 
Last edited:
Joined
Aug 17, 2009
Messages
941
Re: 1977 Cruise Boats Restore

The next thing on the list was to install the steering wheel and bezel.

P1020387.jpg


And then finally the speakers. Everything sounds great!

P1020385.jpg


P1020386.jpg


Next step is to install the seat boxes and seats and hang the motor. I am getting near the end. I can't wait to splash this baby! Come on spring!
 
Joined
Aug 17, 2009
Messages
941
Re: 1977 Cruise Boats Restore

I was able to get little more done this past weekend. First thing was to get the motor put back on the transom. That was straight forward with a little help from a friend of mine.

P1020390.jpg


P1020391.jpg


P1020392.jpg
 
Joined
Aug 17, 2009
Messages
941
Re: 1977 Cruise Boats Restore

Next thing on my list was to fix and install the front sliding deck hatch. When the hatch was originally molded it had a flange running down each side. That flange ran underneath two strips of aluminmum that held the hatch in place while allowing it to slide forward an back. Those finerglass flanges were completly worn down so I had a friend make up some new flanges out of thin stainless steel. I then riveted those to the sides of the hatch thus creating new flanges.

Here is the original condition. You can see the worn down flanges.

P1020365.jpg


P1020366.jpg


Here are the new stainless flanges.

P1020364.jpg


P1020363.jpg


And then drilled, cleaned and painted.

P1020375.jpg
 
Last edited:
Joined
Aug 17, 2009
Messages
941
Re: 1977 Cruise Boats Restore

Next I ground down the old remaining fiberglass flange and installed the new stainless flanges with stainless pop rivets.

P1020376.jpg


P1020377.jpg


And then a final coat of paint to cover the rivets.

P1020394.jpg


P1020395.jpg
 
Joined
Aug 17, 2009
Messages
941
Re: 1977 Cruise Boats Restore

Now that the hatch was ready to install I needed to take some measurements and prep the top deck. When the hatch is installed two aluminum strips will hold down the flange to keep the hatch in place while allowing it to slide. The original strips were looking pretty ratty so I picked some flat aluminum stock to replace it with. I put the hatch in place and attached the new strips for final assembly. Looks good and works well.

P1020399.jpg


P1020398.jpg


Hatch open.

P1020397.jpg


Hatch closed.

P1020400.jpg
 
Joined
Aug 17, 2009
Messages
941
Re: 1977 Cruise Boats Restore

Really nice work! How did you prep the stainless for the paint?

Thanks Arch. I just scuffed the surface well with a fine grit 3M sanding pad, cleaned with acetone, primed with Rustoleum metel primer and then top coated with Rustoleum Professional Enamel (White). I thought about leaving it plain but then thought it would look a little better blended in with the rest of the hatch.
 
Joined
Aug 17, 2009
Messages
941
Re: 1977 Cruise Boats Restore

Okay boys and girls, I can definitely see the light at the end of the tunnel. Next on the list of things to do is install the remote control and run the control cables and wiring. I kept the old mounting holes since they seemed to be in the proper location. I decided to run the cables and wiring through the gunwale rather than down and underneath it. I think this makes for a cleaner look. I used split loom cable covering to line the hole and finish it off.

P1020402.jpg


I connected up the main wiring harness, the throttles cables and the tilt and trim wires. I then carefully bundled and mounted all the cables and wires up under the gunwale. Once that was complete, I covered all of the exposed wires with split loom to protect them and make a cleaner look. For the battery cables I used a cable wrapping to tidy them up.

P1020403.jpg


P1020404.jpg


P1020405.jpg


P1020406.jpg


I know that the throttle cables are a little short but they work just fine. That will be a future upgrade.
 
Joined
Aug 17, 2009
Messages
941
Re: 1977 Cruise Boats Restore

The next project on the list was the seats. I picked up two new fiberglass seat boxes off e-bay and two nice rotomolded captain?s chairs w/pedestals from a guy on Craig's List. So the first order of business was to measure the required seat heights and cut down the pedestal mounts.

Mounts cut.

P1020407.jpg


Then I clean and polished them up.

P1020409.jpg


Next I located the seat boxes and mark the mounting holes.

P1020408.jpg


I then attached/ through bolted the pedestals to the seat boxes with SS machine screws and lock nuts. Everything was fully sealed w/3M 4000 caulk.

P1020413.jpg
 
Joined
Aug 17, 2009
Messages
941
Re: 1977 Cruise Boats Restore

The next step in the seat install was to position and attach the boxes to the floor.
P1020421.jpg


Once screwed in place, I then sealed them to the floor with some 3M 4000 culking. All screw penetrations into the deck were also well sealed.

P1020422.jpg


P1020423.jpg


P1020424.jpg
 
Joined
Aug 17, 2009
Messages
941
Re: 1977 Cruise Boats Restore

And finally the seats themselves. I picked up these two roto-molded seats from a guy on CL. They are a little old but the seats themselves are still in good nick. The seat spyders are not. Both spyders had frozen tensoners, so I replaced one of them with an older sliding spyder bracket that a friend of mine gave me. Only problem was the release lever for the slide had snapped off. No problem. After disassembly to see what was what, I fashoned one out of an old SS bolt. Put it back together and it works just fine.
P1020410.jpg


P1020412.jpg


I ordered a new sliding base for the other one. As soon as it comes in, I will swap it out with a the old one. Here is the final product. It turned out well.

P1020427.jpg


P1020425.jpg


P1020426.jpg
 
Joined
Aug 17, 2009
Messages
941
I will be using "Toggler" toggle bolts to attach the seat boxes to the deck. Each seat box has six monting holes. The three holes closest to the center of the boat will have the toggle bolts and the other three will have large SS screws into the wood deck. The reason I did it this way was because I wasn't sure how much room was under the deck out towards the sides of the boat and I didn't know if there was going to be enough room in those areas to get the toogle piece under it without hitting the hull bottom. (Come to find out I probably could have used the tooglers all around.)

Here is what the Toggler looks like for those that have never seen one.

P1020417.jpg


Here is how they work. Drill a 1/2" hole. Insert the toogle bolt and while appling upward pressure slide down the retaining collar to the surface. It is sort of like a zip tie in that it keeps the toggle portion firmly in place under the deck.

P1020418.jpg


Then you simply snap off the remaining piece leaving just the collar holding the toggle plate. Very neat and easy.

P1020419.jpg


P1020415.jpg


You can then fill these holes with sealant right before you insert the screws so that everything is protected from water.

They make those togglers out of stainless steel specifically for this purpose (marine stores sell them) but they are OUTRAGEOUSLY expensive (like two for $16.00). I used regular steel ones and bought them at Home Desperate (six for $8.00). I figure I will get years out of them and if they rust, so what. I'll wrench out the screw and punch them through. Load in a new one.
 
Joined
Aug 17, 2009
Messages
941
Re: 1977 Cruise Boats Restore

Well I am getting near the end now. The next thing on the agenda was to install a tachometer in the dash. I first removed the sterring wheel and located the tach on the dash in a position where I had enough clearance behind it to fully seat it in. I then cut out a 3" hole for the the tach. I also purchased a prefabricated wiring harness for the tach. It plugs into the Johnson remote control so super easy to install. I ran the wires behind the dash and connected everything up. Slipped in the tach and secured it in place. Turned out nice.

This is the harness pig tail for the tach.

P1020428.jpg


The hole with wires connected.

P1020429.jpg


And the finished product.

P1020430.jpg


P1020431.jpg


P1020432.jpg
 
Joined
Aug 17, 2009
Messages
941
Re: 1977 Cruise Boats Restore

Next thing I did was install stainless steel rods holders. I used existing holes from previous rods holders that were installed. I just had to elongate the holes a little.

P1020433.jpg


P1020434.jpg


Notice that I caulked the top of the rub rail with some 3M 4000 (UV) sealant.
 
Joined
Aug 17, 2009
Messages
941
Re: 1977 Cruise Boats Restore

And finally I installed a new bimini top. I purchased this top off e-bay. It is fairly well made but the fabric is light. Plenty to keep the sun off you though. The poles are double walled 1" diameter aluminum and are very solid. This kit came with a storage boot and support poles as well. It went on fairly easily but you do need an exttra set of hands to help you.

P1020440.jpg


P1020441.jpg


P1020442.jpg


Here it is closed up with the boot on.

P1020439.jpg


P1020438.jpg


I replaced the cheaper nylon mounts that came with the kit with these stainless steel ones. These will hold up much better especially when the bimini is off of the boat.

P1020437.jpg
 
Status
Not open for further replies.
Top