1992 WellCraft Excel

Status
Not open for further replies.

92excel

Chief Petty Officer
Joined
Oct 6, 2008
Messages
477
Re: 1992 WellCraft Excel

The pieces were all removed and taken outside and coated with resin including the edges. After the resin got to soak into the ply for about an hour, csm was applied to the underside of the new deck boards.

P2040001.jpg


The ski locker got anoter piece of ply laminated to it for extra under deck support. That new piece was also treated with resin and csm.

P2050011.jpg
 

92excel

Chief Petty Officer
Joined
Oct 6, 2008
Messages
477
Re: 1992 WellCraft Excel

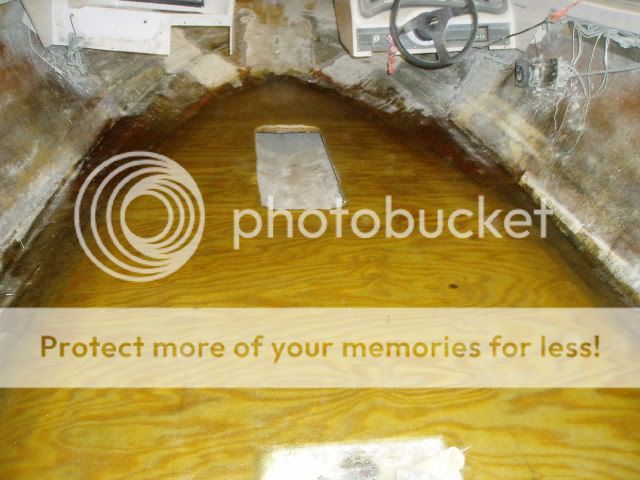
The Entire hull was swept,vacuumed,and acetoned a few times to remove all the dust from the hull so that the deck can be installed. The gas tank was installed and stabalized in place with some extra treated ply.

Deck Installation:
I installed the deck by laying a bead of PL down on the stringers and bulkheads and then laying the deck boards in place. Each Screw was pre-drilled and the holes were filled with 5200. The SS screws were coated with 5200 and then were screwed into the pre-drilled hole.

P2070004.jpg


The Gap between the new deck and the hull has be filled with some bedding material. I chose to use PL. It was layed down and smoothed out with a plastic spatula. This will bond the deck to the hull making it one as well as give you a smooth area to glass.

P2110002.jpg
 

92excel

Chief Petty Officer
Joined
Oct 6, 2008
Messages
477
Re: 1992 WellCraft Excel

Once the between hull and deck bedding material is fully cured it is time to tab the deck to the hull

I then swept and shop vacced the entire deck and hull area and then acitoned it. I put down a strip of resin on the ply to soak in and let that sit for about 30 minutes. While it was curing i cut the biax into 2 foot long strips 8 inches wide. I used 16 of them to tab the deck. I cut them so that the stitching ran parallel to the hull deck joint.

P2110010.jpg


P2110008.jpg
 

92excel

Chief Petty Officer
Joined
Oct 6, 2008
Messages
477
Re: 1992 WellCraft Excel

The Tabbing was grinded out a little to feather out the transition from the glass to the deck. CSM was cut to cover the deck

P2120001.jpg


the deck now has a complete layer of csm over the entire area and overlapping the the tabbing from yesterday..

P2120002.jpg


P2120003.jpg
 

92excel

Chief Petty Officer
Joined
Oct 6, 2008
Messages
477
Re: 1992 WellCraft Excel

The Deck was completely scruffed up and then vaccumed and acitoned. this was done to remove any high spots that might have been. The next step will be to apply another layer of csm directly followed by 8oz cloth for a smooth finish.

here is the cloth:
P3170003.jpg


This stuff is very thin and easy to stretch so you have to be patient and take your time, but it wets out very easy and there are hardy any bubbles to work out during your lay up.

Here is a close up of the deck..
P3170004.jpg


The deck now has 2 layers of 1.5 oz csm and one 8 oz cloth.. total is 11 ozs

P3170001.jpg
 

92excel

Chief Petty Officer
Joined
Oct 6, 2008
Messages
477
Re: 1992 WellCraft Excel

The next step is to begin building back the interior. This is where the measurements that we took before gutting come into play.

I built all the bow area seating and storage. This includes the supports for the consoles. The consoles now line up and window shuts again.

P3280022.jpg


P3280024.jpg


As you can see in the above and below photo, I painted the ski locker and bilge area with Billge Kote.. that stuff is nice and thick and leaves the work looking nice and finished..

P3280021.jpg
 

92excel

Chief Petty Officer
Joined
Oct 6, 2008
Messages
477
Re: 1992 WellCraft Excel

The new bow area seating will need to be wrapped with csm and then followed by 8 oz cloth.. so they will have the same waterproofing as the deck.

P3300025.jpg


P3310026.jpg
 

92excel

Chief Petty Officer
Joined
Oct 6, 2008
Messages
477
Re: 1992 WellCraft Excel

The next step for me was to get ready to drop the engine back into the boat. I drilled the transom holes for the transom shield and the drain plug.
I had to make sure that the 6 holes were all perfectly parallel to each other and perfectly perpendicular to the transom. They sell a "special tool" to do this but instead i built a a rig to keep the drill perpendicular to the transom and keep the drill from shifting left and right. It worked perfectly.

P4020037.jpg


I test fit the transom shield and pefect fit. So i removed the shield and coated all the new holes with resin low kick style to soak into the transom wood. Then i drilled out the drain plug.

P4020030.jpg


Then i drilled a drain groove into the bottom of the transom opening as you can see in the photo below. I Filed it out so this will prevent water from sitting on the bottom of the transom opening. this wasnt there before and this is one of the more rotted transom areas so i think it will work great. i second coated the entire bilge area.

P4020031.jpg
 

92excel

Chief Petty Officer
Joined
Oct 6, 2008
Messages
477
Re: 1992 WellCraft Excel

Engine Installation:

I installed the transom shield, drive pump, bilge pump and switch. The transom shield bolts were coated with 5200

P4030038.jpg


Then i got the engine and engine hoist all ready to go to drop the engine in. It was suggested to build the stern area seating before the engine was put in. but After analyzing the situation, i decided to hold off on building up that area until after the engine is in place. Why? ill explain.. since i am doing this in my garage with a low ceiling i have to use a very short chain to get the engine high enough to clear the boat and this length of chain will not allow me to set her down in the bildge. So i have to set her on some wood blocking on the deck and adjust the chain length and then drop her into the bilge area.

short chain
P4030041.jpg


longer chain
P4030042.jpg


Another iboats user, Don S, helped me figuring out how to align the engine. The differential between the tabs you see below must be with in about 1/16th of an inch from each other..

P4030044.jpg
 

92excel

Chief Petty Officer
Joined
Oct 6, 2008
Messages
477
Re: 1992 WellCraft Excel

I replaced both bellows. The Stern Drive was put on.
The engine got its final allignment and the the lag bolts were installed.
I hooked up all the wiring and installed the battery box and battery.

P4110061.jpg


P4120063.jpg
 

92excel

Chief Petty Officer
Joined
Oct 6, 2008
Messages
477
Re: 1992 WellCraft Excel

Now that the engine is in place, the next step is to built the stern area seating and storage. The four main support pieces were cut, sealed and glassed into place.

P4060054.jpg
 

92excel

Chief Petty Officer
Joined
Oct 6, 2008
Messages
477
Re: 1992 WellCraft Excel

The back rest support was added to the main supports.
This was sealed and tabbed into place.

P4080056.jpg
 

92excel

Chief Petty Officer
Joined
Oct 6, 2008
Messages
477
Re: 1992 WellCraft Excel

Before the middle section was attached to the the two side. I built the middle section of the stern seating area to be removable to allow easier access to the engine.

P4080057.jpg


And a shot with the dog house..

P4080058.jpg
 

92excel

Chief Petty Officer
Joined
Oct 6, 2008
Messages
477
Re: 1992 WellCraft Excel

I built the hatch to my ski locker. It was sealed with resin and will get csm and cloth to match the deck.

P4070055.jpg


I built the new supports for the back to back loungers. They were sealed with resin and wrapped with csm.

P4010028.jpg
 

92excel

Chief Petty Officer
Joined
Oct 6, 2008
Messages
477
Re: 1992 WellCraft Excel

Painting the Interior and Deck:

The Bow and stern area were painted with a rustoleum white.

P4080059.jpg
 

92excel

Chief Petty Officer
Joined
Oct 6, 2008
Messages
477
Re: 1992 WellCraft Excel

For the deck primer, I used Interlux Pre Kote

P4120068.jpg


about half way there..

P4120064.jpg


all done for the primer

P4120065.jpg
 

92excel

Chief Petty Officer
Joined
Oct 6, 2008
Messages
477
Re: 1992 WellCraft Excel

This is the second coat. First coat of the Off White. The seating area sides are smooth and the deck got grit for the anti slip.

I dont know why this pic looks purple but it is off white color paint.

P4140075.jpg


P4140074.jpg


P4120069.jpg
 

92excel

Chief Petty Officer
Joined
Oct 6, 2008
Messages
477
Re: 1992 WellCraft Excel

Re-install the interior:

I installed all of the bow area seating
P4210011.jpg


I got the smoke grey carpet installed on the hull sides

P4210008.jpg


I got the radio installed. I was going to put it in the glove box but i didnt have the depth and i didnt want to cut out the back of the glove box. It has a detach face for security.

P4210014.jpg


I have the 6 X 9 Speakers installed and wired under the stern area seating

P4210013.jpg
 

92excel

Chief Petty Officer
Joined
Oct 6, 2008
Messages
477
Re: 1992 WellCraft Excel

I chose to replace the the controller and the control cables while I had easy access to do it. Here is the new controller.. swapped out perfectly for the old one.

P4230020.jpg


The rest of the interior was installed

P4230022.jpg


P4230019.jpg


P4230018.jpg
 
Status
Not open for further replies.
Top