Lund Nisswa Restoration

Status
Not open for further replies.

ondarvr

Supreme Mariner
Joined
Apr 6, 2005
Messages
11,527
Re: Lund Nisswa Restoration

It won't make a difference, you'll be glassing the inside any way, all you may need to do is touch up the outside later.
 

lundnisswa

Petty Officer 1st Class
Joined
Mar 2, 2008
Messages
245
Re: Lund Nisswa Restoration

That hole happens to be directly under where a bulkhead will be placed, do I need to put a patch on there prior to bedding in the bulkhead? Or is there a better way to handle this small hole?

Yes I have 4 tubes of the 5200 sealant as well, what am I gonna do with all of it? My plan was/is to use it to glue the floor to the tops of the stringers, my goal is to use alot less screws than I took out.

Off to grind some more today.
Lund
 

lundnisswa

Petty Officer 1st Class
Joined
Mar 2, 2008
Messages
245
Re: Lund Nisswa Restoration

Two Questions for you guys;
1.) The original Transom is hour glass shaped, it was "not" Glassed to the hull sides. It was glassed on the bottom of the hull. When I cut out the new Transom Should I extend the ends to meet the side of the hull to apply glass from Transom to side of hull? There will be a void at the outer edges of the transom that would be filled with foam, this is because the shape of the Transom, it is not flat all the way across, just the mid 2/3 are flat glass, the outer 1/3 is formed/concaved.


2.) The boat sitting on the Bunk trailer right now is like a noodle when I shake it. How do I go about ensuring the boat hull is True before reassembly, when I look at everything looks straight, but that is just by eyeballing it.

Thanks for any inputs;
Marine Ply came in, Nice Stuff! Maybe Overkill/makes me feel good.
She is going back together, Hell or High Water.......


Lund
 
Last edited:

ondarvr

Supreme Mariner
Joined
Apr 6, 2005
Messages
11,527
Re: Lund Nisswa Restoration

You should put a small patch over the inside where you sanded through, but it doesn't need to be very big.

You do need to get the hull straight before going any further, but don't expect it to be Symmetrical, the dimentions may be off by an inch or two.
The wetted surface is the most important part, but the deck still needs to fit back on, so measure it as you go also.
 

erikgreen

Captain
Joined
Jan 8, 2007
Messages
3,105
Re: Lund Nisswa Restoration

Cannot Post any Pictures today for some reason, comes back with invalid format;

Anyway

Two Questions for you guys;
1.) The original Transom is hour glass shaped, it was "not" Glassed to the hull sides. It was glassed on the bottom of the hull. When I cut out the new Transom Should I extend the ends to meet the side of the hull to apply glass from Transom to side of hull? There will be a void at the outer edges of the transom that would be filled with foam, this is because the shape of the Transom, it is not flat all the way across, just the mid 2/3 are flat glass, the outer 1/3 is formed/concaved.

**See Post #63/#61 for visual reference since I couldn't upload Pix today.


2.) The boat sitting on the Bunk trailer right now is like a noodle when I shake it. How do I go about ensuring the boat hull is True before reassembly, when I look at everything looks straight, but that is just by eyeballing it.

Thanks for any inputs;
Marine Ply came in, Nice Stuff! Maybe Overkill/makes me feel good.
She is going back together, Hell or High Water.......
1 May is goal- We'll See!

Lund Nisswa


1) I'd get it as close to the sides as you can comfortably. When I've done a transom I've cut it close, then puttied (peanut butter) the sides to fill in. I'm guessing your boat it's optional since the original design didn't have it, so you don't NEED to do it, strictly speaking.


2) The technique for checking straightness is as follows:

a. Take a non-stretchable piece of string or twine to the boat, about the same length as the hull.

b. Choose a reference point in the back corners of the hull.. the edge of the top cap or gunwale works well. You'll be using a pair of points on port and starboard corners.

c. Attach/hold one end of the string to the corner, then run the string across the hull to the other gunwale, in a diagonal forward, about to the point the hull starts to narrow to the bow. This is gonna roughly divide your hull interior in two pieces.

d. Pull the string tight and mark with a piece of tape or sharpie on the string where it met the gunwale.

e. Repeat for the other side. If the two measured distances are the same, then your hull is straight. If one is longer than the other then the hull is twisted toward the forward endpoint of the line you measured.

Here's a crude pic:

twist.png


The top hull is ok, because the red and green lines are the same length.

The bottom hull is twisted, so the red line is longer than the green.

Note that all boats are asymmetric to some degree, so I wouldn't worry about it if it's only a couple millimeters....

Erik
 

erikgreen

Captain
Joined
Jan 8, 2007
Messages
3,105
Re: Lund Nisswa Restoration

Forgot to mention... don't worry about the hole, it happens. I'd recommend you grind out a dished spot around it about an inch on all sides, put some peanut butter in the hole itself, then cover with 2-3 layers of progressively larger glass scraps, epoxied in. Do this whenever.

Finish off with a backfill from the outside... you can use a piece of plastic over whatever patching material you use (marine-tex?) to fair the plug.

I've currently got three tiny holes in my hull to fix... power tools go through fiberglass really quick... then there's those two through-hulls I don't need any more...
 

lundnisswa

Petty Officer 1st Class
Joined
Mar 2, 2008
Messages
245
Re: Lund Nisswa Restoration

Erik, Ondarvr
Now that was some great feed back.

1st- Erik, I performed the string measurement just for the fun of it, and one side is longer than the other by 3/16".

2nd- Ondarvr, trying to comprehend your intent;

- "Get the running surface taken care of first, then put the stringers in"
-- How do I get the running surface taken care of, what do you mean?

- "But keep in mind the deck needs to fit in place, so measure the deck and top of the hull during the process".
-- I just dont get it, this is a 3 piece 8 foot lower deck about six feet wide and tapering (outsides are glassed in and a mid removable fuel Tank center section). I understand that once the stringers are in and as square as can be that the deck pieces should be somewhat symetrical and close to the same size, but I was thinking they are sort of gonna be a "Cut to Fit situation".


- "The side walls of the hull will be somewhat flexible and you can move them into place, so the deck will fit even if the measurement aren't perfect."
-- If you are refferring to Eriks X-Dimension that I measured as 3/16" off here I assume, that is what I was thinking is the flex would allow for correction of this, and to pay particular attention while attaching the deck to the sides of hull with glass.

- "If the running surface is crooked, hooked or has some rocker in it, it can mess up the performance, that's why time needs to be spent on getting it right."
-- This is exactly why I want to get it right, the boat does over 40mph, do not want it porpoising or weaving.

So many questions I always seem to have, but "No One" around here builds boats, thank goodness for this Forum!

Lund

Darn it, work is getting in my way of boat building again, gotta go.
 
Last edited:

lundnisswa

Petty Officer 1st Class
Joined
Mar 2, 2008
Messages
245
Re: Lund Nisswa Restoration

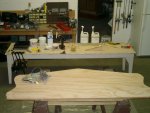
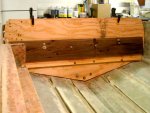
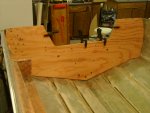
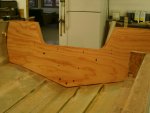
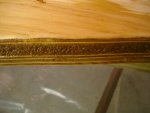
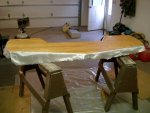
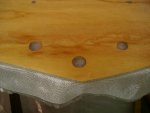
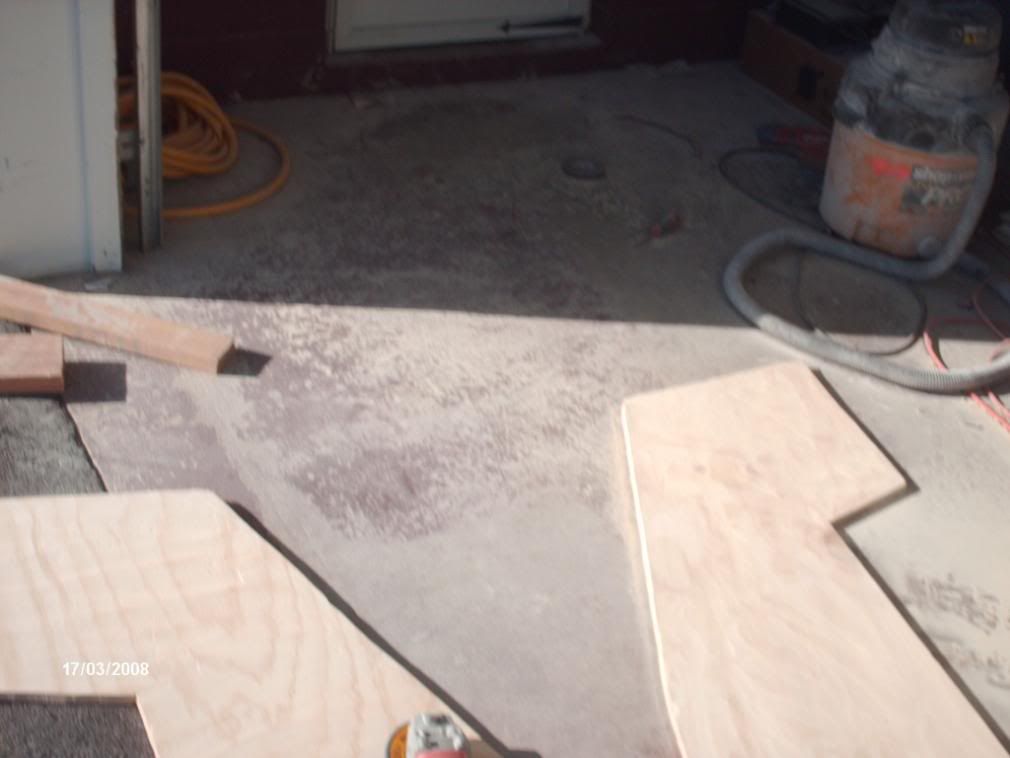
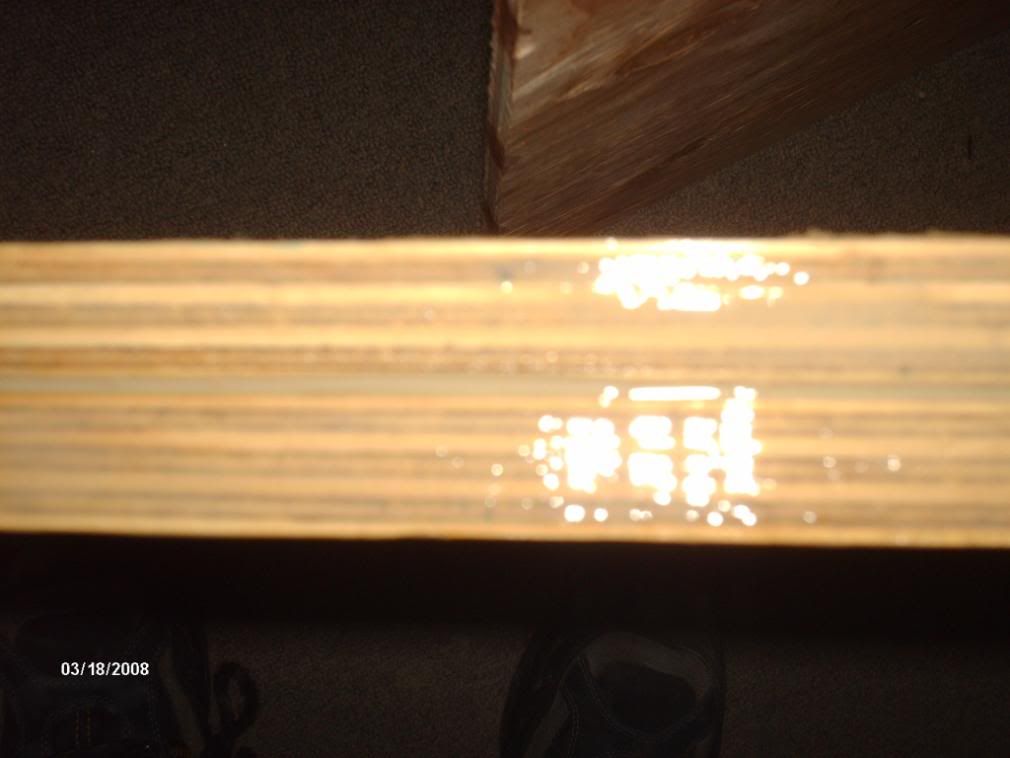
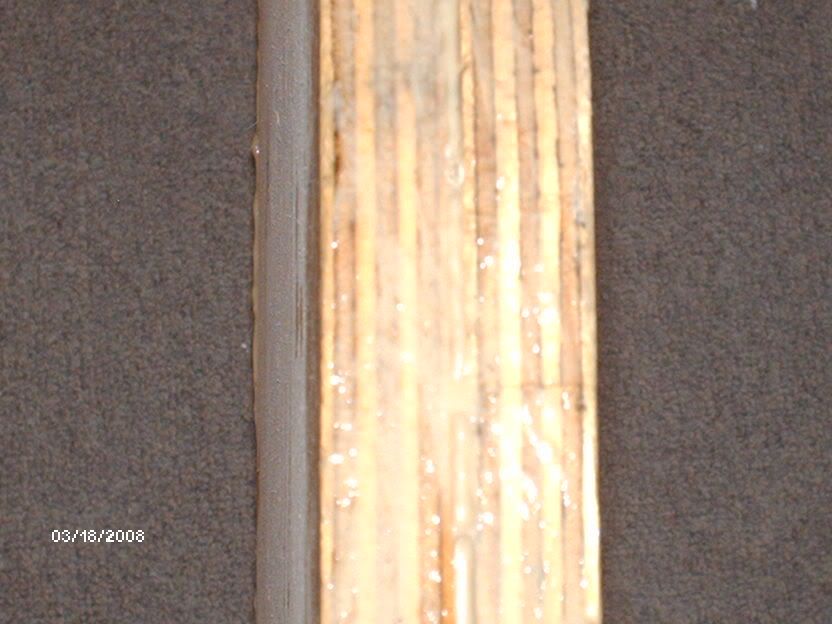
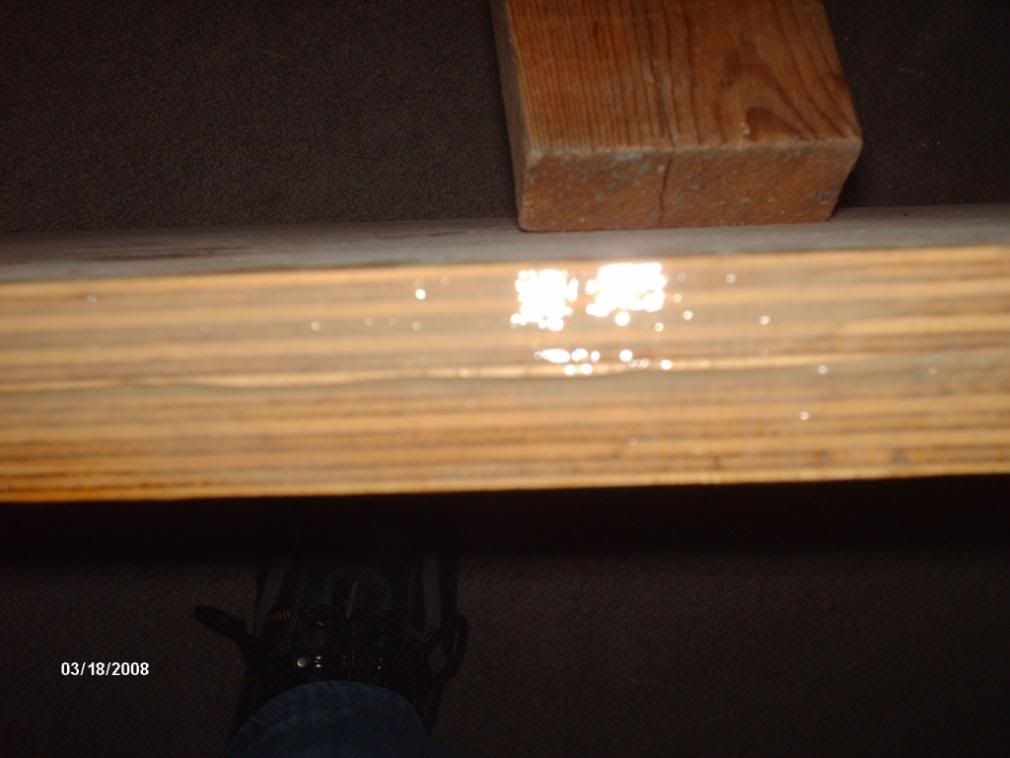
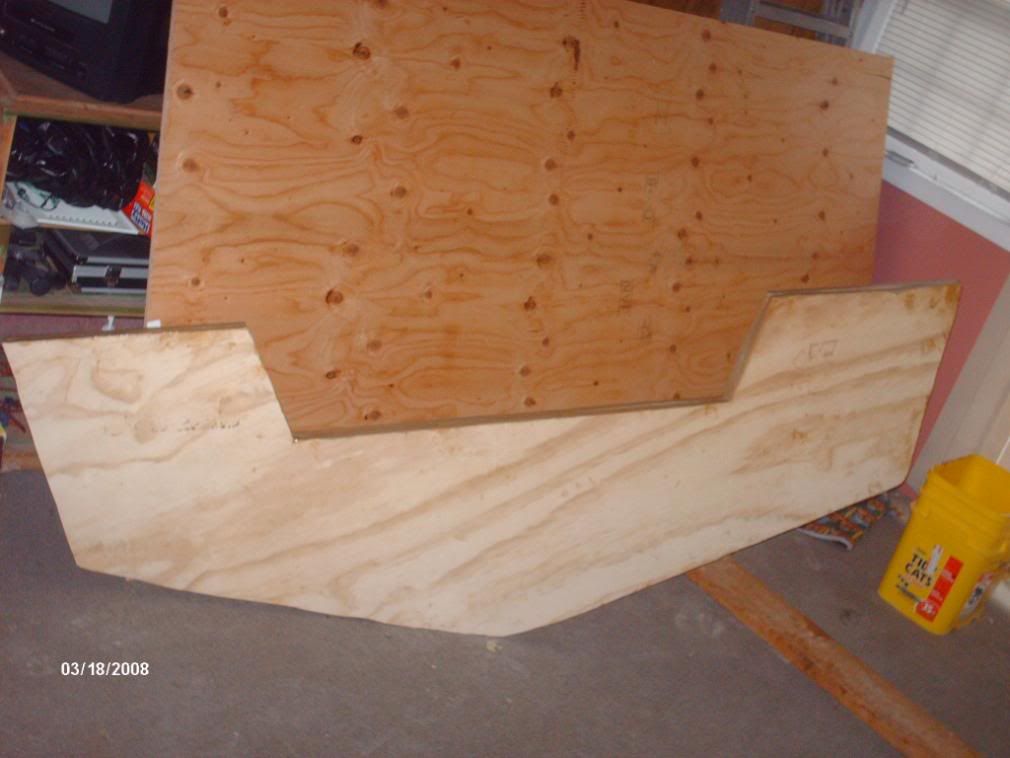
Transom Pieces are cut to fit and ready to epoxy together.

Have never worked with Resin before, so I decided to do some practice, mixed up a batch of thin peanut butter, (Baby Food Consistency of Resin, Hardner thoroughly mixed and then added wood flour-Mixed again- and added chopped Glass-Mixed) Practiced on some scrap wood, applied evenly and lightly clamped two pieces toghether, checked it this A.M. and that sucker is like iron.

Then I practiced a bit with some 6oz Cloth, whole different story here, this must take some experience and lots of practice because I made one big sticky mess, that is why the practice is important i guess. Next practice session I am going to try really hard to keep the fingers out of it!

Some specific Epoxy Resin/Hardner Questions
1.) Metering pumps, do you guys use and rely on these for the 2:1 mix or whatever? My resin pump seems to spit and sputter really bad, cannot imagine how I could get a reliable 2:1 mix with it?

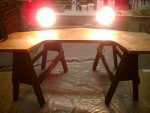
2.) Temperature, the shop was at 55degrees when i started, then I turned the heat up, is this too cold to begin applying glass?? I am buying heat lamps today so I can apply heat to a specific area.

3.) I used a respirator and goggles and of course lots of rubber gloves, I was suprised at how little smell this stuff has, is that normal?

4.) Clean-up, I used MEK to clean up a rubber scraper, came right off. If it gets on your skin what is the best method for that?

5.) Frayed edges of Cloth, what do you guys do with that? Cut off all fraying before you start applying? Oh and a Great Big OLD Knife Edge Scissors cut right through that cloth, will have to see how it does on the Biax1708 next.

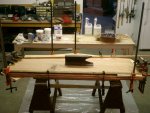
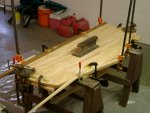
Today I am going to epoxy the transom halves together, lightly clamp and practice more on laying cloth.

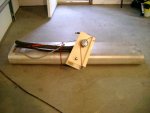
Tommorrow I am going to adhere the Transom Wood to the boat, will the same peanut butter (Resin/Flour/chopped glass be ok for this, or do I need to add a layer of Biax??)

Lund
 

Attachments

  • IMGP2820.JPG
    IMGP2820.JPG
    47.8 KB · Views: 1

drewmitch44

Lieutenant Commander
Joined
Jun 26, 2005
Messages
1,749
Re: Lund Nisswa Restoration

I used PL Polyurethane adhesive to join my transom halvs together. Its 100% Polyurethane and you can get it at lowes or HD. It can be used by a caulk gun and you will need a few clamps or some heavy stuff. It worked great for me. I just put 2 tubes, 1 on each half of the wood and then used a notched plastic trowel and then put them together and clamped the heck out of em. I have some pics. This thing is sooo solid. I did some tests with scrap pieces of ply and tried to pull the halves apart and the wood failed before the bond did in every case. I bonded some 2X4's together and it took a truck and a stump to get them apart and then the wood completely broke! the bond was still strong after that. Ill get you a pic of my transom.

CuttingNewtransom.jpg


plys6.jpg


plys3.jpg


plys7.jpg


together.jpg
 

lundnisswa

Petty Officer 1st Class
Joined
Mar 2, 2008
Messages
245
Re: Lund Nisswa Restoration

DrewMitch44;
Thanks for the Input, I have been seriously considering this PL route, especially on bedding the stringers, what is it called exactly PL-6000 or something like that?
So how did you attach your transom wood to the boat glass then?
Thanks.

Lund
 

lundnisswa

Petty Officer 1st Class
Joined
Mar 2, 2008
Messages
245
Re: Lund Nisswa Restoration

Back Track a bit.
Yesterday I spent the day confirming the boat hull is stabilized and level and the running surface is true/straight, ended up putting in two extra 9 foot bunks under the boat to help firm it up, so there are now four nine foot bunks supporting the hull, it was really flexing alot when in there working, so the boat is now as straight as I can get it. Hope it runs straight in the water when all done.

Lund
 

drewmitch44

Lieutenant Commander
Joined
Jun 26, 2005
Messages
1,749
Re: Lund Nisswa Restoration

No its PL is the brand name. And its "construction adhesive". Its 100% polyureathane. http://www.amazon.com/Henkel-10-2-Ounce-Polyurethane-Construction-P73948125/dp/B0002YVJG8 This is what the tube looks like. Its not like pl6000 or whatever you said. Its PL brand, Polyurethane Construction Adhesive. Its at Lowes in the Paint department where the silly-cone caulk is. Id use it and i did. And im going to use it for my stringers bedding too.
 

drewmitch44

Lieutenant Commander
Joined
Jun 26, 2005
Messages
1,749
Re: Lund Nisswa Restoration

Here it is at the lowes site.... http://www.lowes.com/lowes/lkn?action=productDetail&productId=100575-69-P73948125 . I really think its great and seems like a lot of others do also. And its Polyurethane and thats great!!!! I have really done some tests on it and i wish i had pics of the tests i did. Thats why i will swear by it. You got to rough up the surfaces with sanding or a grinder though. But you got to do that with bonding with epoxy, polyresin or whatever other method you use also. This was just a lot easier and i think it is stronger. I got it on my hands and it took a week to get off!!! So wear gloves if you use your fingers to work it in!!
 

lundnisswa

Petty Officer 1st Class
Joined
Mar 2, 2008
Messages
245
Re: Lund Nisswa Restoration

Took every clamp I have, but the Transom halves are together.
Awaiting a 24 hour cure now.

My fuel tank was super Dirty and oily, so I took it outside, scrubbed it with goof off, looks pretty now!

After the Transom halves are cured, I will coat all sides with Epoxy resin/hardner, special attention on the end grains.

Lund
 

Attachments

  • IMGP2824.JPG
    IMGP2824.JPG
    47.6 KB · Views: 2
  • IMGP2822.JPG
    IMGP2822.JPG
    44.8 KB · Views: 2
  • IMGP2823.JPG
    IMGP2823.JPG
    43.6 KB · Views: 2
Last edited:

erikgreen

Captain
Joined
Jan 8, 2007
Messages
3,105
Re: Lund Nisswa Restoration

Looks good.... do wait 24 hours before sanding/grinding, otherwise you'll gum up your discs. I don't know whether epoxy will stick to wet PL better than dry, you'll have to tell us :)

Yes, coat all sides... you need to keep water from ever touching the wood.

Erik
 

lundnisswa

Petty Officer 1st Class
Joined
Mar 2, 2008
Messages
245
Re: Lund Nisswa Restoration

Sort of Scary drilling 13 holes in the nice new Transom you have built, and glued together, but did it any way, one at a time, inserting the correct size Bolt in each hole as I went.

Then it was time to cut out the Splash well, spent the rest of the day tapering the top edge so the Transom Cap will fit over it, the new Transom is 1/8" Thicker than original and I am going to encase it in cloth so that will add a bit more Thickness, all done-ready to glass up.
Now I can get to waterproofing it by encasing with Resin/Cloth.

I know, a bit of a gap in spots on the bottom where it meets the hull, but thats the way it turned out, nothing some peanut butter cant conceal, then glass her to the hull.


Lund
 

Attachments

  • IMGP2828.JPG
    IMGP2828.JPG
    56.8 KB · Views: 1
  • IMGP2831.JPG
    IMGP2831.JPG
    44.3 KB · Views: 1
  • IMGP2836.JPG
    IMGP2836.JPG
    39.8 KB · Views: 1

erikgreen

Captain
Joined
Jan 8, 2007
Messages
3,105
Re: Lund Nisswa Restoration

I'd call that a good fit, and a nice job.

The cool thing about repairing boats with epoxy and peanut butter putty is that a small gap becomes an advantage... it gives space for a bit more putty, which improves the strength of the joint (to a point).

Good job, keep going!

Erik
 

drewmitch44

Lieutenant Commander
Joined
Jun 26, 2005
Messages
1,749
Re: Lund Nisswa Restoration

What i did when i put the wood in is use 2 tubes of that PL for the bottom where that gap is you got. I had the same thing when i did mine. The PL filled it in nicely. I used a lot of it so im giving it 2 days to completely cure. How did it go anyways using that PL to seal the 2 halvs together? PM me if you want. Anyways i used PL also on the outer skin to the wood to glue it together. I used the holes that i cut in the wood where the splashwell drains and where the motor mount holes and the hooks on the back of the transom are. I used all of these with big washers as clamps kinda to hold the wood tightly to the outer skin that way i didnt get any air bubbles. PM me and let me know how you are doing. You are about in the same place that i am on my rebuild. My completion date keeps getting pushed back but they say "the more you gring the more you find!" that has held true in my case. Its a good thing that i enjoy workin on her or id be pissed!
 

lundnisswa

Petty Officer 1st Class
Joined
Mar 2, 2008
Messages
245
Re: Lund Nisswa Restoration

My first attempt ever at applying Cloth/Resin to an object, I did the back of the transom that joins the boat with 6oz cloth, the flat surface went really good, but when I got to where I was gonna wrap down around the edge things got a bit dicey, kept wanting to fray and then not lay there, it did not like taking a corner, well I did my best and it was all in all great practice.

Oh and I got to practice a fillet too, I used a 12" disposable cake decorator bag, it went on like caulking, just had to touch it up a bit in spots with a bondo spreader.
Lund
 

Attachments

  • IMGP2842.JPG
    IMGP2842.JPG
    44.4 KB · Views: 2
  • IMGP2843.JPG
    IMGP2843.JPG
    41.8 KB · Views: 1
  • IMGP2838.JPG
    IMGP2838.JPG
    36.7 KB · Views: 2
  • IMGP2837.JPG
    IMGP2837.JPG
    43.9 KB · Views: 2

lundnisswa

Petty Officer 1st Class
Joined
Mar 2, 2008
Messages
245
Re: Lund Nisswa Restoration

Upon close evaluation of the transom I soon figured out that where I had attempted to make the turn down the short edge with the 8oz cloth it had indeed bubbled, so I got an "F" on that, but I am happy to say that the Flat surface turned out great, so I ground off the short edge bubbles.

Today I did the other side of the transom, I guess I try to learn form my mistakes, it is now curing, so we will see, I did not attempt to take the sharp turn this time, I just left the extra fabric hanging, will trim and sand it off.

So How in the world do I do that short edge????

Lund
 

Attachments

  • IMGP2855.JPG
    IMGP2855.JPG
    50.7 KB · Views: 1
  • IMGP2859.JPG
    IMGP2859.JPG
    43.8 KB · Views: 1
Last edited:
Status
Not open for further replies.
Top