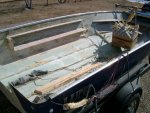
Re: Lund Nisswa Restoration
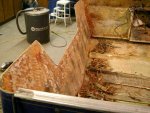
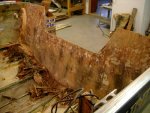
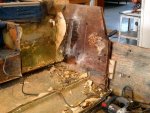
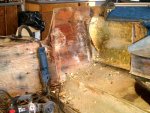
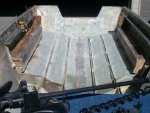
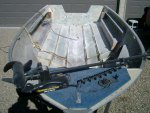
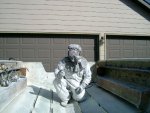
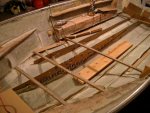
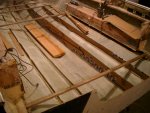
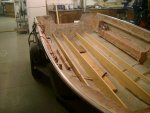
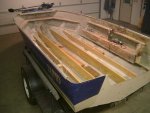
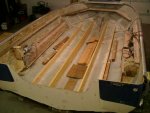
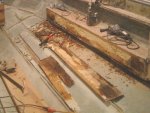
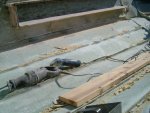
This is Grinding week, so I am hitting that hard. -
Gonna Grind and then grind some more.
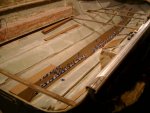
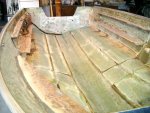
I do have one question that has been bugging me, cutting fiberglass cloth like 1708 or whatever into the proper size pieces,
Do I need to buy a special scissors or is there a trick to your trade?
Thanks.
Lund
Nope. You can cut it with a razor blade or good scissors. Personally I have a paper shear, one of those things you used to use in school to cut the edges of bit pieces of paper straight. With a little effort it cuts biaxial glass the same way, perfectly straight with no shredding.
Sorry I didn't reply earlier, I think I've been asleep or something.
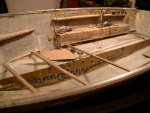
The epoxy sounds good at 6 gallons... to wet out six square feet of the 1708 you'll need to use almost a half gallon. You have to keep adding resin until the glass is translucent, with no bubbles... takes a lot.
Epoxy is a lot more forgiving than poly resin like oops uses, but it's still better to work all the layers at once if you can manage it. I'd try to avoid letting a layer harden for a day then going back to it. It's unavoidable sometimes, but it does add strength to work wet on wet. Also do surface prep.. clean the surface, sand if you haven't, and wipe it down with Acetone while wearing disposable gloves. I use some cheap cloth rags and I make sure to pretend I'm wiping butter off the dining room floor... you don't want to spread contaminants you can't see around, you want them gone.
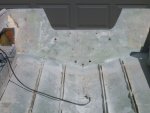
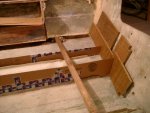
Six ounce cloth is very light... I'd use it for covering wood to prevent epoxy cracks, and small odd jobs. The biax is going to be most of your strength. You can use either one first, I'd probably recommend the biax because it'll be easier to get into place when it's not going over older glass (sticks better). My technique for wetting out 1708 is as follows:
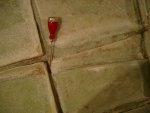
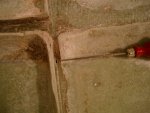
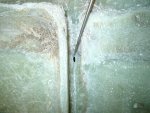
1) Perform the fillet on whatever joint you have... leave no voids. Try for an interior radius about the same size as a US quarter dollar... more is ok, just wasteful. You can use a piece of plastic coffee can lid for forming the radius.. I cut them into quarters, then run the rounded edge (minus the lip) along the fillet to smooth it.
2) Using a 1" foam roller wet the surface of the area to be glassed. Make sure you don't deform the fillet, because if you're working wet on wet it's still mushy.
3) Gently fold the biaxial at the same place it will be folded on the hull (usually lengthwise). Put the corner of the fold down first, then open the glass up into place. Position it carefully where you want it, then use a gentle pressure to stick it to the pre-wet surface. It should stay in place pretty well. Reposition as needed to remove large wrinkles. Most glass including biaxial can deform and stretch a bit when wet.
4) Use the same foam roller to wet the top of the biaxial. Make sure you keep the roller wet, IE go back to the tray often. You'll see the glass get wetted out in color changes... it turns darker a bit, then translucent. Make sure you add enough resin to wet out any white spots. There's a fine line between that and resin pooling in the bottom of the boat, just FYI
")
5) Repeat 3-4 for other layers of glass or other glass types.
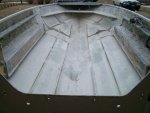
It's possible but hard to go back after everything hardens and remove bubbles, but it's easier not to make 'em in the first place.
Once you're done adding glass, check once more for positioning problems, major bubbles, and anything else wrong, then knock off for the day. Nothing is more frustrating than doing a great glass lay-up then stepping in it or putting a knee in it trying to do something else.
You can accelerate hardening using heat lamps if it's cold... most medium epoxies take 12 hours to harden, but up to 2 days to fully cure, so be aware it won't be rock hard for a couple of days. It will be hard enough to work around.
Post your progress here
Erik