1983 Procraft 1750V Boat Restoration

eggs712

Petty Officer 1st Class
Joined
May 8, 2012
Messages
333

I made a video of my progress (hopefully not as crappy as my older videos)

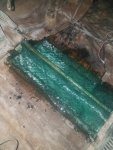
I forgot to take a pic, but I finally finished the stringer filets. It took a lot longer than I would've thought, but I at least had time to cut out all the 1708 for the stringers in between resin tack time.
I'm gonna be pretty low on resin after the stringers, but a local paint place sells isophthalic resin for only $29 a gallon!
 

eggs712

Petty Officer 1st Class
Joined
May 8, 2012
Messages
333
I ground/touched up filets this morning, followed by lots vaccuming. Got off early this evening, and was ready to do some real glassing, finally.

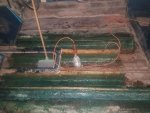
Folks here aren't kidding when they say that 1708 is nice to work with! I just glassed one of the 18" bilge stringer sections and the 1708 went down without any air bubble fights whatsoever. I had plenty of working time and got the whole layup done. I'm gonna do the port side and call it a night.

I used 6" tabbing to the top of the stringer, 4" tab over that, and capped with one layer of CSM.

Resized_20171006_204731.jpeg
 

eggs712

Petty Officer 1st Class
Joined
May 8, 2012
Messages
333
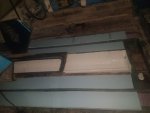
The stringers are just about done. I just have to add a couple of ribs at the end of the ski locker.

Resized_20171009_112840.jpeg
 

eggs712

Petty Officer 1st Class
Joined
May 8, 2012
Messages
333
I've been having problems with my electric fence and some family illness, so I haven't worked much on the boat lately.

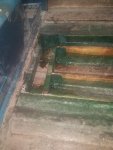
But this morning I cut out the ribs and got them encased in CSM and ready to tab in.

I'll start working on fitting the flotation foam next, then start cutting out the deck. For it, I plan on sealing the underside using Woodonglass' old timer recipe (money is tight).
 

eggs712

Petty Officer 1st Class
Joined
May 8, 2012
Messages
333
Resized_20171021_161415.jpeg

I used PB filets to glue the ribs in and then added some 6 and 4 inch tabbing. The reason I wrapped them in CSM before installing is because part of the bottom nearly touches the hull and would be very hard to glass. The factory ribs were only held in by staples!
 

eggs712

Petty Officer 1st Class
Joined
May 8, 2012
Messages
333
Since local gelcoat prices for me are crazy high ($75/gallon at the cheapest), I bought a quart of titanium dioxide pigment to mix with my iso resin.

Last night I mixed a pint of resin with 3 oz of pigment to achieve an opaque white color. I then added some milled fiber for thickness. My thought is that the fiber will make the gelcoat less likely to crack as opposed to using fumed silica or another powder thickener. This coat is going in the ski locker, so a beautiful finish doesn't matter to me. The pint didn't go that far, but worked well and looks fine! (To me lol)

My problem is that, for the final coat, no local stores carry any wax additive for the gel. I've been reading of people using things like wax paper, PVA, etc to help the gelcoat cure non-tacky. But I have an idea....

Could I simply use some Rustoleum clear gloss enamel spray paint over the gelcoat? It just may even look good. If this is a bad idea, someone please tell me before I try it.
 

eggs712

Petty Officer 1st Class
Joined
May 8, 2012
Messages
333
Resized_20171027_235559.jpeg

I didn't get any objections, so I added my second layer of gelcoat and sprayed Rustoleum Crystal Clear Enamel after it gelled. It is going to freeze here tonight, so I had to stay up and finish it all tonight. I'll leave the heat lamp on it overnight to help with the cure.
 

Skipper Sean

Petty Officer 2nd Class
Joined
Sep 19, 2017
Messages
124
Looking good (I wish I was that far along). I?m just at the beginning cutting up the rotten deck and digging out some very soggy foam. Like you I landed a pretty good deal, the boat was mechanically sound. I like being able to log onto this forum and check out how everyone?s projects are coming out and get ideas. I can?t wait to see you finished boat.
 

eggs712

Petty Officer 1st Class
Joined
May 8, 2012
Messages
333
Thank ya Skipper. I like the potential of your boat! I love cuddies and cabin cruisers.
 

eggs712

Petty Officer 1st Class
Joined
May 8, 2012
Messages
333
I'm no insulator, but my ski locker has pretty good R-value now. Time to fit the deck now.

Resized_20171031_120509.jpeg
 

Skipper Sean

Petty Officer 2nd Class
Joined
Sep 19, 2017
Messages
124
Moving right along you will definitely be ?splashing? that boat next summer!
 

eggs712

Petty Officer 1st Class
Joined
May 8, 2012
Messages
333
Moving right along you will definitely be “splashing” that boat next summer!

I'm trying my best to finish glassing before winter sets in!


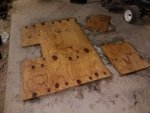
I got the biggest part of the deck fit today:

Resized_20171102_121409.jpeg
 

Skipper Sean

Petty Officer 2nd Class
Joined
Sep 19, 2017
Messages
124
Now just look at all that fun you are having. Where else can you do carpentry, fiberglass work, bodywork and painting all on one project :p
 

Skipper Sean

Petty Officer 2nd Class
Joined
Sep 19, 2017
Messages
124
Hey Eggs
What type of adhesive did you use for the preliminary setup of you stringers before you tabbed them in? As I?m working up a materials list?
 

eggs712

Petty Officer 1st Class
Joined
May 8, 2012
Messages
333
Hey Eggs
What type of adhesive did you use for the preliminary setup of you stringers before you tabbed them in? As I’m working up a materials list?

I used thickened polyester resin, aka 'Peanut Butter' or PB for short. You want it thick enough to not be runny. Do a forum search for more info and the additives used for thickening. Looking forward to seeing your progress!
 

Skipper Sean

Petty Officer 2nd Class
Joined
Sep 19, 2017
Messages
124
I was thinking of adding some West Sytem fairing filler to the resin. Since I have a ton of it. But I seen that some guys like to bed the stringers in with the PL adhesive. Just wondered what you used.
Thanks!
 
Last edited:

eggs712

Petty Officer 1st Class
Joined
May 8, 2012
Messages
333
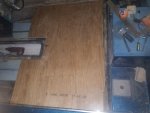
I've been putting layers of Spar Urethane on the underside of the deck the past few days. The first coat was thinned 50% with mineral spirits, followed by a 25% thinned coat, then a couple of full strength coats. Extra emphasis was put on coating the end grain good. The bottom side shown in the pic has lots of knots, but the top side looks smooth and knot-free.

Resized_20171107_104951.jpeg

This morning, I installed the deck with PL Premium. I used boat batteries, cinderblocks, and whatever else I could grab to provide clamping. No screws will be used in the new deck.
 

eggs712

Petty Officer 1st Class
Joined
May 8, 2012
Messages
333
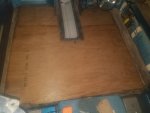
It's been 48 hours since gluing the floor, so I removed the weights. The floor feels solid and I only need to fair the starboard seam a little, plus a couple of indented spots.

Resized_20171109_123615.jpeg

I am planning on 8 inch 1708 tabbing, a layer of 1708 over the entire floor with 2 or 3 inches up the sides, and a final layer of 1.5 oz CSM. The original floor had a layer of heavy woven, so I'm going with the 1708 layer in case the strength is needed.

Before I even start filets, I'm going to calculate how much resin I'll need and have all the glass pre-cut to make sure I get a good chemical bond with my layups.
 

eggs712

Petty Officer 1st Class
Joined
May 8, 2012
Messages
333
Thinking more about this, I think 2 layers of CSM will be fine for this deck. I already beefed up the deck with 3/4" ply that has zero flex as is, so I think the 1708 full layer would be overkill that would use a ton of resin and add unneccesary weight.

I bought a couple more gallons of resin, a sheet of 1/2" BCX ply, and one pack of Rustoleum non-skid additive yesterday. This should give me everything I need to finish the deck and seat box for the passenger side.
 

eggs712

Petty Officer 1st Class
Joined
May 8, 2012
Messages
333
I put in a 12 hour day on the boat yesterday, but didn't get as far as I expected. I have about all the glass laid out for the deck and have all the plywood cut out for the seat base and box.

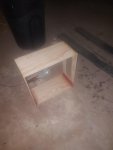
I'm making the seat box 17" by 8", with 1" ply thickness on top. I used some quick set epoxy to hold the box together and started on inside filets. I'll use 4" 1708 tape over the fillets inside, and finish the inside with a layer of CSM. I'll then sand the outside, cover with CSM, and tab to the floor.

Resized_20171113_134531.jpeg
 
Top