1983 Procraft 1750V Boat Restoration

eggs712

Petty Officer 1st Class
Joined
May 8, 2012
Messages
333
Teamster- Yes sir, it sure is awesome to have!

Watermann- Boy I sure have a TON left, lol.

I also thought that I'd introduce my new boat buddy! This is Molly, I've had her for almost two weeks now:


After doing a little research and comparison, I'm almost certain that she's a Black Lab/Pitbull mix. I adopted her from a lady that I mow for, and the vet believes her to be about 3-4 years old. I'm at least her third home, but she's a wonderful dog! Very sweet to every person she meets, and already really attached to me. Her only issue is dog aggression, but that can be fixed. I took her to a park/pond a few days ago, and she didn't hesitate to swim after some ducks. In fact, she swam fifty yards before finally giving up. I hope to take on her on a boating/camping trip really soon, I think she'll have a blast!
 

eggs712

Petty Officer 1st Class
Joined
May 8, 2012
Messages
333
Hello all, it's been a while, but I'm ready to get this boat finished after the long hiatus. It's been barn kept this whole time so no worse for wear.

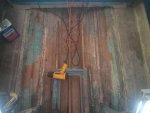
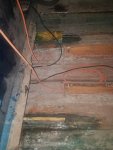
Anyway, today I spent a couple hours getting itchy and finished all the grinding. Part of the hull has some little 1/2" thick wood strips that were glassed in with CSM. The edges of the strips were sharp and the factory didn't connect the glass to the sides of them, so I ground out those edges. I'm thinking that some PB will work to fill those sharp edges.

Lastly, would it be smart to add a layer of glass to the hull, or would just be extra weight and money spent?
 

eggs712

Petty Officer 1st Class
Joined
May 8, 2012
Messages
333
I have to scratch my original stringer idea with the Nida-bond. I called 3M to ask the proper MEKP dose when mixing, and they told me they stopped making it in early 2013. So they sold me product already well past its shelf life in 2014. I went to open it and the ceramic filler rose to the top with thick, gelled up resin on the bottom.

The 435 resin was never opened and tacked up like it should when I tested a little last night. I won't choke up another large sum for ceramic stringers, so I have a new plan on solving my cap in the way problem using wood. About one and a half feet of stringer won't be tabbed to the hull, not enough to worry me. I'll post more pics when I have some visible progress to show.
 

eggs712

Petty Officer 1st Class
Joined
May 8, 2012
Messages
333
No Title

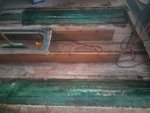
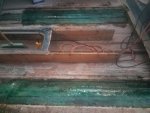
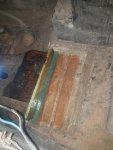
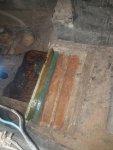
Yesterday, I used some of the precipitated ceramic from the Nida bond to make PB; I used this to filet the edges of the hull's wood strips. The resin turned it a weird greenish-gray color, but hard as a rock!

photo277319.jpeg

Today, I finished the filets, ground them smooth, and glassed them over with CSM. The port side layup gave me a little trouble, but coating the area with resin before putting down the glass seemed to help on the other side.

photo277320.jpeg

Stringers are next!
 

Attachments

  • image_277320.jpeg
    image_277320.jpeg
    263.4 KB · Views: 1
Last edited:

eggs712

Petty Officer 1st Class
Joined
May 8, 2012
Messages
333
Also, the gas tank has to come out so I can grind some more in the bilge without gashing the tank by accident. While out, what's a good way to clean out the inside of the tank (plastic)?
 

eggs712

Petty Officer 1st Class
Joined
May 8, 2012
Messages
333
Thanks Watermann. I had to first rinse out the solid pieces of gunk from the tank. It's soaking in vinegar right now with some gravel to shake around every few hours. I'll throw some Startron in after the heavy varnish is gone.

Yesterday I had to finish planting wheat before the rains started, then it rained overnight and left nothing to do except the boat!

I coated my stringers in resin today, and the high humidity plus mid 60s weather made kicking off the resin take forever. I did not realize how much humidity effected proper catalyst levels. With the extra time, I decided to mess with the electric on the boat.

Only the tach would come on and the trolling motor works if you jiggle the wire right. I replaced a couple of corroded splices, which made a courtesy light and the fuel gauge work, but everything else is dead. The wiring under the dash isn't a mess but there are a ton of crappy splices that probably need replacing.
 

Watermann

Starmada Splash of the Year 2014
Joined
Jan 12, 2013
Messages
13,753
I heard member WOG tell of using a length of dog chain in the tank to scrub the heavy gunk loose. He also suggested putting the tank in the bed of your pick up and driving around with it on some bumpy roads.
 

chevymaher

Commander
Joined
Mar 29, 2017
Messages
2,915
I heard member WOG tell of using a length of dog chain in the tank to scrub the heavy gunk loose. He also suggested putting the tank in the bed of your pick up and driving around with it on some bumpy roads.
Similar To wog's suggestion. Pea gravel and kerosine in the tank. Soak it a day and shake it around. Knocks all that crud loose.
 

eggs712

Petty Officer 1st Class
Joined
May 8, 2012
Messages
333
I don't have kerosene, but would paint thinner or laquer thinner work? I already have a couple gallons of both sitting around.
 

eggs712

Petty Officer 1st Class
Joined
May 8, 2012
Messages
333
Under where the gas tank was, I found a big bouncy ball and a seat rod for the casting deck. My bilge is clean now and surface is prepped for tabbing down the stringers.

I may catch flack for the way I'm doing the stringers, but here is the plan. I left the stringer shell for the 22" space unaccessable under the casting deck and sanded down the wood until it just snugly fit through the shell all the way back to where it hits the transom. I further sanded down the part of the wood where I can't tab it, and wrapped it in a double layer of CSM flush to the rest of the wood. I will put down PB as bedding for the stringer and then slide it back. Then start tabbing. I know this isn't ideal, but the wood will at least be water-proofed with just a little tabbing missing.
 

eggs712

Petty Officer 1st Class
Joined
May 8, 2012
Messages
333
No Title

The first part of the stringers are bedded in. I have to measure and cut the remainder of the stringer and get that bedded tomorrow.

photo277769.jpeg

photo277767.jpeg

photo277768.jpeg
 

Attachments

  • image_277768.jpeg
    image_277768.jpeg
    262.1 KB · Views: 1
Last edited:

eggs712

Petty Officer 1st Class
Joined
May 8, 2012
Messages
333
No Title

The vinegar worked wonders; over thirty years of trash and varnish is gone. I measured the dimension of the tank and it's 18 gallons. Not a lot for a gas hog tower of power, but still better than hauling portable tanks like my other boat!

I sanded the hull today and cut out and fit stringers, I will bed them with PB tomorrow. I also plan to PB the ski locker stringers and tab with 1708; that wood is like new.

I found another bad inline fuse connection that I did away with, and the electronics work now! I just have to replace the horn button and light bulb in the speedometer. Everything else is good to go.

Why do people find it necessary to install inline fuses before a fuse box??? It seems really redundant to me.

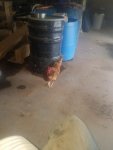
Also, here's a pic of my shop buddy. She likes to walk all the way around the gate and barn to hang out. šŸ˜
 

Attachments

  • photo277894.jpeg
    photo277894.jpeg
    123 KB · Views: 0

Watermann

Starmada Splash of the Year 2014
Joined
Jan 12, 2013
Messages
13,753
One reason to add an inline fuse between the battery and fuse block is not to over load the capacity of the main wire. Say you run 12 ga wire to the fuse block from the battery and you could have a a number of 5 amp draws that will over load the 20 amp rating of the 12 ga main wire but not blow any of the 5 amp fuses in the fuse block.
 

eggs712

Petty Officer 1st Class
Joined
May 8, 2012
Messages
333
Ah, that makes sense. Thanks for explaining. I'll clip off the butt splice and put in a new inline fuse.
 

eggs712

Petty Officer 1st Class
Joined
May 8, 2012
Messages
333
The stringers are bedded. Fileting will start tomorrow, and maybe I'll have time for glassing.

Quick question - is it pretty hard to glass 1708 over the top of a 1" wide stringer? I'm not sure if I should attempt it or go with tabbing and then glass the top.
 

zool

Captain
Joined
Aug 19, 2012
Messages
3,432
Hey eggs, Yes its a real pain to get a tight wrap with that mat backed cloth. Ive seen some success by completely wetting out the sections and draping them wet over it all, but that still produced bubbles. You dont really need to do that anyway, the strength comes from the verticle lapping.

What worked best for me was doing the sides on 1700 (i use epoxy) and I picked up some of the 6oz finish cloth from home depot, it was cheap, and covered the tops and sides with it, wetted out real easy and a few layers is all that was needed.
 

eggs712

Petty Officer 1st Class
Joined
May 8, 2012
Messages
333
Thanks for the answer zool. I'm thinking of doing an 8 inch 1708 tab to the top of the stringer, followed by a 6 inch 1708 tab, taper the top edges, then cap. For capping, would 1.5 oz CSM work or not be strong enough?
 

eggs712

Petty Officer 1st Class
Joined
May 8, 2012
Messages
333
No Title

Also, got more filets done this morning.

photo278034.jpeg
 

Attachments

  • image_278034.jpeg
    image_278034.jpeg
    250 KB · Views: 0
Last edited:
Top