1983 Procraft 1750V Boat Restoration

eggs712

Petty Officer 1st Class
Joined
May 8, 2012
Messages
333
Re: 1983 Procraft 1750V Boat Restoration

George- My plan is to use sandpaper where I have cut off the stringer caps and then use the long screw driver to sand the part of the stringer that's inaccessible. Then I would use the same technique to wipe acetone to finish prep. Basically just the same way that people prep to pour Seacast into the far reaches of their transom skins.

jbcurt- Nida-core is self-leveling I thought, so I could pour it from the bilge area and have the end of that part of the stringer blocked so that could fill the entire void.

Also, I'm able to see very well into all of the stringer by putting my head to the hull and shining a light into the shell. A little cramped, but I'm young :)
 

Woodonglass

Supreme Mariner
Joined
Dec 29, 2009
Messages
25,924
Re: 1983 Procraft 1750V Boat Restoration

With all due respect this plan is not a good one. Trying to marry composite and wood into a viable structural stringer is, IMHO, skeptical at best. I totally understand your predicament with removing the cap but in order to place a good structural stringer system you must have the ability to tab it to the hull. If this is not done the structural integrity of the hull could be compromised. Remove the cap or cut away the deck to gain full access. With fiberglass anything can be repaired. We'll be here to help with anything that might be a bit overwhelming
 

eggs712

Petty Officer 1st Class
Joined
May 8, 2012
Messages
333
Re: 1983 Procraft 1750V Boat Restoration

Thanks everyone for helping me sort out my problem. Since the idea is sketchy, I won't do it.

Instead, I think that solid composite stringers are the best option for me. That way I can avoid cutting up the fore deck and mess with making it look original, matching color, etc. Plus, I'll have piece of mind knowing that they'll never rot. It'll also raise the cost a little, but I'm fine with that.

As far as pourable composites go, I'll probably use either arjay or nida-core depending on which is cheaper. I have to call arjay to get a quote.

Does anyone know anything else I could use that would be cheaper?

By the way, I would just like to say that iBoats is an awesome resource for newbies like myself, and it's great to be able to run ideas through experts with tons of collective experience.
 

Woodonglass

Supreme Mariner
Joined
Dec 29, 2009
Messages
25,924
Re: 1983 Procraft 1750V Boat Restoration

If you still plan on using the original tabbings to pour the composite material into, as I stated before, you still have the issue of Adhesion, (really no way of ensuring you'll get it) and getting the stringers to the proper Height since you've cut off a portion of the casings they will be shorter than before and therefore not able to support the deck in the areas needed. I again encourage you to NOT use the old stringer tabbings. Take a look at this old thread that will show you the correct way to do composite stringers. http://forums.iboats.com/boat-resto...2-arkansas-traveler-restoration-365820-9.html

It goes on for several pages in the thread. You'll learn a LOT!!! Once again it's Imperative that the stringer system be attached to the hull in a strong fashion and the methods you are proposing, IMHO, will not ensure this.
 

SigSaurP229

Commander
Joined
Oct 1, 2008
Messages
2,123
Re: 1983 Procraft 1750V Boat Restoration

Hate to step in on your glasser thread, Just wanted to say, I have a procraft donor boat that I am scaveging everything from let me know if you need any procraft specific parts, you can have them for just the cost of shipping, I am gonna cut it up and haul it to the dump anyways..
 

eggs712

Petty Officer 1st Class
Joined
May 8, 2012
Messages
333
Re: 1983 Procraft 1750V Boat Restoration

Woodonglass- Thanks for that link. Very useful info in that thread that will help me a lot as a guide.

SigSaur- I can't think of anything procraft specific that I need off the top of my head. Are the seats in decent condition?
 

eggs712

Petty Officer 1st Class
Joined
May 8, 2012
Messages
333
Re: 1983 Procraft 1750V Boat Restoration

I've only gotten one good day of work on the boat done since I last posted. I have most of the surface prep grinding now, and I'll be posting a video of that soon when I have time to edit it. School has just been overwhelming and lawn mowing season is starting to kick back up again, so I've been tied up between landscaping jobs and homework!

I'm also still waiting on funds for the Nidacore. I could buy it now, but then I'd have to miss out on bass spawning season :rolleyes:

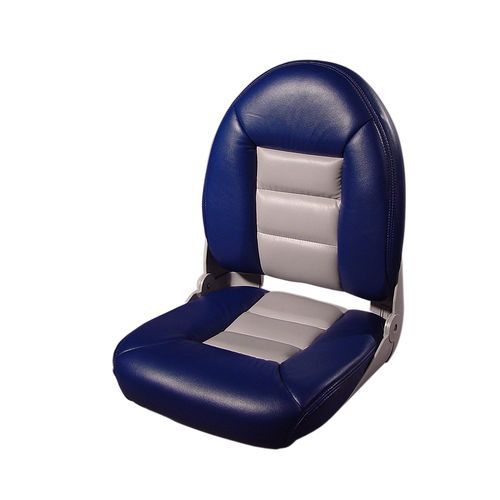
Anyway, I did go ahead and make one purchase for this boat unexpectedly. I'd decided to use the Tempress Navi-style High Back seats for the helm and passenger seats after researching seats for a while, but I was waiting to purchase them until after the deck was complete. However, Academy had them on sale for only $69! (normally $110 there).


I think they'll look sharp!

I've also ordered some free navy and grey vinyl samples to match all of the seats to the front cushions and trim pieces.

Hopefully I'll get some real work done in May when it'll be warm, school will be out, and mowing won't be too busy yet. My goal is to have this project done by the end of the summer. Even better would be to splash it by July 4th.

For spring break, I'm going to take a relaxing week long camping trip to the lake :)
 

Watermann

Starmada Splash of the Year 2014
Joined
Jan 12, 2013
Messages
13,753
Re: 1983 Procraft 1750V Boat Restoration

Those are some nice seats alright and at a great price. Don't ya hate it when obligations or work get int he way of the fun stuff?
 

pckeen

Commander
Joined
Jun 20, 2012
Messages
2,067
Re: 1983 Procraft 1750V Boat Restoration

As far as pourable composites go, I'll probably use either arjay or nida-core depending on which is cheaper. I have to call arjay to get a quote.

Hmmmmm.

If I understand your plan correctly, you intend to pour a pourable composite into one (or several) parts of the stringer, expecting it to flow far enough into the areas you cannot access, to make a full stringer. I haven't used these products, but it strikes me that unless they flow like water, there will be a lot of voids which you will not be able to see. This sounds like an expensive way to do a patch job repair.
 

Bob_VT

Moderator & Unofficial iBoats Historian
Staff member
Joined
May 19, 2001
Messages
26,022
Re: 1983 Procraft 1750V Boat Restoration

This is from Procraft first hand experience ........... You NEED to create and make a strong center string and get it in and tabbed even if one never was there. Get some supplies here Boat Paint, Repair & Maintenance - Boat Carpet, Fiberglass Repair, Antifouling and use these in addition to your nida bond.

I was in a procraft that split open right at the keel and had a gap wide enough for me to slide my hand inside. It made a believer out of me and I would design and add a stringer. After procraft replaced the hull it was immediately traded for a Ranger.
 

eggs712

Petty Officer 1st Class
Joined
May 8, 2012
Messages
333
Re: 1983 Procraft 1750V Boat Restoration

Watermann- Man I sure do hate it when that stuff gets in the way of having fun, but thankfully in only a couple of months I'll be out of school for the semester and ready to tackle this thing!

pckeen- I did some research and watched videos of people using Nidacore and Seacast.

Seacast is definitely too viscous to work and would cause voids like you mentioned.

However, Nidacore is ceramic-based and will do great for what I need it for. It's not too viscous, and while I can't bond one very small part of it to the hull as would be ideal, I will still get the longitudinal strength I need from it.

Bob- Was the Procraft that happened to a similar model to mine? If so, it sounds like I need a center stringer. That would get rid of the ski locker though, which stinks.
 

jbcurt00

Moderator
Staff member
Joined
Oct 25, 2011
Messages
24,863
Re: 1983 Procraft 1750V Boat Restoration

I did some research and watched videos of people using Nidacore and Seacast..

I'd be interested in seeing videos of Seacast or Nidacore being used as you intend too, pushing it up under an area of decking that is currently inaccessible from above.

I've watched several videos on both products. Sam(Sphelps) used 1 on his transom, and posted lots of good info about it's use. BUT he had a fairly large cavity that he filled from above. Using a tamping stick he was able to well fill the transom wood void.

Filling from above is not the same as filling stringers as you suggest, if I understand your plan, which I think I do...........

Best of luck w/ your project.
 

Bob_VT

Moderator & Unofficial iBoats Historian
Staff member
Joined
May 19, 2001
Messages
26,022
Re: 1983 Procraft 1750V Boat Restoration

It was newer and the consoles appeared more rounded. Big deal about the ski locker....... is it going to be a fishing boat or a ski boat? I would dump the locker in favor of a center stringer and more solid decking. A ski locker is just a place to collect junk and leaves. Yes, I am anti ski locker ;)
 

eggs712

Petty Officer 1st Class
Joined
May 8, 2012
Messages
333
Re: 1983 Procraft 1750V Boat Restoration

Well Bob, I actually do a lot of skiing in addition to fishing, so I'm gonna keep the locker. I hate it when boats get too crowded from not having enough storage. :)

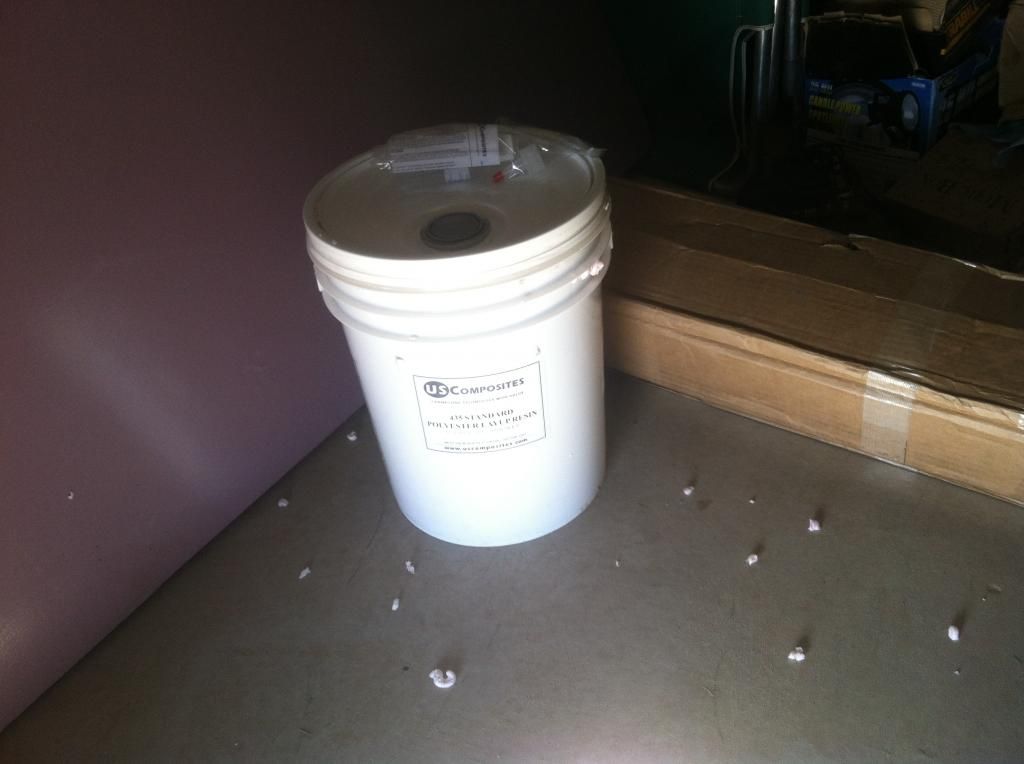
It's been a few weeks since I've done an update or even worked on the boat. The money for more materials came in last week, so I ordered 10 yards of 1708, 15 yards of 1.5 oz CSM, and 5 gallons of 435 polyester from US Composites, which came in today. I also picked up 3/4" thick sheet foam to begin making a form for the composite stringers.


I also ordered 5 gallons of Nidabond, which should arrive on Thursday. Lastly, I ordered some vinyl samples to match the new seats that I have. I'll being redoing the front cushions and interior trim pieces soon, and I'll be doing those parts to match the navy blue and light gray colors of the seats. I think it'll look better than the original light blue and white colors.

So, with the new materials in, hopefully I can make some real progress soon! I have only a little bit of grinding left. The next step will be to reinforce the hull with a layer of 1708.
 

Watermann

Starmada Splash of the Year 2014
Joined
Jan 12, 2013
Messages
13,753
Re: 1983 Procraft 1750V Boat Restoration

Some well thought out plans, standing by to see the work commence. :thumb:
 

eggs712

Petty Officer 1st Class
Joined
May 8, 2012
Messages
333
Re: 1983 Procraft 1750V Boat Restoration

Thanks!

I just uploaded this to Youtube, but I actually recorded it almost a month ago and forgot about it:


The Nidabond came in yesterday, so I'm set to get a lot done if I can just get some darned time.

I'm glad spring is finally arriving for those up north. I'm enjoying reading some of the other projects :calm:
 

Teamster

Lieutenant Commander
Joined
Nov 8, 2010
Messages
1,923
Re: 1983 Procraft 1750V Boat Restoration

Wow, huge work space,......

I need to find a friend with a grandpa with a barn like that!!!!!!
 

Watermann

Starmada Splash of the Year 2014
Joined
Jan 12, 2013
Messages
13,753
Re: 1983 Procraft 1750V Boat Restoration

Good progress so far but you have ton of work ahead of you!
 

eggs712

Petty Officer 1st Class
Joined
May 8, 2012
Messages
333
Well, school is out now, but I've only worked on the boat one day so far. However, I expect to get some more progress hopefully next week!

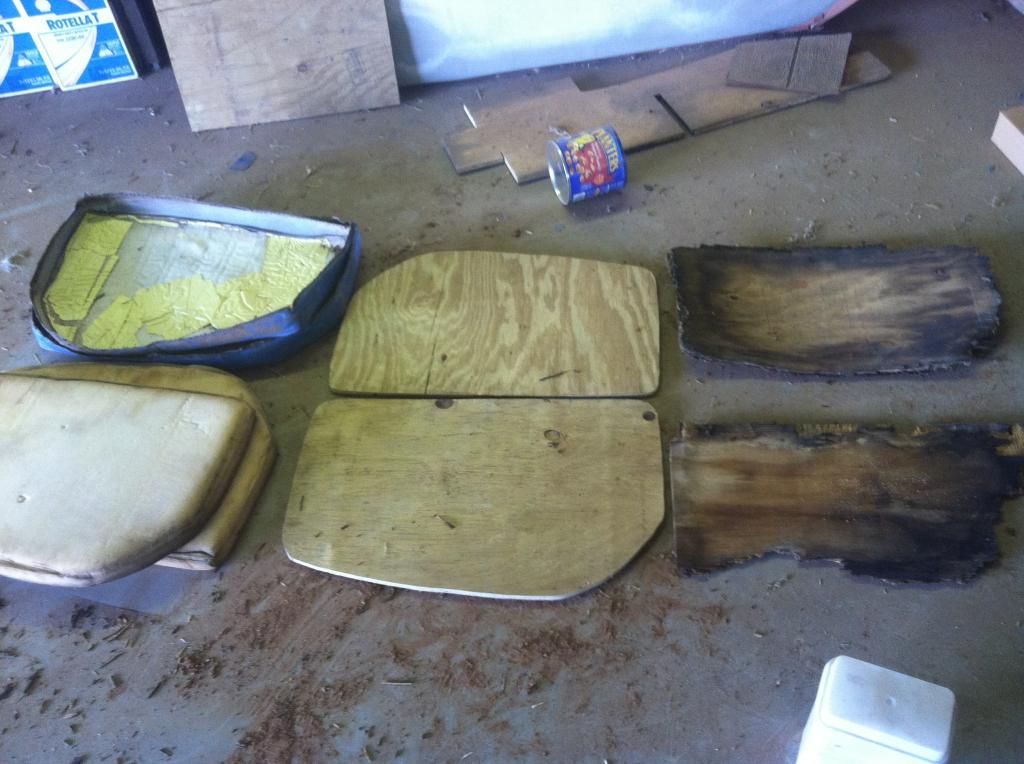
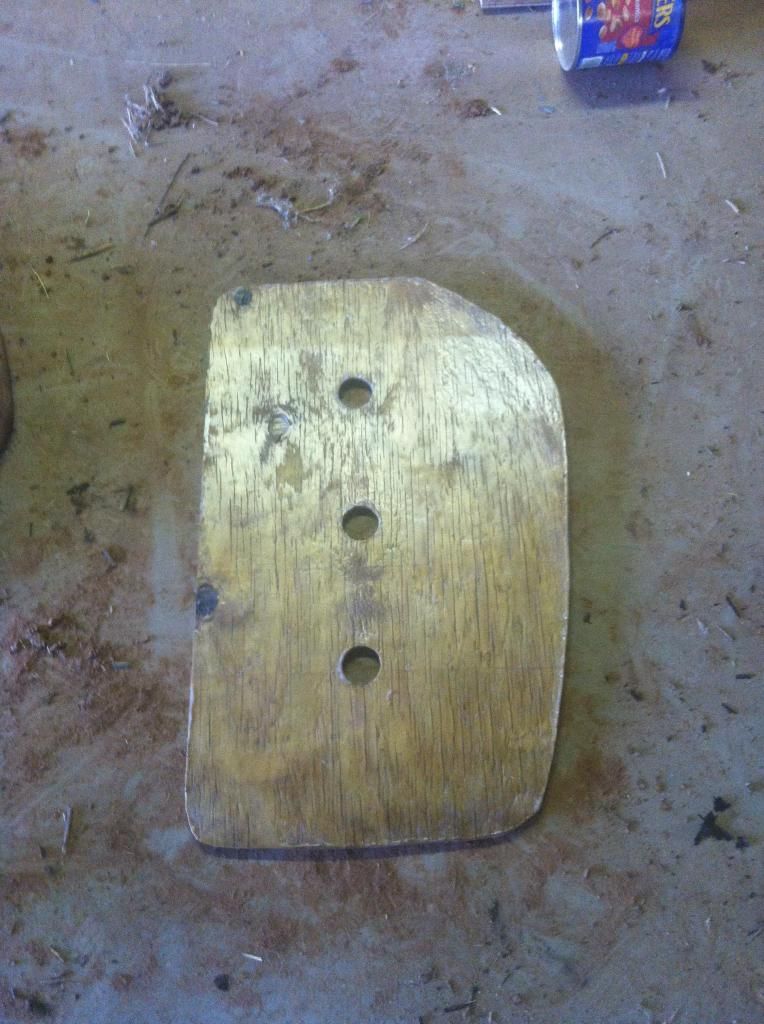
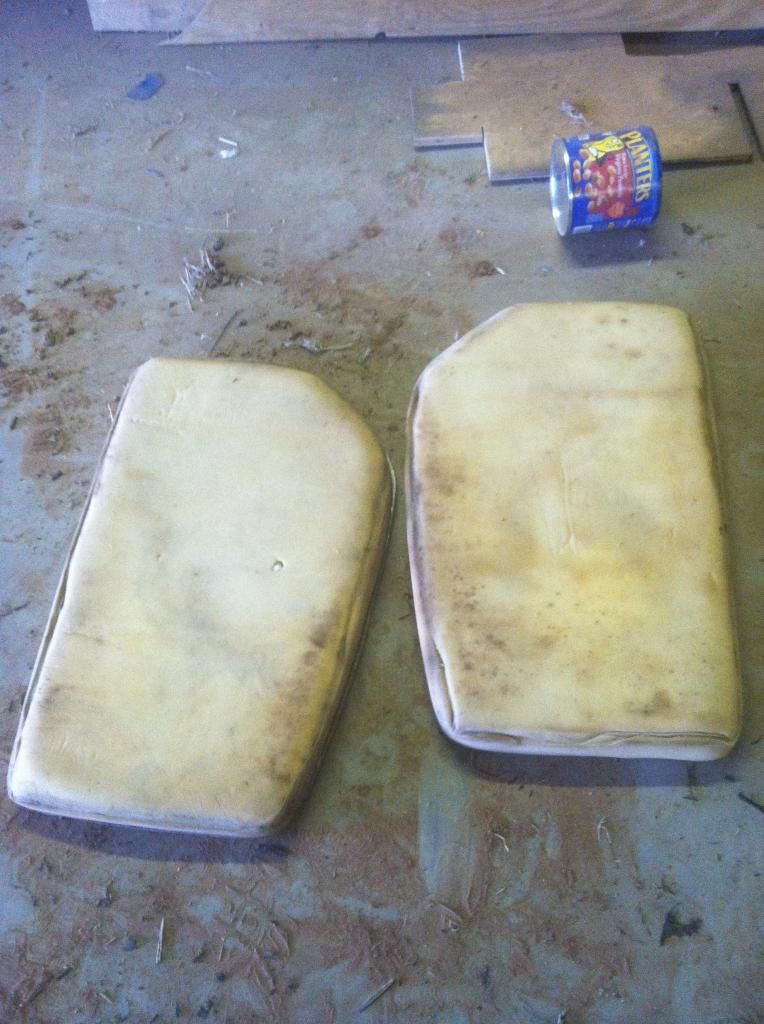
I started some upholstery work a couple a weeks ago when I did work and forgot to post it. I was originally going to grind, but accidentally misplaced my grinder that day from having to use it to help a friend open a closet with a lost key. Instead, I worked on redoing the front seat cushions. The original wood was crumbling it was so rotted, and the vinyl was cracking. First, I used the original foam that I'll be reusing as an outline for the new wood. For the wood, I used some 1/2" treated ply that I've had sitting around for nearly a year.


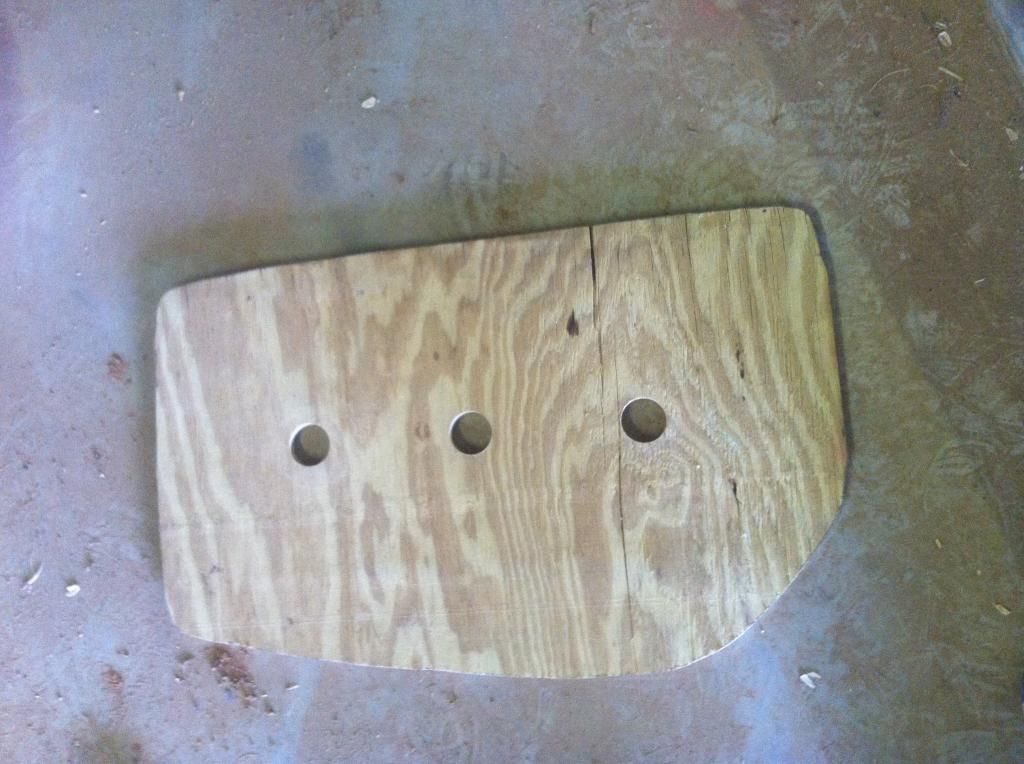
Next, I drilled three large holes in each piece to allow for drainage.


After that, I coated each piece with some Bondo resin that I'm trying to finish up. The Bondo was perfect for this application since it's waxed.


Lastly (for now), I used some 3M foam adhesive to attach the foam to the new wood.


I don't have the new vinyl bought yet, so that's how they'll stay for a while! I have my grinder back now, so I can go back to the "fun" work.
 
Top