Damaged Hull -- Pictures

Peter9Do

Petty Officer 2nd Class
Joined
Nov 11, 2012
Messages
120
Re: Damaged Hull -- Pictures

I was able to get all the measurements for the front cradle this weekend and draw up some ideas, unfortunately it was WAY TO COLD to do any work out there. I draw the line when the temperature is in the single digits. Anyways, I would like a week or so to go over my plans for the front cradle anyways, I want to make sure I have everything planed out the way I did the rear cradle. I was able to finish the front cradle just by putting the last carpeted 2x4 on and trimming all the boats I was worried about making contact with the boat. Other than that I have nothing good to really post after the conclusion of the weekend. I hope everyone had an enjoyable weekend!
 

73Chrysler105

Chief Petty Officer
Joined
Sep 10, 2009
Messages
407
Re: Damaged Hull -- Pictures

Cool deal on the electronic stuff I am right there with ya. I am still trying to figure out how to build a hatch/cover lift motor and linkage so I can push a button and open the cover for the inboard engine instead of having to manually lift it. I will have to make sure the hood pins are removed from it first. I already have LED's planned for mine as well and was working on a water sensor to make the bilge pumps automatic.
 

Peter9Do

Petty Officer 2nd Class
Joined
Nov 11, 2012
Messages
120
Re: Damaged Hull -- Pictures

Cool deal on the electronic stuff I am right there with ya. I am still trying to figure out how to build a hatch/cover lift motor and linkage so I can push a button and open the cover for the inboard engine instead of having to manually lift it. I will have to make sure the hood pins are removed from it first. I already have LED's planned for mine as well and was working on a water sensor to make the bilge pumps automatic.

If you need some help, post some pictures of the door open and closed and I will send you a list of everything you will need to do so on automation. I can promise you this depending on how heavy the door is, you can get all the parts for about $100 - $150... Honestly all you will really need is an actuator, but depending on factors of voltage (which I'm assuming 12v) how many Amps you can supply it (I'm sure you want to stay in the rang of 2 -3A), how fast you want it to go and the distance you will need it to open. All put a factor on the cost. The main cost factor is going to be the distance you need the actuator to move. The larger the more moooooo-la it'll cost you. Also, you can program it using an Arduino board for controls or, you can just reverse polarity on a 3 way switch or button to make the actuator travel one direction or another. I would recommend an Arduino, if you have some time to learn simple programming because you can hook up EVERYTHING on your boat to it for I/O. It really is a GREAT little piece of technology. You can pick it up online or at a local Radio Shack for about $30.00, best part about it is everything is open source so you can find code for just about anything and then just edit it the way you need it to function. It might take some time to learn it but, it's worth it, well worth it! Anyways, let me know if you need some help on the hardware or software design, I would love to help!
 

73Chrysler105

Chief Petty Officer
Joined
Sep 10, 2009
Messages
407
Re: Damaged Hull -- Pictures

I'll give you a holler. It's just a simple fiberglass hood not a lot of weight. I have been thinking of actuators or using a geared motor as well with the proper leverage won't take much. It does need to move 90 degrees from horizontal to vertical. Yes its a 12v system and it has a V8 inboard so plenty of amps if need be but keeping it under 5-10 amps is best obviously. I was planning on just hooking it up with a set of relays and micro switches. I know the arduino can do a lot just never had the time to play and learn. I have learned how to build a lot of projects without using a programmable controller and just using components that match up and work the way I want.
 

Peter9Do

Petty Officer 2nd Class
Joined
Nov 11, 2012
Messages
120
Re: Damaged Hull -- Pictures

I'll give you a holler. It's just a simple fiberglass hood not a lot of weight. I have been thinking of actuators or using a geared motor as well with the proper leverage won't take much. It does need to move 90 degrees from horizontal to vertical. Yes its a 12v system and it has a V8 inboard so plenty of amps if need be but keeping it under 5-10 amps is best obviously. I was planning on just hooking it up with a set of relays and micro switches. I know the arduino can do a lot just never had the time to play and learn. I have learned how to build a lot of projects without using a programmable controller and just using components that match up and work the way I want.

Oh yea, without a doubt you can built I/O stuff easily without any ICs. And something like just moving a motor or an actuator would be an easy setup for a non-IC circuit. However, the things you can add to an Arduino are really crazy. If you just go to the website and look around it really is confusing. However if you buy one and start with a simple LED on/off set up I'm telling you it will click after the second or 3rd LED project you do. The possibilities are endless! It can read something automated and run a separate function off of the results a sensor is giving it. I honestly love Arduino! I intend on putting a couple in the boat for various functions. It really takes not time at all and it's much cheaper than buying a bunch of hardware. I'm going to run a couple of temperature sensors and have the Arduino controlling all of my lighting. I honestly can't wait to get to that part of this boat project... I'll really be having some fun then! Anyways, if you need any help give me a shout! Also, consider looking into an Arduino, if you like playing with circuit hardware, you'll love this thing, it really is a lot easier than you may think, seeing all the code is open source and they have GREAT message boards as well for any help you may need.
 

chriscraft254

Commander
Joined
Jun 4, 2011
Messages
2,445
Re: Damaged Hull -- Pictures

If your getting into the LED lighting, I would suggest going with the Rgb lights so you can change colors. The white might be nice for rigging or cleaning, but red will be needed if you plan on running them while underway or just sitting fishing. The rgb's only cost you a few more bucks for a 5 meter roll compared to the single colors.

I did a Led thread here a while back. LED STRIP LIGHTING (Ins and outs info)
 

Peter9Do

Petty Officer 2nd Class
Joined
Nov 11, 2012
Messages
120
Re: Damaged Hull -- Pictures

If your getting into the LED lighting, I would suggest going with the Rgb lights so you can change colors. The white might be nice for rigging or cleaning, but red will be needed if you plan on running them while underway or just sitting fishing. The rgb's only cost you a few more bucks for a 5 meter roll compared to the single colors.

I did a Led thread here a while back. LED STRIP LIGHTING (Ins and outs info)

Yes, I agree. I think I will be using these white lights for inside compartments and going to a RGB string instead. These are nice because you can cut them to fit and just hook the sections up as needed. After I had purchased the white lights, I almost immediately said I should have bought the RGB. However, I'm still happy with the white and when you adjust the voltage on it, the dimness really will work nice just for standing lights. I think I only paid like $16.00 USD for 5 meters (16 feet) any way you look at it, it was a GREAT deal I couldn't pass up!
 

73Chrysler105

Chief Petty Officer
Joined
Sep 10, 2009
Messages
407
Re: Damaged Hull -- Pictures

I with you both on this and with my boat being red white and blue works great for me. One other option too is to use fiberoptic side glow cable as this will allow the electronics to always be in a water safe area and the light can glow from almost anywhere. It can also project a variety of colors depending on your light source.
 

Peter9Do

Petty Officer 2nd Class
Joined
Nov 11, 2012
Messages
120
Re: Damaged Hull -- Pictures

I with you both on this and with my boat being red white and blue works great for me. One other option too is to use fiberoptic side glow cable as this will allow the electronics to always be in a water safe area and the light can glow from almost anywhere. It can also project a variety of colors depending on your light source.

The LED strand lighting is water-proof... to a certain degree of course... I don't know about submerging for a long period of time however, it does claim to be water-proof. The fiber optic route might be a little pricy, and with these strands coming in at around $20 for 5 Meters (16ft), you really can't beat that. I can't tell you how bright these light strands are. I have unfolded 3 feet and hooked it up to my power supply, provided it with 12v 2 1.5a and these things are 10 times brighter than my florescent bulbs around my work bench. Also, just like the fiber optic they have the ability to be shaped in areas due to it being make out of a pliable, almost clear rubber like material. Just to point out another plus over fiber optics, you can cut these to size (I think it's 6" or 3" increment) I will check. Then all you have to do is attach another set of positive and negative leads put some heat shrink on them and you have custom sizes again working off the same 12v, 1.5a supply or a different supply for that matter. Add a 47k potentiometer to the mix for a dimmer or multiple pots to do different sections or switches, and you're good to go! I got this on eBay, you can find hundreds of different people selling the same ones, just make sure you get the water proof ones!
 

Peter9Do

Petty Officer 2nd Class
Joined
Nov 11, 2012
Messages
120
Re: Damaged Hull -- Pictures

Okay so I take that back it's about 2" between the sections you can cut, which have 3 LEDs. See the attached picture. By the way the other side of it is 3M, I don't know if I would just mount it using that but it will help when you're mounting it into place. LEDs.jpg
 

73Chrysler105

Chief Petty Officer
Joined
Sep 10, 2009
Messages
407
Re: Damaged Hull -- Pictures

I know all about these but its good info for others ready the thread. The 3M backing works great. I have zip tied mine in some cases for extra support but as long as you get it right the first time on a clean surface the 3M backing is great. I have worked with the weatherproof and the non weather proof. My opinion is if they can stay in a dry place on the boat the non weatherproof would actually be fine like under the gunwhales but for a little more the weatherproof are great if you cut them the weatherproofing can be a little hard to remove to solder on a new set of wires. Also that coating doesn't like heat so keep it out of direct sunlight, use a soldering iron sparingly and same with a heat gun for heat shrink tubing.
 

Peter9Do

Petty Officer 2nd Class
Joined
Nov 11, 2012
Messages
120
Re: Damaged Hull -- Pictures

Good point made on the soldering and heat shrinking. Also, I agree on the weatherproofing being a pain to remove. I recommend using a utility knife or razor and cut at angles going to the cut end of the string.
 

Peter9Do

Petty Officer 2nd Class
Joined
Nov 11, 2012
Messages
120
Re: Damaged Hull -- Pictures

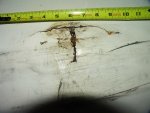
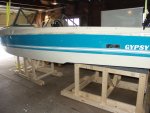
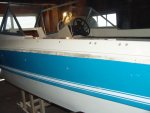
I know it has been some time since I have posted anything, however I have NOT given up... It's been too cold to be out there for hours at a time. I was able to finish my cradles and got the boat on them today! I took all the trim off and started grinding down the PB on the transom to get this mama-jam-a caped. Seeing that I'm freezing my arse off. I'm going to go back out there a little later and get to working on the PB. Now that I have that boat off the trailer I was able to get a good shot of the hole in the bottom of the boat (please see attached picture). Now, I can start knocking out all the remainder destruction phase of this restoration. I'm hoping to have this boat ready for summer, however knowing how much work I have a head of me and not wanting to rush through it I don't know if I will make it by the summer. Anyways, take a look at the pics! Hope all you guys are doing well! DSC06577.jpg DSC06578.jpg DSC06579.jpg
 

tallcanadian

Captain
Joined
Sep 7, 2006
Messages
3,245
Re: Damaged Hull -- Pictures

Good deal, Peter. I like the cradle. Did you build a ladder to get up in there? ;) This will get you going for sure. Great looking boat by the way., :D
 

GT1000000

Rear Admiral
Joined
Jul 13, 2011
Messages
4,916
Re: Damaged Hull -- Pictures

Nice job on the cradle!:encouragement:

By the time you get to repairing that little 'ol hole in the hull, you'll git-r-dun without a second thought...

Don't worry about pressuring yourself to get it all done by the summer...take your time, enjoy the experience and know for a fact that the finished product is better than anything the factory ever did and you will have the sense of pride and satisfaction of knowing every inch of that fine looking vessel...:D
 

Peter9Do

Petty Officer 2nd Class
Joined
Nov 11, 2012
Messages
120
Re: Damaged Hull -- Pictures

LMAO!!!!! It's a little high isn't it! I wanted to have enough room to work and keep it easy getting the trailer out and putting the cradle in. I guess if I ever have to build a cradle again, I know not to make it so high. It's like a trophy on its pedestal! lol!

I'm trying not to put pressure on myself, but the more I work on it, I just can't wait to take it out and watch it sink the first time she gets in the water! lol! I'm going to attach my kayaks to it and use them as life rafts! As the boat is on it's decent to the bottom of whatever body of water I choose to put it on, I will calmly scrape off the NYS registration so it can't be linked back to me and hope the fish enjoy the new reef! while I quickly paddle my reliable kayak back to shore! (the end) - lol!
 

Peter9Do

Petty Officer 2nd Class
Joined
Nov 11, 2012
Messages
120
Re: Damaged Hull -- Pictures

The cap is stuck on there pretty good... Any tips for getting it off in one piece?
 

GT1000000

Rear Admiral
Joined
Jul 13, 2011
Messages
4,916
Re: Damaged Hull -- Pictures

Usually the cap is held in place by both the tons of perimeter screws holding the rub rail on and sometimes can even be PB'd in place, especially the transom area...there is no real easy way to remove if it is PB'd in place, although some have had a good measure of luck using a combination of chisels, prybars, hammers and a reciprocating/oscillating type tool...Unfortunately, sometimes even brute force has to be called into the equation...:facepalm::rolleyes::)

Some have even cut the cap at certain locations and just pieced them back together when the time comes...
 

Peter9Do

Petty Officer 2nd Class
Joined
Nov 11, 2012
Messages
120
Re: Damaged Hull -- Pictures

Yea I got all the rub-rails off and all the screws out. I have been working on the transom PB with a Dremel however, it just does not want to budge... I will just keep cutting and see what happens. I know it will all come off in one piece so I'll just keep working the cutoff wheel around it. It should pop sooner or later! I don't want to put to much force into it because it's so cold out and the fiberglass has to be more brittle. So, I'm trying to avoid further damage to the boat.
 

Peter9Do

Petty Officer 2nd Class
Joined
Nov 11, 2012
Messages
120
Re: Damaged Hull -- Pictures

So I went back out into the tundra to do a little more cutting when I had a bright idea. Why not get in the boat and take a look for any adhesive or PB from that side. Well, what I found was a little shocking... There must be about 6 lbs of PB jammed into the crack between the cap and the transom... WTF! I think I'm going to need to get some bigger tools. I will be going to Harbor Freight to see if I can find a nice Oscillating Multi-Tool for $20 that I can beat up. I had enough of this weather and CAN'T WAIT UNTIL SPRING!

I was telling my brother the other day, I really can't wait just for the weather to get nice so I can go Walleye fishing! It's been a good 6 months since I pulled a Walleye out of the water, fillet it, and threw it on the grill! Nothing is more rewarding that eating the catch of the day and washing it down with a little Crown Royal! - Ahhh Summer, how I miss you!
 
Top