'96 lund tyee 1850 floor rebuild and foam replacement.

brunolund

Chief Petty Officer
Joined
Jan 26, 2008
Messages
417
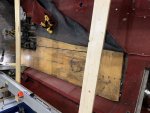
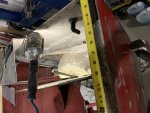
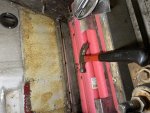
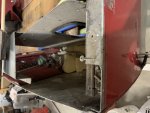
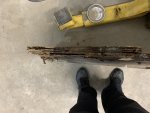
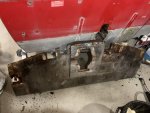
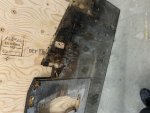
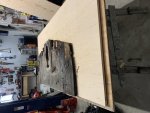
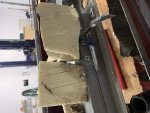
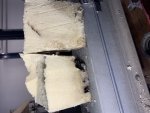
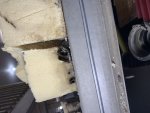
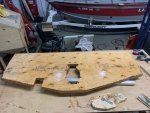
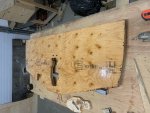
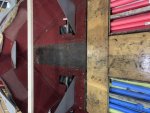
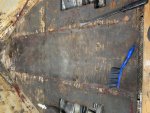
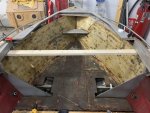
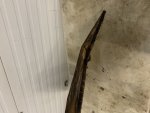
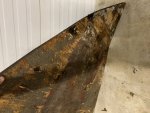
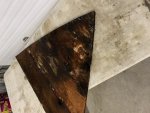
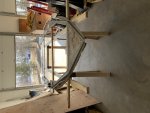
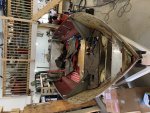
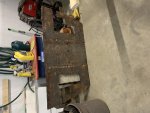
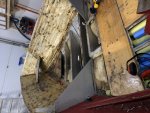
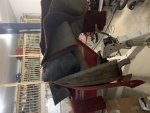
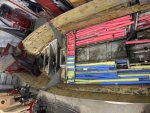
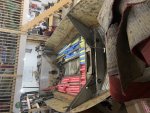
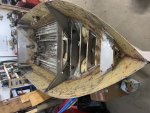
just got my transom out last night. will get some pics up soon. found some more wet foam in the rear sides under the gunnels. foam was about 16” deep, but only the bottom two inches were wet. but very wet. surprising how much weight it holds. will get some pics of that too.

good luck sparike. feel free to ask any questions. and take lots of pics.
 

brunolund

Chief Petty Officer
Joined
Jan 26, 2008
Messages
417
got a question about foam. in the back of my boat, there was plastic sheeting between the foam and the sidewall. it went under the foam, but not all the way across. any idea why that would be there? and is it needed? i can’t see a purpose other than to keep the foam from sticking to the sidewall, but not sure why i wouldn’t want it stuck to sidewall
 

brunolund

Chief Petty Officer
Joined
Jan 26, 2008
Messages
417
floor i put in 8 years ago. looks pretty good, but i didn’t seal the screw holes. very apparent that moisture was getting in there. 3/4 ply sealed with west systems 205 epoxy.

also the pool noodles i put in instead of flotation foam, we’re in perfect condition after 8 years. i was surprised how well they held up. i was planning on going back to the pour foam, but like the fact noodles don’t hold the water. still unsure of this.
 

Attachments

  • photo327111.jpg
    photo327111.jpg
    360.3 KB · Views: 11
  • photo327112.jpg
    photo327112.jpg
    307.1 KB · Views: 12
  • photo327113.jpg
    photo327113.jpg
    410.8 KB · Views: 12

brunolund

Chief Petty Officer
Joined
Jan 26, 2008
Messages
417
this lip stopped the transom from coming out, so out of they way it goes. thought about cutting it off and riveting it back on, but just bent it out of the way and will hammer it back into place. i’ll add some screws to hold it in place. had to go little bits at a time and work my way back and forth. eventually got it straight up and out of the way.
 

Attachments

  • photo327114.jpg
    photo327114.jpg
    286.3 KB · Views: 7
  • photo327115.jpg
    photo327115.jpg
    262.2 KB · Views: 7
  • photo327116.jpg
    photo327116.jpg
    262.6 KB · Views: 7

brunolund

Chief Petty Officer
Joined
Jan 26, 2008
Messages
417
it’s out!! still mostly in one piece, but the spot where the tie downs came through were completely gone. not sure if water came in from the tie downs, or ran off the top of the gunnel and sat on between the foam and the transom. kind of a weird design in that the gunnel is flat on top, and ends just short of the transom. there is a cap on the rear corner, but it sits above the gunnel, so water just runs along gunnel and drops onto foam against transom. will be remedying that situation.
 

Attachments

  • photo327117.jpg
    photo327117.jpg
    281 KB · Views: 8
  • photo327118.jpg
    photo327118.jpg
    320.9 KB · Views: 8

brunolund

Chief Petty Officer
Joined
Jan 26, 2008
Messages
417
tracing rough shape of transom on some 3/4 exterior for plywood.
 

Attachments

  • photo327123.jpg
    photo327123.jpg
    335.6 KB · Views: 5
  • photo327126.jpg
    photo327126.jpg
    308.5 KB · Views: 5

brunolund

Chief Petty Officer
Joined
Jan 26, 2008
Messages
417
some of the foam chunks from inside the gunnels. these were the bottom pieces. you can see the bottom 1” approx. is wet. it’s quite surprising how much water that 1” will hold. the rest above was dry. but it was about 16” thick in this area.
 

Attachments

  • photo327128.jpg
    photo327128.jpg
    293.1 KB · Views: 6
  • photo327129.jpg
    photo327129.jpg
    323.4 KB · Views: 6
  • photo327130.jpg
    photo327130.jpg
    337.6 KB · Views: 6

brunolund

Chief Petty Officer
Joined
Jan 26, 2008
Messages
417
new transom. this is the rear face that will be against the aluminum hull. didn’t get a picture of the front for some reason. i didn’t copy two of the lower cutouts, because i didn’t need them. just the one seen for the livewell pump.
 

Attachments

  • photo327131.jpg
    photo327131.jpg
    324.2 KB · Views: 6
  • photo327132.jpg
    photo327132.jpg
    322.9 KB · Views: 6

brunolund

Chief Petty Officer
Joined
Jan 26, 2008
Messages
417
back to the floor. you can see the floor that was not charged 8 years ago. its definitely past usable. gonna be fun removing all the glue.
 

Attachments

  • photo327133.jpg
    photo327133.jpg
    392.6 KB · Views: 9
  • photo327134.jpg
    photo327134.jpg
    454.2 KB · Views: 9
  • photo327135.jpg
    photo327135.jpg
    413.9 KB · Views: 9

brunolund

Chief Petty Officer
Joined
Jan 26, 2008
Messages
417
this is what the floor screws look like once you find them under the carpet/ glue/ rotted wood!! slow going cleaning out the heads, using a chisel to start it turning, then working it back and forth till it comes out. good thing i have a good set of screwdrivers!!
 

Attachments

  • photo327136.jpg
    photo327136.jpg
    263.3 KB · Views: 0
  • photo327137.jpg
    photo327137.jpg
    365.2 KB · Views: 0
  • photo327138.jpg
    photo327138.jpg
    397.1 KB · Views: 0

brunolund

Chief Petty Officer
Joined
Jan 26, 2008
Messages
417
bow front floor is out. this is the softest piece i’ve seen that stayed together!! you can see how it bent there. that is not a crack, it actually flops around!! the front 6 or so screws just pulled right through floor board. at least i can still use it for a pattern.

one original piece of floor left!!!!
 

Attachments

  • photo327139.jpg
    photo327139.jpg
    228.3 KB · Views: 5
  • photo327140.jpg
    photo327140.jpg
    302.6 KB · Views: 5
  • photo327141.jpg
    photo327141.jpg
    293 KB · Views: 5
  • photo327142.jpg
    photo327142.jpg
    425.3 KB · Views: 5

brunolund

Chief Petty Officer
Joined
Jan 26, 2008
Messages
417
cap out of the way
 

Attachments

  • photo327206.jpg
    photo327206.jpg
    399.1 KB · Views: 5
  • photo327207.jpg
    photo327207.jpg
    304 KB · Views: 5
  • photo327208.jpg
    photo327208.jpg
    386.8 KB · Views: 5

brunolund

Chief Petty Officer
Joined
Jan 26, 2008
Messages
417
last pieces of the floor coming out!!!
 

Attachments

  • photo327209.jpg
    photo327209.jpg
    310.3 KB · Views: 3
  • photo327210.jpg
    photo327210.jpg
    381.8 KB · Views: 5

brunolund

Chief Petty Officer
Joined
Jan 26, 2008
Messages
417
all of the carpet out in a pile, and just a shot of the boat as it sits now. tomorrow i’ll remove all the noodles!, and the fuel tank.
 

Attachments

  • photo327211.jpg
    photo327211.jpg
    307.9 KB · Views: 9
  • photo327212.jpg
    photo327212.jpg
    424.7 KB · Views: 9
  • photo327213.jpg
    photo327213.jpg
    390.5 KB · Views: 9

Sparike

Seaman Apprentice
Joined
Aug 29, 2019
Messages
46
WOW, you're going a lot deeper than I am!! Did you epoxy both sides of the floor you replaced a few years back? Wondering about the theory of trapping moisture if you do both sides. With the moisture that followed your screws down, how did your plywood respond?
 

brunolund

Chief Petty Officer
Joined
Jan 26, 2008
Messages
417
i did epoxy both sides the first time, and it worked great. the only place it showed discolouration from moisture was around the screws. i didn’t seal them then, but i will definitely do it this time. going to either prettily them and put sealer in the hole, or run the screw in and then remove it to put sealer in. might even epoxy over the heads of the screws. but thinking that would make it close to impossible to remove later. maybe just a marine sealer over top of them.
 

brunolund

Chief Petty Officer
Joined
Jan 26, 2008
Messages
417
everything out, ready for a scrubbing
 

Attachments

  • photo327287.jpg
    photo327287.jpg
    386 KB · Views: 8

Sparike

Seaman Apprentice
Joined
Aug 29, 2019
Messages
46
Mine's going a bit slower than yours, unless we count your very beginning start date! I'm trying to find a composite type board I can use for the dash that will hold the windshield. I am not going to use any of that padded vinyl
that was in the boat to start with. I like your snap in carpet idea but will most likely just glue mine in. I plan on coating the floor with epoxy after I have it screwed down. Doubt I'll ever have it up again, still might take those little sticky dots & put over the screws. Any ideas on the composite dash or a better way---I'm all ears
 

brunolund

Chief Petty Officer
Joined
Jan 26, 2008
Messages
417
i am going back to glue in carpet as well. not sure what to suggest for the dash. i’m going back to vinyl on plywood.
 
Top