MFG rebuild getting started pics

GT1000000

Rear Admiral
Joined
Jul 13, 2011
Messages
4,916
Re: MFG rebuild getting started pics

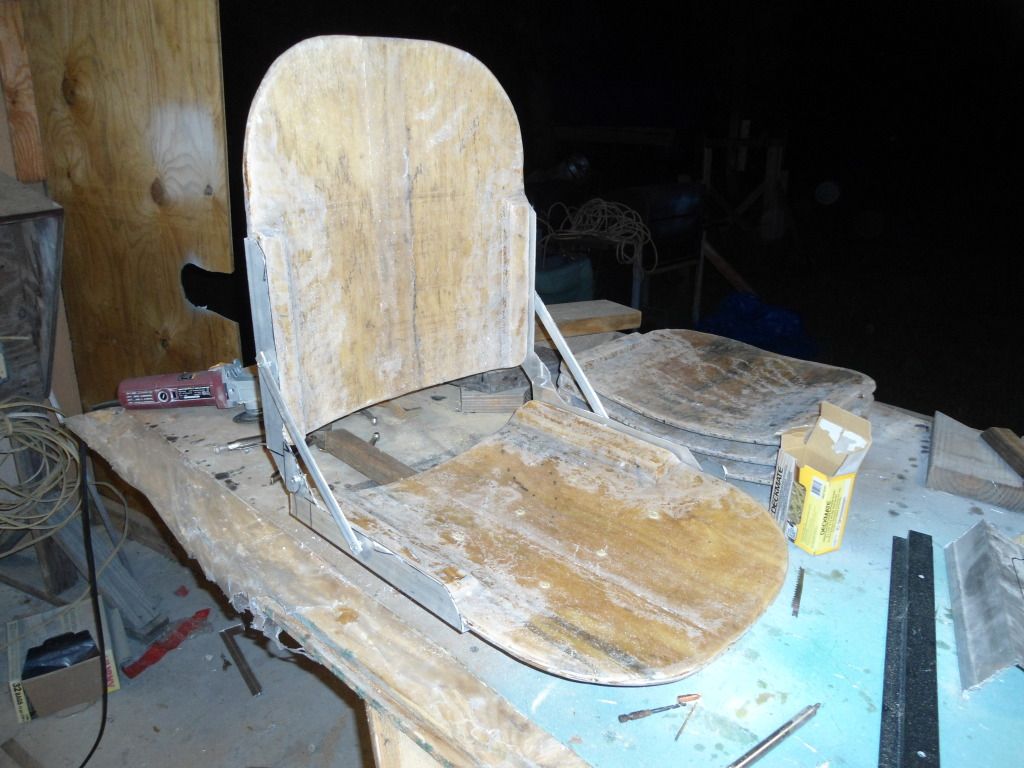
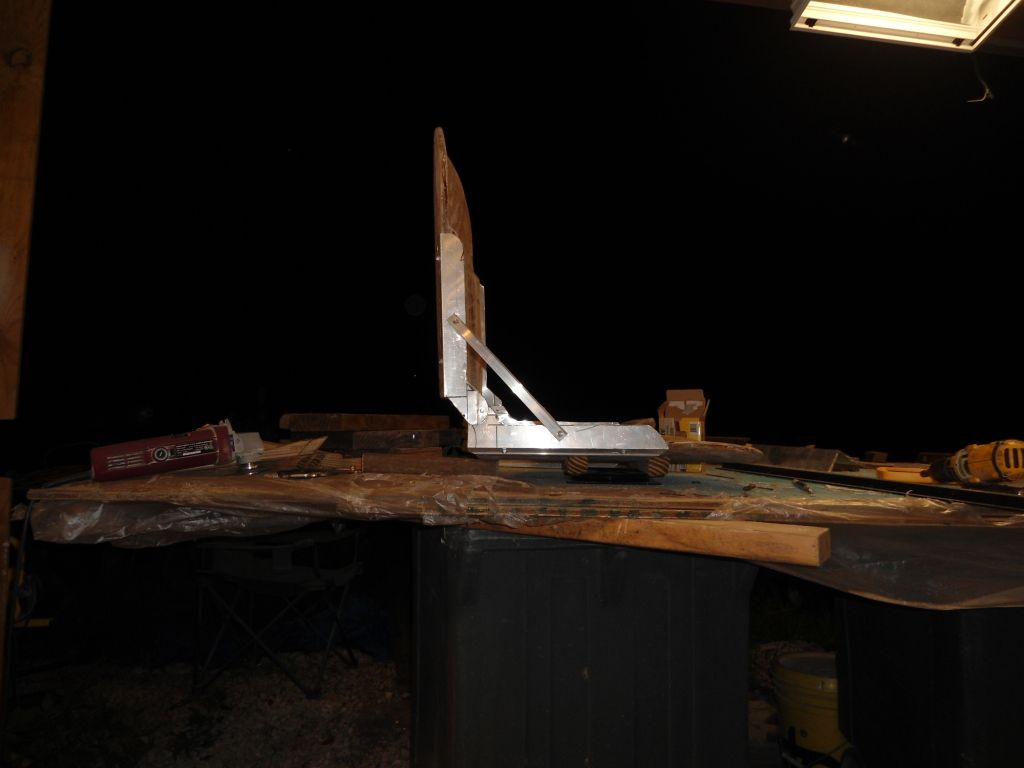
Now that I see the original design, I can see exactly where you are headed and you seem to be right on track...Like Decker mentioned, you could lower the as designed pivot a little lower and maybe use either a denser foam all across, or use a softer foam for the center section and a denser foam for the bolsters...

Sorry, I didn't mean to turn this into a "Jas, where do I put the batteries?", discussion...:redface::facepalm:... LOL...:)
 

sphelps

Supreme Mariner
Joined
Nov 16, 2011
Messages
11,435
Re: MFG rebuild getting started pics

Quite alright my friend the more the hampster turns the wheel the better he stay's in shape ! :p
 

sphelps

Supreme Mariner
Joined
Nov 16, 2011
Messages
11,435
Re: MFG rebuild getting started pics

Well I have been working on the seat backing a little but I still have a ways to go. I bought some of the cheap flat swivel brackets from W-M . I had to figure out how to mount them on the bottom of the curved plywood. So I cut some 2x2's 12" long and cut the radius on them to fit . Now I can fasten the mounting bracket on a flat surface. I took some pics but the house computer wont stay connected long enough to down load to my PBucket. I have been using my sons pc and I haven't figured out how to down load with his.. :facepalm:
I'm about ready to go SCTV on the house compooper!:mad:
Have a good Friday everyone !
 

sphelps

Supreme Mariner
Joined
Nov 16, 2011
Messages
11,435
Re: MFG rebuild getting started pics

I have the seat mounts temp screwed to the bottom .
DSC00699.jpg

DSC00700.jpg

As you can see I beefed up the edges with some ply strips to give the hardware a little more to screw too.
I think I need to move the swivel mount back . It is centered with the seat but it seems so back heavy .
DSC00701.jpg

i was just thinking down the road when the sewing starts should I add the thin foam padding to the back of the seats ?
Also got any idea's on how to close the bottom of the vinyl on the seat back's ? The seat bottoms I guess will just staple tight underneath .
 

jbcurt00

Moderator
Staff member
Joined
Oct 25, 2011
Messages
24,871
Re: MFG rebuild getting started pics

My low cost, re-dye job seat back's vinyl are really slip covers that go on before the hinges, then velcro is used to close the bottom flaps. Once velcro'd closed, the remaining few inches of the 2 welted edge seams got sewn closed, then the hinges got screwed on thru the vinyl.

Seat layout & fab look great!!
 

Pmccraney

Lieutenant Commander
Joined
Jul 26, 2011
Messages
1,734
Re: MFG rebuild getting started pics

Great job on the seats so far... I can't believe you made those.... You have mad skills...
 

sphelps

Supreme Mariner
Joined
Nov 16, 2011
Messages
11,435
Re: MFG rebuild getting started pics

Yep looking at FSIL's elcheapo bass seats they used the velcro also . Did the edge seems get sewn by hand on the re-dye ?
 

Woodonglass

Supreme Mariner
Joined
Dec 29, 2009
Messages
25,924
Re: MFG rebuild getting started pics

SP, I'm Thinkin I'd make the covers totally removable with velcro attachments to the frames. Either Nylon zippers or velcro enclosures. Somethin like this...
seats.jpg


Just my 2? worth
 

Jon Sob

Master Chief Petty Officer
Joined
Jun 11, 2011
Messages
827
Re: MFG rebuild getting started pics

Nice work sp ..... can't wait to see them finished.
 

jbcurt00

Moderator
Staff member
Joined
Oct 25, 2011
Messages
24,871
Re: MFG rebuild getting started pics

Yep looking at FSIL's elcheapo bass seats they used the velcro also . Did the edge seems get sewn by hand on the re-dye ?

I sprayed the dye w/ the covers still on the seats. But yes, the last little bit of edge seam must have been sewn after the seat vinyl was put on, and the velcro at the bottom closed.

Sorry missed your question this am...
 

sphelps

Supreme Mariner
Joined
Nov 16, 2011
Messages
11,435
Re: MFG rebuild getting started pics

SP, I'm Thinkin I'd make the covers totally removable with velcro attachments to the frames. Either Nylon zippers or velcro enclosures. Somethin like this...
seats.jpg


Just my 2? worth

Any reason to make them removable Wood ? The hinge will have to screw over the velcro / zipper.
 

Woodonglass

Supreme Mariner
Joined
Dec 29, 2009
Messages
25,924
Re: MFG rebuild getting started pics

You misunderstood the drawing. the Velcro zipper would run across the back of the cushion on the beveled portion of each of the cushions and the cushions would attach to the wood with velcro strips. I'm doing a bad job of explaining.
 

sphelps

Supreme Mariner
Joined
Nov 16, 2011
Messages
11,435
Re: MFG rebuild getting started pics

Jon ,
Thanks and I can't wait to get them done also . It'll be nice to have something to sit on other than a 5 gal bucket !


Got a paint question.
I bought some rusto specialty reducer for the really high temps ,90 deg + . Do you use the same amount per cup of paint as ms and act ? Also would it make since to add the hardener first let it cook then add thinner to keep it from evaporating quickly ?
My last paint session had VERY bad orange peel and I want to work this out before I shoot more paint.
Thanks !
 

sphelps

Supreme Mariner
Joined
Nov 16, 2011
Messages
11,435
Re: MFG rebuild getting started pics

Wood , on the seats, do you mean build like a slip cover and have the velcro attached to the wood on the bottom or end of the seat?
I think the ends are going to be built square and not beveled . If I have to bevel it will not be much of a bevel.
The hamster is still turning the wheel up there !:rolleyes:
 

Woodonglass

Supreme Mariner
Joined
Dec 29, 2009
Messages
25,924
Re: MFG rebuild getting started pics

Yep, Slip Covers. Just my thought. How thick are the cushions going to be??

On the paint I would add the Hardener let it cook, and then ad the reducer right before I sprayed it.
 

sphelps

Supreme Mariner
Joined
Nov 16, 2011
Messages
11,435
Re: MFG rebuild getting started pics

The foam is 4" thick . Iwas thinking on making the sides a little smaller for a good tight fit maybe 3 1/2 " . I think I will take some of the donor cushions vinyl and do a mockup to see how it will fit. The top and bottom will have to have a slight radius to keep the curved look.

Same amount of reducer as the thinner correct ? It said 50 / 50 paint / reducer . Seems a little high.
 

Woodonglass

Supreme Mariner
Joined
Dec 29, 2009
Messages
25,924
Re: MFG rebuild getting started pics

I used 3/4 cup of reducer with 2 cups of paint. With a 4 inch foam cushion I think you could make slip covers without and issue. If you covered the foam with plastic they would slip on with ease.
 

sphelps

Supreme Mariner
Joined
Nov 16, 2011
Messages
11,435
Re: MFG rebuild getting started pics

Well I have ran into that guy murphy , somebody really needs to do something about him ..:mad: I have brought this on myself well mainly because I am way to picky when it comes to my own work and I can be as Fred Sanford say's a " big dummy " ! :facepalm:
I was worried that I could not get the fish eye's out of the third coat of paint on the bow and I wanted to touch up a few spots on the stripes I decided to shoot one more coat of paint just on the bow . So when I shot the paint it was orange peal city big time on the white with the small gun and the green with the big gun. I talked with the valspar tech guy about how much cure time before buffing and he said I should be good in a week . It was in the 90's when I shot it so I assumed that was the problem. So I tried wet sanding and buffing using GT's earlier post on buffing. The problem with with that was I had to sand pretty aggressive to git the orange peel down and you guess it I sanded to far in a few spots . Man I have really beat myself up over this for a while . Every time I would walk by and see it it would just eat at me until I came to the conclusion that Hey you big dummy it's JUST PAINT and I can fix it ! Or at least I thought I could . So that brings me to today . I re-shot it using the reducer and still got the bad orange peel . I stopped and added another 1/4 cup and adjusted the air and paint every way I could think of and still the orange peel .:confused: I had a foam roller so I finished up doing some roll on roll with muuuch better results . I 'm sure I had to much thinner for rolling but I used it anyway. I'm gunna check it out tomorrow and see what it looks like. It was around 97 deg when I shot it today so I guess it's just too darn hot ! Anyway I WILL get it worked out and move on to other things . Sorry for all my rambling on . Thanks everyone for all your help ! S.P.
 
Top