Starcraft Holiday Reno and Hull Repair

Grandad

Lieutenant Commander
Joined
Jun 7, 2011
Messages
1,504
Re: Starcraft Holiday Reno and Hull Repair

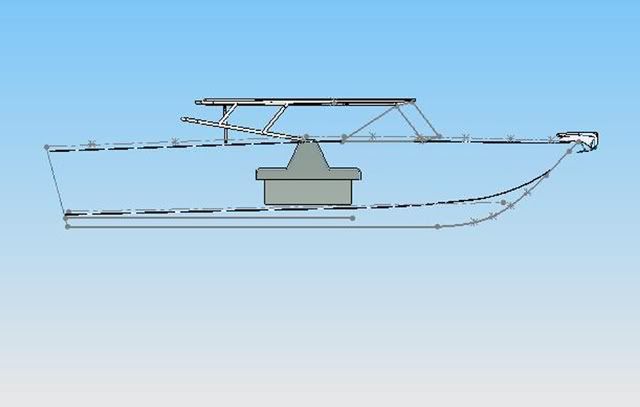
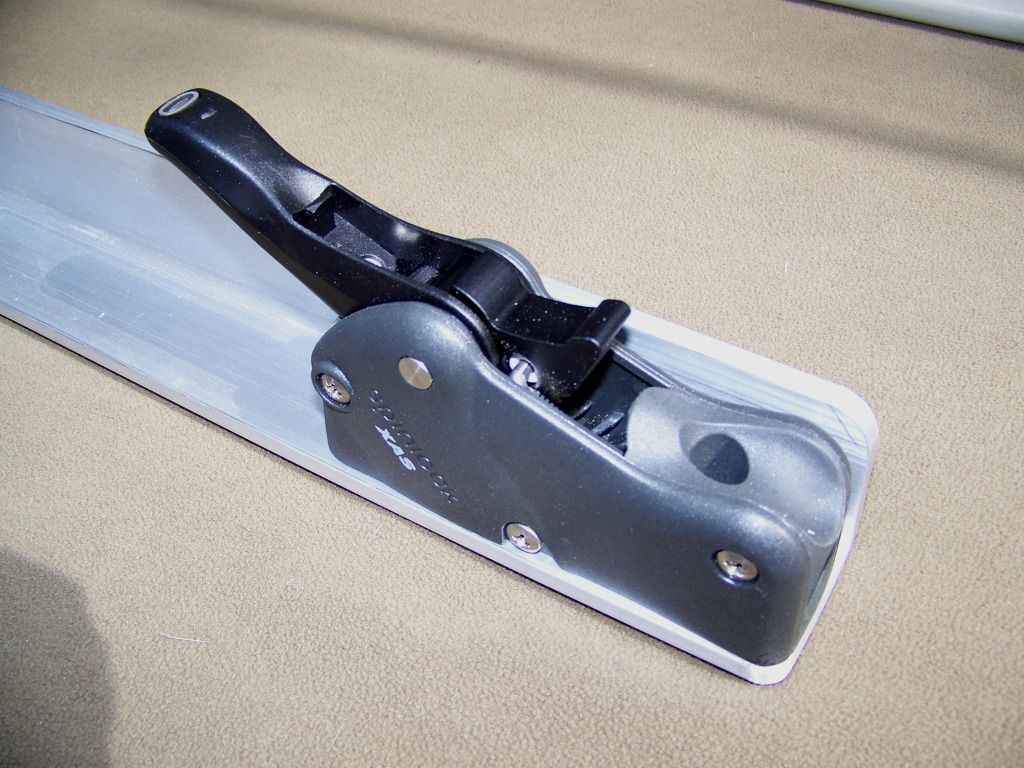
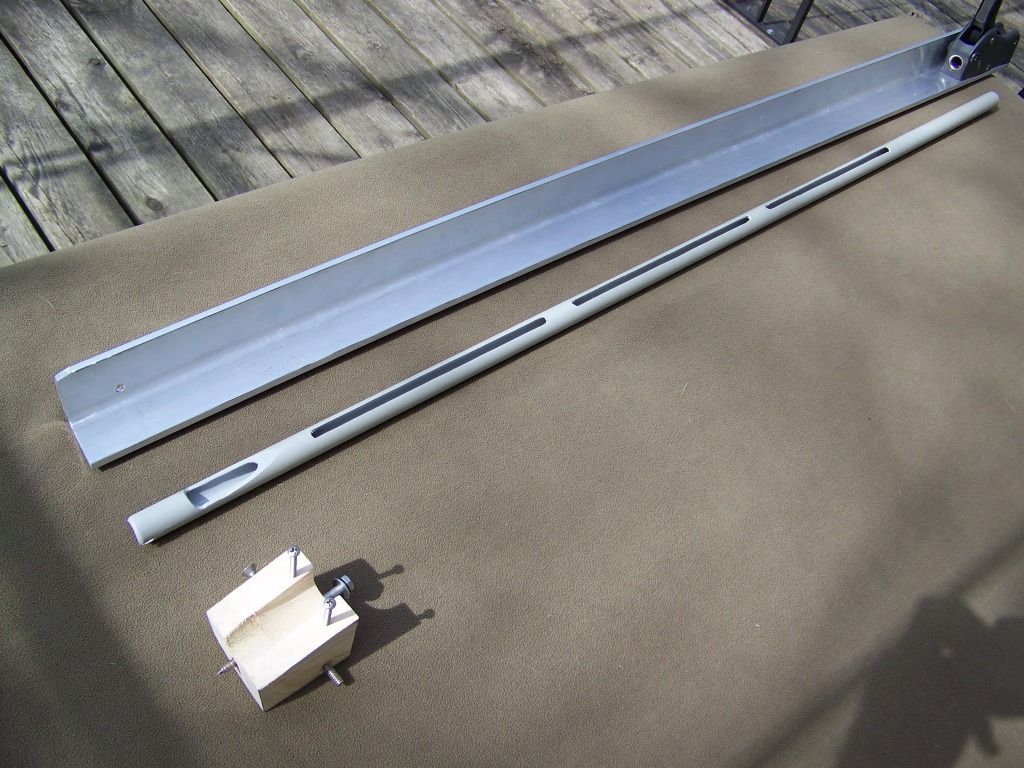
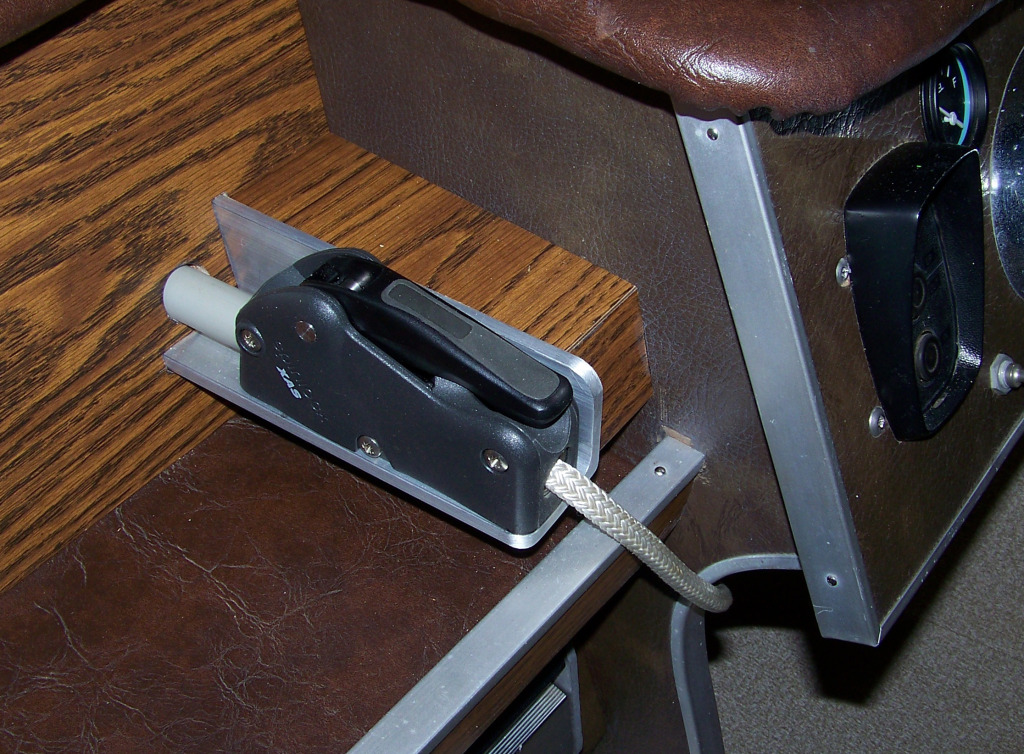
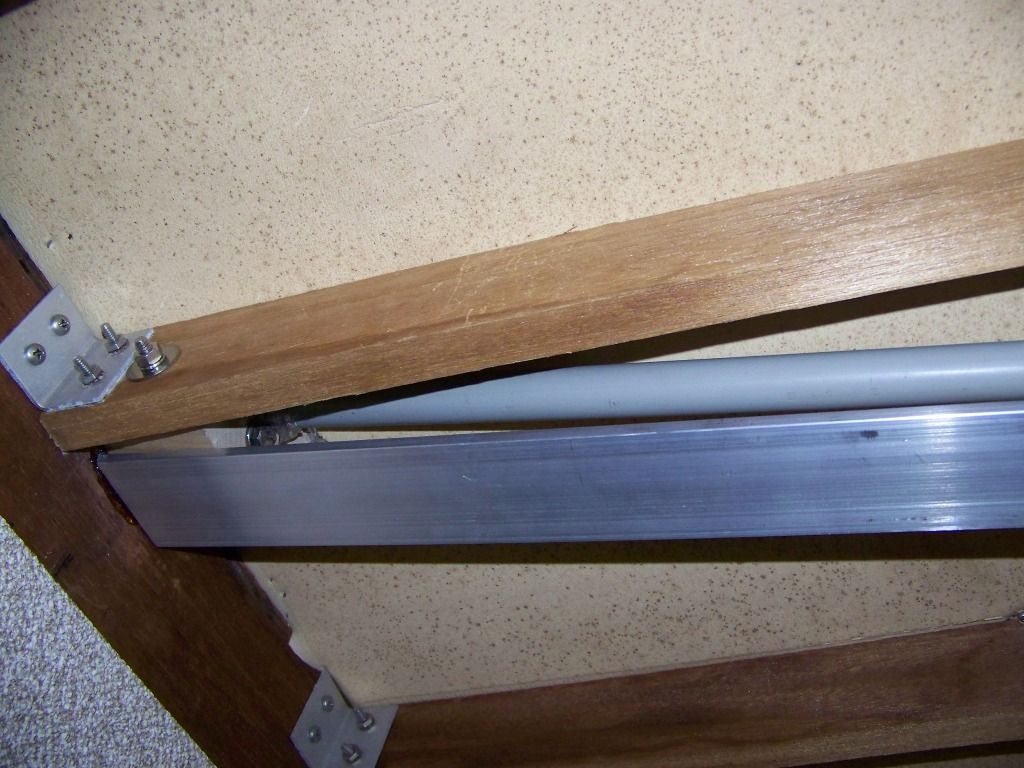
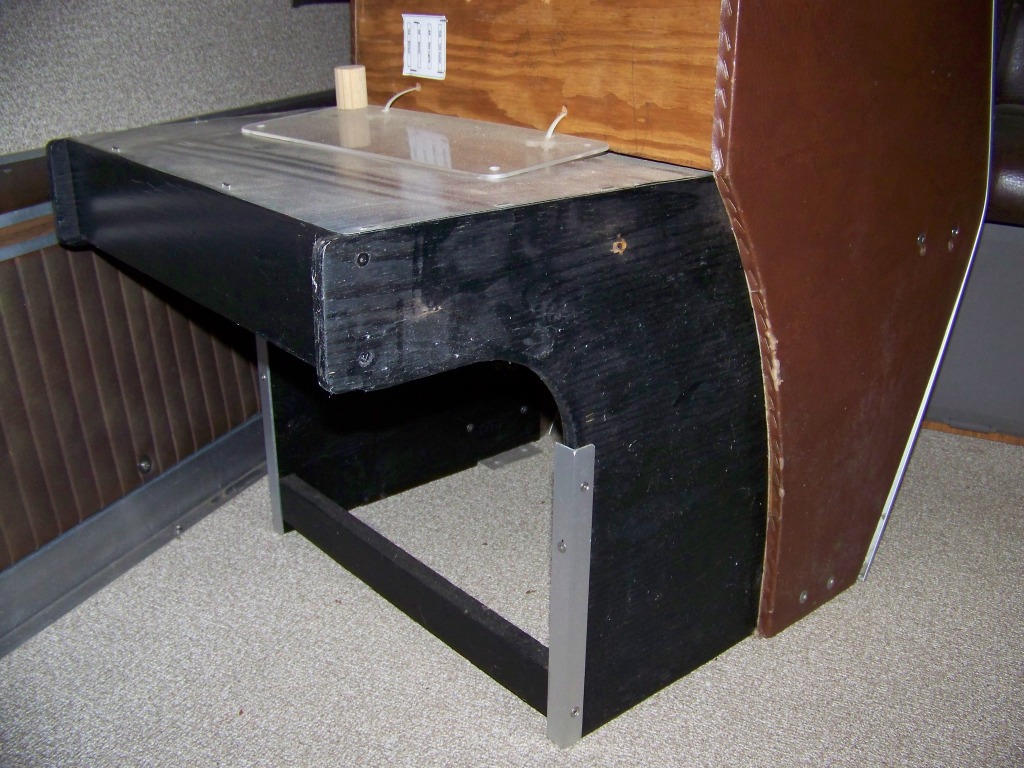
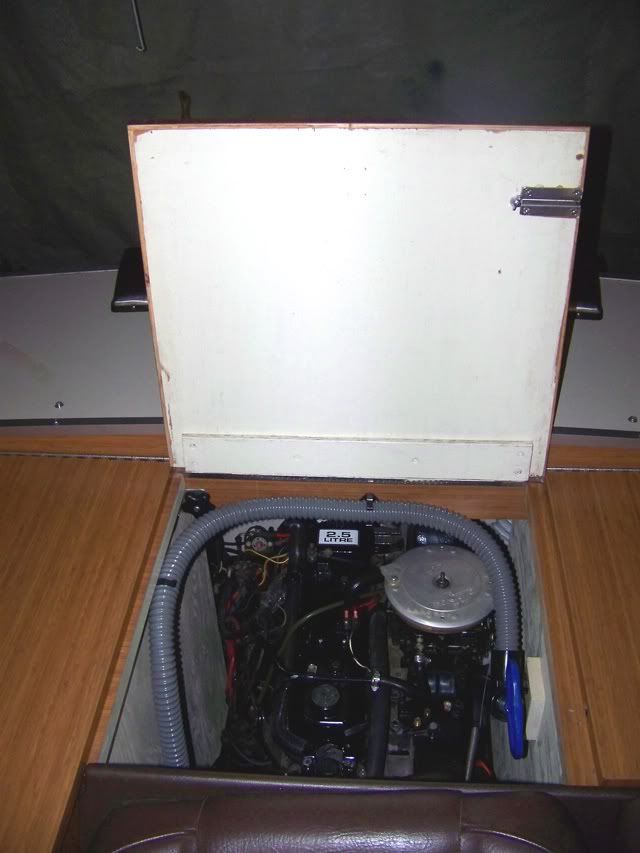
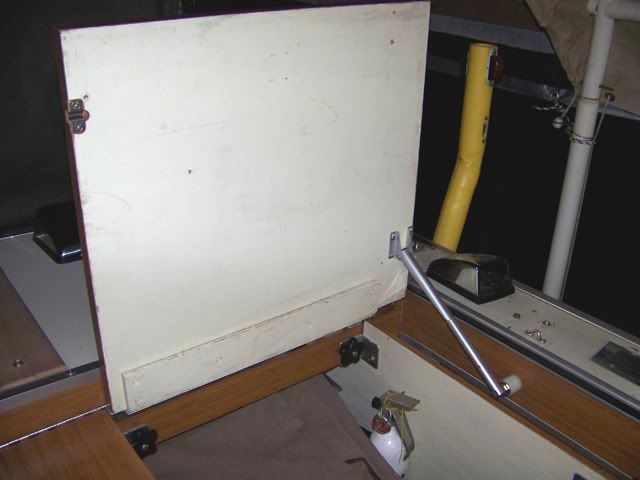
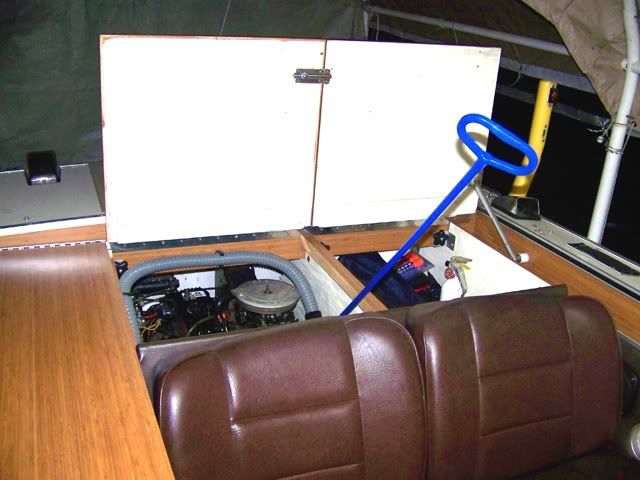
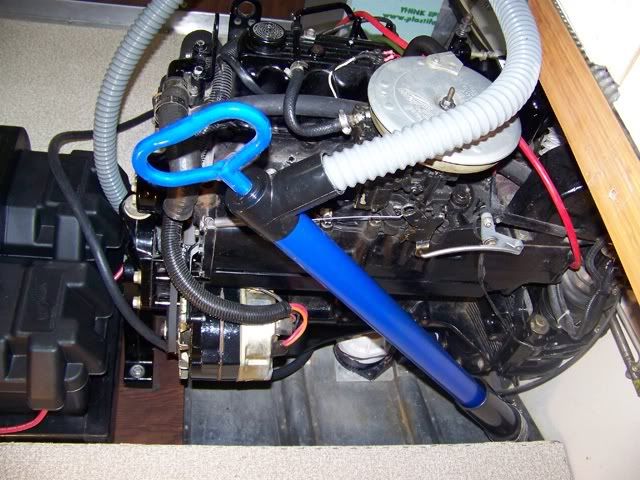
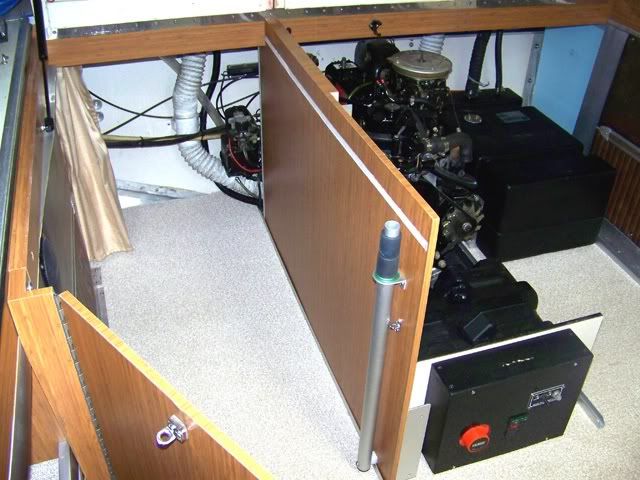
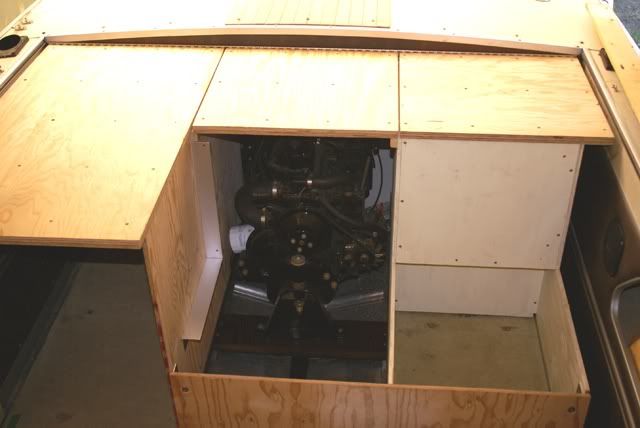
The lids for all sections are double 1/2" plywood glue laminated to form a 1" thick walking platform. The port side storage lid, when opened, is automatically held by an aluminum strut. The engine lid, when opened, secures to the port side storage lid with a slide bolt. All finished surfaces are covered in Formica laminate. All hardware is stainless steel. The entire structure is held in place using 12 hand knobs with 1/4-20 SS threads. Access to any part of the engine can be made in minutes without using any tools.

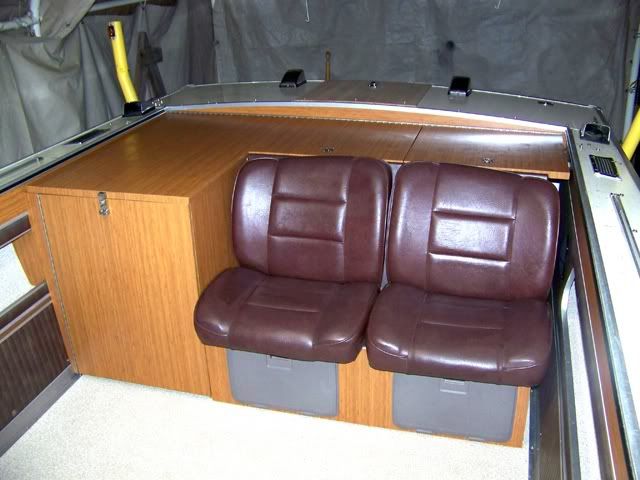
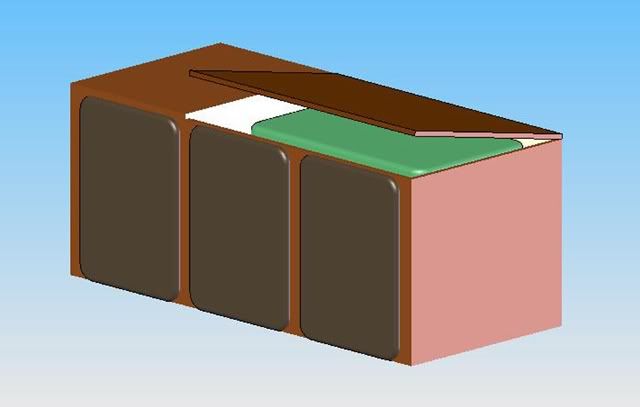
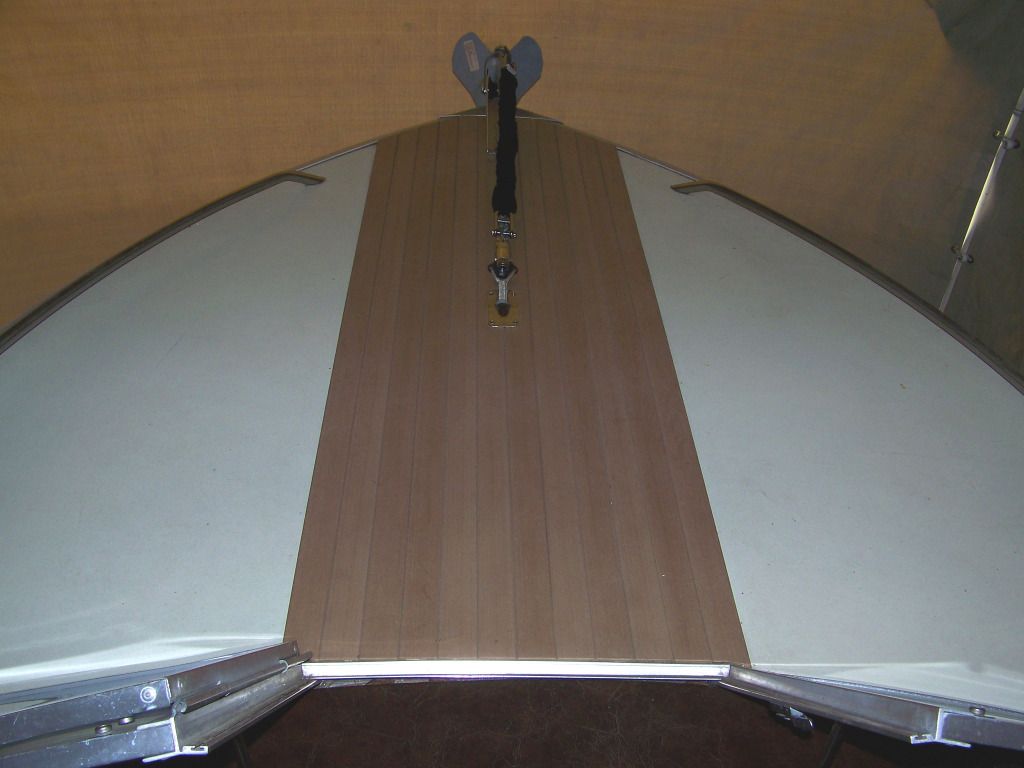
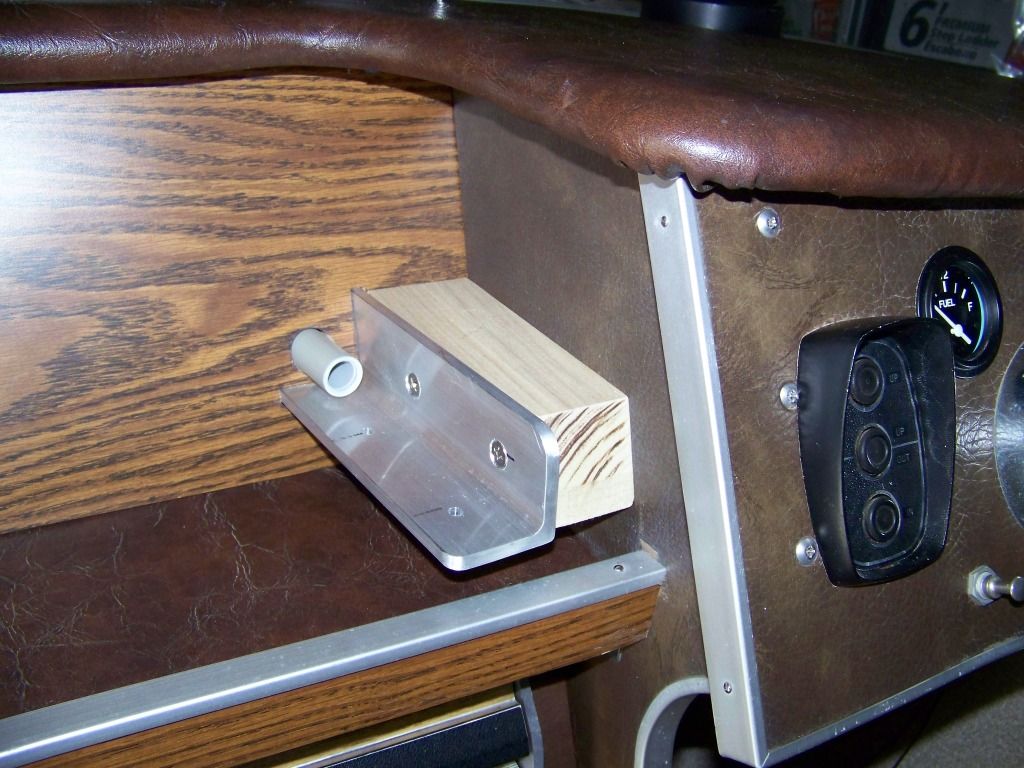
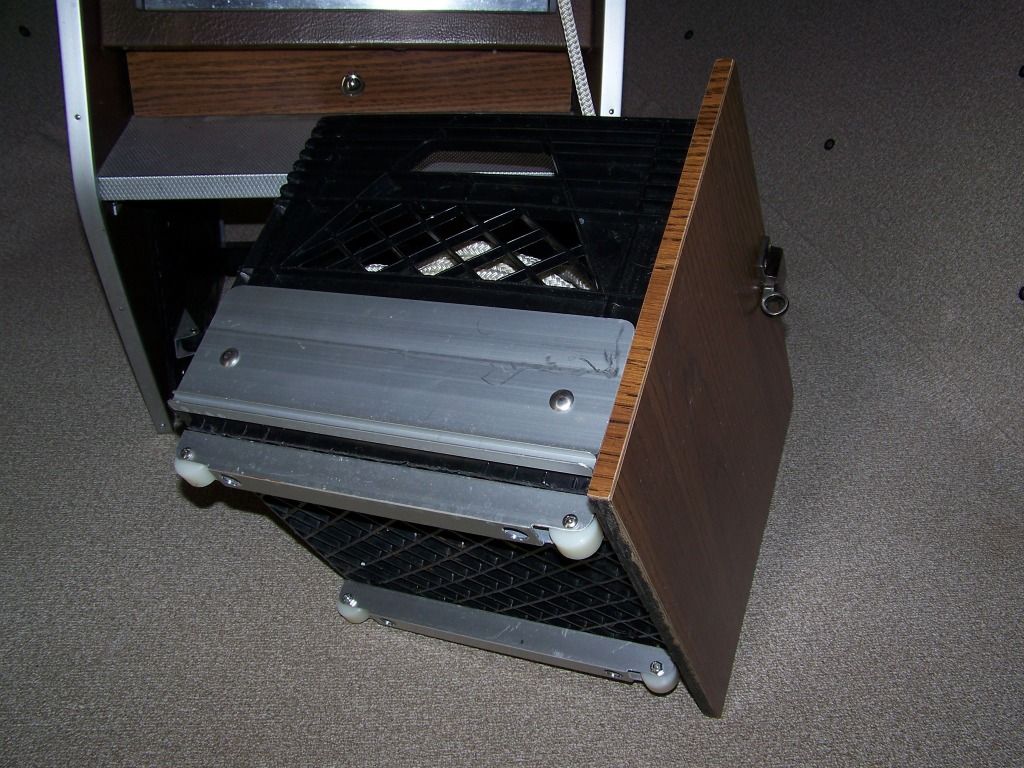
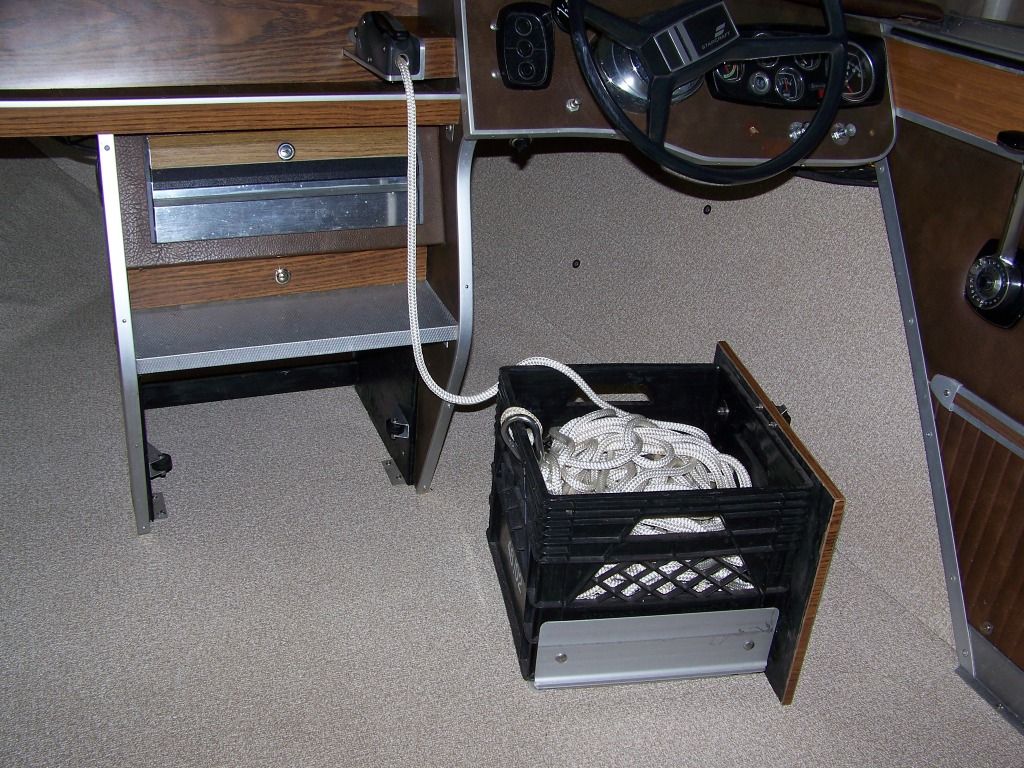
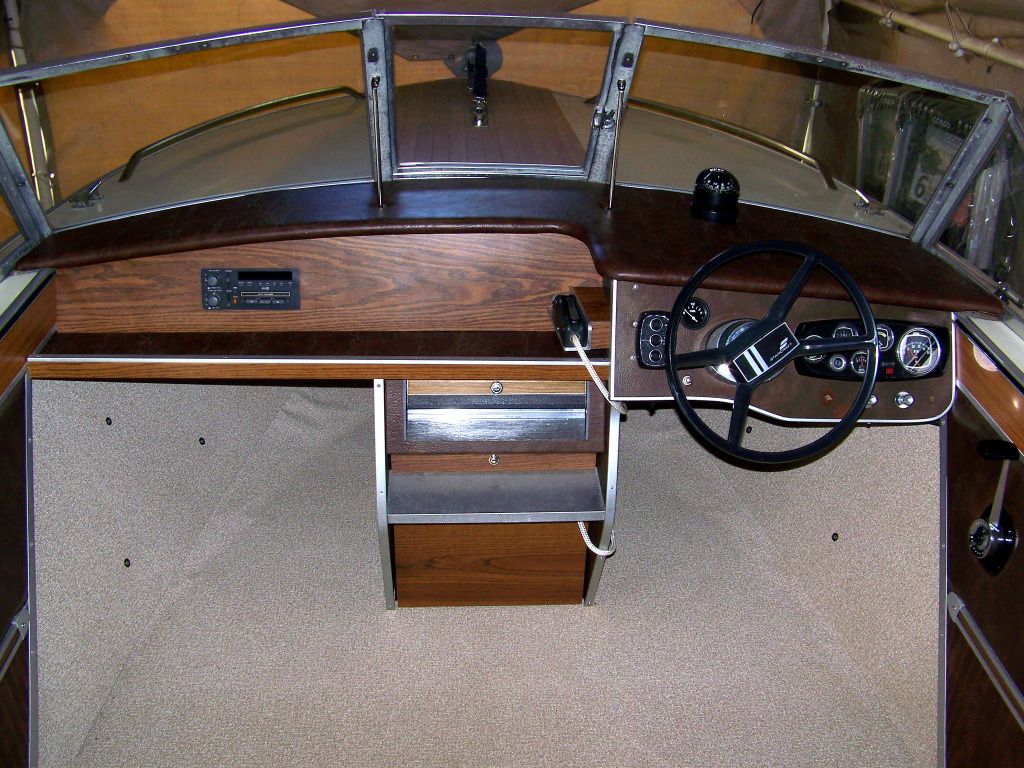
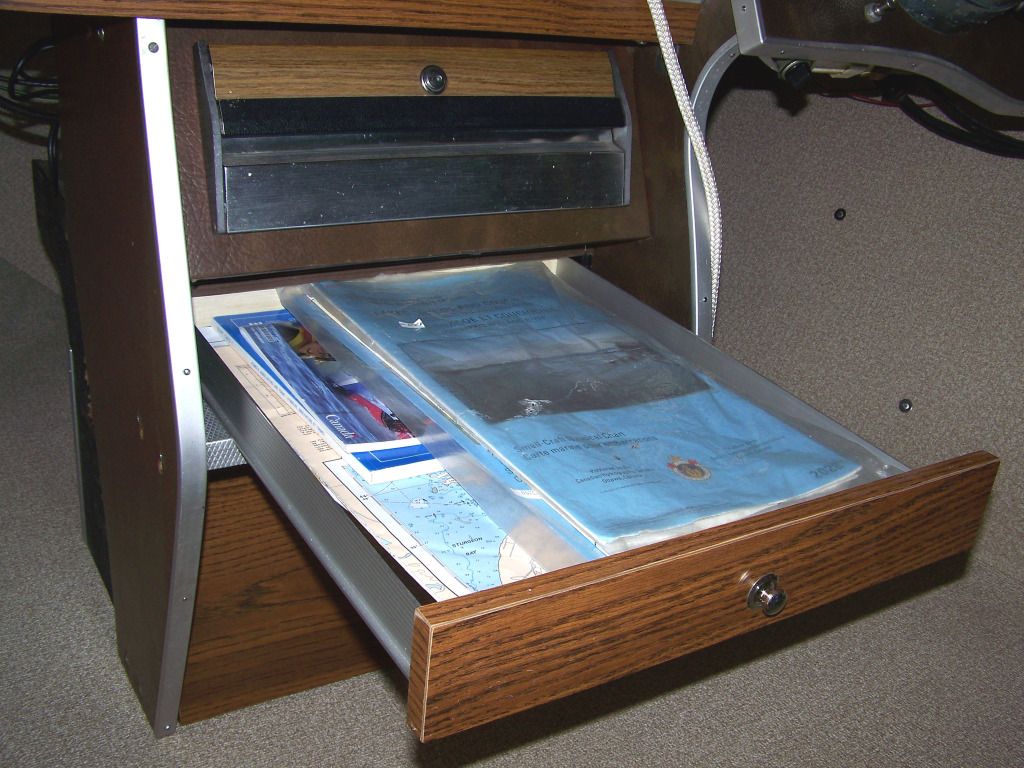
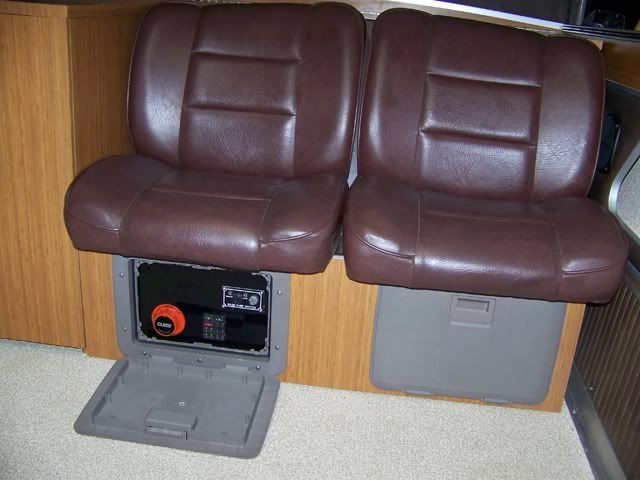
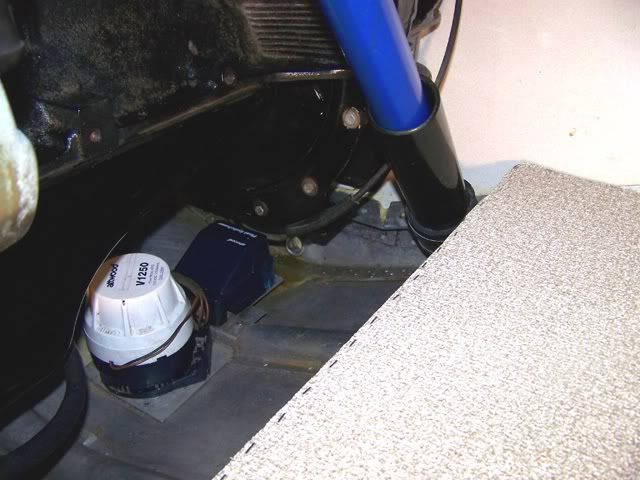
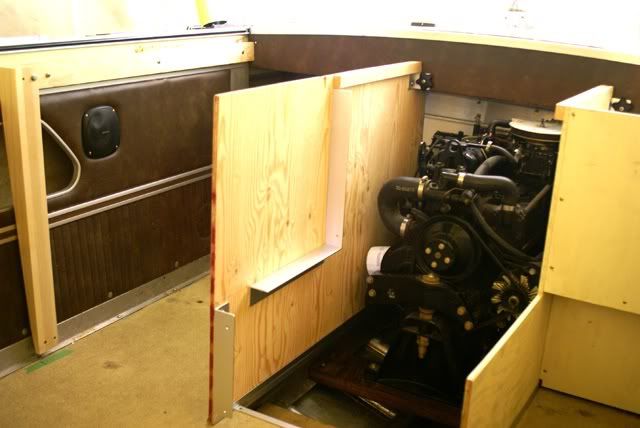
A kick panel below the seats has 2 hinged locker doors to access the control panel and the storage space. Behind the seats are 2 hinged lids to access the top of the engine
and a port side storage compartment.
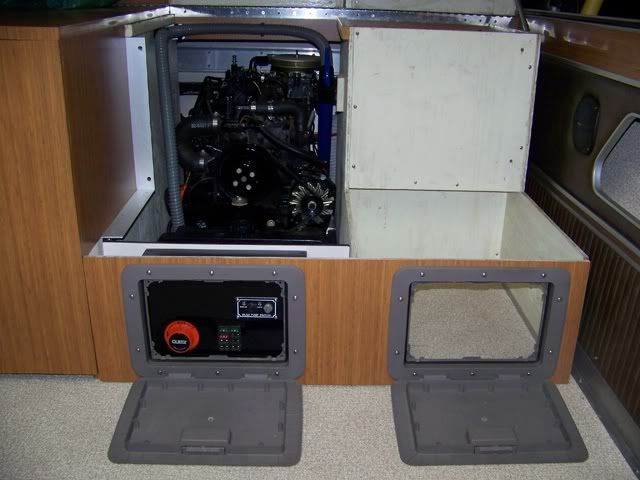
100_3508Reduced.jpg


100_3520Reduced.jpg


100_3522Reduced.jpg


100_3521Reduced.jpg
 
Last edited:

sprintst

Commander
Joined
Apr 18, 2009
Messages
2,066
Re: Starcraft Holiday Reno and Hull Repair

Wow man.. Beautiful work. Solid as a rock and well thought out.
 

Grandad

Lieutenant Commander
Joined
Jun 7, 2011
Messages
1,504
Re: Starcraft Holiday Reno and Hull Repair

Thanks for your kind words guys. I have some more to tell when time permits. I'll get the story up to date with where I'm at, then button things up for winter in Canada. I'm sure only you guys can appreciate how lonely it can be trying to make chicken salad out of chicken spit when everyone else is out there on the water enjoying life. - Grandad
 

ezmobee

Supreme Mariner
Joined
Mar 26, 2007
Messages
23,767
Re: Starcraft Holiday Reno and Hull Repair

Very innovative. Looking great.
 

Grandad

Lieutenant Commander
Joined
Jun 7, 2011
Messages
1,504
Re: Starcraft Holiday Reno and Hull Repair

Concerned about access to the bilge for emergency bailing in the event that the float controlled electric bilge pump failed, I added a 36" manual bailer pump that is booted at the bottom of the transom and rises to a pump handle just behind the top of the loveseat below the engine compartment lid. With the bottom end already positioned in the bilge, pumping action can be started as soon as the engine lid is lifted and the hose directed overboard. I mounted a short piece of 2" ABS pipe in a stainless steel and rubber coupling spaced off the port stringer on a UHMW plastic block as a guide for the bottom end of the pump. The upper end of the pump is "clipped" in place to the side of the storage cabinet and can be removed easily for engine access or for emergency use by another boater.

100_3511Reduced.jpg


100_3480Reduced.jpg


100_3383Reduced.jpg


100_3473Reduced.jpg


100_3479Reduced.jpg
 
Last edited:

Grandad

Lieutenant Commander
Joined
Jun 7, 2011
Messages
1,504
Re: Starcraft Holiday Reno and Hull Repair

The partition on the starboard side of the engine separates it from a privacy area to be used for a toilet and change room. A hinged air shock spring assisted "pop-up" lid supports a privacy curtain on a tubular frame pivoted from the lid. When opened for use, the frame is further supported by 2 extendable aluminum tubes at the entrance. When collapsed, the frame is held captive to the lid, with the curtain still suspended intact on the frame.

100_3533Reduced.jpg


DSC01007Reduced.jpg


100_3497Reduced.jpg


DSC01010Reduced.jpg


100_3531Reduced2.jpg
 
Last edited:

Grandad

Lieutenant Commander
Joined
Jun 7, 2011
Messages
1,504
Re: Starcraft Holiday Reno and Hull Repair

Nana made a sliding curtain suspended below the stern deck to conceal the throttle, shift and steering cables, I/O trim pump and bilge blower behind the toilet. She made the main privacy curtain with a rod pocket top to be mounted on the tubular frame. The curtain's side and bottom edges are held in place by Velcro strips. Nana's a "keeper". Entry to the area is via a hinged half door at the bottom and a corresponding split in the privacy curtain above.

The toilet (ya, ya, I know it's a "head") is a Dometic Sealand porcelain unit with 9 gal holding tank. It requires a pressure water system to flush, but I haven't yet done the plumbing. I had planned to just use the port-a-potty that we used for years, but apparently it is no longer legal here. Portable toilets are not allowed on the great lakes. I understand that you can be fined if you have a portable on board. The only acceptable toilet types are those that must be pumped out, not dumped out into your residential toilet. I understand that "they" don't want idiots dumping waste into our lakes, but this is a serious inconvenience and expense. I'm not sure what trailer boaters are expected to do without a portable; maybe poop on the beach somewhere or pee overboard? I hope this legislation doesn't backfire.

http://www.dometic.com/enus/America...ischarge-Toilet/products/?productdataid=96282

100_3498Reduced.jpg


100_3501Reduced.jpg


100_3503Reduced.jpg


100_3504Reduced.jpg


100_3505Reduced.jpg
 
Last edited:

sprintst

Commander
Joined
Apr 18, 2009
Messages
2,066
Re: Starcraft Holiday Reno and Hull Repair

Nice setup on the washroom. With three boys I'd be tempted to use it on the driveway :)
 

ezmobee

Supreme Mariner
Joined
Mar 26, 2007
Messages
23,767
Re: Starcraft Holiday Reno and Hull Repair

Really cool idea on the bathroom/changing room.
 

Grandad

Lieutenant Commander
Joined
Jun 7, 2011
Messages
1,504
Re: Starcraft Holiday Reno and Hull Repair

Well, I'm afraid it's time to pack in the boat(build)ing season around here. Nana's honey-do list is getting longer. Next season, I plan to get the dashboard console re-installed complete with chart drawer and anchor line locker. In progress is an anchor roller for a self launching Delta anchor. The anchor line will be accessible from within the cockpit so this old man won't have to climb onto the foredeck. I want to complete the anchor and some minor wiring changes before re-installing the console and sleeper seats.

Also in progress is a wakeboard tower. I have 2" aluminum tubular arches near completion to be welded into an assembly as shown. I've already reinforced the gunwales with 1/4" aluminum angle to support the tower. I need to finish machining the tower's swivel mount feet. The tower will eventually support a semi-permanent canvas top. The tower and top will fold as a unit for trailering.

Perhaps in the future, an additional folding canvas camper top extending full height to the stern would allow us to do a little overnight travel like we did back before children. I've roughly designed a cabinet that interchanges with the loveseat bench to store galley amenities. I'd like to incorporate a propane stove. That'll require an outboard stern mounted propane tank locker and solenoid valve. - Grandad

100_3512Reduced.jpg


CabinetReduced.jpg


TowerRoofDimetricReduced.jpg


TowerRoofStarboardReduced.jpg


TowerRoofFoldedStarboardReduced.jpg
 
Last edited:

Decker83

Commander
Joined
Apr 5, 2011
Messages
2,592
Re: Starcraft Holiday Reno and Hull Repair

Hey Grandad
I have been looking for a way to setup a toilet like this on my deck boat. This is awesome how you fixed it. Along with everything else you have done here.
Just want to say a big thanks to you for sharing with us on i-boats. You have some great ideals and or very professional at what you do.

THANKS !!!
Kent
 

Grandad

Lieutenant Commander
Joined
Jun 7, 2011
Messages
1,504
Re: Starcraft Holiday Reno and Hull Repair

I have been looking for a way to setup a toilet like this on my deck boat.
Thanks Decker. I'm not that familiar with deck boats, but I'm sure with the amount of real estate your boat has, you'll have lots of room for a toilet. - Grandad
 

erwinner

Petty Officer 1st Class
Joined
Aug 8, 2011
Messages
369
Re: Starcraft Holiday Reno and Hull Repair

That is some incredible work you've done there! The precision and attention to detail is astonishing. I really like all the ideas you've come up with and implemented.
 

Grandad

Lieutenant Commander
Joined
Jun 7, 2011
Messages
1,504
Re: Starcraft Holiday Reno and Hull Repair

OK, winter's over, it's time to revive this thread. Next item: the anchor system. I've been disappointed by the 10 lb Danforth anchor I've been using. I've watched it refuse to set in a hard sand bottom in 3 ft of crystal clear Lake Huron water with a rode angle much lower than the recommended 7:1 scope. I also found the Danforth awkward to deploy and to store. I investigated a Bruce claw and thought it to be a good alternative until a marine supplier sold me on a Delta, mostly because of the self launch capability from a simple bow roller. I chose a 9 pounder, which is perhaps a little on the light side, but for our kind of boating, a lunch hook will do. I'll still carry the Danforth as a backup.

100_3832.jpg


After removing the bow light, I through-bolted the new bow roller to an under deck aluminum 2 x 2 x 1/4" angle. The angle runs transverse from one deck edge to the other at the aft end of the roller to counter any tipping moment should the roller get a severe downward tug while the boat is anchored. I used only a very short piece of galvanized chain rather than the recommended rode length, since trying to handle the usual chain rode through the deck without a winch would present issues. I shackled the end of the chain to the trip eye of the anchor and tie-wrapped the chain to the normal eye. My expectation is that if the anchor gets stuck somehow on the bottom during use, I can overrun it to snap the tie and break the anchor free.

100_3837.jpg


Next, I mounted a deck plate fairlead on the centerline directly above the cross-member that bridges the middle of the deck. The anchor rode passes through the deck plate and runs below deck and through the dashboard on its way to the cockpit. The increased diameter of the line where the eye is served fills the hole in the deck.

100_3818.jpg


The black fabric covered segment in the pictures is a "Shockle" or anchor line snubber. See http://www.shockles.com/ It's essentially just a bungee cord intended to prevent shock to the boat when anchored by a chain rode. I've installed it somewhat contrary to directions in that normally it is paralleled by a longer segment of anchor chain than what I've used. My purpose though is only to provide spring tension on the line when the anchor is on the roller to hold the anchor fast against the roller so that it won't rattle or dance around. It seems to be working and with only a couple of inches of stretch, I don't have a problem with excess chain bouncing on the deck.

100_3835.jpg
 

Grandad

Lieutenant Commander
Joined
Jun 7, 2011
Messages
1,504
Re: Starcraft Holiday Reno and Hull Repair

I chose a Spinlock XAS rope clutch as a means of clamping the line. The XAS seems to work very well, positively stopping any line release while the operating handle is locked, yet still allowing inboard retrieval of the line. Flipping the handle back as shown launches the anchor.

100_3800.jpg


Since the anchor line can put tremendous stresses on the structure, I mounted the clutch to the inboard end of a 2 x 2 x 1/4" aluminum angle. I bolted the forward end of the angle to a hardwood block mounted on the deck centre cross-member and bolted also to the centre deck rib. The block is also fastened to the deck itself via long screws through the deck plate.

100_3797.jpg


The angle passes directly through the dashboard and is then bolted to the centre console wall via another hardwood block. The pull from the anchor line is countered collectively now by the deck, the cross-member, the dashboard and the console. To control water while retrieving a wet anchor line, I installed a 1/2" PVC hawsepipe that protrudes through the deck plate and guides the line back through the dashboard and directly into the rope clutch. Not wanting the anchor line to remain wet inside the PVC pipe, I slotted the top side of the pipe to allow air flow to dry the line. I expect water to drip from the pipe at the rope clutch where it can be absorbed by a cloth or a sponge.

100_3815.jpg


After I carefully fitted the wood block to the dash, I covered it in Formica identical to the dash.

100_3829.jpg


The aluminum angle provides mechanical protection for the PVC pipe throughout its 4' length.

100_3803.jpg
 

jasoutside

Supreme Mariner
Joined
Dec 20, 2009
Messages
13,269
Re: Starcraft Holiday Reno and Hull Repair

Wow, you put a ton of thought into that anchor set up. All in the details eh:)
 

Grandad

Lieutenant Commander
Joined
Jun 7, 2011
Messages
1,504
Re: Starcraft Holiday Reno and Hull Repair

To store the anchor line, I modified the console to add a storage bin that easily holds 300' of 3/8" line. It's structured around a heavy weight plastic milk crate. I reinforced the outside with aluminum panels that also provide a surface on which guide rollers inside the console could roll. I mounted a set of rollers on the bottom of the crate and mounted a 1/2" plywood front panel covered in wood grain Formica. The bin rolls easily on the floor, guides accurately into position and latches positively in place. The milk crate design allows free air movement to the line.

100_3825.jpg


100_3827.jpg


To ensure that the anchor doesn't accidentally self launch, I added a cleat on the helm side of the console where the line can be cinched before continuing into the storage locker.

100_3830.jpg


One more modification to the console was to add a chart drawer between the aluminum step and the glove compartment. The sides are aluminum extrusions made specifically for drawer construction. The aluminum sides have a fin that slides in grooves in UHMW plastic guides. The drawer bottom is plexiglas. The front is wood covered in Formica. The latch has a recessed pushbutton knob that pops out when pressed providing a drawer pull. After the drawer is pushed back into place, pressing the chrome knob recesses it again and locks the drawer closed.

100_3806.jpg


100_3828.jpg
 

Grandad

Lieutenant Commander
Joined
Jun 7, 2011
Messages
1,504
Re: Starcraft Holiday Reno and Hull Repair

Yes Jas, details, details. Now I've got to re-install the nav lights. I've purchased red & green sidelights that I plan to mount next to the windshield. - Grandad
 

64osby

Admiral
Joined
Jul 28, 2009
Messages
6,799
Re: Starcraft Holiday Reno and Hull Repair

Grandad, Just read your thread, Top Notch. Certainly gets my noodle working on some ideas for my boat.
 

sprintst

Commander
Joined
Apr 18, 2009
Messages
2,066
Re: Starcraft Holiday Reno and Hull Repair

Just got caught up. That is some sweet work. Lots of ideas for me to get my anchor system up and running.
 
Top