1991 Bayliner Trophy 2002 Transom Repair

Status
Not open for further replies.

j_k_bisson

Lieutenant Junior Grade
Joined
Oct 6, 2010
Messages
1,082
Update 10-24-2010 Glass'n done!

Update 10-24-2010 Glass'n done!

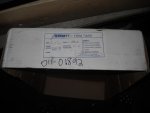
We'll try this again for the second time. Pressed the back button and lost everything. Anyways, a very good night last night. Finished the glass'n on the hull!! :cool: I was even able to start the reassembly. Only put the fuel tank back into place. But it's a start! Of coarse I could not find the screws and bolts that held it into place. Maybe after I clean the garage this afternoon I will find them. If not off to buy new bolts. I attached two pics. One showing the tank into place with the same clearence as original, and a pic of my work bench. I included it because I need to find the spare set of car keys that has to be on there. Can not find them in the house!

DSCN0663-1.jpg
DSCN0668-1-1.jpg

I started the night by painting/coating the wood to be installed with thined out epoxy. I thin the epoxy a little to aid the wood in sucking up the resin. After that was dried/hardened I made a batch of PB epoxy and floated the wood into place. Next filleted and tabed it. Used 6" wide 1708 biax for the tabing. After I started mixing up a batch of pigmented epoxy for coloring the area of repair. It did not come out very good. I am not happy at all with the outcome. Check it out. This is only 5 minute after application. I looks alot worse this morning. It all ran down the vertical wall.

DSCN0664-1.jpg
DSCN0666-1-1.jpg

I was thinking of trying something new. Seeing that pigment really thins out the epoxy mixture. I was thinking of adding a bit of cordical silica to thickned it to a slight gel. Then crank the heat in the garage to 85-90'F and shoot this mixture through an undercoating gun where I want it. Anyone ever try this? Pleaswe let me know, will not be doing this for a couple of days (Monday/Tuesday).

The plan for this afternoon it to clean the garage.

Also for those of you who are wondering what materials I have gone through here is the list so far;

1) 7.5 gallons of epoxy
2) 8 Yard 50' wide 1708 biax
3) 3 yard 12" wide 1708 biax
4) 5 yard 6" wide 1708 biax
5) 1-50 yard roll 8.5oz 6" wide CSM
6) 1 pd cord silica
7) 32 mixing pails
8) 2 gallons of acetone
9) 2 flap wheel ginding discs (40 grit)
10) 2-25ft rolls for wax paper
11) 4-100pcs boxes rubber gloes
12) 6 tyvec suits (disposable)
13) 2 pairs of good sissors (cutting 1708)
14) 2 sets of epoxy pumps (only last a couple of days in epoxy)

A few other small things I can't think of.
Do not buy the rollers for glass'n have not used them at all. Waste of money.

Thats it for today

Jeff:D
 

Yacht Dr.

Vice Admiral
Joined
Feb 26, 2005
Messages
5,581
Re: 1991 Bayliner Trophy 2002 Transom Repair

Thanks Proshadetree! I hope it is. I thought so too. But the comments from "Yard Dr" on another forum here has me wondering about how long it will last in rought sees and a really big motor on the back. He stated that it probably needed 4 layers of 1708, I only have 2. Oh well. I could always be doing this again next year if it breaks!!!! LOL :eek:
Jeff

Looks like a very pro job there .. nice and clean.

I hope "Yard Dr" is not a referrance to me :)

A resin roller or also called a bubble roller should be in your arsonal of tools to help roll out bubbles. :)

YD.
 

j_k_bisson

Lieutenant Junior Grade
Joined
Oct 6, 2010
Messages
1,082
Re: 1991 Bayliner Trophy 2002 Transom Repair

Yard Dr I was refering to you actually. Seeing I have your attention and you are a professional I do have a few questions.

1) I was refering to a previous post of yours on Iboats here and you stated that 2 layers of 1708 on stringers are not enough. What do you think of what I have done here. Should it last 5-8 yrs? I fish lake Erie any weather. You being from Michigan you should know something about this.

2) If I thicken the epoxy with silica and add white pigment to it. Should I be able to shoot this through a undercoating gun? (automotive style)

Thanks For the compliments.

Jeff
 

j_k_bisson

Lieutenant Junior Grade
Joined
Oct 6, 2010
Messages
1,082
Re: 1991 Bayliner Trophy 2002 Transom Repair

Sorry just noticed the wrong name thing. Sorry about that!:( Its been a long couple of days.
 

j_k_bisson

Lieutenant Junior Grade
Joined
Oct 6, 2010
Messages
1,082
Update 10-25-2010

Update 10-25-2010

Well garage is cleaned and still no keys. The kids must of got them again!:mad: But anyway's, All prep work is done for spraying the pigmented epoxy. Just need to pick up a undecoating gun today. Also I found the rest of the screw and bolts that held in the fuel tank. So I was able to complete that task yesterday.

Here is my next task after spraying tonight. I need to cel coat these holes up. I am relocating them due to trim tabs and different motor. The Evinrude 200hp.

DSCN0690-1.jpg

I already filled the holes with PB Epoxy. Then recoated with regular resin to fill ang cracks/voids. Now need to grind out a bit and fill with gel coat repair paste. I'll post pics of progress.

Here is the rest of the plan for this half of the hull.

1) Spray the inside of the hull white with epoxy
2) Gel coat canceled holes on transom
3) Gel coat repair 3 more spots on side and corner of the hull
4) Buff/polish hull
5) Rewire/plumb (install) bilages hull
6) Install on board battery charger
7) Install fuel separator
8) Make cover (Tarp) frame work for hull.
9) Make rolling stand for top half (cap) of hull.

So still lots of things to do!!!!:eek:
 
Joined
Aug 17, 2009
Messages
941
Re: 1991 Bayliner Trophy 2002 Transom Repair

JK,

Very nice work so far. Two layers of 1708 is more than enough especially if you are using epoxy resin. Keep up the great work. I love those Bayliner Trophys.
 

j_k_bisson

Lieutenant Junior Grade
Joined
Oct 6, 2010
Messages
1,082
Re: 1991 Bayliner Trophy 2002 Transom Repair

As I stated earlier I love these boats forever. Always wanted one. Thanks For the compliment on the outcome so far. I am oving this project, my wife on the other hand is not so much. I get out of doind a few things around the house due to it. But she loves fishing and water sports. So it's all good in the end!:D
 

Yacht Dr.

Vice Admiral
Joined
Feb 26, 2005
Messages
5,581
Re: 1991 Bayliner Trophy 2002 Transom Repair

Yard Dr I was refering to you actually. Seeing I have your attention and you are a professional I do have a few questions.

1) I was refering to a previous post of yours on Iboats here and you stated that 2 layers of 1708 on stringers are not enough. What do you think of what I have done here. Should it last 5-8 yrs? I fish lake Erie any weather. You being from Michigan you should know something about this.

2) If I thicken the epoxy with silica and add white pigment to it. Should I be able to shoot this through a undercoating gun? (automotive style)

Thanks For the compliments.

Jeff

Howdies Jeff :)

1. I just feel more comfortable suggesting more 1708 that is needed. Will 2 layers work ? probably depending on size motor, Pan sizes, resin and technique. I cannot in all good conscience suggest anything less then Better then Origional for Anyone and Everyone that has to ask. I feel responsible for the saftey of the vessel and all aboard. Thats probably why I get hot headed sometimes :).

Your stringer systems are correctly evaluated above as " Made for a tank " :) .

I dont know If thickened epoxy will pray though your coating gun. Ive never tried or heard of it.. sorry ..

YD.
 

j_k_bisson

Lieutenant Junior Grade
Joined
Oct 6, 2010
Messages
1,082
Update 10-26-2010 Transom is Done in Hull Side

Update 10-26-2010 Transom is Done in Hull Side

Well I had a couple of set backs yesterday on what I wanted to do. I could not find a undercoating gun for cheap (under $20). So purhased a cheap disposable paint gun. ($14 Harbour Freight) Tried this first but did not work good at all. Would have taken 10-20 coats to get the finishs I wanted.

Next cleaned my current undercoating gun. That was a very big mess with black everywhere in the garage. After cleaning tried to spray slightly thickened epoxy on, could not get the cosistency right so it would still shoot and not sag. So stopped that. :mad:

Last just mixed up a thickened (like runny vaseline) batch of epoxy and just brushed it on. I also cranked the heat to 90'F in the garage to aid in the saging issues. I think it came out ok. Not perfect, and could use another coat, but good enough for now. Check it out. :cool:

DSCN0691-1.jpg

DSCN0692-1.jpg

DSCN0693-1.jpg

I have a ton of stuff to put in here. Like swim platform washers/bolts, battery charger, batteries, pumps, fuel filters. You name it its going in there. So Most of the area you see will be covered.

I was thinking of relocating the bateries to up front in the cabin. Along with the charger. This is to transfer weight up front. Anyone ever do this on a trophy of the same style? Also is there some regulation that states they (batteries) can not be placed in a confined area? Please let me know.

Started also on the buffing on the outside of the hull. Was going to start on the gel coat repair on the transom, but I read some where on here that gel coat does not stick to epoxy. Anyone have any coments on this? I was going to call Septrum today with this question also.
 

proshadetree

Lieutenant Commander
Joined
Jul 19, 2008
Messages
1,887
Re: 1991 Bayliner Trophy 2002 Transom Repair

See the hull extension thread by ops. He used gell coat over his epoxy i think.
 

j_k_bisson

Lieutenant Junior Grade
Joined
Oct 6, 2010
Messages
1,082
Update 10-27-2010

Update 10-27-2010

I called Spectrum Color where I purchased the pre colored gel coat repair kit. Their technical advisor stated that the gel coat repair paste could be used directly on top of epoxy from System Three. (He also reps for System Three) I do need to be very perticular on my prep work though. I need to sand the area with a maximum grit of 100g. Then wash the area with soap and water to remove any residue from the resin. So we are a go tonight for the gel coat repair!

Did not get anything done last night. Took the night off and had a couple of pops with the buddies!.

I did start formulating the shopping list to complete the rewiring and plumbing for the the hull side. So shopping trip is in order before the weekend.

I'm being talked into leaving the batteries in the rear of the boat in the factory locations by my buddies. Anyone have any issues with this. Here are mine.

New set up
The new 200hp motor will weigh 455lbs
Kicker motor Honda 10hp LS 76lbs
Batteries x 2 50lbs
Kicker bracket 30lbs
Battery charger 10lbs

Total 621lbs

Old set up
120hp Force 1991 284lbs
9.9 Force 1991 62lbs
Batteries x 2 50lbs
Kicker bracket 30lbs
Battery charger 10lbs
Total 426lbs

Max factory weights
175 black max 1991 395lbs
15 Merc 1991 71lbs
Batteries x 2 50lbs
Kicker bracket 30lbs
Battery charger 10lbs
Total 556lbs

As you can see if I move the bateries up front the weight will be closer to the max HP for 1991 weights. If I don't I will be 200bs heavier than I was before transom replacement and 75lbs heavier than max hp rating for 1991. So it will be very *** end heavy. It will deffinately need a couple of sand bags in the front to make the bow sit lower.

So what you guys think?
 

Colega

Cadet
Joined
Oct 6, 2010
Messages
6
Re: Update 10-27-2010

Re: Update 10-27-2010

Hi Jeff: Here are my 0.02 on the battery location. The reason you have your batteries set up close to the engine, it?s because you don't want to loose any cracking power by having a long wire. The farther you are the thicker the wire you need and it?s harder for the engine to turn, but it can be done. I?d relocate them and I'd run some really good quality wire 0 gage and buy a top quality set of batteries like ?Optima Blue Top - D31M? which has 1125 Amps of cranking power at 32F (60 LBS each). I think it?s a good idea to keep the weight in the back as close to original specs as possible. Don?t forget to have some ventilation for the batteries, you don?t want fumes to accumulate in case you get a spark. Have you thought about using a lighter kicker, perhaps a 8 hp?.
 

j_k_bisson

Lieutenant Junior Grade
Joined
Oct 6, 2010
Messages
1,082
Update 10-28-2010 The end is near!!!!!!

Update 10-28-2010 The end is near!!!!!!

Well changing the kicker size right now is out of the question. I currenly have two kicker motors. The force 9.9 and the honda bf100. So not spending the money right now on new kicker motor. Will make due with what I have. Later though I was hoping to get a new 4 stroke. Maybe next year!

I did not think about wire size before. But someone recently mentioned it to me. I was going to have my buddy, who is a certified electrician, help out on the batery relocation. I'm sure he would have caught the wire size detail.

I have been thinking of a compromise on this battery thing. If I leave the one starting battery in the rear on the passenger side. Then relocate the other spare battery up front with the charger. This could help with some of the weight issue. Still do not know yet what I am going to do. But it will get done this weekend!

Last night finished sanding the gell coat repair spots and buffed the transom. I did not wax it as I need to assemble the fittings first. Do not want any sealing issues with the 3M 5200. Sorry not pics yet. When Assembled and Waxed I will post.

Tonights project is to reinstall the wiring, plumbing, and hull fittings. Then possibly wax the transom. Probably wax tomorrow and let the 3M 5200 dry. I plan on being a bit liberal with this product.
 

j_k_bisson

Lieutenant Junior Grade
Joined
Oct 6, 2010
Messages
1,082
Update 10-29-2010

Update 10-29-2010

Well I broke down and put the batteries in the original spots. Sorry for all the fuss that was for nothing. The reason I did this was my Wife remindered me that time is ticking on this project and it needs to be reassembled before the snow flies. I will end up putting a couple of put ropes front to back so that I can feed the cabels at a later date when I relocate them. Maybe spring.

I was able to install the batteries, on-board battery charger, original wiring harness, and a couple of thru-hull fittings. This weekend when I am not limited by time I will finish it all up. Hope to have the hull finished this weekend. Check out the progress so far.

DSCN0696-1.jpg

I plan on installing a perko battery switch by the charger. Need to make up the wire that come across the boat from the other battery. I plan to use 2ga. jumper cabels for the wire. I priced out the proper wire and it is $6.75/ft/strand. A bit to much for my taste. So of to buy a good set of jumper cables for 30 bucks.

I will also install the trim tabs this weekend after figuring out how to fit them.
 

Attachments

  • DSCN0699-1.jpg
    DSCN0699-1.jpg
    126.3 KB · Views: 28

series60

Chief Petty Officer
Joined
Jan 4, 2010
Messages
420
silicone sealant

silicone sealant

Wondering is there is something to take off the rest/film for silicone left?


Jeff

FYI: Shade tree silicone remover is good old gasoline. Will soften silicone in a short short. Wipe off thin layer with rag. Finish wipe down with acetone.

Didn't catch if have made up your new transom yet but I just did mine and using a vacuum sealing process it really did the job. Look down about half way on this page and you can see how I set it up. Very short materials list - 2 items and a good shop vac.
 

j_k_bisson

Lieutenant Junior Grade
Joined
Oct 6, 2010
Messages
1,082
Update 10-30-2010

Update 10-30-2010

Worked to 1am last night and would have finished the wiring if I had not run out of material's.:mad: Need to pick up a couple of things from Canadian Tire today then I can finish. Here area couple pics of the progress so far.

DSCN0707-1.jpg

DSCN0708-1.jpg

DSCN0709-1.jpg

If you see anything that is wrong or should be fixed please let me know. Things that still need to be done to finish wiring;

1) Screw the perko switch down. Need 4 x 1 3/4" #8 screws.
2) Need to create common ground post mount.
3) Mount/finish fishwell drain system. Need 3/4" T for drain tube, hose washers for hose fittings, and wire new pump in.
4) Route and mount vent tube for fuel tank.
5) Semi mount fuel separator and plumb. The fuel separator mounts to the same bolts for the kicker bracket. Seeing I am building a new mount, only semi mounted for now.
6) Finish adding connector #4ga to battery jumper wires. Need to buy 4 more ends.
7) Clean up and vaccum inside of hull.

You will notice that I have not mounted my scuppers. They will be mounted after I join the hull together. I figure that with them removable it will be easier to put the conecting hose between both halfs.

After I get all this done I will start working on the outside again. Buffing and waxing. When done the hul,l the top comes in for a couple of fixs/upgrades!

Then end is in sight!!!!!!!!!!! Only a couple of more weeks!!!!!!:D
 

proshadetree

Lieutenant Commander
Joined
Jul 19, 2008
Messages
1,887
Re: 1991 Bayliner Trophy 2002 Transom Repair

Well being you asked if anything was wrong. I have noticed that your methods of building have been flawed since the start of this project. I shall now tell you how to make amends rather easily. It should not take you any longer to perform these tasks than if you were still working on your own boat. That boat should be in my driveway! Biggest error Ive seen so far and it should be corrected as soon as possible to have the best build possible MINE. Great job dude
 

j_k_bisson

Lieutenant Junior Grade
Joined
Oct 6, 2010
Messages
1,082
Update 10-31-2010

Update 10-31-2010

Thanks for the compliment! It's apreciated. It will be staying in my driveway for now. But I should say, my moto is, everyingthing is for sale for the right price. Other than my kids and wife. Most of the time! LOL I think my wife would have a problem with selling it though. She is planing on spending her summer on it fishing and working on her tan!

As to progress, I was able to finish the hull side wiring and plumbing last night. I still have a couple of things to do though. Check out the pics.

DSCN0714-1-1.jpg

You will notice the arrows. This is where the hoses from the fish well drains are going to conect. Needs to be done when I join the hull with the cap.

DSCN0715-1-1.jpg

You will notice the arrow in this pic. This is where I need to make a common ground post. Something I need to do when the boat is out of the garage. Do not want to make sparks while cutting stainless near the hull.

DSCN0716-1.jpg

This is the improved location for the fish well pump. I could not figure out where to put it. Had no room! I know someone will find fault with this location but this was my thinking. I used a pump that does not self prime so it needs to be close to the lowest point in the system to work. With being in the centerline of the boat and low on the transom I can plug one fishwell and drain the other like current system. I will not be putting two pumps in due to cost and no room. I might upgrade the pump at a later date but this is what I am going with for now. Plus the motor in the pump is servicable without dismattling the whole system. I did check and made sure that it will not interfer with the motor bolts of the new 200hp. You will also notice I used clear tubing. I'll be able to find any blockages more easily from now on.

I started buffing the Hull on my own. Might not call my buddy. One less favor to repay. Did not get to far, but its coming along. Heres the pics of a finished area.

DSCN0710-1.jpg
DSCN0713-1.jpg

Not bad shine and I was able to get rid on the oxidation on the dark bottom and the line from the pinstriping. I was going to pinstripe the hull again so it will not be that important to get rid of it completely.

Tonight is Holloween! My 4 kids are going nuts today. If I see another costume be put on before noon I am going to cancel holloween! they are driving me nuts! But seriously when they finally go to bed tonight I will be buffing a hull again. Two or three nights and buffing will be done. Only buffing and waxing left then the cap comes in!!!!!!!!:eek:
 

j_k_bisson

Lieutenant Junior Grade
Joined
Oct 6, 2010
Messages
1,082
Happy Halloween

Happy Halloween

Greetings from the factory! Happy Halloween!!!!!


DSCN0723-1.jpg
 

Woodonglass

Supreme Mariner
Joined
Dec 29, 2009
Messages
25,924
Re: 1991 Bayliner Trophy 2002 Transom Repair

Now THAT is ONE SCARY CREATURE!!!! They oughta make a Halloween movie about the TYVEK creature from the BLACK GARAGE that made everyone itch all over. I think it would be a HIT!!!!


I'm just sayin...:D
 
Status
Not open for further replies.
Top