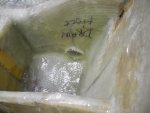
1991 Bayliner Trophy 2002 Transom Repair

Status
Not open for further replies.

proshadetree

Lieutenant Commander
Joined
Jul 19, 2008
Messages
1,887
Re: 1991 Bayliner Trophy 2002 Transom Repair

When working with fiberglass it is advisable to staple the cloth or mat to help hold it in place. The resin will seal the staple in the wood. I know some people do this and to me it is very advantageous to ease working on corners.
 

Woodonglass

Supreme Mariner
Joined
Dec 29, 2009
Messages
25,924
Re: 1991 Bayliner Trophy 2002 Transom Repair

So, How did you clamp the bottom of the transom to the outer skin??


I'm just sayin...:D
 

j_k_bisson

Lieutenant Junior Grade
Joined
Oct 6, 2010
Messages
1,082
Re: 1991 Bayliner Trophy 2002 Transom Repair

I clamped the bottom of the transom first using screws. I have a bunch of holes from previous fishfinders and spead sensors. So I put a wood screw through them to clamp them. I use a screw driver to ensure wet out when tightening.

I did try to use a staplers. The problem with that is the more you play with the mat the longer it stretches.

Well the kids just got lunch and the two of the four are going to bed. The others are coming out side with me.

Next update around 4pm.

Jeff:eek:
 

j_k_bisson

Lieutenant Junior Grade
Joined
Oct 6, 2010
Messages
1,082
Update 10-16-2010 Part-3

Update 10-16-2010 Part-3

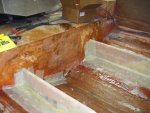
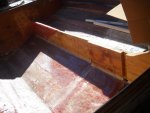
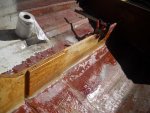
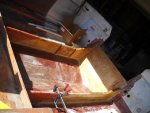
Here are a couple of pics of how I am making out. I have beded the stringers down with Pb epoxy. Also filleted and tab them. Including the trarnsom. So right now I am waiting for things to set up. Here are the pics.

DSCN0618-1.jpg

DSCN0619-1.jpg

DSCN0622-1.jpg

Next start on the remaining pieces for the floatation chamber.

So far 6hrs last night and 3 hrs this afternoon. Aslo 2 gallons of resin with no waste yet. We will what the totals are after tonight.

Enjoy my discomfort!

Jeff
 

proshadetree

Lieutenant Commander
Joined
Jul 19, 2008
Messages
1,887
Re: 1991 Bayliner Trophy 2002 Transom Repair

Your discomfort looks to be extremely well built. Great work
 

j_k_bisson

Lieutenant Junior Grade
Joined
Oct 6, 2010
Messages
1,082
Update 10-17-2010

Update 10-17-2010

Check it out. Here is how we made out. First things first though, To all my buddies that helped me get this done last night, Thanks. Without you guys I would not of been able to get this done to this point. We ran out of resin last nigth at 1:30am. The 1708 biax cloth really drinks it up. SOO far 6 gallons gone and need to order another 3 gallons to finish the transom portion of this job. So on hold till then!

We started by the evening by finishing the tabbing of the frame to the hull. Here is a pic.
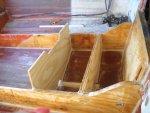
DSCN0623-1.jpg

Then we layed 1708 biax sheets "one piece" over the stringers where there where no cross pieces. There tab the corners in the cross pieces with 1708. As seen here.
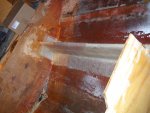
DSCN0627-1.jpg

Then another layer of 1708 biax extending another 3-4" past previous layer. We where lucky no large bubbles between the layers. I do have a couple small bubbles, 4 total, 1" diameter. Here is a pick of the finished product from last night when we ran out of resin.
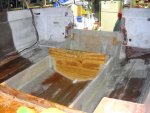
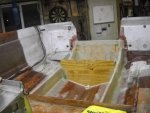
DSCN0633-1.jpg
DSCN0638-1.jpg
DSCN0639-1-1.jpg

We set up a production line process. We took the wetting out of the 1708 biax with resin offline. I had one buddy cutting the 1708 pieces to the sizes I needed, another one mixing resin, and another two wetting out the 1708 biax on a piece of cardboard, and me laying it out in the hull after they where saturated. Total time last night 8 hrs per 5 guys. Used 7.5 yards of 1708 Biax. Need some more of this, probably 3 more yards to be safe.

I still have to glass in my transom gussets. I have about a 1/2gallon of resin left from pouring/combining all the little amounts from all the jugs. I'll try to get this done this afternoon. I will only use on layer of 1708 on the gussets and tab them in with 1708. The wood and one layer of 1708 biax fiberglass will be more that what Bayline used.

The plan for the next week.

1) Order the following
-3 gallons of resin
-3 yard of 1708 biax
2) Pour the floatation foam
3) Clean-up/sand the other areas that need glass'n still
-Tank support plate
-Top of floatation chamber
-Reinforcement of floatation chamber top
-Clean the garage again
-Vinyl gloves
4) Cut holes for stringer drains
5) Glass in the drain tubes
6) Finish gel coat repairs on bottom half
7) Buff the bottom of the hull
8) Vacuum/clean the the carpet in the front half
9) Make tarp support for the hull while it sits in the driveway
10) Make dolly support to moving the top half in and out of the garage

I'm a bit sore from twisting like a pretzel and a bit hung over from drinking to 3:30 in the morning. Tonight movie night with the kids. and abreak.

Enjoy

Jeff:D
 

proshadetree

Lieutenant Commander
Joined
Jul 19, 2008
Messages
1,887
Re: 1991 Bayliner Trophy 2002 Transom Repair

Looks great . I said it softly as to not hurt your head.
 

j_k_bisson

Lieutenant Junior Grade
Joined
Oct 6, 2010
Messages
1,082
Re: 1991 Bayliner Trophy 2002 Transom Repair

Thanks for saying it quitely but I'm sitting here lo9oking at the job and cleaning up think hove there is still whiskey in the bottle........

A little nip might make me feel better.......

Hummm.......

Ok lets have one or three........ I'll definately sleep better tonight..........

Where the glass and ice....... Dame not coke left:eek:......


There 1 can of ginger!:)

Well nothing getting done today!!!!!!!!!!!!!

There is always tomorrow!
 

j_k_bisson

Lieutenant Junior Grade
Joined
Oct 6, 2010
Messages
1,082
Re: 1991 Bayliner Trophy 2002 Transom Repair

Dane I'm still drunk! I'm seeing double of my last post!!!!:eek:
 

j_k_bisson

Lieutenant Junior Grade
Joined
Oct 6, 2010
Messages
1,082
Re: 1991 Bayliner Trophy 2002 Transom Repair

Well I have a bigger hangover today than yesterday! But I did get a bit done yesterday. I cleaned the garage. Scraped the garage floor with a razor blade to get off all the leaked epoxy. Drilled the drain hole in the transom. It came out sweet! Also drilled the holes for the transom tie downs. Need to epoxy seal them.

The plan for tonight is drill the drain holes through the stringers. Planning to use 1.5" hole saw. I plan on fishing through these holes the hoses for the fish well drains. The hoses from the pumps can go over the stringers. I just want the pump to be the lowest point in the fish well system. I will glass/seal these tonight. Might also put the transom reinforcements in as well.

If I get really abitious I wil pour the floatation foam tonight. We'll see.

Jeff:(
 

j_k_bisson

Lieutenant Junior Grade
Joined
Oct 6, 2010
Messages
1,082
Update 10-19-2010

Update 10-19-2010

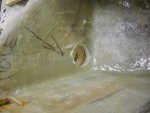
Last night I was able to complete a few of my planned tasks. I drilled the holes for drains in the stringers. I used a 2" holes saw due to the size of the fish well drain hose I plan on fishing thou this opening. This 3/4" hose was actually 1.25" in diameter. So I upsized the cut out to accomidate. Here is a pic of the hole after drilling.

View attachment 70850

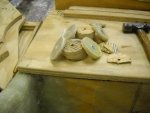
Here is a pic of the cut out pieces. As you can see I had excellent bonding to the wood. The actual wood failed when I had to pry out the pieces to drill deeper. Also note that the plywood laminated quite well. It did not break either. The fiberglass is around 1/4" to 3/16" thick both sides. I am very happy with the job so far. Check it out.

View attachment 70849

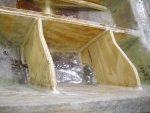
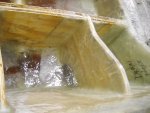
I was able to bed and fillet in the transom reinforcemets. You can see in the pic that the fillets are 1/2" to 3/4". I am learning that it is easier to wrap the 1708 biax around a larger radius than a smaller one.

View attachment 70851

I then proceeded to wrap one of the reinforcements completely with 1708 biax. I did not have enough resin to complete the other reinforcement so I did not start it. Less sanding later I figure. When the new 3 gallon kit comes in from mertons I will finish the whole hull side, and hopefully have enough for the top half.

Check out the trick I found last night. I was having a problem with the resin not setting fast enough before it would run throught the 1708 down the vertical wall. I did not want to comprimise my mix ratio in the resin, so I wrapped the reinforcement with wax paper after glass'n it. This made a vacum so the resin could not move down the vertical wall and cause a bubble. I'll remove the wax paper tonight, or just might leave it. Check the pic.

View attachment 70852

I also had enough resin left to coat the drain holes exposed wood. Then when that was very tacky I made up some PB resin and coated it again. The last step I took was to place a piece of wetted out 1708 and lay it in the drain holes. Tonight I plan on giving the drain holes one last coat of resin to the 1708 biax inside and out of the drain hole. and the some PB resin around the 1708 sticking out of the hole. Just to make sure everything is perfectly sealed. I'll post pics tomorrow of the fully sealled drain hole.

Let me know what you think of this drain hole. I don't think I will have any problems with it. But If somene else has done this and did have problem's I like to know. I can fix it now before its to late.

View attachment 70853

Tonights plan!
1) Cut the grass
2) Finish the drain holes as described above.
3) Pour the flotation foam.
4) Sand some more gel coat repair patches around the transom splash well.
5) Prep the transom openings/holes that are being moved
6) Fill locations with gell coat repair.

This will be the last time I ask this question. Does anyone know how long (days or hrs) do I have to wait before I can put gel coat repair (Spectrum) on fresh epoxy resin (System Three)?

Thanks it for today.

Jeff:)
 

j_k_bisson

Lieutenant Junior Grade
Joined
Oct 6, 2010
Messages
1,082
Update 10-19-2010

Update 10-19-2010

:eek:The pics did not come through. So here they are.

DSCN0640-1.jpg

DSCN0649-1.jpg

DSCN0650-1.jpg

DSCN0651-1.jpg

DSCN0653-1.jpg
 

j_k_bisson

Lieutenant Junior Grade
Joined
Oct 6, 2010
Messages
1,082
Update 10-20-2010

Update 10-20-2010

Finished off the rain holes last night. I made up a batch of PB epoxy and plastered in to the joint around the 1708 sticking out of the hole. Also plastered into the surface of the same 1708. I will grind all the excess off by the end of the week. and paint with normal resin mixture. That should seal these nicely. No pic today. I was slacking. Sorry.

I also poured the floatation foam. That was interesting to say the least. I learnt a few things while using it. When pouring the small batches let them fully expand before pouring another one. I did have a problem thought, I did not have enough foam for the cavity I was filling. I need to order more.

I did order more epoxy and foam and cloth yesterday. I order the following;

1) 3 gallon Epoxy kit (Three System)
2) 3 yards 1708 12" wide
3) 5 yards 1708 6" wide
4) 2 pint kit of floatation foam.

So till it gets in, Gel coat repair and prep sanding. Will get suited up again and clean up everything for the next round of glass'n.

Tonights plan:

1) Sand the past gel coat patches.
2) Clean up and patch new areas.
3) Possible suit up for sanding and sand for finishing glass'n

Jeff
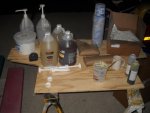
 

proshadetree

Lieutenant Commander
Joined
Jul 19, 2008
Messages
1,887
Re: 1991 Bayliner Trophy 2002 Transom Repair

Looks like your building a tank where you cut through. Going to be a tough boat for sure.
 

j_k_bisson

Lieutenant Junior Grade
Joined
Oct 6, 2010
Messages
1,082
Re: 1991 Bayliner Trophy 2002 Transom Repair

Thanks Proshadetree! I hope it is. I thought so too. But the comments from "Yard Dr" on another forum here has me wondering about how long it will last in rought sees and a really big motor on the back. He stated that it probably needed 4 layers of 1708, I only have 2. Oh well. I could always be doing this again next year if it breaks!!!! LOL :eek:

Last night repaid one of those favors I called in and helped one of my buddies get his new/used 4wheeler going. Had to rebuild the carb and set the new choke. So no work done. Definately get somethig done tonight. I feel I forgot to do something if I don't work of this project every day.

Jeff
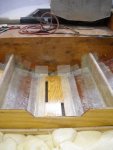
 

Colega

Cadet
Joined
Oct 6, 2010
Messages
6
Re: 1991 Bayliner Trophy 2002 Transom Repair

Jeff, I'm no expert on this..., but I think you got it right with the 2 layers of 1708 and the way you have installed the plywood. Don't forget that you are improving upon bayliners original design for the transom of this boat and according to your calculations that engine is not that much heavier than the Verado. Time will tell, but it looks good to me.
 

j_k_bisson

Lieutenant Junior Grade
Joined
Oct 6, 2010
Messages
1,082
Update 10-22-2010

Update 10-22-2010

Still did not work on the boat last night. Work on my Buddies 4 Wheeler instead. I completely rebuilt his carb, not just tuning it like the night before. Still did not fix his issue with starting though. Started asking the cheap #ucker if he changed the plug, and the fuel shince he got it. Of coarse no! He only painted the bike to make it look good. He stated that it's been sitting for 2 years before he bought it. So no wonder he is having the issues he is having. Told him to change the plug and fuel and then give me a call. Also found out a ton of particles in the bowl on the carb when rebuilding. Asked him if the bike had a filter on it, he did not know. Told him to get a inline one and install it. Just one of the particals could block/plug an orfice in the carb and affect running ability. So I'll probably get involved again in this tomorrow afternoon when I have to clean the carb bwl and jets again. But not tonight. My boat comes first!

My order of resin comes in today from Merton's! I have to say that they are the nicest people to deal with on the phone. No problem get tracking numbers from them at all. And they do not gouge on shipping cost. They have their stuff together. Also the products are non-toxic, Vapour wise. So you can put the masks away! I would recomend this suff to anyone. A bit more expensive but well worth it in my opinion!

I'll post an update tomorrow morning of what I get done tonight. I hope the rest of the glass'n for the transom/string replacement. The tomorrow night the one battery tray and clean up.

Jeff
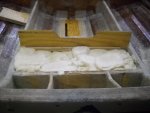
 

j_k_bisson

Lieutenant Junior Grade
Joined
Oct 6, 2010
Messages
1,082
Re: 1991 Bayliner Trophy 2002 Transom Repair

I have been doing alot of research and calculations "the engineer part of me" and this repair should be just as strong as before. The failure mode that should present itself before any other is the new glass could delaminate from the old if enough force is applied before the stringer where to crack where I cut them.

I tried to figure out through calculations and I can not get this to fail using math so it should hold up. I have like a 10 times safe factor before failure. I would have to hit something solid to cause a failure.

So we will see how it makes out next year walleye fishing in Erie.

Jeff
 

j_k_bisson

Lieutenant Junior Grade
Joined
Oct 6, 2010
Messages
1,082
Update 10-23-2010

Update 10-23-2010

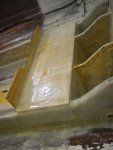
Well I worked to 2 am again but did get alot done. I can see the light at the end of the tunnel! Here is a pic of another 250 bucks of materials from Mertons. We'll see how much is going to be left after tonight. I am still hoping there will be enoght to fix the cap after the hull is done. We will see.
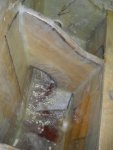
DSCN0655-1.jpg

So I started with some sanding in the areas that I was going to glass. Then a acetone wipe down. Then the fuel tank support was installed. I used a piece of 1/2" ply just like factory. I started the process by making up a batch of pb epoxy and floated the ply into the hull like a ceramic tile on a floor job. Next I filleted with more PB epoxy. Then a layer of 1708 biax on both long sides and ends. You'll notice the ends where not glass'd all along the ends. This is how the factory did it. There is drains at the ends of the board. Bayliner also used chopped glass for glass'n this down. I used mat. Take a look.

DSCN0657-41-1.jpg

Next I finished filling the floatation chamber with foam. It took a total of 2 pt and 2 qt kit's to fill. I know I could have put a bit more but I ran out and was not ordering any more for this little bit. Take a look.

DSCN0658-1-1.jpg

Next I started in on the cover for the floatation chamber. I mixed up another batch of PB epoxy and glued the lid on. Then a couple of screws to hold in place until things set. Next filled around the perimeter with PB epoxy to fill in the lows that would normally cause the air bubbles when I lay the mat and fillet. After that another layer of 1708 biax around the whole perimeter. Check out the pic.

DSCN0660-1-1.jpg

Last thing I worked on last night was the last transom reinforcement. I glass'd the outside. I cover it in 1708 biax one layer. I used here my new trick with the wax paper. If you remember from the last reinforcement I was having a problem of the resin running through the 1708 and making air bubbles. What I do is use wax paper to make like a vacuum so that the resin can not travel way from the intended area due to suction cause by the papere. Take a look.

DSCN0662-1-1.jpg

Tonight should be the last night of glass'n on the hull. I have a bit of sanding/prep work to put the batter tray in. And then glass'n in the tray. Then clean up the drain holes in the stringers. I have an edge I do not like and want to get rid of. Also I want to mix up a batch of epoxy with white pigment and paint everything to make everything look like factory.

Should only take 3-4 hrs tonight. Then buffing and sanding for the gel coat repair this week on the outside of the hull. Then the hull side is complete. :D

Thats it for today.
Jeff :D
 
Status
Not open for further replies.
Top