1991 Bayliner Trophy 2002 Transom Repair

Status
Not open for further replies.

proshadetree

Lieutenant Commander
Joined
Jul 19, 2008
Messages
1,887
Re: 1991 Bayliner Trophy 2002 Transom Repair

Sorry been away for a while csm is chopped strand mat Looking good man. I love the baylinner line even though it is probably the most ragged on line. I have a capri cuddy and just love the old barge.
 

j_k_bisson

Lieutenant Junior Grade
Joined
Oct 6, 2010
Messages
1,082
Re: 1991 Bayliner Trophy 2002 Transom Repair

Thanks for all your help. I will check all those links out. Until I do here is the update.

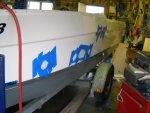
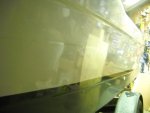
Seeing that I am waiting for the resin to come in from Merton's I started my Gelcoat repair. I have quite a few scratches on the one side from the previous owner. He must not of know how to come into the docks right because there is about 40-50 deep scratches. Using spectrum gel coat repair kits (the 2 oz kind) They don't quite match but they are close. Give it a year or two and they will match perfectly.

Question how long do I have to wait to put the Spectrum gel coat repair kit over fress epoxy? I have a couple of holes I would like to fill/get rid of. A week or so?

I'll post some pics tomorrow f how I am making out with the gel coat.

Jeff
 

j_k_bisson

Lieutenant Junior Grade
Joined
Oct 6, 2010
Messages
1,082
Re: 1991 Bayliner Trophy 2002 Transom Repair

To Colega the boat is rated for a 175hp even back then. But My buddy has a 1993 trophy that he has had a 200 black max on for years. He has had no problems with. The scuppesr are not under water, so weight is not an issue and the boat performs like a sprots car.

The Evinrude that I have chosen is 455lbs his Black max is 395lbs. So there is a weight diference of 60 lbs. I plan on replacing the kicker bracket with a fixed aluminum one (home made) and hang a 10hp Honda on it (76lbs). So total weight in the rear will be arouns 550lbs with bracket. A new Merc 175hp Verado is 510lbs without kicker. So there should not be any problems. But we will see.

I can always put a couple sand/shot bags in the bow to lift the stern and settle the boat.

What are your thoughts?

Jeff
 

j_k_bisson

Lieutenant Junior Grade
Joined
Oct 6, 2010
Messages
1,082
Re: 1991 Bayliner Trophy 2002 Transom Repair

Woodonglass I will definately try that stuf. I will be looking for a dealer around my area. I'll let you know how it works. I tried my fingers/nails and I will definately be there all year doing that.

Thanks for the info.

Jeff
 

j_k_bisson

Lieutenant Junior Grade
Joined
Oct 6, 2010
Messages
1,082
Re: 1991 Bayliner Trophy 2002 Transom Repair

Proshadetree. I can understand why some people rag on Bayliner after separating this boat. Looking at the glass work I can see where there is voids in the glass that seal the wood through out the boat. The craftmanship is just not there. But hey what do you expect for a mass producted boat.

A couple of things you should look at on your boat that are definately an issues that needs to be addressed. Check the splash well drains. They are not sealed and leak into the transom. That is partly what cause my problems. Any cutout/hole check and seal. I had to replace the front cabin floor before this. The hole for the table pedistal was not sealed and rotted out. I found that my sequential lift slots that have wood in them are not completely sealed. Not rotten yet but would be in a couple more year if left alone. I will be sealing with resin while I'm in there doing the transom. Also I have a scupper that was loose. The wood behind that is roten as well.

I guess Maintence/through inspection every year is required in a huge way with these boats.

Jeff
 

j_k_bisson

Lieutenant Junior Grade
Joined
Oct 6, 2010
Messages
1,082
Re: 1991 Bayliner Trophy 2002 Transom Repair

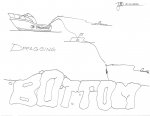
How about this for a boat name

dragging bottom-2.jpg

Seeing I troll Lake Erie for Walleye's most of the time. I thought that it would fit. Let me know.

"Trolling Erie means 3-4oz bottom bouncer with worm tipped spinners" Like the logo.

Jeff
 

proshadetree

Lieutenant Commander
Joined
Jul 19, 2008
Messages
1,887
Re: 1991 Bayliner Trophy 2002 Transom Repair

Cool name. I had to rebuild mine every piece of wood is replaced except for the stringers. I have seen 1990 searays being rebuilt so I think it is more the mass produced thing than it is baylinners are junk boats. I just like them and if rebuilt right should have years of life in them.
 

j_k_bisson

Lieutenant Junior Grade
Joined
Oct 6, 2010
Messages
1,082
Update 10-12-10

Update 10-12-10

I think you are right Proshadetree, its a mass production thing. But I still get stuck fixing it, but I love projects. Just not fiberglass. I hate the ichyness.

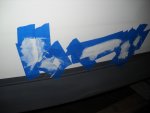
Here is last nights progress. I sanded out the 9 gelcoat repair spots and patched up 7 more for sanding tonight. Ordered 3M finishing compond for buffing yesterday, so it should be in today/tomorrow. I have tried the Meguires stuff and had very little success with it. My buddy down the street (that worked at a GM dealer buffing cars for 10 years) said to get this 3m stuff and he would do it for a case a beer. Nothing like the power of a case of beer.

Here is a pic of the areas I need to sand today.

DSCN0583-1-1.jpg

Here is the area that needs to sand tomorrow.

DSCN0587-1.jpg

Here is an area that is ready for buffing.

DSCN0588-1.jpg

My process after dry. Nock down area to height of blue tape around area with 180 grit wet sandpaper block sanding, then use 400 grit untill almost thru tape then finish with 800 grit. Final buff area when all done.

So tonights plans, sand and patch. Same as above.

Anyone know how long I have to wait to gelcoat repair fresh epoxy? I'm using System three epoxy and spectrum gel coat.

Jeff
 

proshadetree

Lieutenant Commander
Joined
Jul 19, 2008
Messages
1,887
Re: 1991 Bayliner Trophy 2002 Transom Repair

Tell your buddy I buy him two cases of beer to come and buff mine. I buffed for days to get it looking ok not perfect just ok. I think he will earn this one.
 

sprintst

Commander
Joined
Apr 18, 2009
Messages
2,066
Re: 1991 Bayliner Trophy 2002 Transom Repair

Nice work. You're progressing at a crazy pace.
 

j_k_bisson

Lieutenant Junior Grade
Joined
Oct 6, 2010
Messages
1,082
Update 10-13-2010

Update 10-13-2010

The progess is not much in way of visual but I did get done another 7-10 spots of gel coat repair. And patched up another 8-9 more. This should be the last of them. All other scratches are not through the gel coat. Maybe 5-10 deep gouges. It appears that a previous owner hung the anchor from the cleat on the side of the boat and went for a 2hrs ride in 7 foot swells. Or did not tie up the boat properly at the docks and a storm came through. Any ways they are geting fixed. I plan on covering them with new decals from Greatlakes Skipper "trophy and the marlin"

The 3M finesse-it II Finishing compound came in today. I read Porshadetree post reguarding buffing. I give you credit for what you accomplished. And took away a bit of info. I plan on using spounge type buffing pads from Meguire, with a harbour freight buffer. I actually have two buffer's from Harbour feight. They came on sale for 29 bucks awhile ago. So I bought another two. I run two different pads, compound on one, and polish on the other. Might get into this tonight where I have been fixing the gel coat.

Proshadetree if you are still looking for the Meguires buffin pads. I bought a set of 6 x 8" (2 finishing, 2 coumponding, and 2 waxing) for around 65 bucks off ebay. You might want to check it out if you still need them. Good to have with a boat.

My latest order of resin should be in today. I purchased with this white pigments to be added to the resin for the final coat. Trying to give the glass work a factory finish. Anyone ever try this? Wondering how it turned out. How many coats did it take.

Tonights plan is either go out and have a couple of beers with the buddies and confirm their help, or stay in and start cutting my mat for glass'n. And try to make plan of attack. Also as stated previosly might buff the side as well. But this does not need to be done right away.

Jeff
 

Stratohammer

Seaman Apprentice
Joined
Sep 30, 2010
Messages
40
Re: 1991 Bayliner Trophy 2002 Transom Repair

Jeff,

You are certainly making good progress on a big job. I've just begun mine and found that rot originating in the stringers spread to the transom because the wooden pieces contacted each other. I intend to completely glass the transom and tie in the stringers with glass. This should serve to isolate the parts and reduce the chance of future transom rot.

Mike
 

Colega

Cadet
Joined
Oct 6, 2010
Messages
6
Re: 1991 Bayliner Trophy 2002 Transom Repair

It's going to be fast !!. It looks like you have done your research and your buddy has a similar set up, so you have something to compare. How about the coast guard, would they give you a hard time about it since exceeds the manufacture recommendations?
 

j_k_bisson

Lieutenant Junior Grade
Joined
Oct 6, 2010
Messages
1,082
Re: 1991 Bayliner Trophy 2002 Transom Repair

The update fo today is that nothing happened last night but a few pops and alot of laughs. And I have the hangover to prove it. But I have four buddies that are coming over this weekend to give a hand laying all this fiberglass. It will be done in one pour. No sanding in between coats.

Tonight the prep work for the glass'n starts.

Tonight's list
1) Check Mom' car over. (they are coming for dinner)
2) Cook/Grill some steaks on the BBQ for Mom and Dad.
3) Clean an area for working in the garage.
4) Set up a work station for the resin mixing.
5) Laminate transom's three layers together.
6) Seal/laminate the outside of the transom.
7) Glue/bed the transom into place on the hull.

A bit much to do, but I'll kick Mom and Dad out right after supper. They are coming over to watch the little one this afternoon while my wife takes my son to the doctors for a MRI and testing.

So this should be a fun night.

As to the question of the Coast Guard and the motor. I have to repaint and decal the motor hood. SO 175 Decal fits nicely where the 225/200 decal goes. And the motors look pretty much the same. So not problems, just a sleeper.

Jeff
 

Colega

Cadet
Joined
Oct 6, 2010
Messages
6
Re: 1991 Bayliner Trophy 2002 Transom Repair

Jeff,

I see that you got all your basis covered (Coast Guard question). By the way, I like the name for your boat. Good luck with the fiberglass this weekend. Keep posting progress pictures, you are making great progress.
 

j_k_bisson

Lieutenant Junior Grade
Joined
Oct 6, 2010
Messages
1,082
Update 10-15-2010

Update 10-15-2010

:eek:Update from last night. Did not get much done. Mon and Dad stayed till 9pm, and I did not get out to the garage till 9:30, so I desided to only clean/organize the garage for glass'n. The when done that I finish sanding the gelcoat repair spots and buffed them to see how they came out. I'd say not bad, but they deffinately need more attention.

Here is a pic

DSCN0592-1.jpg

Seeing its Friday and no work tomorrow, I'll definately be all over this glass'n tonight. I'll post pics Saterday morning of the progress.

The Plan for tonight.

1) Push the boat out and get the garage back.
2) Laminated the transom together.
3) Coat/laminate CSM and 1708 to outside of transom.
4) Laminate the transom into the hull.
5) Fillet the transom in the hull.
6) Tab the transom with 6" wide CSM
7) Laminate the new stringers.
8) Coat/laminate csm and 1708 to outside of stringers.
9) Laminate/bed stringers into hull.
10) Fillet the stringers into place.
11) Tab the stringers to hull.

I'll work to 2am and the pick up Saterday where I left off. Anyone comes into the garage for the next couple of days will be put to work. I'm not stopping!!!

Jeff
 

proshadetree

Lieutenant Commander
Joined
Jul 19, 2008
Messages
1,887
Re: 1991 Bayliner Trophy 2002 Transom Repair

Dedic:redface:ation Get on it man. Great work so far
 

j_k_bisson

Lieutenant Junior Grade
Joined
Oct 6, 2010
Messages
1,082
Update 10-16-2010

Update 10-16-2010

Here the scope!:) I didn't get all of what I wanted to get done done, but I did get most of it. I should be on scedual by the end of this afternoon. Started by pushing out the boat and setting up the garage. Here is a pic.

DSCN0600-1-1.jpg

And Boat was pushed out to the drive way.

DSCN0601-1.jpg

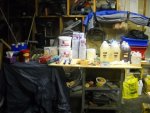
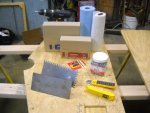
Next layed out all the materials that I could possibly need. This is what $1000.00 will get you for fiber glassing. The list
1) 8 Yard 1708 Biax
2) 6 gal on System Three Epoxy w/medium hardener
3) 1x50 yardx6" roll of 8.5oz mat
4) 3 cubic ft of two part floatation foam
5) Stir sticks
6) Rollers
7) Plastic rollers
8) Cord Silica for thickening
9) Mixing pails
10) Pump kit
11) Measuring Scale
13) Wax paper
14) White Pigment for Epoxy Final coat (factory finish)
ETC See pic

DSCN0595-1-1-1.jpg
DSCN0602-1.jpg

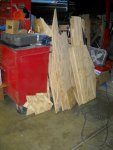
And most of all thew wood that need glass'n.

DSCN0599-14.jpg

This the end of part one.
Jeff:(
 

j_k_bisson

Lieutenant Junior Grade
Joined
Oct 6, 2010
Messages
1,082
Update 10-16-2010 Part2

Update 10-16-2010 Part2

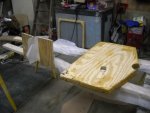
Started with the transom lamination. Scored both pieces that where to be laminated. Something my father taught me when I was a kid. Aids in the bonding process. The epoxy lamination process was as follows. "Paint" both faces to laminated. Wait 10-20 minutes for wood to suck in epoxy. Recoat one piece lightly, (to fill any areas where wood sucked up all the epoxy), and the other piece med/heavy coat. Lay together and screw together every 8-10 inches starting in the center moving out. Wipe the epoxy the squeezes out and coat edge. (made a mess of the floor, and had horrid time with the mess the rest of the night. Hint "USE A DROP CLOTH ON THE FLOOR". I know my shoe bottoms will not rot ever.:D Here is a pic of the laminated transom before laminating and after.
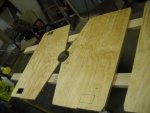
DSCN0606-1.jpg
DSCN0609-1.jpg

Next I tab'd the bottom and top edges with the 6" 8.5oz. This was a new experience. I would recommend that all edges have a minumum od 1/2 radius on it to aid in the mat laying down on the wood. If not the mat lifts from the wood. It took me and hour of constant rolling to get it to stay down.
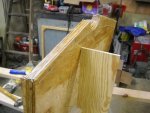
DSCN0610-1-1.jpg

Next I started laminating my stringers. I did not take and pics due to they are following the same process as the transom. WHen I bedd them in the boat I will post pics. I did how ever bed/laminate the transom to the hull. This was after glass'n a piece of 1708 biax to the wood. This was between the wood and hull on hte wood. I coated again the wood and the fiber glass in the boat with normal epoxy. The layed the 1708 and spread epoxy resin on top and the it saturate throu the material. While this was setting up. I mixed some PB epoxy and spread on the transom hull and bottom. Placed the wood in the boat and proceeded to screw/clamp the transom in place. You will notice a void under the transom wood. This has not been filleted and I want to fill to drain plug with PB epoxy before tabbing the transom to the hull. So this void will get filled. Here are some more pics.
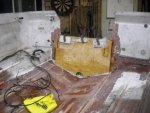
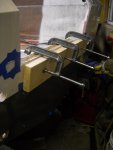
DSCN0612-1-1.jpg
DSCN0617-1.jpg

I did not get the string bedded like I wanted but I have time this afternoon to get it done. Worked this last night from 7:30PM to 2:30am. That is what I got done. I probably could of done more if I had the heat on at first but I wanted a slow cure on the transom lamination. Let the wood soak it in.

Lessons learned from last night.
1) Drop cloth is absolutely needs to keep mess down.
2) Have a full box of disposable glove. Going to go throu them.
3) Anywhere you are going to wrap mat, it needs a fillet.
4) 1708 Eats large amounts of resin for wet out. About 250ml/1sq/ft
5) To make PB epoxy take alot of Cord Silica
6) 10 degrees in temp diferences make huge curing time change.
7) Have huge amounts of Patience when glass'n

So this afternoon thing to do.

1) Fil/fillet the transom
2) Finish wraping the bottom of the rh stringer.
3) Bedd both stringers to hull
4) FIllet the strings to the hull.

I'll keep you posted. Don't feel to bad with only 5 hrs sleep. Kind of like waking up the next day still drunk from the night before.

Jeff
 
Status
Not open for further replies.
Top