The NOOBS 1st restoration: 1970 TideCraft

Status
Not open for further replies.

NOOB2Boats

Cadet
Joined
Aug 29, 2010
Messages
17
Ok, so after speaking a few guys on here and reading a lot of threads I have decided to go ahead with my restoration. So here it goes.

I will be uploading pics of pretty much everything I do, and adding up the cost of everything I purchase going toward the boat itself so I might as well start with this:

PURCHASED:
Boat, Trailer and Engine: $350
Trailer hitch: $41

9/1/10 Day 1:
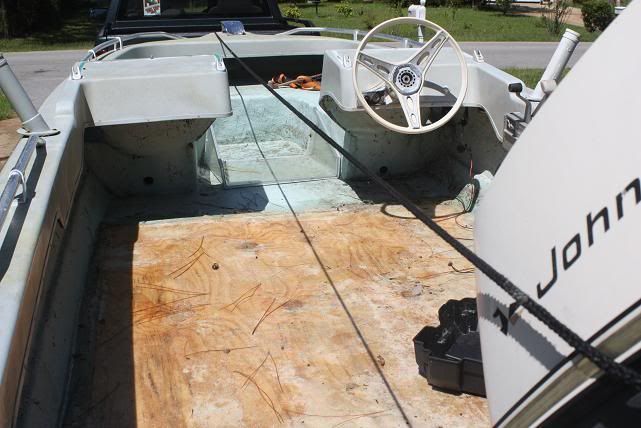
Today I pressure washed all the mold and BS from the boat. It looks pretty decent, but as I was washing I found out that the decks paint isn't the original paint just faded. It has been painted over. Se below:

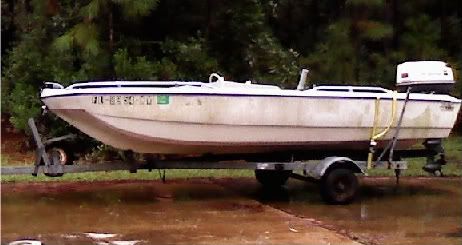
The day I purchased her
0828001435-1.jpg


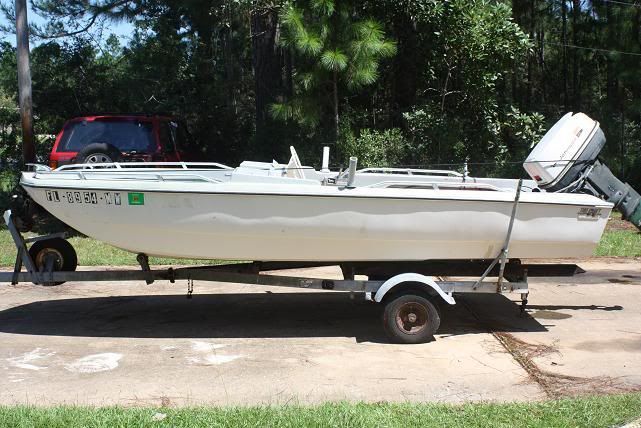
After the pressure wash:
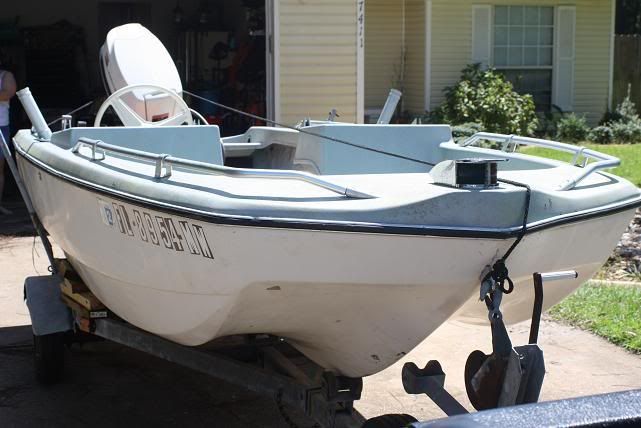
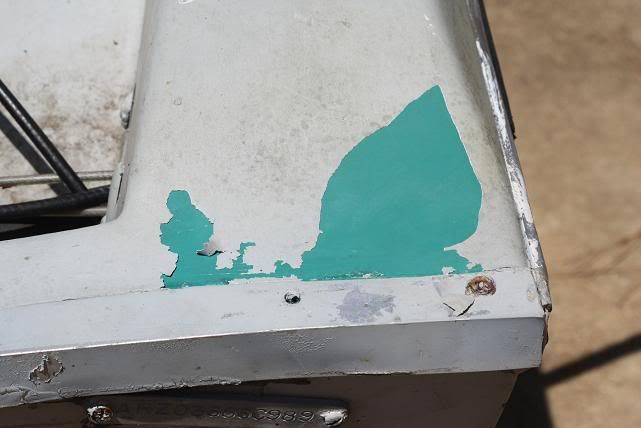
SideLeft.jpg


Rear.jpg


FrontRight.jpg


Deck.jpg


The Original paint:

OriginalPaint.jpg


I like the original paint, I was thinking about doing a classic candy apple red with a fresh coat of high gloss on the hull. But I think now that I know the original color, I like it. So I might just keep it in the end.

I got the garage cleaned out last night, so as soon as she is dry she goes into her new home for the next few weeks.

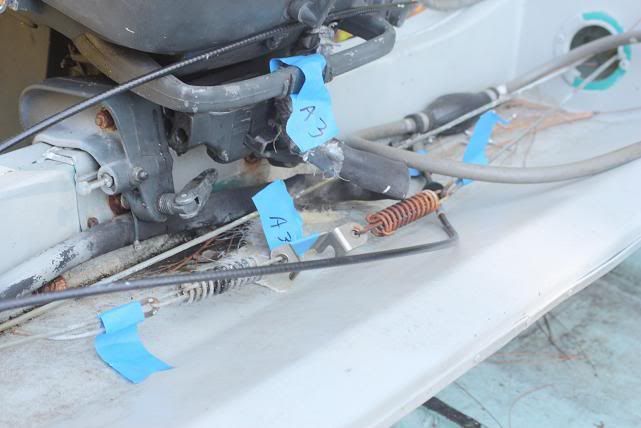
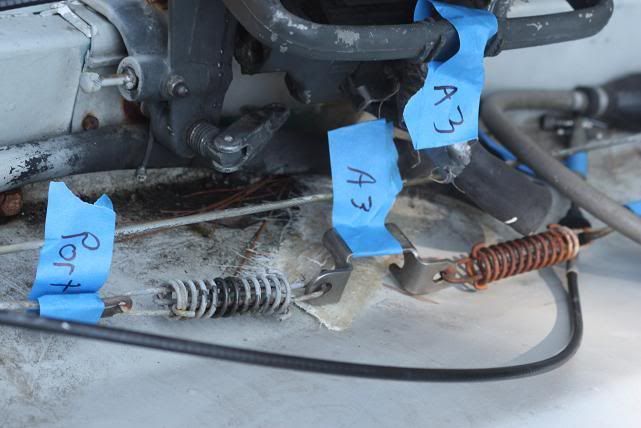
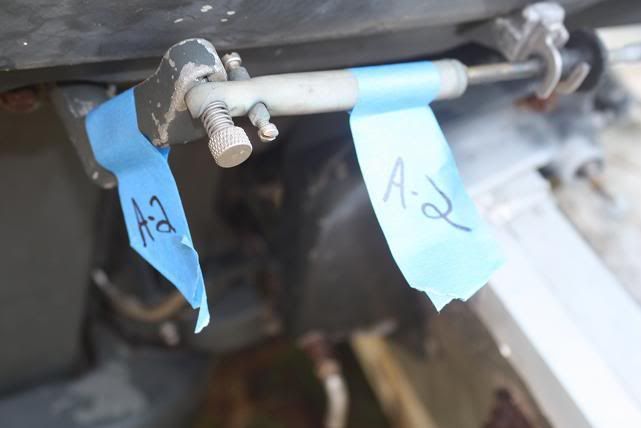
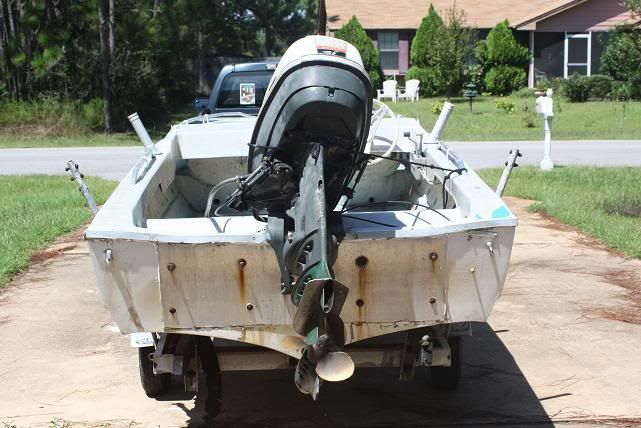
1st step remove the enging
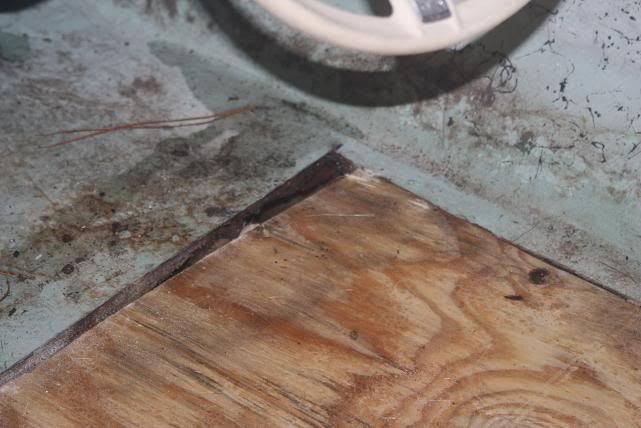
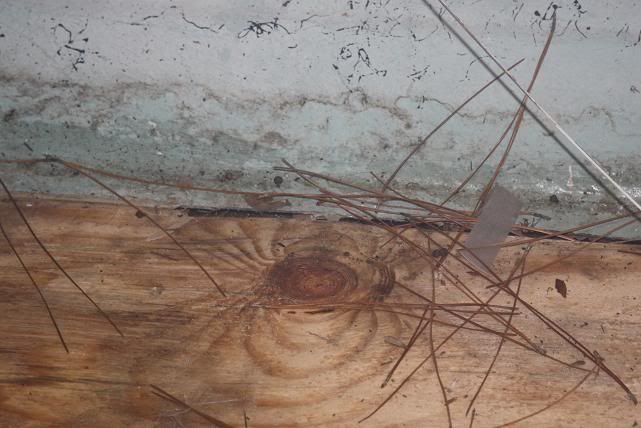
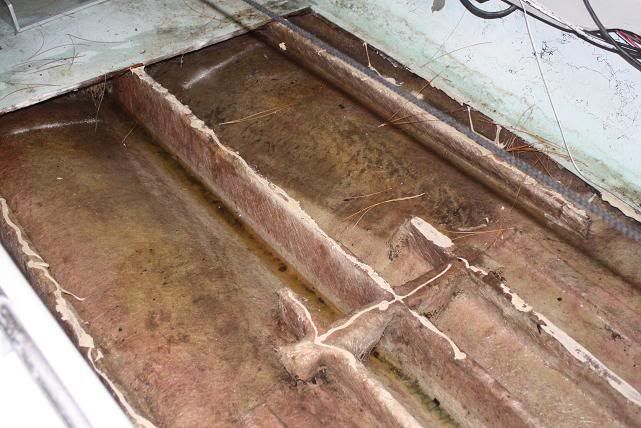
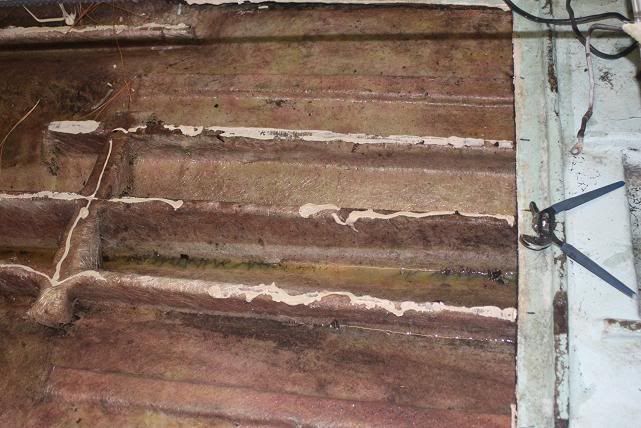
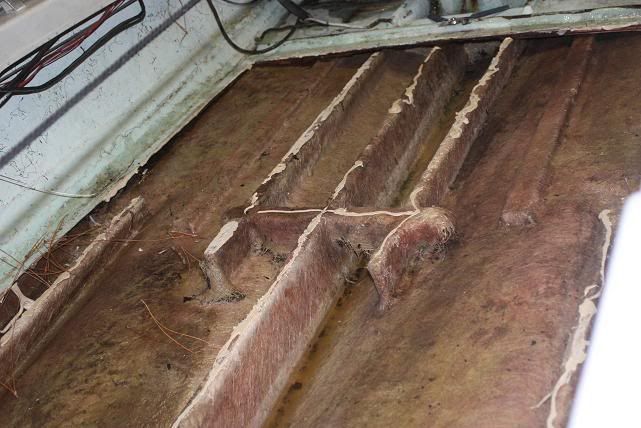
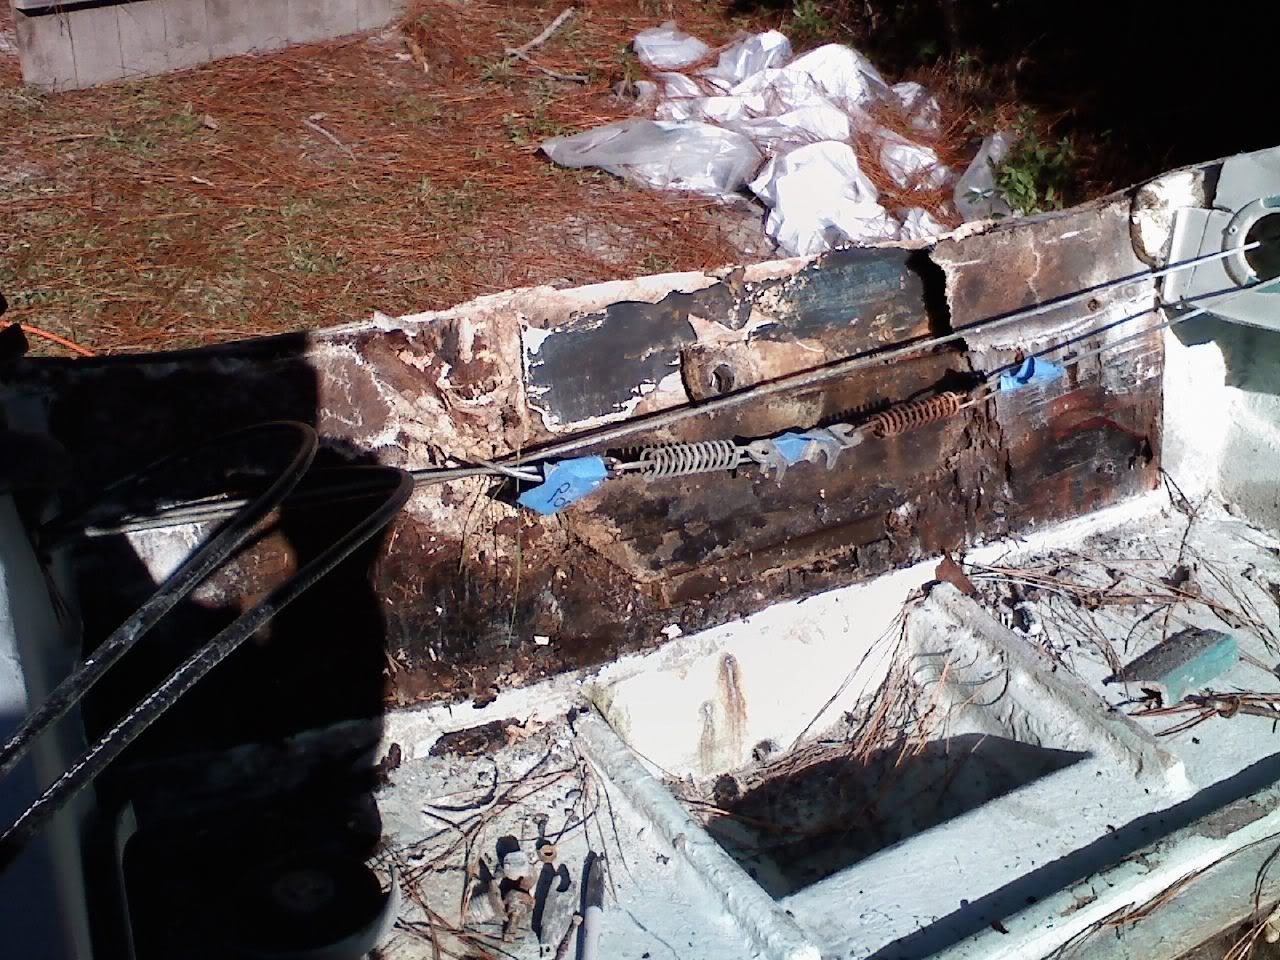
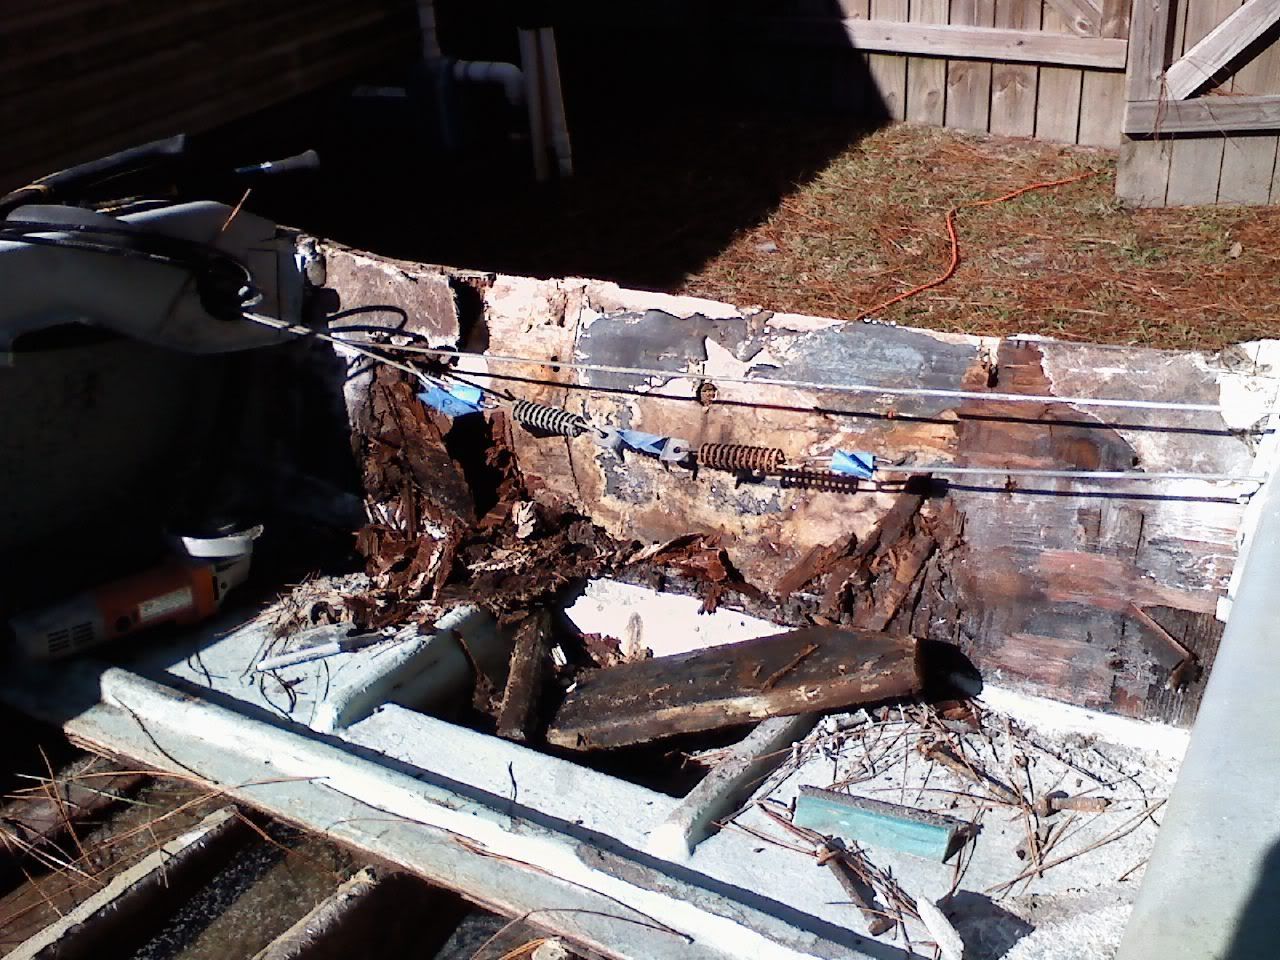
2nd remove the patch job ply wood and inspect the stringers and foam.

Ill have new pics up soon.

WISH ME LUCK!!!!
 

wishboneZ51

Petty Officer 2nd Class
Joined
Jul 11, 2010
Messages
135
Re: The NOOBS 1st restoration

Re: The NOOBS 1st restoration

Nice find and she doesn't look bad at all. My boat had that teil green as well. I dont know where you can get that color again but I am sure some of the guys will be able to lead you in the right direction!

You dont need luck, you need a lot of patience, time, coin, and BEER.:D

Have fun and post lots of pics, we all love pics.
 

NOOB2Boats

Cadet
Joined
Aug 29, 2010
Messages
17
Re: The NOOBS 1st restoration

Re: The NOOBS 1st restoration

So I started cutting the fiberglass off the plywood to get the wood out, and all of a sudden I got a lip of the corner to peel off. So I actually was able to peel off the entire fiberglass overlay.. And No wonder why there is water in the hull.. It was crappy fiberglassed, the wood was wet on top under the overlay, also take a look at these gaps:

DeckGap2.jpg


deckgap.jpg


And here is a few pics of the inner hull with what water is in there:

InnerHull3.jpg


InnerHull2.jpg


InnerHull1.jpg


I was surprised to see that there is absolutley no foam... NONE..

Also I was pondering if the Stringers were good or rotten, the screws I took out of the plywood that attached them to the stringers. They were all dry, not one of them were moist. So I took a hammer and knocked on them to see if I got a thud or a knock. All of them knocked, sounded like they were all great. The fiberglass looks a little shady, so I most likely will be sanding them down a little and overlaying more fiberglass to make them at least protected.

Suggestions?

Comments?

Let me know.

Thanks
 

Woodonglass

Supreme Mariner
Joined
Dec 29, 2009
Messages
25,924
Re: The NOOBS 1st restoration: 1970 TideCraft Tri-hull

Re: The NOOBS 1st restoration: 1970 TideCraft Tri-hull

Welcome to iBoats!
She's the same color as my Flamingo!!!
You need to drill into the stringers at various places with a 3/8 inch drill and see if you get light tan dry shavings or dark brown wet shavings that will tell you what you have. I'm betting that you will get the latter. That reinforcement plate on the transom tells me your transom is totally wasted and will need to be replaced as well. Looks like you have a total rebuild on your hands. Good news is that there is a lot of help here on the forum for you with lots of pics. You'll be on the water next year with a boat that looks and performs like a new one. Have you had the motor checked?

I'm just sayin...:D
 

NOOB2Boats

Cadet
Joined
Aug 29, 2010
Messages
17
Re: The NOOBS 1st restoration: 1970 TideCraft Tri-hull

Re: The NOOBS 1st restoration: 1970 TideCraft Tri-hull

I havent got the motor checked yet, but I know that it is in need of a new water pump. At least the old owner told me that. But I had planned on having it worked over and a friends shop in town. I took out some screws that were about 3 inches long and they were all dry. But Ill give the boat tomorrow in the sun, I took it out of the garage to let it dry out the hull a little tomorrow before I start working on it again. But as soon as the inner hull is dry, I will be drilling a few spots with that 3/8s bit. Thanks
 

Woodonglass

Supreme Mariner
Joined
Dec 29, 2009
Messages
25,924
Re: The NOOBS 1st restoration: 1970 TideCraft Tri-hull

Re: The NOOBS 1st restoration: 1970 TideCraft Tri-hull

If after drilling the stringers are dry use 3M 5200 to fill the holes. Make sure and drill the transom on the inside as well. I am afraid you are going to find that it is in need of replacement as well.

I'm just sayin...:D
 

NOOB2Boats

Cadet
Joined
Aug 29, 2010
Messages
17
Re: The NOOBS 1st restoration: 1970 TideCraft

I havent been able to drill the stringers yet. Im a beer vendor, so Thur and Fridays are lond days for me. But before the sun went down today, I was able to look in the hull where I pulled up the board. With the exception of the collection of water at the aft area, the entire hull is bone dry. There are no dark areas on any of the stringers. So im wondering if it is even needed at all. But better safe than sorry I guess. I will let you know as soon as I get it drilled.
 

NOOB2Boats

Cadet
Joined
Aug 29, 2010
Messages
17
Re: The NOOBS 1st restoration: 1970 TideCraft

Ok, so I had a little time today to focus on the boat. So first off I made a stand :
stand.jpg


stand2.jpg


Then I started to label and diconnect the wires and cables from the engine:

tag3.jpg


tag2.jpg


tag1.jpg


tag.jpg


So then I started to try and loosen the engine mount screws.. To my surprise I CAN NOT GET THEM LOOSE!!!!! I tried WD-40, tapping it with a hammer, vice grips.. I can not get it to loosen. I ended up breaking on of the levers off the screw itself.. SO I GUESS YOU CAN SAY IM SCREWED!!!

Please anyone.. Give me a little help here. How the hell do I loosen these to get it off?

Thanks
 

NOOB2Boats

Cadet
Joined
Aug 29, 2010
Messages
17
Re: The NOOBS 1st restoration: 1970 TideCraft

Anyone? I tried vice grips on it for a good 45 mins... Still no progress.
 

wishboneZ51

Petty Officer 2nd Class
Joined
Jul 11, 2010
Messages
135
Re: The NOOBS 1st restoration: 1970 TideCraft

I am trying to understand what you are doing or trying to get undone!

Could you please show some pictures of what you are having trouble gettinng off?

PB blast is the best stuff on the market that I have been able to use for just about every stubborn type of fastner. You can purchase this tuff at any hardware store. But before you go and start spending money lets see what it is that is not allowing you to move forward.
 

tmcalavy

Rear Admiral
Joined
Aug 29, 2001
Messages
4,005
Re: The NOOBS 1st restoration: 1970 TideCraft

Sounds like the transom screws are locked tight. You can use a sawzall to cut off the bolt right behind the transom clamp...between the back of the clamp and the transom. If you can't get the old ones unstuck, and yes replacements are available, you can get a replacement clamp with working bolts for not much $$$. Is it just clamped to the boat, or is it bolted through the transom, too?
 

NOOB2Boats

Cadet
Joined
Aug 29, 2010
Messages
17
Re: The NOOBS 1st restoration: 1970 TideCraft

Ok, so I bought the pb blast, a nice pair of really big vice grips yesterday. I sprayed the clamping bolts four different times and to no avail it was still too tight to budge. I soaked them for the fifth and final time with so much pb blast that now I have about a half inch in the splash well. I let it sit for about an hour this time instead of 15 minutes. Again, no budging them. So I got a little ticked went and got my angle grinder and cut them both off.

No my name should say it all, I am a noob to boats; So I had NO CLUE that the damn engine was that heavy. I def was not prepaired for this. I thought it would have weight, but man... I had to stand it up next to the garage and get the motor stand I made and struggled getting it on it for over 15 mins by myself. But now the engine is off and on the stand. And I def need to start on the transom..

So where do I go from here guys.. Step 2 anyone? Step 1 start working on the boat, step 3 have fun in the water... step 2? well I really havent worked that out yet (inside joke for all you south park fans)

But for real, do I need to cut the back end of the upper deck off to start drilling out the wood for the seacast? or do I drill out the rivets to lift the entire deck?
 

NOOB2Boats

Cadet
Joined
Aug 29, 2010
Messages
17
Re: The NOOBS 1st restoration: 1970 TideCraft

Ok guys, so its been a while that I have been on as well as been able to work on the boat. LONG STORY!!!

Anyway, I started to take out the rivets today, and was about to pop the cap on the baby when I noticed that the entire cap is fiberglassed to the hull and the deck. So I moved on and decided to just cut the cap off the top of the transom. After doing so, as EVERYONE said, it is rotten to the core.. I mean I can easily pinch of chuncks of this wet wood.

So here is the reason for the post, since I was unable to get the cap off, I can not take the deck off and breakdown the transom. Now I am going to do the seacast pour to replace the wood once the wood is removed. The outter hull seems to be a little flimsy and is bowed a little. So my question, instead of drilling the wood out like the video suggests (HERE IS THE VIDEO), which would be better, cutting the inner deck wall to the transom and removing the wood then fiberglassing the deck wall back on then pouring the seacast? Or cutting the outer hull wall off, removing the wood, repairing it, then seacast?

I personally believe that the deck wall, but Im posting her because Im not sure.

Also, is there any need for the "splash well" I believe its called?
 

NOOB2Boats

Cadet
Joined
Aug 29, 2010
Messages
17
Re: The NOOBS 1st restoration: 1970 TideCraft

So what Im about to tell you is crazy, but it actually took longer to upload these pictures and deescribe what happened, than the actual process did.

Since I did not get any replies about what I should do or where to cut, I figured screw it and cut off the splash well as well as the deck wall that is against the transom. I used an angle grinder to cut the fiberglass and upon doing that chuncks of wood just come falling off:

12-5-101.jpg


Then I decided to take a roofers tool ( a hammer looking item with a hammer head at one end, and a hatchet looking area on the opposing side of the head), and bearly chipped as the rest of the wood started falling off and crumble:

12-5-10.jpg


basically, I have I would say 80 to 90% of the transom off in all about 15 mins total. I have to go back to work now, but I m going to drill the rest of the decent wood, fiderglass the deck wall back on and pour the seacast transom.
 

GA_Boater

Honorary Moderator Emeritus
Joined
May 24, 2011
Messages
49,038
FT III

Noobs hasn't been here in over 6 years. Don't expect more pics.

Why don't you start a thread of your own?

Closed.
 
Status
Not open for further replies.
Top