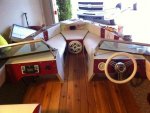
Restoring 1986 Sea Nymph SS155 (pics)

Piece715

Senior Chief Petty Officer
Joined
Jan 26, 2009
Messages
757
Re: Restoring 1986 Sea Nymph SS155 (pics)

Bow mount? battery or trolling motor?

And i have a gander mountain close and im pretty sure they carry the prosport chargers... I just have no experience with any of them and I'm gonna have to run a dual battery set up. Just throwing some feelers out there to see if people have suggestions. I have searched the forums and its seems everyone use something different and they all work about the same
 

ezmobee

Supreme Mariner
Joined
Mar 26, 2007
Messages
23,767
Re: Restoring 1986 Sea Nymph SS155 (pics)

Sorry, trolling motor. Its battery is located in the bow also so I've got a battery in the front and one in the back. Looking through my most recent BassPro catalog, I can't believe how many friggin' options they have for chargers and they all do the same thing!
 

Piece715

Senior Chief Petty Officer
Joined
Jan 26, 2009
Messages
757
Re: Restoring 1986 Sea Nymph SS155 (pics)

There are TONS and yea i have noticed they all do the same as well. Just tryin to figure out if there is reliability with certain brands; It may be a "trial and error" type thing.
My trolling motor was a bow mount but i haven't decided if I am gonna remount it just yet. One thing I'm kinda worried about is having the gas and dual batteries under the splash well plus the new 4 inch set back with the CMC and the CMC itself weight an extra 40lbs. Seems like some heavy lbs all in the stern, but guess that's why i got the CMC just plane it out ;)

I could separate the batteries and put one near the amp in the port bow seat but seeing that the battery switch and starting battery will be in splash well do i really want to move the house battery up front? Can i use a long run of power wire like that when using a battery switch?
 

ezmobee

Supreme Mariner
Joined
Mar 26, 2007
Messages
23,767
Re: Restoring 1986 Sea Nymph SS155 (pics)

Price out the proper gauge battery wire and you'll change your mind on relocating them :eek:
 

Piece715

Senior Chief Petty Officer
Joined
Jan 26, 2009
Messages
757
Re: Restoring 1986 Sea Nymph SS155 (pics)

How much wire and fuse can u put in the splashwell with an outboard gas tank? It doesn't seem too safe to me but I'm tryin to find a place in my boat for the fuse block and battery switch. The splashwell would be the best for looks and most room for wire.
 

Piece715

Senior Chief Petty Officer
Joined
Jan 26, 2009
Messages
757
Re: Restoring 1986 Sea Nymph SS155 (pics)

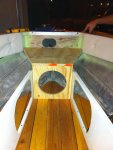
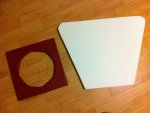
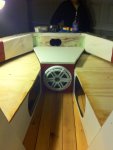
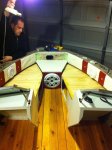
Made a box into the bow seating to mount the sub. It was either there or in the back to back seating. This way actually turned out to be easier to make.
untitled(1).jpg
photo3.jpg
photo.jpg
 

Piece715

Senior Chief Petty Officer
Joined
Jan 26, 2009
Messages
757
Re: Restoring 1986 Sea Nymph SS155 (pics)

Hey EZ or anyone I guess... Is a 6 gallon tank sufficient for a day on the water or should I shoot for 12 gallon with my 50hp
 

Huron Angler

Admiral
Joined
Apr 7, 2009
Messages
6,025
Re: Restoring 1986 Sea Nymph SS155 (pics)

Very nice work on that bow, it looks great.:)

I think you will be happier with a 12 gallon tank, but 2 six gallon tanks are easier to fit.

I'm going with an 18 gallon tank under the splashwell.
 

Piece715

Senior Chief Petty Officer
Joined
Jan 26, 2009
Messages
757
Re: Restoring 1986 Sea Nymph SS155 (pics)

Very nice work on that bow, it looks great.:)

I think you will be happier with a 12 gallon tank, but 2 six gallon tanks are easier to fit.

I'm going with an 18 gallon tank under the splashwell.

Thanks Huron! Your work is looking great as well!

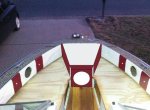
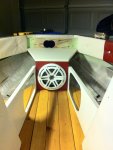
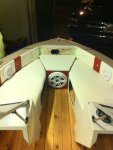
Here is the finished bow except for the seating; getting foam today. Guess im going with 2 6 gallon tanks as i think thats all that will fit in my splash well. Batteries will have to be moved up front. Guess that fixes the fuse and battery switch question I had earlier.

Here are pics of the finished sub mount and bow seating minus the foam. Enjoy!
photo4.jpg
photo5.jpg
photo6.jpg
 

Piece715

Senior Chief Petty Officer
Joined
Jan 26, 2009
Messages
757
Re: Restoring 1986 Sea Nymph SS155 (pics)

Finished bow seating and sub woofer box/mount... well ish... still need to do the nose piece and finding it difficult because of the bend... any ideas?

photo.jpg
 

jbcurt00

Moderator
Staff member
Joined
Oct 25, 2011
Messages
24,863
Re: Restoring 1986 Sea Nymph SS155 (pics)

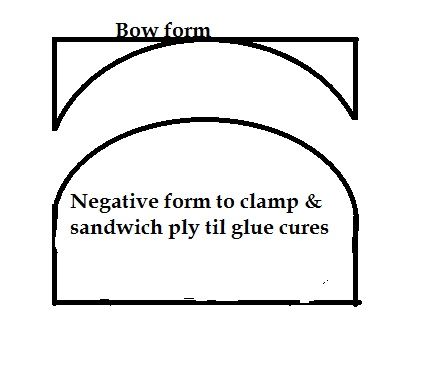
Kerf the back ends of a couple sheets of 1/4" luan & make a form to 'pre-bend' a multiple sheet layup of the bow piece. Once you apply glue (gorilla glue would probably be best) and bend them to fit, let them stay in the form until well cured. Then cover w/ foam & upholster as necessary. A vertical seam in the center of the curve may make it easier to fit the vinyl to the contour. Or completely spraying the foam & vinyl w/ contact adhesive to help it take & hold the shape of the curve. Then install the bow piece as you have the others.

You may be able to cover the bow area w/ plastic & use the existing bow area as the form, it looks like you may be able to clamp the kerf'd ply across the bow to the rubrails.
 

Piece715

Senior Chief Petty Officer
Joined
Jan 26, 2009
Messages
757
Re: Restoring 1986 Sea Nymph SS155 (pics)

Kerf the back ends of a couple sheets of 1/4" luan & make a form to 'pre-bend' a multiple sheet layup of the bow piece. Once you apply glue (gorilla glue would probably be best, but avail to you?) and bend them to fit, let them stay in the form until well cured. Then cover w/ foam & upholster as necessary. A vertical seam in the center of the curve may make it easier to fit the vinyl to the contour. Or completely spraying the foam & vinyl w/ contact adhesive to help it take & hold the shape of the curve. Then install the bow piece as you have the others.

You may be able to cover the bow area w/ plastic & use the existing bow area as the form, it looks like you may be able to clamp the kerf'd ply across the bow to the rubrails.

Thanks for the info Jbcurt! Ill do some reading on it... i have the general idea what ya mean but getting the wood to bend in the mold is confusing me. I guess that wood needs to be kerfed too due to the fact that i can't push it into place; the angle of the bend is just too sharp. Know of any thread where someone has performed this that i can read through?
 

jbcurt00

Moderator
Staff member
Joined
Oct 25, 2011
Messages
24,863
Re: Restoring 1986 Sea Nymph SS155 (pics)

Yes the shallow cuts spaced evenly on the back will allow the ply to bend into a radius that it wouldn't otherwise conform to. It also gives you extra glue surface area between the sheets. The end of that panel has some pretty tight radiuses, you may do better to look for bendable ply. It is made specifically for this purpose, but is also more expensive. It would however be much easier to work w/ & definitely would conform to that radius.

Try these to eHow-to sites:

Bending Ply w/ steam or kerfs

Bending w/out steam


I'm not sure what you mean about the mold, but yes you are on the right track w/ the Kerfs. The molds would be a form that matches what your bow shape is that you need to fit the bent ply too. Here is a quick mockup of a 2part mold, it's not a good match to your actual bow shape, but you should get the idea:

Bowclamp.jpg
 

Piece715

Senior Chief Petty Officer
Joined
Jan 26, 2009
Messages
757
Re: Restoring 1986 Sea Nymph SS155 (pics)

Awesome jbcurt! That actually clears it up for me! Appreciate it!
 

Piece715

Senior Chief Petty Officer
Joined
Jan 26, 2009
Messages
757
Re: Restoring 1986 Sea Nymph SS155 (pics)

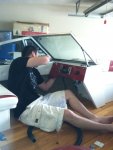
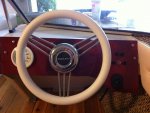
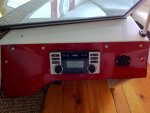
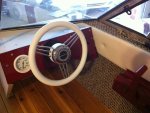
More work done! Man do I hate drilling through plexiglass... very nerve racking! But finished the dash panels and installed them. Must say I think they came out well for a homemade job :D Gonna tackle running the steering and last little odds and ends this week. Ordered side vent handles as the originals were all dry rotted... at 20 bucks a pop hope the ones i ordered will work. Last task will be the wiring which i think is becoming more clear... we'll see! Enjoy the pics!

Completed Dashes.jpg
Dash install.jpg
Passenger Dash.jpg
Driver dash tach and throttle.jpg
Steering wheel.jpg
 

Piece715

Senior Chief Petty Officer
Joined
Jan 26, 2009
Messages
757
Re: Restoring 1986 Sea Nymph SS155 (pics)

So opinions needed... When doing a dual battery set up do I want to go for a cranking battery and a deep cycle vs two deep cycle batteries vs some other setup? I'm pretty sure i have seen a wide range of different spreads here on the forums. If ya could list some pros/cons of each. Thanks
 

ezmobee

Supreme Mariner
Joined
Mar 26, 2007
Messages
23,767
Re: Restoring 1986 Sea Nymph SS155 (pics)

Dashes look great.

I'd go cranking battery and deep cycle. Deep cycles aren't meant for quick discharge/continuous recharge like starting batteries are and starting batteries aren't meant to be run down completely running your stereo.
 

Piece715

Senior Chief Petty Officer
Joined
Jan 26, 2009
Messages
757
Re: Restoring 1986 Sea Nymph SS155 (pics)

Dashes look great.

I'd go cranking battery and deep cycle. Deep cycles aren't meant for quick discharge/continuous recharge like starting batteries are and starting batteries aren't meant to be run down completely running your stereo.

Thanks EZ! Those puppies were time consuming!

As for the batteries thats what I was thinking as well just always like to hear opinions. I finished up the splashwell area and fit my 2 6 gallon outboard tanks... definitely no room for batteries in there so it looks like im going the expensive long run of wire for batteries in the bow seats. On the plus side it will distribute the weight in the boat fairly well.
 

rickryder

Commander
Joined
Jun 24, 2010
Messages
2,722
Re: Restoring 1986 Sea Nymph SS155 (pics)

You have done a really fine job on your boat! Impresive to say the least. Keep up the good work ;)
 
Top