66 Starcraft Sunchief Re-Build

Status
Not open for further replies.

North Beach

Commander
Joined
Sep 29, 2008
Messages
2,022
Re: 66 Starcraft Sunchief Re-Build

Magicbronco, You may be onto something there. I profess to know next to nothing about paint. The data sheet is where I got the bright idea to sand between coats. Anyhow, based on what I'm hearing here and looking at what I was getting results wise I'd have to agree that I'm not laying down enough paint. All said and done, It's looking better now. Thanks for the help!
 

sschefer

Rear Admiral
Joined
Nov 13, 2008
Messages
4,530
Re: 66 Starcraft Sunchief Re-Build

warmer wheather means warmer paint which actually thins the paint for you.
think of cold honey next to hot honey .which falls off a spoon faster?
so when its warm does not mean more thinner.
Tip let your paint supplies stay in the warm house, not the cold garage when your painting the next day.
That's good logic but not the case, thinning paint in warmer weather allows it to flow fully before it skims over. Optimal for flow without thinner is around 60 degrees.
 

magicbronco

Cadet
Joined
Mar 23, 2009
Messages
12
Re: 66 Starcraft Sunchief Re-Build

yes warmer paint is thinner try running cold paint and warm paint thru a zahn cup the cold will be slower.

Most paint's today need reducer to make them sprayable,and lay flat easily.
Temperature is not the determining factor in whether to use reducer or not.
Temperature determines what reducer to use,cold temp use fast reducer,
warm temp use slow reducer,the object is to have the reducer flash off in roughly the same amount of time regardless of temp.
 

sschefer

Rear Admiral
Joined
Nov 13, 2008
Messages
4,530
Re: 66 Starcraft Sunchief Re-Build

yes warmer paint is thinner try running cold paint and warm paint thru a zahn cup the cold will be slower.

Most paint's today need reducer to make them sprayable,and lay flat easily.
Temperature is not the determining factor in whether to use reducer or not.
Temperature determines what reducer to use,cold temp use fast reducer,
warm temp use slow reducer,the object is to have the reducer flash off in roughly the same amount of time regardless of temp.
Thanks for the info. Again that's good logic and the method I would use if I was spraying automotive paints.

I use Interlux epoxies and others use Petit or Epifane for the most part. If you want to see what Interlux recommends you can visit http://www.yachtpaints.com. I think you'll find that Marine epoxies are a slightly different animal then you are used to.
 

sschefer

Rear Admiral
Joined
Nov 13, 2008
Messages
4,530
Re: 66 Starcraft Sunchief Re-Build

Secondly, I'm still searching for windshield gasket material and I'm not having much luck. I ordered the white stuff made by Taylormade hoping to get lucky and it isn't even close. Anyone know of a supplier?

Not sure which gasket your looking for. If its for the glass you can usually find that at a Windshield repair shop. If its for the seal between the deck and the windshield where it mounts, mine didn't have one. I want one and am thinking about using a piece of garage door bottom seal and just trimming it close so you really don't see it.

What I'm really having a hard time finding is the plastic screw cover inserts. I found a place that said they had it so I ordered it but when I got it, it was just door weather strip like you get at HD. I may end up using it because it does work but it's not right.

By the way - How'd the paint go. I know you've been hard at it.
 

magicbronco

Cadet
Joined
Mar 23, 2009
Messages
12
Re: 66 Starcraft Sunchief Re-Build

Thanks for the info. Again that's good logic and the method I would use if I was spraying automotive paints.

I use Interlux epoxies and others use Petit or Epifane for the most part. If you want to see what Interlux recommends you can visit http://www.yachtpaints.com. I think you'll find that Marine epoxies are a slightly different animal then you are used to.

Pettit Easypoxy is a highly rated, one-part polyurethane topside paint improved by the addition of silicone for a brilliant shine and easy brushability. It also contains ultraviolet filters which enhance the already superior gloss retention and durability of polyurethane. This results in a topside finish that is exceptionally easy to apply and produces a lasting gelcoat-like brilliance, with a minimum of effort. Easypoxy is available in white and twenty-five popular topside colors.
Technical Specifications
Finish: High-gloss
Curing Mechanism: Air dry/oxidation
Solids (theoretical): Weight- 62.0 +- 7%, Volume- 49.6 +- 2%
Coverage: 600 sq. ft./gal.
VOC: 394 g/l for 3175 White (other colors will vary slightly)
Flash Point: 113Deg F for White (other colors will vary slightly)
Appplication: Brush, Roller, or Spray
Number of Coats: 2 minimum
Dry Film Thickness per Coat: 1.5 mils (3 wet mils)
Application Temp: 50Deg F. Min., 90Deg F. Max.
Application Humidity: 0% Min., 90% Max.


APPLICATION INFORMATION
Stir thoroughly before use. Easypoxy may be applied by brush, roller, conventional or airless spray. For brush or roller application apply without thinning although in hot weather 5-10% Pettit 120 Brushing Thinner may be added to maintain a wet edge. For best results on large, smooth surfaces roll out using a short nap roller followed immediately by leveling off with the tip of a brush. For conventional spray application thin 15-20% with Pettit 121 Spraying Thinner. Apply one, thin even coat per day. After an overnight dry, lightly sand with 220 grit sandpaper and apply a second coat. Applying two or more coats in one day or applying excessively heavy films (greater than 4 wet mils) will lead to insufficient through drying of the paint and will yield soft paint films. For airless spray application thin up to 5% with Pettit 121 Spraying Thinner. Utilize a .011-.015 inch diameter tip for application. Do not apply Easypoxy on extremely humid days (90Deg+ RH) or when rain is threatening. Do not apply in the late afternoon when working outdoors as the wet film may be adversely affected by dew. When working in cooler temperatures be sure the air and surface temperatures will remain at or above 50Deg F for at least 8 hours after application.


SURFACE PREPARATION
Surface must be free of dirt, loose paint, rust, oil, grease, wax, soap and any other foreign matter. Clean painted areas by washing with a solution of 2 cups household ammonia per gallon of water and rinse well. Remove existing mildew with household bleach instead of ammonia.
Dry Time Hours To Touch To Recoat
90Deg F. 1-1/2 hrs. 8 hrs.
70Deg F. 3 hrs. 16 hrs.
50Deg. F 6 hrs. 24 hrs.

as you see a simple one part poly that is reduced 15% to 20% with a 1.5 mil dft per coat.
No i don't shoot much automotive,usually shoot the most nasty wierdest paints on the planet. Ther is alway's some over thinking engineer to make my life miserable.

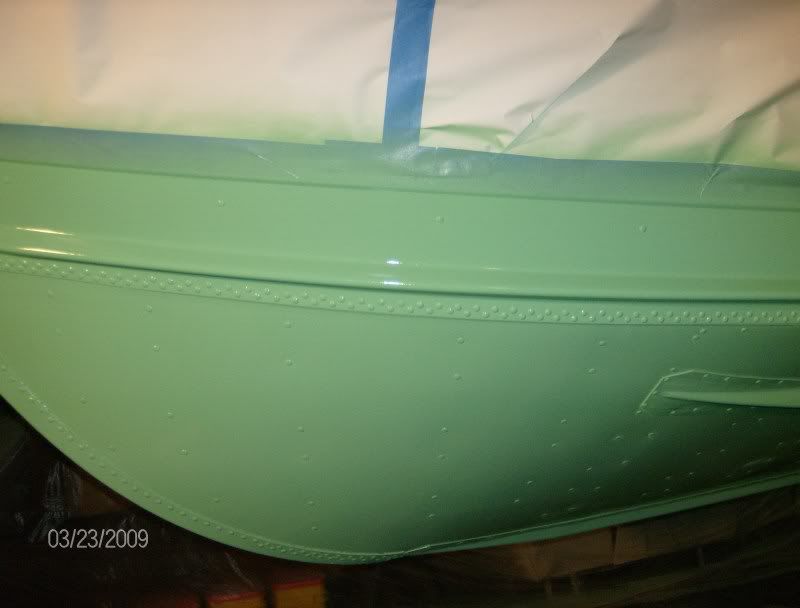
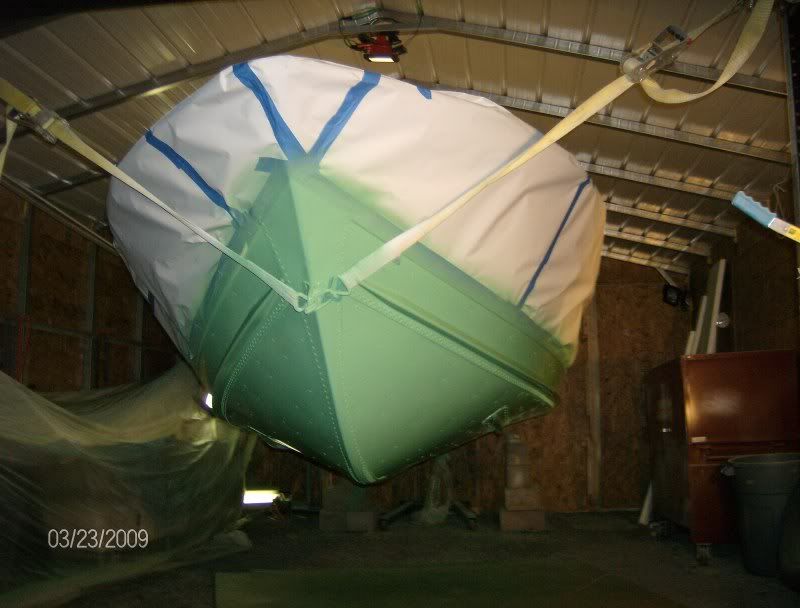
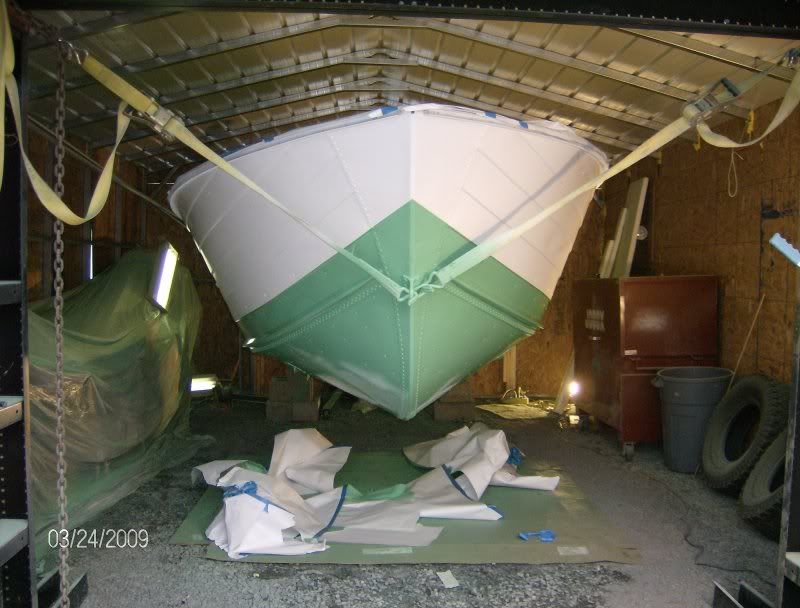
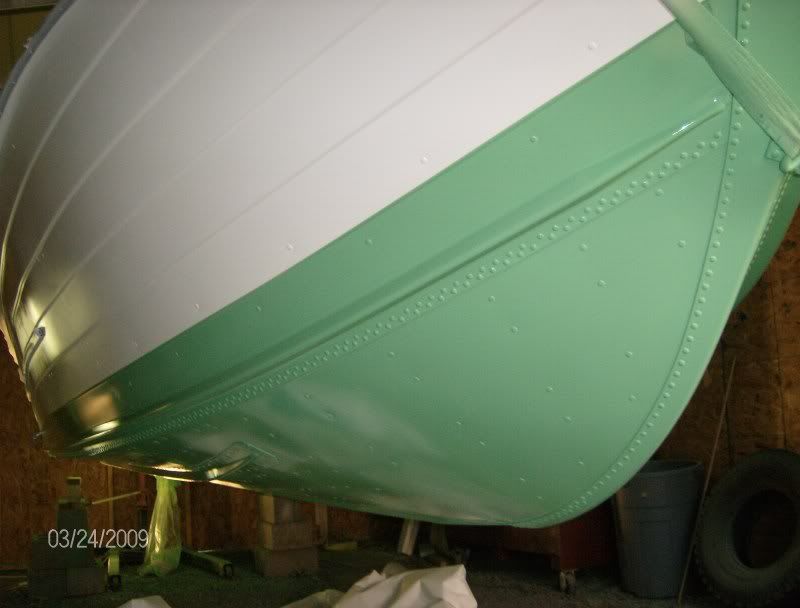
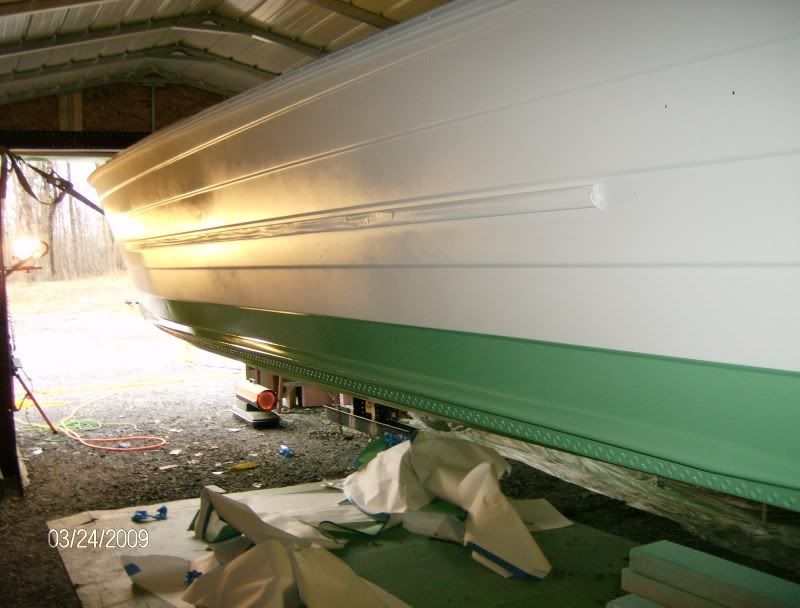
Hope the 66 painting is going well,that paint scheme is great.

Post pic's please
 

North Beach

Commander
Joined
Sep 29, 2008
Messages
2,022
Re: 66 Starcraft Sunchief Re-Build

SS, I'm looking for the windshield gasket peice that goes between the boat and the windshield frame. Here's a cutaway view.
WSgasket.jpg


MB,The paint is going fine. I shot the last coat of white three days ago and we've had rain here since. I've been waiting a couple of days to allow it to harden so this evening I'm masking it off and shooting the first coat of light green on the bottom. I will post pics then.

That's the same data sheet I've read about 400 times since I started this project:D
 

jcsercsa

Captain
Joined
May 21, 2007
Messages
3,401
Re: 66 Starcraft Sunchief Re-Build

Hay North Beach, did you try taylor they have a lot of them !!! john
 

sschefer

Rear Admiral
Joined
Nov 13, 2008
Messages
4,530
Re: 66 Starcraft Sunchief Re-Build

NB, that's the nearly the same one I have (or had). I couldn't find it either and I couldn't find a tall replacement windshield either. Everybody seems to have stopped making them. I'm going to see how the garage door bottom seal works out. The one I found at Homer's Depot is shaped similar to our gaskets and I think with a little trimming it will work o.k.
 

North Beach

Commander
Joined
Sep 29, 2008
Messages
2,022
Re: 66 Starcraft Sunchief Re-Build

Yeah I tried Taylor. Guess I'm gonna have to go McGuyver on it!

SS, let me know how that works out.
 

North Beach

Commander
Joined
Sep 29, 2008
Messages
2,022
Re: 66 Starcraft Sunchief Re-Build

Another Friday evening in the paint shop. This is getting to the point where my wife is calling the boat ?His Other Girl?.

I didn?t want to contribute to SS and MB?s heads getting any bigger so I sort of combined their recommendations.:D

The first step was taping off the waterline with some 1? masking tape. I tried to use the wide stuff but it didn?t want to conform to the radius very well so I went with the 1? on the new paint. Then I broke out a big roll of blueprint paper we salvaged from an office renovation we did a couple of years ago. I keep it out in my bow shop for covering the work benches when I?m glueing up wood. I taped it to the 1? with the wide stuff.

Once I got all the cursed white paint covered I wiped everything with a fresh tack cloth.

The next step was to mix a full quart of Pettit Kelly Green and a quart of the Gloss White. The 50/50 mix gets us real close to the green my wife picked for the bottom and the topside.

Once I got all the mixing done (I wanted to mix it all so we wouldn?t have any tinting issues between coats), I cleaned up one of the quart cans and set a quart of the mixed paint aside for tomorrow. I mixed in 1.5 ounces of spraying thinner to 16 ounces of paint.

The next step was to spray a tack coat with the new green. My friend with the recently restored Orland Clipper said to ?robin egg? the tack coat, so that?s basically what I did. Once I got the whole bottom covered I just went back to the beginning and layed down a nice wet coat of the new stuff. IMO it looks great!!! I shot a full quart on the bottom.

After the opinion sharing of SS and MB I think I got it figured out. Thanks guys!


GP2.jpg

GP1.jpg
 

ezmobee

Supreme Mariner
Joined
Mar 26, 2007
Messages
23,767
Re: 66 Starcraft Sunchief Re-Build

Looks AMAZING. I'm loving the color combination. It's going to look so classic.
 

North Beach

Commander
Joined
Sep 29, 2008
Messages
2,022
Re: 66 Starcraft Sunchief Re-Build

Today I hit the boat shop at 6 AM determined to finish the paint job. I wiped the entire first coat of green down with the tack cloth and shot a tack coat and wet coat. Done!

EDIT- Forgot to mention-I mixed pretty much the same as yesterday -16 ounces of paint to 1.5 ounces of spraying thinner and shot another full quart today.

I waited a couple of hours to give the paint time to set and removed the paper and carefully removed the masking tape. I?ve got the temperature hovering right at 75 degrees so the paint is setting pretty quick.

Here?s what we got!!!!! Note-For some reason my digital camera makes everything look all funky in the shadows under the boat. I can?t wait to get it out in the sun and take some pictures.
Green2nd1.jpg

Green2nd2.jpg

Green2nd3.jpg

Green2nd4.jpg

So, I shot the first Zinc Chromate on the hull on March 18th. It took 10 days working just about every day to finish off the bottom painting. I'm glad I don't do this for a living-I'd probably starve!!

Now it just sets and cures till we throw it on the trailer and haul it over to the boat mechanic to get the outdrive straightened out.
 

CheapboatKev

Vice Admiral
Joined
Oct 4, 2008
Messages
5,813
Re: 66 Starcraft Sunchief Re-Build

Ohhhhhhhhhhhhhhh ahhhhhhhhhhhhhhhhhhhhh
Dang NB...That is one HECK of a job youve done....
Ya know SWFL is really nice this time of year..might find something for you to tinker with if ya come down..lol!
 

ezmobee

Supreme Mariner
Joined
Mar 26, 2007
Messages
23,767
Re: 66 Starcraft Sunchief Re-Build

Looks great. Can't wait to see it all put back together. You're going to be getting lots of compliments at the ramp on that thing. What's the plan for the interior?
 

92excel

Chief Petty Officer
Joined
Oct 6, 2008
Messages
477
Re: 66 Starcraft Sunchief Re-Build

i think you need a shamrock decal or two ..
kelly green always makes me think of st pattys day!

Looks really great..
 

North Beach

Commander
Joined
Sep 29, 2008
Messages
2,022
Re: 66 Starcraft Sunchief Re-Build

92, That was THE GREENEST paint I've ever seen! Mixing it 50/50 with the gloss white sure calmed it down a bunch.

EZ, here's the plan.
Side panels(still don't know what they're called), dash, motorbox, and the piece opposite the dash at the stern are all gonna be finished wood (mahogony), stainless steering wheel, new temptress captains chairs, re-cover the old jump seats (I like the way the seat backs follow the contour of the stern), and two new 46 inch pontoon seats with storage on each side behind the captains chairs. New vinyl. Re-use the stock guages and add NOS airguide in dash compass and speedo just like Kev's. A new switch plate with a couple power plugs to get rid of the existing random switches and knobs approach taken by the previous owner. And we're painting the topside to match the bottom paint.

And of course there's new rubrails, lots of aluminum polishing, re-chroming a bunch of the stock hardware................. I'm gonna need a part time job:eek:
 

APPALOOSA2

Petty Officer 1st Class
Joined
Jul 9, 2008
Messages
354
Re: 66 Starcraft Sunchief Re-Build

NB, she looks snazzy ! Great Job !

Are you painting the top side that mint green also ?
 

North Beach

Commander
Joined
Sep 29, 2008
Messages
2,022
Re: 66 Starcraft Sunchief Re-Build

Yes the topside will match the bottom. Except we're gonna go with PPG automotive and some clearcoat:D
 
Status
Not open for further replies.
Top