73 Sea Ray restoration

Baylinerchuck

Commander
Joined
Jul 29, 2016
Messages
2,726
Don’t worry about the color, just grind down to fresh looking glass. My hull had a few different colors throughout, including some blue which was really weird. You’ll know the difference between fresh and old. Be sure to grind out any roving or chop that doesn’t appear to be fully wetted out.

you’re doing great.
 

GSPLures

Chief Petty Officer
Joined
Sep 3, 2019
Messages
564
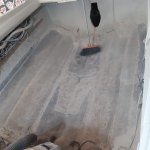
20200902_135354_compress53.jpg I have about 2/3s of the boat hull grinded I cannot wait to be done lol. I passed the crack in the hull that goes all the way through.

my thought was to fix it after stringers are in so the hull has structure and will not flex so the repair is not being stressed. Is that a good idea or should I fix it before the stringers?

20200902_135335_compress79.jpg
 

kcassells

Fleet Admiral
Joined
Oct 16, 2012
Messages
8,598
Depending where your stringer falls you could just tie it into the tabbing is all. I ended up running my tabbing
side to side back to front. Just me though.
 

kcassells

Fleet Admiral
Joined
Oct 16, 2012
Messages
8,598
Your gonna want to grind a small v in that crack, can fill with pb then glass.
 

GSPLures

Chief Petty Officer
Joined
Sep 3, 2019
Messages
564
Your gonna want to grind a small v in that crack, can fill with pb then glass.

That was my plan, with 2 layers of 1708 on the inside then fix on the outside. I just wasn't sure if I should get my stringers PBed in first so the boat doesn't have as much flex. Or if I should fix it before I set my stringers
 

GSPLures

Chief Petty Officer
Joined
Sep 3, 2019
Messages
564
Sorry just saw you posted twice. I will set my stringers in PB then fill in the crack while I am filleting the stringers
 

GSPLures

Chief Petty Officer
Joined
Sep 3, 2019
Messages
564
So instead of finishing grinding the hull tonight, i probably have about 3 more hours of grinding to do. I will clean up around the crack v it out then clean the area really well with acetone put in my PB and follow it up with 2 layers of 1708 so it will all be wet on wet glass then let that dry until morning and continue with the grinding.
 

kcassells

Fleet Admiral
Joined
Oct 16, 2012
Messages
8,598
Wish I had your energy! Since I went back to 1st shift from 3rd shift I lose so many work hours.
I guess I shouldn't complain.
You are kickin arse! Good to see that and you are asking great questions.
Put a pc. of paint tape under the crack on your hull for drippy stuff. Pull it off as it sets off.
 

GSPLures

Chief Petty Officer
Joined
Sep 3, 2019
Messages
564
Thank you, I dont have that much energy, right now I'm on a 3 week vacation which unfortunately this is the last week so progress will slow down considerably lol. My goal was to have the stringers glassed in by time I went back unfortunately that doesn't look like its going to happen.
 

kcassells

Fleet Admiral
Joined
Oct 16, 2012
Messages
8,598
I've seen too many guys burn out on dates. Me included. Just do your thing. Wow... great vaca right. Fcovid. Takes so
much away as I see it. And its real. I reallt need to smell some ocean asap!
 

GSPLures

Chief Petty Officer
Joined
Sep 3, 2019
Messages
564
I've seen too many guys burn out on dates. Me included. Just do your thing. Wow... great vaca right. Fcovid. Takes so
much away as I see it. And its real. I reallt need to smell some ocean asap!
Yeah I didn't expect to make it. Lol your right F covid, I was off for shutdown though I work at Ford. I dont mind doing this kind of stuff on vacation,still beats work.
 

GSPLures

Chief Petty Officer
Joined
Sep 3, 2019
Messages
564
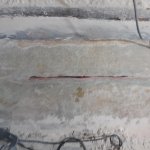
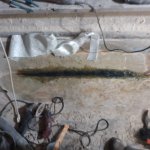
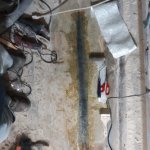
Well the crack is done from the inside now. I ved out the crack, imagine my suprise when I found my tool laying on my garage floor through the crack!
20200902_184246_compress7.jpg20200902_190622_compress3.jpg20200902_191332_compress30.jpg20200902_192200_compress68.jpg
I know it looks dirty but I assure you the repair area was very clean. I may end up doing one more layer of 1708 over it.

I do have 2 questions though, should I repair the outside before continuing grinding and bedding the stringers?

and after the repair is completed is there a way to test it? Or is it just a put her in and hope for the best
 

Baylinerchuck

Commander
Joined
Jul 29, 2016
Messages
2,726
No need to test it. That looks really good. It’ll be waterproof and solid for years to come. You can finish the bottom side whenever you want. You stabilized the crack so it won’t grow while you’re working in that area. Finish grinding and in go the stringers. Great job man. Looking good!!!!
 

GSPLures

Chief Petty Officer
Joined
Sep 3, 2019
Messages
564
No need to test it. That looks really good. It’ll be waterproof and solid for years to come. You can finish the bottom side whenever you want. You stabilized the crack so it won’t grow while you’re working in that area. Finish grinding and in go the stringers. Great job man. Looking good!!!!

Thanks, my plan for the outside is to v it out put a layer or 2 of CSM then fairing to make it looks smooth.
 

Baylinerchuck

Commander
Joined
Jul 29, 2016
Messages
2,726
So here is my take, though others may disagree.

I actually got a little sloppy with my sawzall when removing these stupid little strips of wood that were used as core material to fill the strakes, and punctured my hull. I decided to fill all those strakes inside the boat level with hairy PB. The strakes that we’re not covered by the stringers were then covered with a layer of 1708, and a layer of roving. On the bottom of the hull, I simply ground back the gel coat to a taper an inch or so then added gelcoat in several layers until I was heavier than the surrounding gel coat. I then sanded everything and blended that area.

My point is, the idea is to stabilize the repair and keep the crack from growing. This is why you vee it out, fill, and add layers on the inside. You don’t really care what it looks like on the inside, so you can bulk it up as much as you want and really tie the areas around the crack or gouge together. Once you cover it with the deck, it’ll never be seen. Try saying that about adding layers to the bottom!!

Me personally, I would not add glass to the bottom unless there was a major repair necessary. I don’t really consider that crack to be major. Just my opinion.
 

GSPLures

Chief Petty Officer
Joined
Sep 3, 2019
Messages
564
So here is my take, though others may disagree.

I actually got a little sloppy with my sawzall when removing these stupid little strips of wood that were used as core material to fill the strakes, and punctured my hull. I decided to fill all those strakes inside the boat level with hairy PB. The strakes that we’re not covered by the stringers were then covered with a layer of 1708, and a layer of roving. On the bottom of the hull, I simply ground back the gel coat to a taper an inch or so then added gelcoat in several layers until I was heavier than the surrounding gel coat. I then sanded everything and blended that area.

My point is, the idea is to stabilize the repair and keep the crack from growing. This is why you vee it out, fill, and add layers on the inside. You don’t really care what it looks like on the inside, so you can bulk it up as much as you want and really tie the areas around the crack or gouge together. Once you cover it with the deck, it’ll never be seen. Try saying that about adding layers to the bottom!!

Me personally, I would not add glass to the bottom unless there was a major repair necessary. I don’t really consider that crack to be major. Just my opinion.

Sounds like a plan thank you.
 

GSPLures

Chief Petty Officer
Joined
Sep 3, 2019
Messages
564
Well I haven't done much work to the boat yesterday or today. I had to deal with some issues with the title and a couple of signatures but should be all squared away. Now the long grueling wait to get back into secretary of state:facepalm:.
 
Top