73 Sea Ray restoration

GSPLures

Chief Petty Officer
Joined
Sep 3, 2019
Messages
564
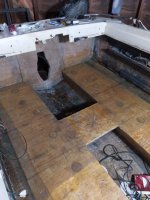
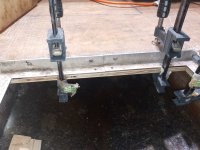
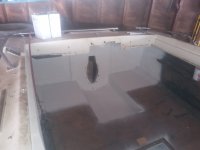
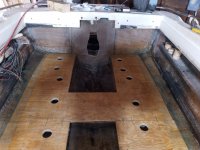
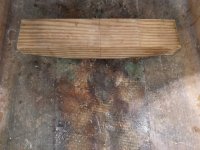
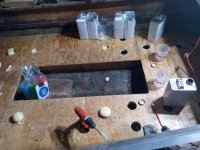
Just finished up tabbing the deck!

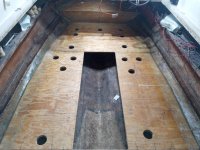
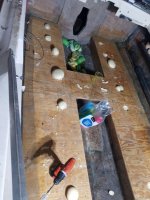
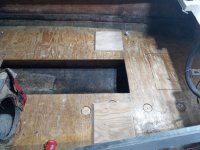
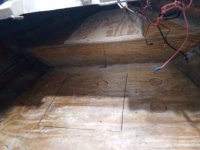
As soon as that hardens and it hopefully cools off a bit I am going to drill my 2" pour holes along the stringers.

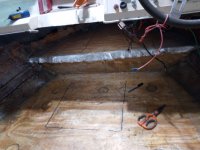
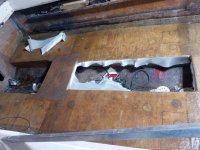
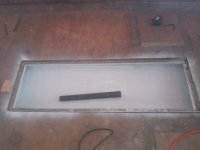
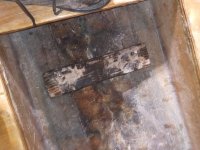
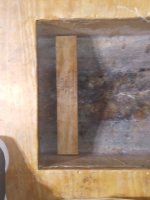
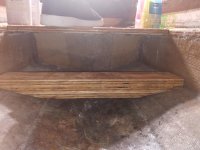
Some of the cavities that I have to fill are smaller is there a calculation of how much to mix for the sq footage of the cavity? I would like to have minimal waste even though I bought extra for a learning curve. (I know there are temperature and humidity variables but something that will get me close).
 

GSPLures

Chief Petty Officer
Joined
Sep 3, 2019
Messages
564
I re-read the pouring foam ins and out thread again and answered my own question. I forgot about mixing smaller batches in clear solo cups until I can come up with a better idea of working time.
By time I get to under the bow I should have a good handle on it. Its a lot of foam up there so will probably be pouring a quart or 2 at a time up there
 

GSPLures

Chief Petty Officer
Joined
Sep 3, 2019
Messages
564
I am ready for foam. Just have to wait until tomorrow for better foaming weather.

I was working on the front mount and would like some input. I attached pics of the original mount sitting in the bilge.

I cut a 4x4 down to correct dimensions to see how I liked it. The original just sat in a pile of 5200? and had a few strips of chop over the end (rest not glassed). Obviously I am going to glass it and install correctly.

The other option I am working on is 3 layers of ply PBed together (still drying) then I planned on cutting to extend to the stringers and tab and install the proper way.

Which option would be the best for durability of the front mount?
 

Attachments

  • 20210524_125417_compress82.jpg
    20210524_125417_compress82.jpg
    930 KB · Views: 8
  • 20210524_125408_compress59.jpg
    20210524_125408_compress59.jpg
    860.7 KB · Views: 9
  • 20210524_142343_compress20.jpg
    20210524_142343_compress20.jpg
    1.2 MB · Views: 9
  • 20210524_142300_compress1.jpg
    20210524_142300_compress1.jpg
    758.2 KB · Views: 8
  • 20210524_142405_compress34.jpg
    20210524_142405_compress34.jpg
    900.2 KB · Views: 7
  • 20210524_142411_compress38.jpg
    20210524_142411_compress38.jpg
    1.3 MB · Views: 8

kcassells

Fleet Admiral
Joined
Oct 16, 2012
Messages
8,600
I am ready for foam. Just have to wait until tomorrow for better foaming weather.

I was working on the front mount and would like some input. I attached pics of the original mount sitting in the bilge.

I cut a 4x4 down to correct dimensions to see how I liked it. The original just sat in a pile of 5200? and had a few strips of chop over the end (rest not glassed). Obviously I am going to glass it and install correctly.

The other option I am working on is 3 layers of ply PBed together (still drying) then I planned on cutting to extend to the stringers and tab and install the proper way.

Which option would be the best for durability of the front mount?
Ply or block of wood works, just as long as it's glassed in. That area can get pretty wet possibly.
Looking good!
 

GSPLures

Chief Petty Officer
Joined
Sep 3, 2019
Messages
564
Ply or block of wood works, just as long as it's glassed in. That area can get pretty wet possibly.
Looking good!
I appreciate it. I will finish cutting the ply to shape and sit them in the bilge and see which one will be look better than.
 

GSPLures

Chief Petty Officer
Joined
Sep 3, 2019
Messages
564
Well I have half of the foam poured, and the motor mount cut. I have to take a break so the admiral can go get her hair done (Gotta keep her happy).

I found that using a spade bit on a driver works great for mixing. Just gotta be careful to not put a hole in the cup (hasn't happened yet).

I like the ply motor mount going to the edges of the stringers. I figure it will take some of the stress off of the hull. Just have to route the edges and glass it. I am going to wait until I have the motor hanging and my alignment bar before I install it just incase I need some adjustments.
 

Attachments

  • 20210525_085353_compress18.jpg
    20210525_085353_compress18.jpg
    864.6 KB · Views: 11
  • 20210525_085501_compress68.jpg
    20210525_085501_compress68.jpg
    754.7 KB · Views: 12
  • 20210525_115957_compress59.jpg
    20210525_115957_compress59.jpg
    1.3 MB · Views: 12
  • 20210525_120003_compress14.jpg
    20210525_120003_compress14.jpg
    934.1 KB · Views: 12

GSPLures

Chief Petty Officer
Joined
Sep 3, 2019
Messages
564
Got the rest foamed and cleaned up and ready for glass!

I also placed my seats and cut my sacrificial bases for the seats and fuel tank.

Hoping I can move enough tomorrow to actually get it glassed😴.
 

Attachments

  • 20210525_194704_compress86.jpg
    20210525_194704_compress86.jpg
    882.2 KB · Views: 6
  • 20210525_194710_compress98.jpg
    20210525_194710_compress98.jpg
    697 KB · Views: 6

GSPLures

Chief Petty Officer
Joined
Sep 3, 2019
Messages
564
Didn't get a whole lot done, had to run to the local glass supplier to pick up another 5 gal of resin and a few more yards of 1708.

I did manage to get all the foam plugs glassed back in, the deck around the bilge and under the bow glassed. I was going to finish the last little bit, but under the bow beat me up. A lot of fumes and heat under there! Then I managed to fall out of the boat🤫(probably funny for my neighbor who was outside, not so funny for the poor jackstand that broke my fall).

I have to clean the edge of the platform then I will wrap it over when I do the riser.
 

Attachments

  • 20210526_183113_compress78.jpg
    20210526_183113_compress78.jpg
    1.3 MB · Views: 7
  • 20210526_183125_compress87.jpg
    20210526_183125_compress87.jpg
    861.5 KB · Views: 7

kcassells

Fleet Admiral
Joined
Oct 16, 2012
Messages
8,600
Didn't get a whole lot done, had to run to the local glass supplier to pick up another 5 gal of resin and a few more yards of 1708.

I did manage to get all the foam plugs glassed back in, the deck around the bilge and under the bow glassed. I was going to finish the last little bit, but under the bow beat me up. A lot of fumes and heat under there! Then I managed to fall out of the boat🤫(probably funny for my neighbor who was outside, not so funny for the poor jackstand that broke my fall).

I have to clean the edge of the platform then I will wrap it over when I do the riser.
Ha ha yup not so funny at all. I was getting out of my boat yapping on the cell phone and fell down with 2 broken ribs.
 

GSPLures

Chief Petty Officer
Joined
Sep 3, 2019
Messages
564
Finished glassing the deck, need to clean up some edges once dried. I still need a couple more layers around the keyhole to get the proper thickness and put a layer of mat in the ski locker and bilge before I can paint those. Then I can fair out the repairs to the outside of the hull and get the motor back in!
 

Attachments

  • 20210527_134244_compress46.jpg
    20210527_134244_compress46.jpg
    884.9 KB · Views: 8
  • 20210527_134248_compress59.jpg
    20210527_134248_compress59.jpg
    924.7 KB · Views: 7

GSPLures

Chief Petty Officer
Joined
Sep 3, 2019
Messages
564
I mic'ed the transom at 1.987 so 13 thousands short of what Merc recommends, so I put 2 layers of 1708 (found a resource saying that 1 layer is 4 hundredths thick) so should be good. I will know for sure when I cut the keyhole again and re mic it.

I also put the layer of chop down in the bilge and ski locker, just for a better look when finished in white.

I didn't get any pics, its going to drop to 55 tonight so I closed the garage to trap heat and cure the resin before the temp drops. I will post pics after memorial day because me and the family are going on a kayaking trip for the weekend.

Hope you all have a great memorial day!
 

todhunter

Canoeist
Joined
Sep 15, 2020
Messages
1,244
My transom measured about 1.875" before I tore it out. I built mine about to the same thickness. I'm planning to see how the transom assembly bolts up after drilling the holes, then adding layers of 1708 if needed.
 

GSPLures

Chief Petty Officer
Joined
Sep 3, 2019
Messages
564
Well not to much work done unfortunately, it has been 90 degrees outside so I have been doing a little work with lots of breaks.

I recut out the keyhole and cleaned it up a bit and drilled the tie down rings in the transom. I also hung the bell housing and inner transom plate so I can hang the motor and get my front mount placed.

Other than that I painted a few of the motor parts, glassed my sacrificial pieces and front mount.

I am glad that once I cleaned up the bell house that the gimble ring is newer and smooth spinning and the bellows also look new with no signs of dry rot or cracking. The housing itself looks a little rough (peeling faded paint) so I am going to do a basic scuff and shoot to make it look better. I will do a proper tear down and paint in the off season (hoping to have her splashed before the summer is over)
 

Attachments

  • 20210606_115900_compress15.jpg
    20210606_115900_compress15.jpg
    917.7 KB · Views: 9
  • 20210606_115910_compress29.jpg
    20210606_115910_compress29.jpg
    942.2 KB · Views: 8

GSPLures

Chief Petty Officer
Joined
Sep 3, 2019
Messages
564
Been getting some small stuff done here and there after work. Tomorrow will be an early day for me so I am hoping to get the motor set and get my alignment for the front mount. Then unfortunately back out with the motor to finish glassing everything up and get the transom, bilge, and ski locker white and looking new.

I am going to attach some sacrificial pieces for the ski locker surround to get screwed into. I routed so it will sit flush and will be PBing them under the deck. They extend to about 3" under the deck.

I also got ahead of myself and bought the carpet today. Fortunately I live close to boat carpet.com's warehouse so I was able to pick it up and get the adhesive. They seem like a good company to deal with (although not sure how they are to deal with online.)
 

Attachments

  • 20210608_164811_compress63.jpg
    20210608_164811_compress63.jpg
    858 KB · Views: 5

GSPLures

Chief Petty Officer
Joined
Sep 3, 2019
Messages
564
I got the motor in and everything marked, aligned, and back out. Not bad with another person, too bad I was alone and it was back breaking getting in and out of the boat.

I would like your opinion/advice please. I installed the newer serrated mounts that do not need the coil washer. Problem was the rear was low. I got the bar in when it was as far down as the front would go. So I replaced the the single washer with a double and was able to get it aligned. When I have the mounts bolted with the double washer the front mount is about a 1/4" lower than as high as the front will go.

Is it a problem to be aligned that way?
I figure the mounts will eventually wear and sag so the front will ultimately have to be adjusted lower.
I was thinking about adding another 3/4 ply on top of the mount so the front is not adjusted so high, would that be the proper thing to do? Or just let it be, since I had decent marks on the bar and it was going in and out fairly easy.
 

Attachments

  • 20210609_142427_compress82.jpg
    20210609_142427_compress82.jpg
    918.4 KB · Views: 12
  • 20210609_142405_compress95.jpg
    20210609_142405_compress95.jpg
    829.2 KB · Views: 11
  • 20210609_142353_compress26.jpg
    20210609_142353_compress26.jpg
    790.7 KB · Views: 10
  • 20210609_142323_compress86.jpg
    20210609_142323_compress86.jpg
    1.1 MB · Views: 10
  • 20210609_142316_compress47.jpg
    20210609_142316_compress47.jpg
    1.1 MB · Views: 9
  • 20210609_142308_compress97.jpg
    20210609_142308_compress97.jpg
    905.8 KB · Views: 9
  • 20210609_141502_compress78.jpg
    20210609_141502_compress78.jpg
    930.1 KB · Views: 11

GSPLures

Chief Petty Officer
Joined
Sep 3, 2019
Messages
564
I ended up cutting about 3/4" off of the motor mount to use the proper hardware for the new style mounts.

I have all my sacrificial pieces glassed in and painted the bilge with bilge kote. Then painted the transom, ski locker, and under the bow with rustoleum professional with hardener added. I also replaced the water pump in the lower unit.

Up next I am going to lift the boat back off of the trailer to fare the repairs I made to the hull. Then use a compound and wax on the bottom, and carpet the bunks. I will also be doing a few repairs on the trailer.
 

Attachments

  • 20210613_172010_compress12.jpg
    20210613_172010_compress12.jpg
    1.2 MB · Views: 8
  • 20210613_172017_compress66.jpg
    20210613_172017_compress66.jpg
    1.9 MB · Views: 8

carlos515

Petty Officer 2nd Class
Joined
Aug 23, 2020
Messages
167
What hardener did you add to the paint? Is this an enamel paint? Did you use a primer ?
Sorry for all the questions but I would be interested in doing this on my boat also.
 

GSPLures

Chief Petty Officer
Joined
Sep 3, 2019
Messages
564
The bilge kote (epoxy) I did not use a primer, for the rustoleum(enamel) I did.

I used my hvlp gun for the rustoleum, I thinned it 10% with acetone and I used majic enamel hardener from tractor supply.
 
Top