1995 Larson 174 SEI Complete Rebuild

Mechanicalmike08

Petty Officer 1st Class
Joined
Aug 29, 2018
Messages
308
How are the side panels mounted? Mine were screwed on with a cap over it which I don't like. Planning on doing the beau clips from sailrite that are blind and you can pull it off without tools

Mine is a mix of threaded studs from the back and plastic barbed clips. I am going to use wing nuts instead if the nuts that were on there to make it easier to reinstall
 

Mechanicalmike08

Petty Officer 1st Class
Joined
Aug 29, 2018
Messages
308
If anyone is looking Joann has 50% off coupons now. I just got all my upholstery supplies. I'm going to be doing three color interior. Off white, navy and grey. Ordered foam for the new sun deck and bench, and thread is on its way. I'll be up north for the rest of the holiday so no work for me, don't know if I'm happy or sad about the break...
 

mickyryan

Rear Admiral
Joined
Apr 18, 2016
Messages
4,210
I am still debating foam to use , as most of mine is under cover , not sure i should need fast dry foam on that stuff or regular foam .
 

Mechanicalmike08

Petty Officer 1st Class
Joined
Aug 29, 2018
Messages
308
Finally back at it, Hope everyone had a Merry Christmas and Happy new year. It was a nice break.
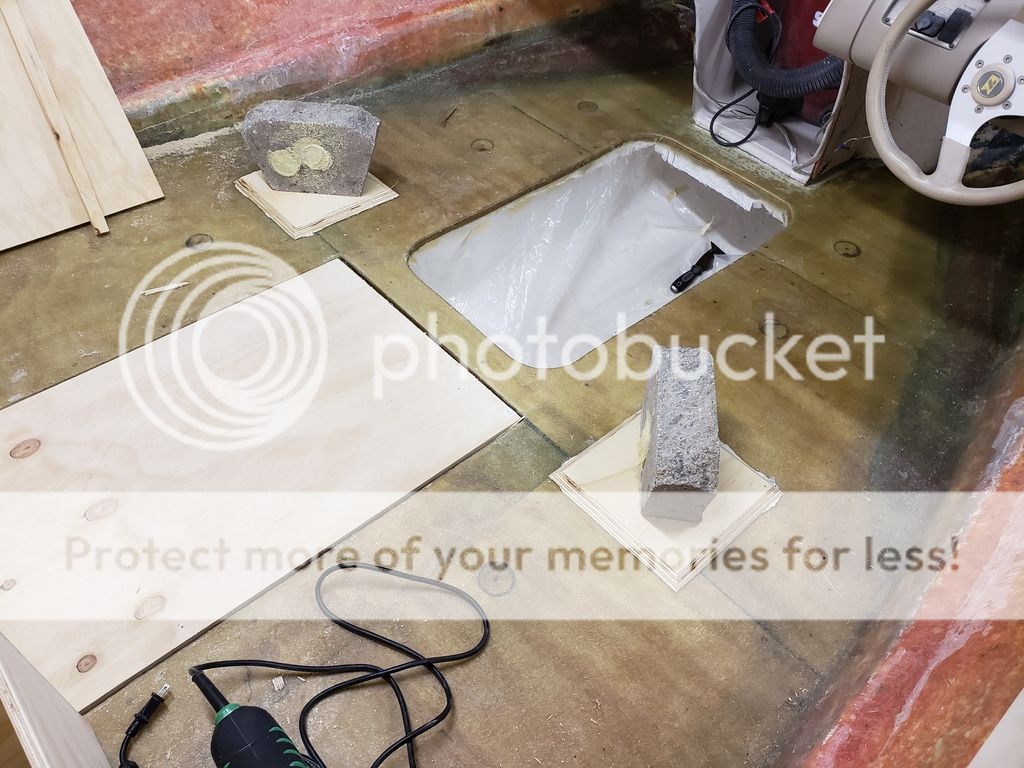
Got all my sacrificial parts cut out and angled and radiused. Got the attachments points for the new sun deck/ bench glued down and got the seat base ones glued down.


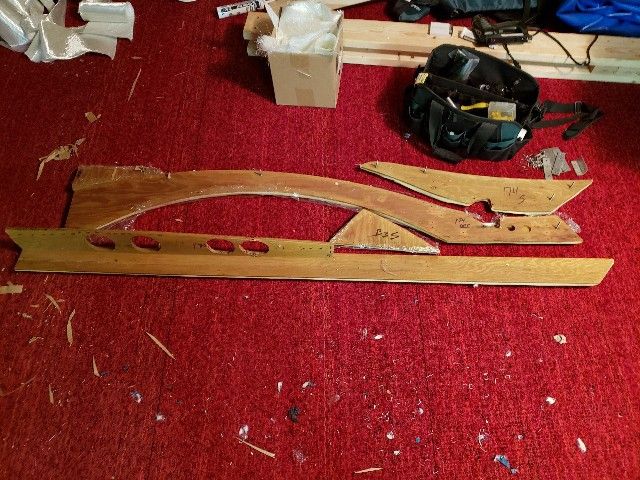
The when we got home the other night I started to disassemble the side panels to recover them so I have something to do while I wait for other stuff to dry.


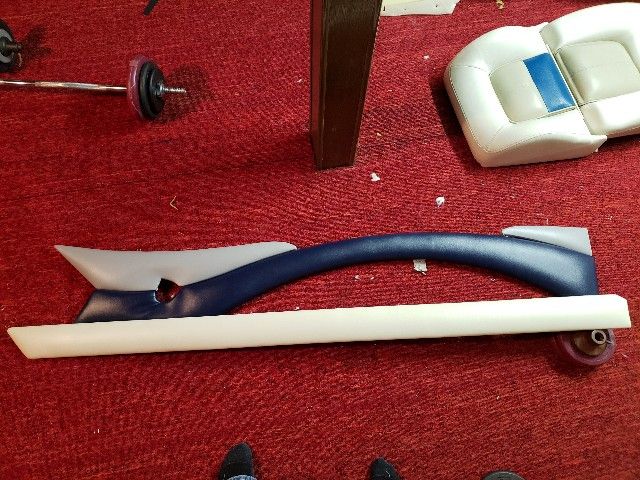
Got most of the pieces for one side covered last night. I wish the grey was a little darker for more contrast between the off white. Don't mind the wrinkle up front that is where the throttle mounts and will pull tight.


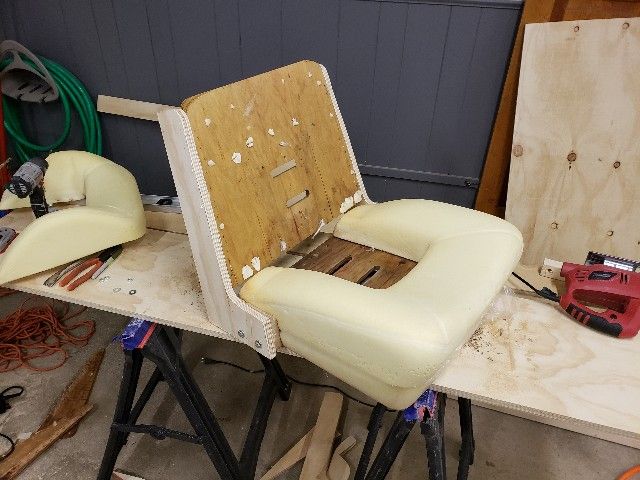
Lastly started working on how to convert the back to back to bucket seats. Its pretty rough right now. I need to sand and round corners but wanted to make sure it would work before making it purdy. Should work out nicely.


Today going to glue the two battery tray mounts down and the trim pump as well as a few other screw points. Then finish he prep on the sun deck so I can coat it in some waxed resin.
 

dezmond

Senior Chief Petty Officer
Joined
Jul 21, 2010
Messages
760
Very nice work. Doing a great job on the interior pieces. Can’t wait to see your ideas on the sun deck. I want to try that as well. I just don’t know if I have the room. I will wait and see what you do ;)
 

oldrem

Commander
Joined
Nov 7, 2013
Messages
2,002
Really looking good! Looks like plenty contrast from the photos.
 

Chris51280

Ensign
Joined
Jan 24, 2018
Messages
905
Are the wood pieces individually wrapped and then put together? How are they mounted together on the backside
 

Mechanicalmike08

Petty Officer 1st Class
Joined
Aug 29, 2018
Messages
308
Are the wood pieces individually wrapped and then put together? How are they mounted together on the backside

Yep from the factory there just individual pieces then the backside has metal plates with stainless screws holding them together. Next to my tool bag is the pile of plates and screws. Makes recovering them super easy. In the picture they are not back together yet because there is a rail on the inside where some cup holders are that is going to be carpet that I need to do yet then it can go back together.
 

Mechanicalmike08

Petty Officer 1st Class
Joined
Aug 29, 2018
Messages
308
Today was a good day, got the final fit and finish of the sundeck and bench parts done. Cut releifes on the bottom sides where it contacts the floor for water to run out. Then I cut slots for air to escape the cushion when someone sits, routered all the edges and sanded everything smooth. Then time for a good resin coating with surface wax for protection.


Then I glued the last of the sacrificial pieces down, two for the batteries, one for the trim pump and two in the engine bay to secure gas line and other electrical runs.
 

Mechanicalmike08

Petty Officer 1st Class
Joined
Aug 29, 2018
Messages
308
Long day, started out good and got the underside of the new sun deck covered with a thin fabric I found at Joann's. Glued this down with fabric adhesive.


Then I got the new carpet on the drink rail of the side panel and assembled it. Added the piping along top edge too.


Then covered the first rear bench seat front and sides in 1/2" foam, then covered it in the off white vinyl. Lastly covered the inside with the same carpet from the drink rail. This came out nice.


And then there is this. My first attempt at making a sewn cushion. This took forever, I'm not real happy with it at the moment. It looks ok in the picture but the front white is suppose to be raised and the grey recessed a small amount. I have a piece to pull it down between the different heights but couldn't really get the stapler in and just couldn't get it right. Had to take a few stabs at the corners. I think I learned a lot and will see how the second one comes out. I may try and redo this one.


Also sorry for the poor quality pictures, photobucket hasn't been working to resize my photos and have to use some other site which doesn't seem to keep the quality.
 

dezmond

Senior Chief Petty Officer
Joined
Jul 21, 2010
Messages
760
Love the colour combination and quality of workmanship on those side panels. Your doing such a good job I will let you come and do my interior for free! :lol:

Great work dude!
 

Mechanicalmike08

Petty Officer 1st Class
Joined
Aug 29, 2018
Messages
308
Love the colour combination and quality of workmanship on those side panels. Your doing such a good job I will let you come and do my interior for free! :lol:

Great work dude!

Its growing on me, I thought I wanted a darker grey but now that the first seat is done it ain't bad. The flat panels are easy, just pull tight and staple. Making seat covers is new to me and honing to take a couple stabs. That's why I'm doing the sun deck after a few of these. Then I'll really test my skills on the bucket seats
 

Mechanicalmike08

Petty Officer 1st Class
Joined
Aug 29, 2018
Messages
308
Well tonight I got the second bench finished up covered and carpeted. Then I tore apart the second side panel. I had to clean up my floor as there was about 500 staples on it. Then I just could not leave that first cushion alone. I am so glad I didn't. I think I figured out how the factory did it/ maybe how it should be done. I pulled back what should be the raised front and exposed my pull down tab. I then worked it and got it to conform to that shape and then shoved back in the front raised cushion piece. Now I actually have the shape I was looking for the raised front/ side section. The corners aren't perfect and one wrinkle on the side but most will be covered or hidden once in place next to the other cushions. I think the other two will come out much nicer now.


chevymaher

Commander
Joined
Mar 29, 2017
Messages
2,915
Looks good.

Yea that is the way it is. By the time you finish the interior. Now if you could start at the beginning you could do sooo much better. You learned the ins and outs of your boats quirks.

But it looks great you will get nothing but wows when people see it.
 

Chris51280

Ensign
Joined
Jan 24, 2018
Messages
905
looks good. maybe you can take a picture on how the inside looks like with the next cusions
 

Mechanicalmike08

Petty Officer 1st Class
Joined
Aug 29, 2018
Messages
308
looking really good! what kinda sewing machine are you using?

Nothing to special it was my grandma's. Huskavarna Viking model 51 I believe. Not direct drive but seems to do alright. I guess it has well designed dogs so feeding isn't really an issue yet. Only downside is the longest stitch setting isn't quite where it should be but seems to be a strong joint.
 

Mad Props

Lieutenant Commander
Joined
Jul 8, 2016
Messages
1,766
Gotcha, I'm somewhere between trying to find an old singer and risking all the potential work to get it running well or dropping 500 bucks on a entry level walking foot machine which i really don't wanna do

My wifes newer model singer barely goes through 2 layers of vinyl and the feed essentially doesn't work with it lol
 

Chris51280

Ensign
Joined
Jan 24, 2018
Messages
905
I got a newer singer heavy duty 4423. they are around $120 new. Then I listened to Woodonglass and got an old direct drive singer model 15-91 from around 1935. They both will do the job but I have to say that the Singer 15-91 is alot stronger and bulletproof. I picked mine up for about $70-80. They made a direct drive and a belt drive. Direct drive is the best one. Also, there is no plastic on those. Since they made millions of them, new aftermarket parts are still available. I bought a Teflon foot for to reduce the friction of the vinyl while feeding through. There are youtube videos that show that it will go through 4 layers without a problem. I use #69 thread from sailrite that is UV resistant and the proper needle for it. The needles are standard and also available. Singer pretty much set alot of standards.
 
Top