1990 4.3 Century 2000 - Floor,Transom,Stringer,Upholstery Project

Chris51280

Ensign
Joined
Jan 24, 2018
Messages
909
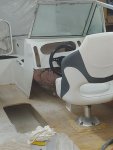
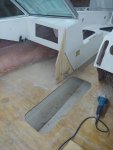
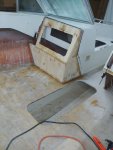
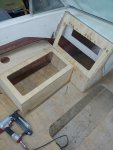
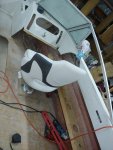
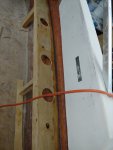
Installed the windshield and then pb'ed the bow seat area so i know I have it set up right. Window actually closes again.
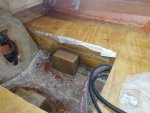
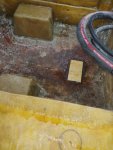
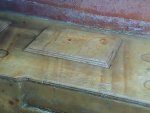
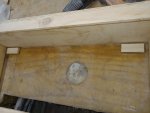
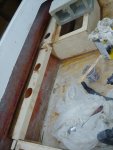
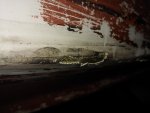
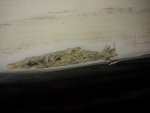
yesterday i put the second layer on the engine mount with two additional layers today. Wow is that bulky. Even if the wood rots, the glass will hold it for sure.
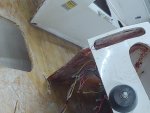
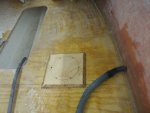
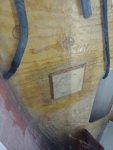
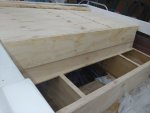
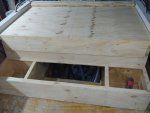
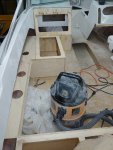
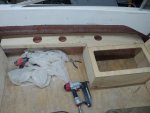
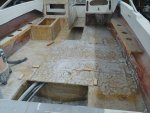
deck is finally glassed. Will start fairing soon and adding my seat base and battery base.
I'm already on my sixt bucket. I think it will be enough. Has to be
 

Attachments

  • photo313198.jpg
    photo313198.jpg
    278 KB · Views: 3
  • photo313199.jpg
    photo313199.jpg
    206.5 KB · Views: 3

Chris51280

Ensign
Joined
Jan 24, 2018
Messages
909
They are.
had some other obligations yesterday.
Today I installed the seat bases, battery and trim pump base. Also the mount for the bilge pump.
I glued it in with pb and then just tabbed it in with csm. Then over the top with 6oz.
seat mount got a layer of 1708 since it will need the strength.
 

Attachments

  • photo313334.jpg
    photo313334.jpg
    182.2 KB · Views: 3
  • photo313335.jpg
    photo313335.jpg
    323.4 KB · Views: 3
  • photo313336.jpg
    photo313336.jpg
    194.8 KB · Views: 3
  • photo313337.jpg
    photo313337.jpg
    236.4 KB · Views: 3
  • photo313338.jpg
    photo313338.jpg
    241.2 KB · Views: 3

Chris51280

Ensign
Joined
Jan 24, 2018
Messages
909
Started on the sun deck and bench seat. Ran out if screws and glue.
finished the bilge with a 6oz for a nice finish.
tested the engine again since the offline oil filter line was leaking. That got fixed. Then I wheeled it back in the garage on my make shift cart and it tipped over damaging the pulley. :facepalm::mad-new:
so I got one on fleabay for 85 bucks. Should be here in a week. Im so mad at myself. Little careless and it cost you
 

Chris51280

Ensign
Joined
Jan 24, 2018
Messages
909
My new pulley came today and it is a match. Ebay said it was for the bigger v8 mercruiser but apparently they share the same pulley from back then.
fitted the sundeck and bench.
Then i started on the front lounge area. That will be tricky to blend in to the existing structure. The old glove cutout will be gone. I hope I can wrap this up this weekend.
 

Attachments

  • photo313665.jpg
    photo313665.jpg
    156.2 KB · Views: 3
  • photo313666.jpg
    photo313666.jpg
    180.3 KB · Views: 3
  • photo313667.jpg
    photo313667.jpg
    188 KB · Views: 3

dezmond

Senior Chief Petty Officer
Joined
Jul 21, 2010
Messages
760
Very nice work there. Gonna be a nice place to relax. Keep at er!
 

Chris51280

Ensign
Joined
Jan 24, 2018
Messages
909
Pb'ed the pieces for the bench brackets and the first piece of the lounge seat. The old fiberglass will be cutout after it has dried.
 

Attachments

  • photo313769.jpg
    photo313769.jpg
    196.7 KB · Views: 2
  • photo313770.jpg
    photo313770.jpg
    201.8 KB · Views: 2

Chris51280

Ensign
Joined
Jan 24, 2018
Messages
909
Added my new side pieces which will have cup holders. The starboard side needed supports since there was nothing. I hope it will be strong enough with the peanut butter.
i have been going back and forth on what to do with the painting of the seats. The top will have carpet. The sides which are joined together on the bottom with fillets will get gelcoated. I think by sealing the wood with resin and then just do a couple of layers with gelcoat. Then sand smooth. I don't think it is necessary to glass it before with csm.
also running low on resin and i still need some to smooth out the deck and the added seats
 

Attachments

  • photo313828.jpg
    photo313828.jpg
    205.8 KB · Views: 3
  • photo313829.jpg
    photo313829.jpg
    212.8 KB · Views: 3
  • photo313830.jpg
    photo313830.jpg
    209.5 KB · Views: 3
  • photo313831.jpg
    photo313831.jpg
    224.8 KB · Views: 3
  • photo313832.jpg
    photo313832.jpg
    185.9 KB · Views: 3
  • photo313833.jpg
    photo313833.jpg
    205.7 KB · Views: 3

dezmond

Senior Chief Petty Officer
Joined
Jul 21, 2010
Messages
760
That is gonna be a sweet layout. Doing great on the woodwork!
 

Chris51280

Ensign
Joined
Jan 24, 2018
Messages
909
Thanks. Running out of time and working overtime.
I started a test by painting plain wood with gelcoat and then sanding it to see how it will come out. I will know more tomorrow. I think it will work just fine
 

Woodonglass

Supreme Mariner
Joined
Dec 29, 2009
Messages
25,924
You do NOT want to put Gelcoat on Bare wood. It will NOT work. Gelcoat is a polyester resin based product and is designed specifically to be applied over Polyester resin mixed with CSM. When the Gelcoat cures it is very hard and when the wood flexes it WILL crack and break.
 

Chris51280

Ensign
Joined
Jan 24, 2018
Messages
909
Sealed the wood that get the csm. Added csm to the areas that get gelcoat. Fared the deck areas that is important.
started to fix the keel with pb. The sun deck got a coat of old timers formula. Hope I can paint soon. Maybe by Sunday I can lift in the engine
 

Attachments

  • photo314001.jpg
    photo314001.jpg
    183.5 KB · Views: 3
  • photo314002.jpg
    photo314002.jpg
    157.2 KB · Views: 3
  • photo314003.jpg
    photo314003.jpg
    121.8 KB · Views: 3
  • photo314004.jpg
    photo314004.jpg
    238.1 KB · Views: 3

Chris51280

Ensign
Joined
Jan 24, 2018
Messages
909
Oh. And . don't get poly on your legs when you wear shorts. Hurts like a m.... To get the sticky off with hair attached to it.:facepalm:
 

Mad Props

Lieutenant Commander
Joined
Jul 8, 2016
Messages
1,766
This is looking great, your right about where I am. I need to get to fairing my deck and getting the gelcoat down, then its lots of little stuff like reinstalling the motor and trim pump and batteries and on and on and on.
 

Chris51280

Ensign
Joined
Jan 24, 2018
Messages
909
Thanks. I got about 3 weeks left to finish before I go on a longer vacation and it needs to be done by then. Not sure if I have all the seat cushions done, but it should be seaworthy. Starting to paint either tonight or tomorrow with gelcoat and sand mixed in dedicated areas. gotta tape off the boundaries. There will be some strips that remain smooth to give it some texture. I hope by sunday I can install the engine as well. 3 coats of gelcoat in the bilge area should be good
 

Mechanicalmike08

Petty Officer 1st Class
Joined
Aug 29, 2018
Messages
308
Put Plastic down after you gel coat when its is dry and you are going to be working in there. It saved me from a few spills. Also at some point i was wearing just socks on the fresh gel coat and not sure if it was the heat from my foot or what but actually got stuck and left fuzz behind, almost like the gel wasn't fully hard. Didn't seem to get fully hard hard like gel coat should for a week or so. But i was also doing it in colder temps.
 
Top