1990 4.3 Century 2000 - Floor,Transom,Stringer,Upholstery Project

mickyryan

Rear Admiral
Joined
Apr 18, 2016
Messages
4,210
Anybody else will have to replace the number 7 bolts? It's the only one that corroded badly. Its a 7/16-14 x 4.25". I think I can replace it with a stainless bolt. 18-8.
I replaced all of mine and the studs also put anti seize on the threads so hopefully they wouldn't corrode in the housing
if i recall torque on those are 25 lbs when reinstalling and i did mine in a alternating pattern , the reason the hull needs to be as true as possible is because inside plat will crack if it isnt.
 

Chris51280

Ensign
Joined
Jan 24, 2018
Messages
908
kcassells
I did read the write up but I'm still puzzled.
quote:
As shown in the illustration below, you are going to set the tank on top of 1/4" strips of plastic about 2" wide and spaced about every 12". Its best to place the strips transversly to the length of the tank. We recommend Haysite or any of the fiber reinforced plastic sheet. The strips should be cut to a length exactly 1/4" shorter than the width of the tank. We don't want the strips sticking out the sides and collecting water.

Next, you will need at least two tubes of 3M 5200 adhesive, and you will literally glue the plastic strips to the bottom of the tank. Apply the adhesive so that the entire surface of the plastic is coated with 5200 and will not leave any gaps or crevices for water to get into. Once the strips are pressed into position, make sure that the ends are equally 1/8' from the edges of the tank. Wipe off the excess 5200 that squeezes out, making sure that the joint between tank and plastic strip is completely sealed. Don't leave any globs of material.


Also:
  • Do not use rubber strips: rubber contains carbon, which is cathodic to aluminum and will cause galvanic corrosion.
  • Make sure that wherever the tank is sitting on is a stable surface; always use the hull stringers and never the bottom of the hull.
I haven't seen anybody using plastic strips. Those Haysite strips are pricey. What is fiber reinforced plastic?

My tank was sitting on rubber strips on the hull. I had two levels. One for the skilocker drain and about 2-3" above that the drain for the tank compartment. My tank is flat on the bottom and will sit on the edge on top of transversely placed strips that are glued on the hull. There will be another board across the width but not all the way up to the bottom of the tank.

I don't read anywhere that I can use neoprene

This is how mine was designed.
 

Attachments

  • photo308096.jpg
    photo308096.jpg
    16.9 KB · Views: 2

kcassells

Fleet Admiral
Joined
Oct 16, 2012
Messages
8,600
Well to me it's more info to disseminate, gather and determine approach. But yea the correct material is neoprene and lots a guys just call it rubber. I would suggest a platform under your tank. How many gals is it? The hull is not recommended to be the support for a fuel tank. JMHO.
 

mickyryan

Rear Admiral
Joined
Apr 18, 2016
Messages
4,210
Quote: The hull is not recommended to be the support for a fuel tank..... Unless it was :) my bayliner had boards on hull that spread the weight yet was still the hull , i also thought maybe the boards were there for added protection from a impact.
it was alum tank and it wasn't bolted in or foamed or sealed in it was wrapped with poly plastic and was in very good shape for its age.
 

Chris51280

Ensign
Joined
Jan 24, 2018
Messages
908
The tank has about 30g capacity. I see that most just follow the strip placement. Alot of times the tanks V-shape fits to the hull and therefore sits on the hull.
 

kcassells

Fleet Admiral
Joined
Oct 16, 2012
Messages
8,600
Just fyi,
Your boat do what you want, I'm just passing on info.

Coast guard reg;

5.0 Manufacturer Requirements
FEDERAL LAW:
183.550 Fuel tanks: Installation.
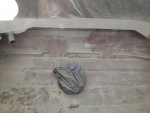
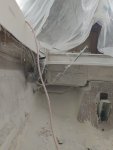
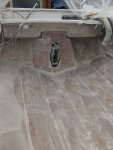
(a) Each fuel tank must not be integral with any boat structure or mounted on an engine
Each fuel tank intended to be permanently installed, must be made as a separate component and then installed in the boat. Portions of a boat’s structure, i.e. hull surfaces, bulkheads, stringers, floors, decks, frames, etc., may not form part of a fuel tank.
Fuel tanks glued, bonded or foamed-in-place are not considered integral and are therefore acceptable. However, that installation must comply with the applicable portions of this regulation.
Fuel tanks may not be mounted on an engine, except if the engine is part of a portable piece of equipment that is not permanently installed in the boat. If a fuel tank is removed from an engine to be installed in the boat, the installation must comply with the requirements of this standard. Particular attention is directed to the fuel tank vent requirements and the requirements for all openings to be in or at the topmost surface. Many tanks installed on engines have a bottom fuel supply; this fuel tank is not acceptable for installation in a boat.
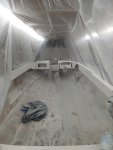
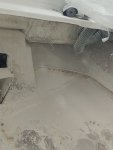
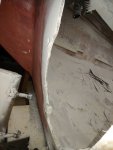
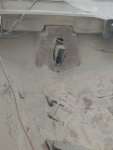
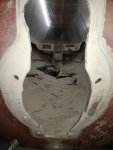
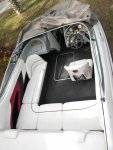
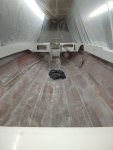
 

Chris51280

Ensign
Joined
Jan 24, 2018
Messages
908
That is what I will be following. Wasn't planning on using the structure as a fuel tank. The link you provided goes into more detail. At the same time, century build "quality" boats for a long time and hope they knew what they were doing. The tank is in really good shape and shows no corrosion. I will lay some more glass on the sides with a board about 1 inch below the tank bottom. With the neoprene strips should give enough cushion and rigidity for a 30gallon gas tank
 

Chris51280

Ensign
Joined
Jan 24, 2018
Messages
908
I ground almost all stringers away. Tje front corner lives are whats left. The side bulkheads are cleared for new ones.

My transom does not extend all the way across. The recessed angled surfaces have 3/4 plywood that hoses and wires bolted to. Not sure how much structural support this is. I won't be able to complete cut all of it out since rhe top would have to come off. I will leave 8 inches or so.i hope that will be enough.
 

Attachments

  • photo308179.jpg
    photo308179.jpg
    597.5 KB · Views: 5
  • photo308180.jpg
    photo308180.jpg
    605.5 KB · Views: 5
  • photo308181.jpg
    photo308181.jpg
    638 KB · Views: 5
  • photo308182.jpg
    photo308182.jpg
    603.2 KB · Views: 5
Last edited:

kcassells

Fleet Admiral
Joined
Oct 16, 2012
Messages
8,600
Ohhh the dread and memories. Get a beer cough out some dust. Lookin good.
 

Chris51280

Ensign
Joined
Jan 24, 2018
Messages
908
My transom is tappered from the bottom to the top. About 1/8". How can I make them parralel? After the wood or before with 1708 or csm?
the side transom panels delaminated and I may can get them off completely without taking the top off. To glass them back in will be tricky but I think I can peanut butter them in and seal the wood beforehand
 

Attachments

  • photo308407.jpg
    photo308407.jpg
    649.4 KB · Views: 6
  • photo308408.jpg
    photo308408.jpg
    671.5 KB · Views: 6
  • photo308409.jpg
    photo308409.jpg
    612.3 KB · Views: 6
  • photo308410.jpg
    photo308410.jpg
    592.9 KB · Views: 6

Chris51280

Ensign
Joined
Jan 24, 2018
Messages
908
I had a seating arrangement planned like this. My floor will be gelocated and the sides as well. I think 2 layers of 1708 will do to reinforce the bases. I want to keep the Wight as low as possible. What plywood thickness should I go with. Will 1/4 work. I would think so with 2 layers of 1708 on the outside.

The inside will get the old timers formula. Will polyester stick to oldtimers formula since ther will be some overlap?
 

Attachments

  • photo308543.jpg
    photo308543.jpg
    39.5 KB · Views: 2
  • photo308544.jpg
    photo308544.jpg
    643.3 KB · Views: 2

dezmond

Senior Chief Petty Officer
Joined
Jul 21, 2010
Messages
760
One of my favourite layouts that I’ve seen. I thought about going that route. Can’t wait to see it when it’s done.
 

Chris51280

Ensign
Joined
Jan 24, 2018
Messages
908
That makes two.

I got all the rotten wood out now. Grinding is almost done. Just a few more finishing touches and then I can clean up and start shaping the transom. I will post my list that i will order from us composites. I'd like to get some feedback on if it will be enough or not. I figure 25-30 gallons of resin.
 

Attachments

  • photo308557.jpg
    photo308557.jpg
    638.4 KB · Views: 2
  • photo308558.jpg
    photo308558.jpg
    784.8 KB · Views: 2
Top