1991 Starcraft Islander rebuild

captdre

Seaman Apprentice
Joined
Aug 6, 2007
Messages
34
[No message]
 

Attachments

  • photo301475.jpg
    photo301475.jpg
    482.6 KB · Views: 7
  • photo301476.jpg
    photo301476.jpg
    603.4 KB · Views: 6
  • photo301477.jpg
    photo301477.jpg
    572.9 KB · Views: 6
  • photo301478.jpg
    photo301478.jpg
    561 KB · Views: 7
  • photo301479.jpg
    photo301479.jpg
    560.6 KB · Views: 7

captdre

Seaman Apprentice
Joined
Aug 6, 2007
Messages
34
Any suggestions on installing the gas tank?
it was sitting on plywood with 2 rubber strips, there's gotta be a better way
 

captdre

Seaman Apprentice
Joined
Aug 6, 2007
Messages
34
Well this what I came up with, some 1" square aluminum, 1/8 vinyl trim riveted together.
hope it works out
 

Attachments

  • photo301875.jpg
    photo301875.jpg
    582.2 KB · Views: 7
  • photo301876.jpg
    photo301876.jpg
    563.8 KB · Views: 6
  • photo301877.jpg
    photo301877.jpg
    1,018.2 KB · Views: 7

captdre

Seaman Apprentice
Joined
Aug 6, 2007
Messages
34
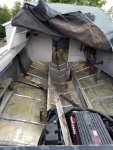
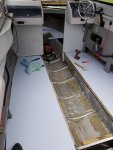
gas tank supports didn't work, the tank doesn't sit at the same height on all the ribs. So the forward part of the tank, the main fill and vent hose were above the floor. Gonna try supports at the rear and just the vinyl pads up front.
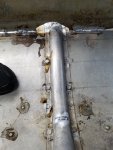
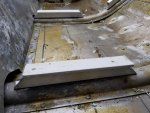
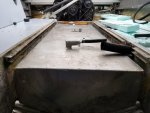
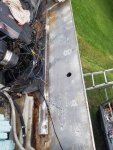
 

captdre

Seaman Apprentice
Joined
Aug 6, 2007
Messages
34
photo302808.jpg Transom work.
previous owner did some really dumb repairs and nearly burnt the boat with this switch for the downrigger power outlets.
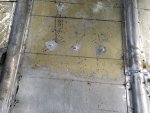
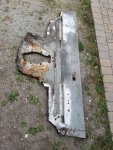
he cut the rot out of the transom and replaced it with pressure treated 2"x8" boards.
 

Attachments

  • photo302809.jpg
    photo302809.jpg
    847.8 KB · Views: 7
  • photo302810.jpg
    photo302810.jpg
    559.7 KB · Views: 6
  • attach10667549.jpg
    attach10667549.jpg
    500.2 KB · Views: 7
  • photo302811.jpg
    photo302811.jpg
    500.2 KB · Views: 6
Last edited:

captdre

Seaman Apprentice
Joined
Aug 6, 2007
Messages
34
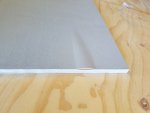
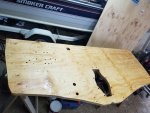
The new transom, 3 pieces of 1/2" arauco ply. Center piece is square the outer pieces clocked as much as possible in opposite directions. Holes drilled oversized and filled to be redrilled when installed. 3 coats of West system epoxy to seal it all
 

astor

2018's Starmada Splash Of The Year.
Joined
Jul 31, 2011
Messages
425
Lots of welds on those ribs, i wonder what happened to this boat?
Cool project! I'll be following- post lots of pics
 

captdre

Seaman Apprentice
Joined
Aug 6, 2007
Messages
34
Lots of welds on those ribs, i wonder what happened to this boat?
Cool project! I'll be following- post lots of pics

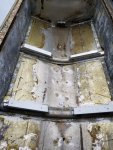
I had the ribs welded, I'm assuming the previous owner, who used the boat to fish tournaments, went full speed in conditions he shouldn't have. My theory is that they crack around that area because of pounding through waves.
Also the boat was winterized/stored in almost bow down position so water freezing under the ribs didn't help.
 
Top