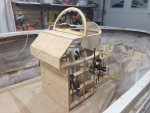
Too cool, just like building a wood model plane. That framing will save you a ton of weight and be tougher than most. Till now I didn't realize how far to the bow you were with placement.
")
Hey everyone. Been a busy week. Just got my first kit of 2lb foam in. I was hoping to start to pour tomorrow night. Could you guys give me some pointers/tips/direction as to figure out how much I need when I figure out the space I have to pour?
Thanks
Dezi
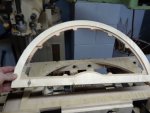
My Dash panel was ready for pickup at the CNC Laser shop so off I went to get it. Boy oh boy does it look nice. And I actually did my drawing correct for size as everything fit with no mods 


 Mushroom and lot's of foam LOL.... It's all good though.. I can clean it up. I know that spot is filled good