1997 Sylvan 824SE Adding a Center Toon

scott011422

Cadet
Joined
Jan 15, 2018
Messages
23
Hey all

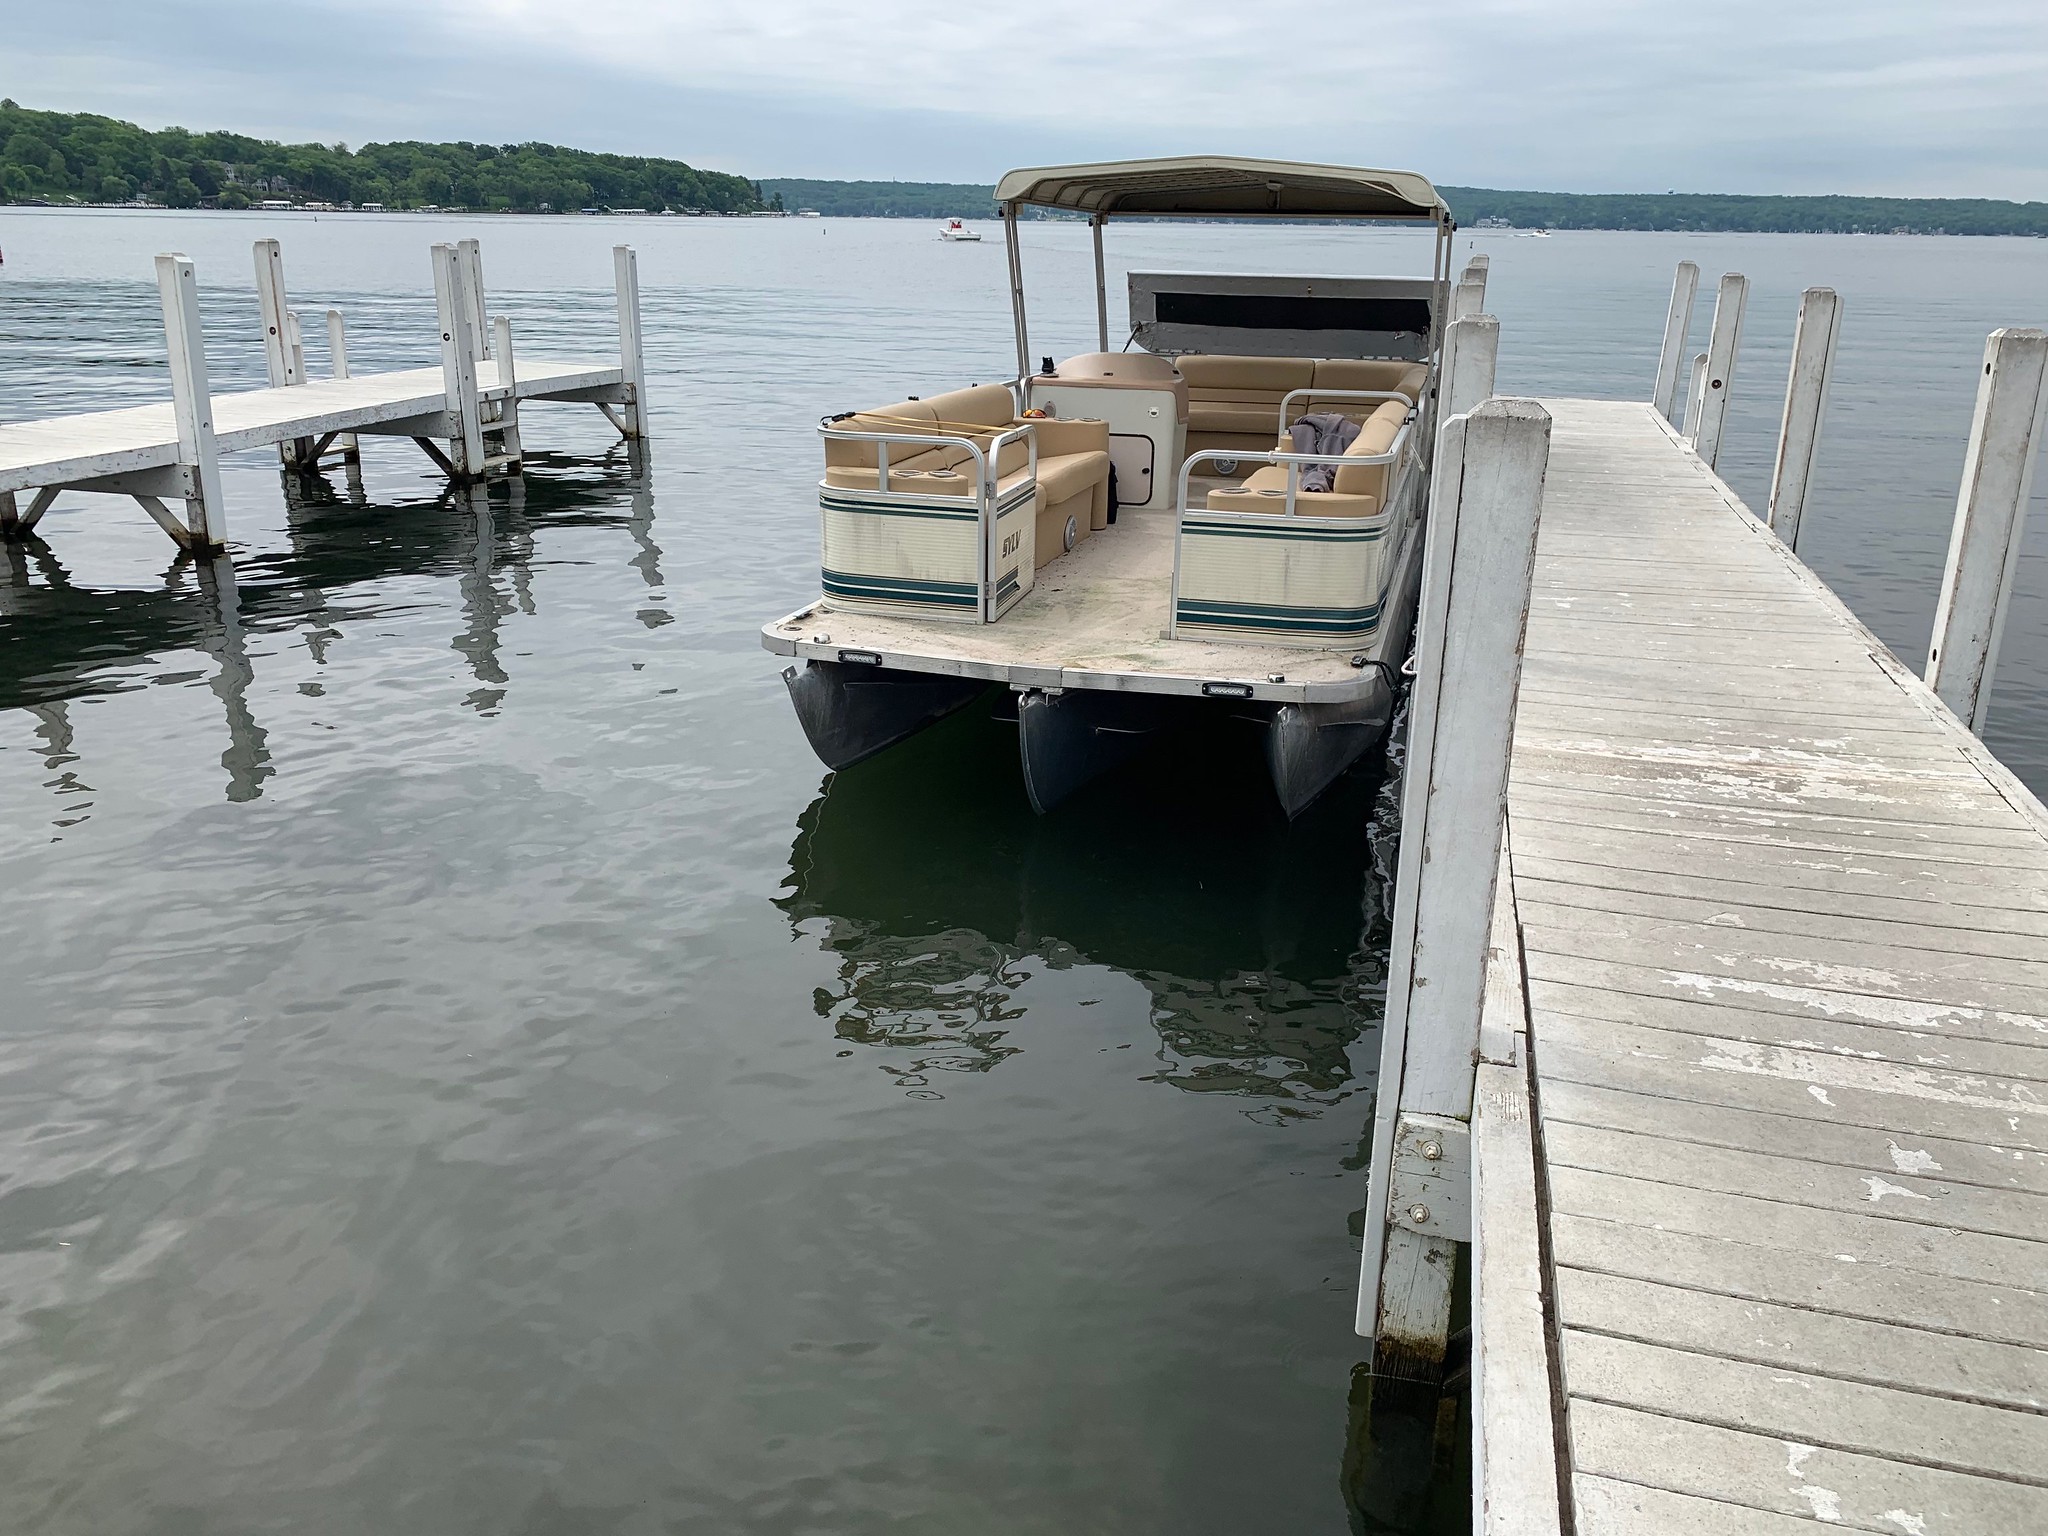
My father and I purchased a 1997 24ft long Sylvan pontoon two years ago. It gets most of it use up on Lake Geneva in Wisconsin which can be quite wavy, especially on the weekends. So this year we decided we were going to add a third pontoon for more flotation and a better ride. I figured I would post everything up in case it could help someone with their conversion in the future.

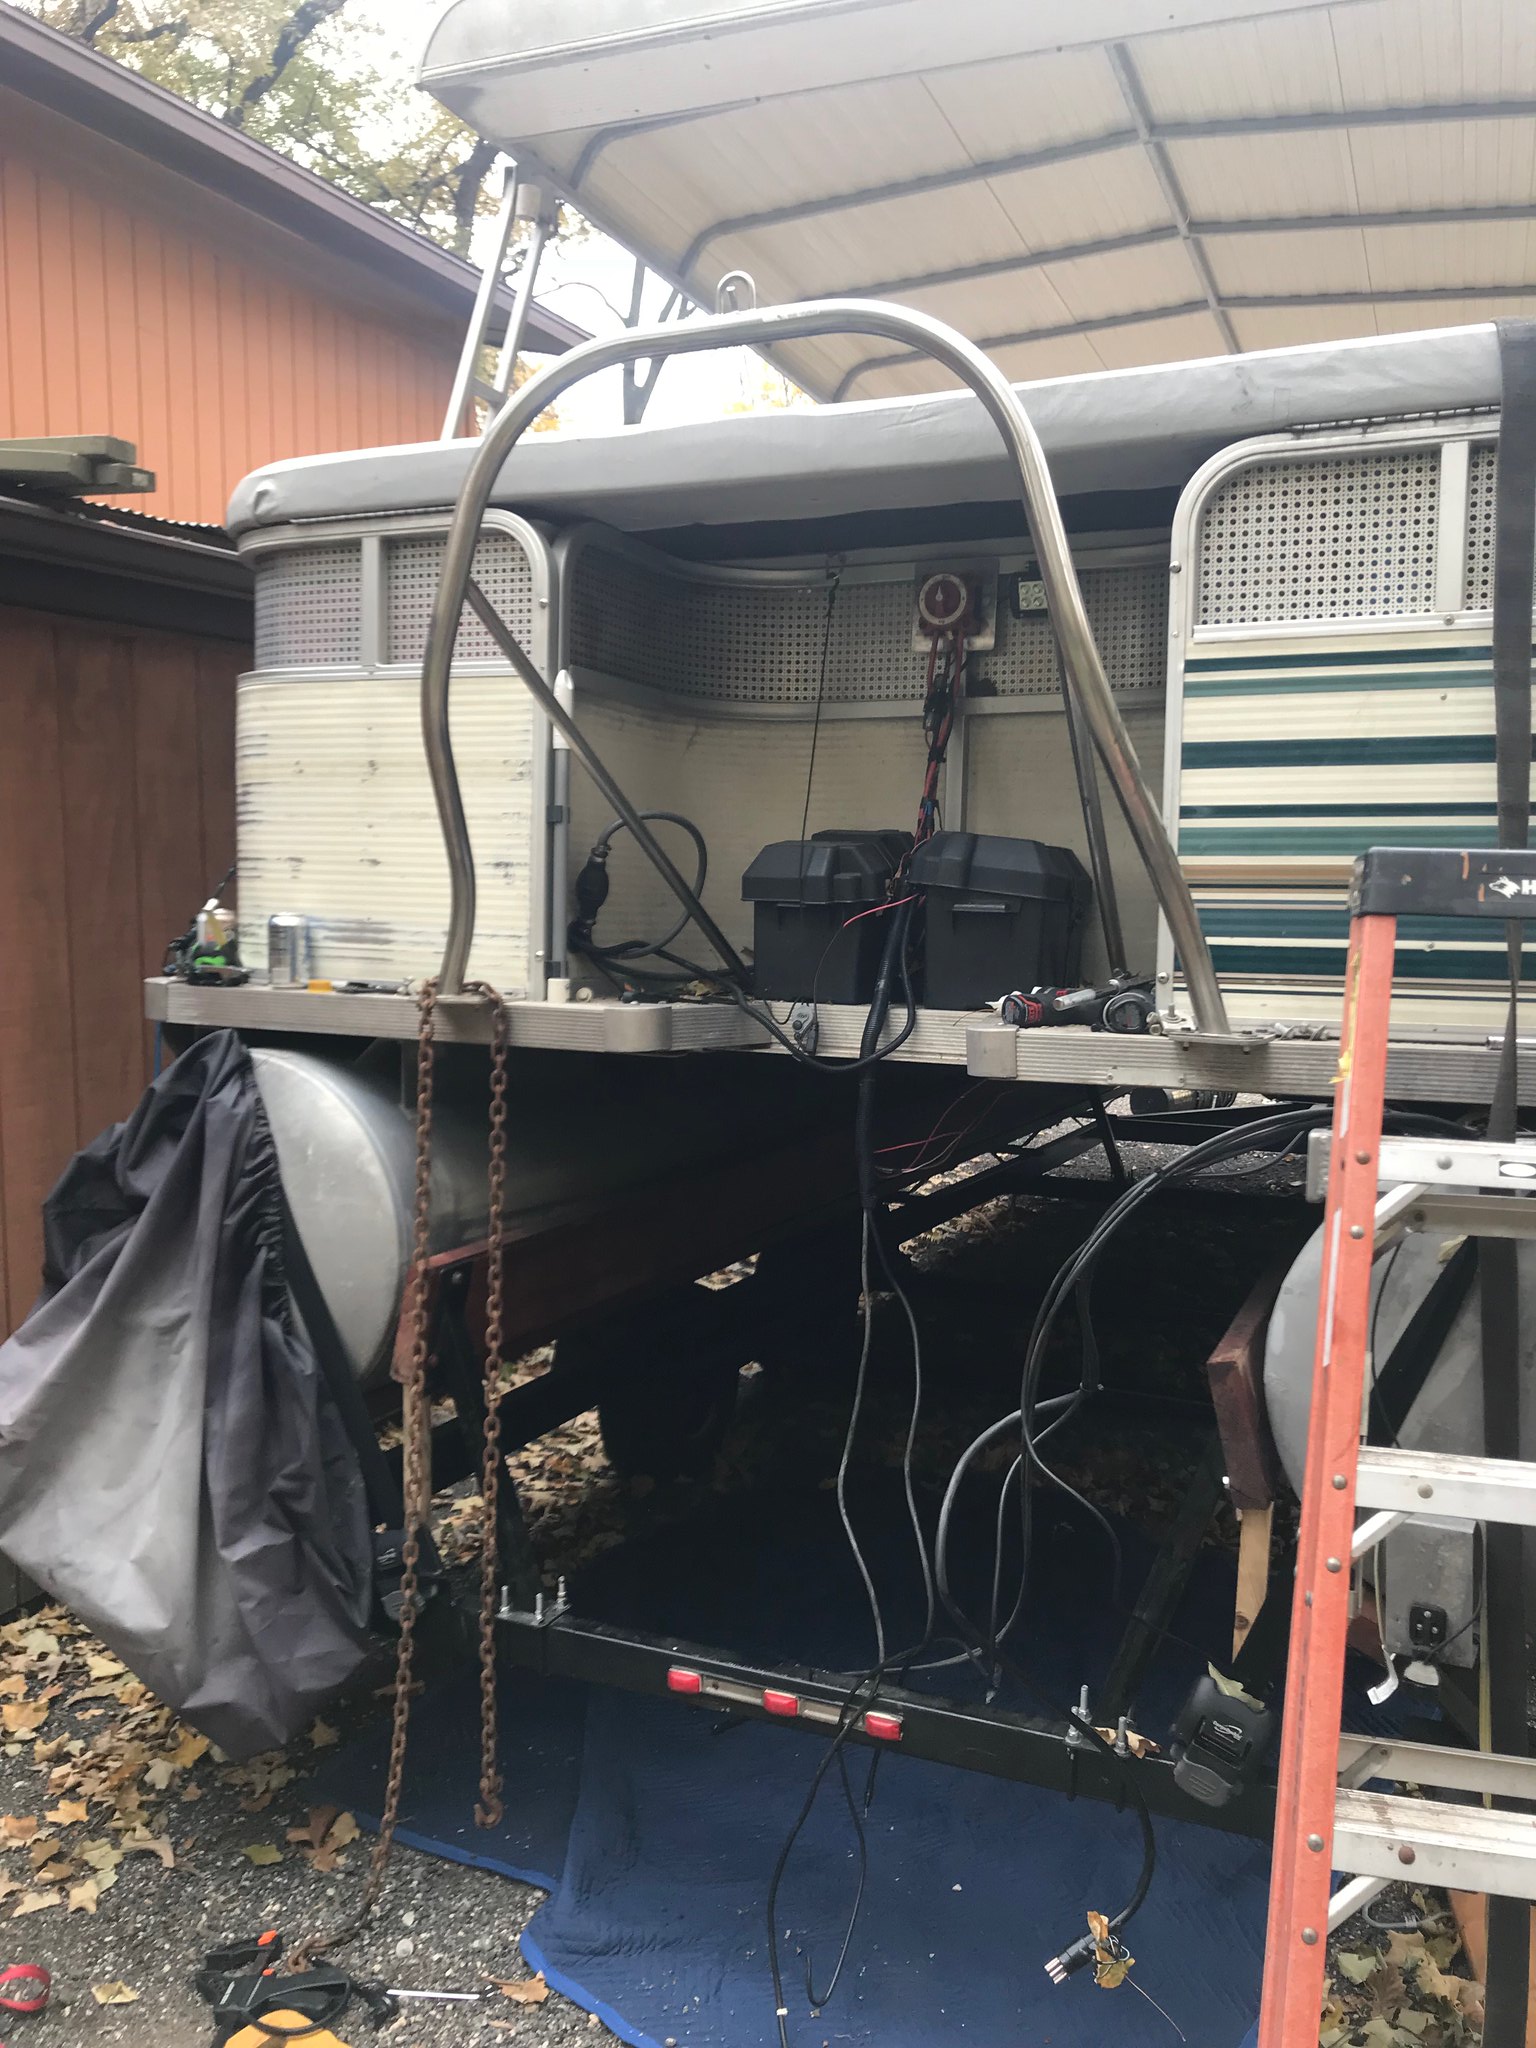
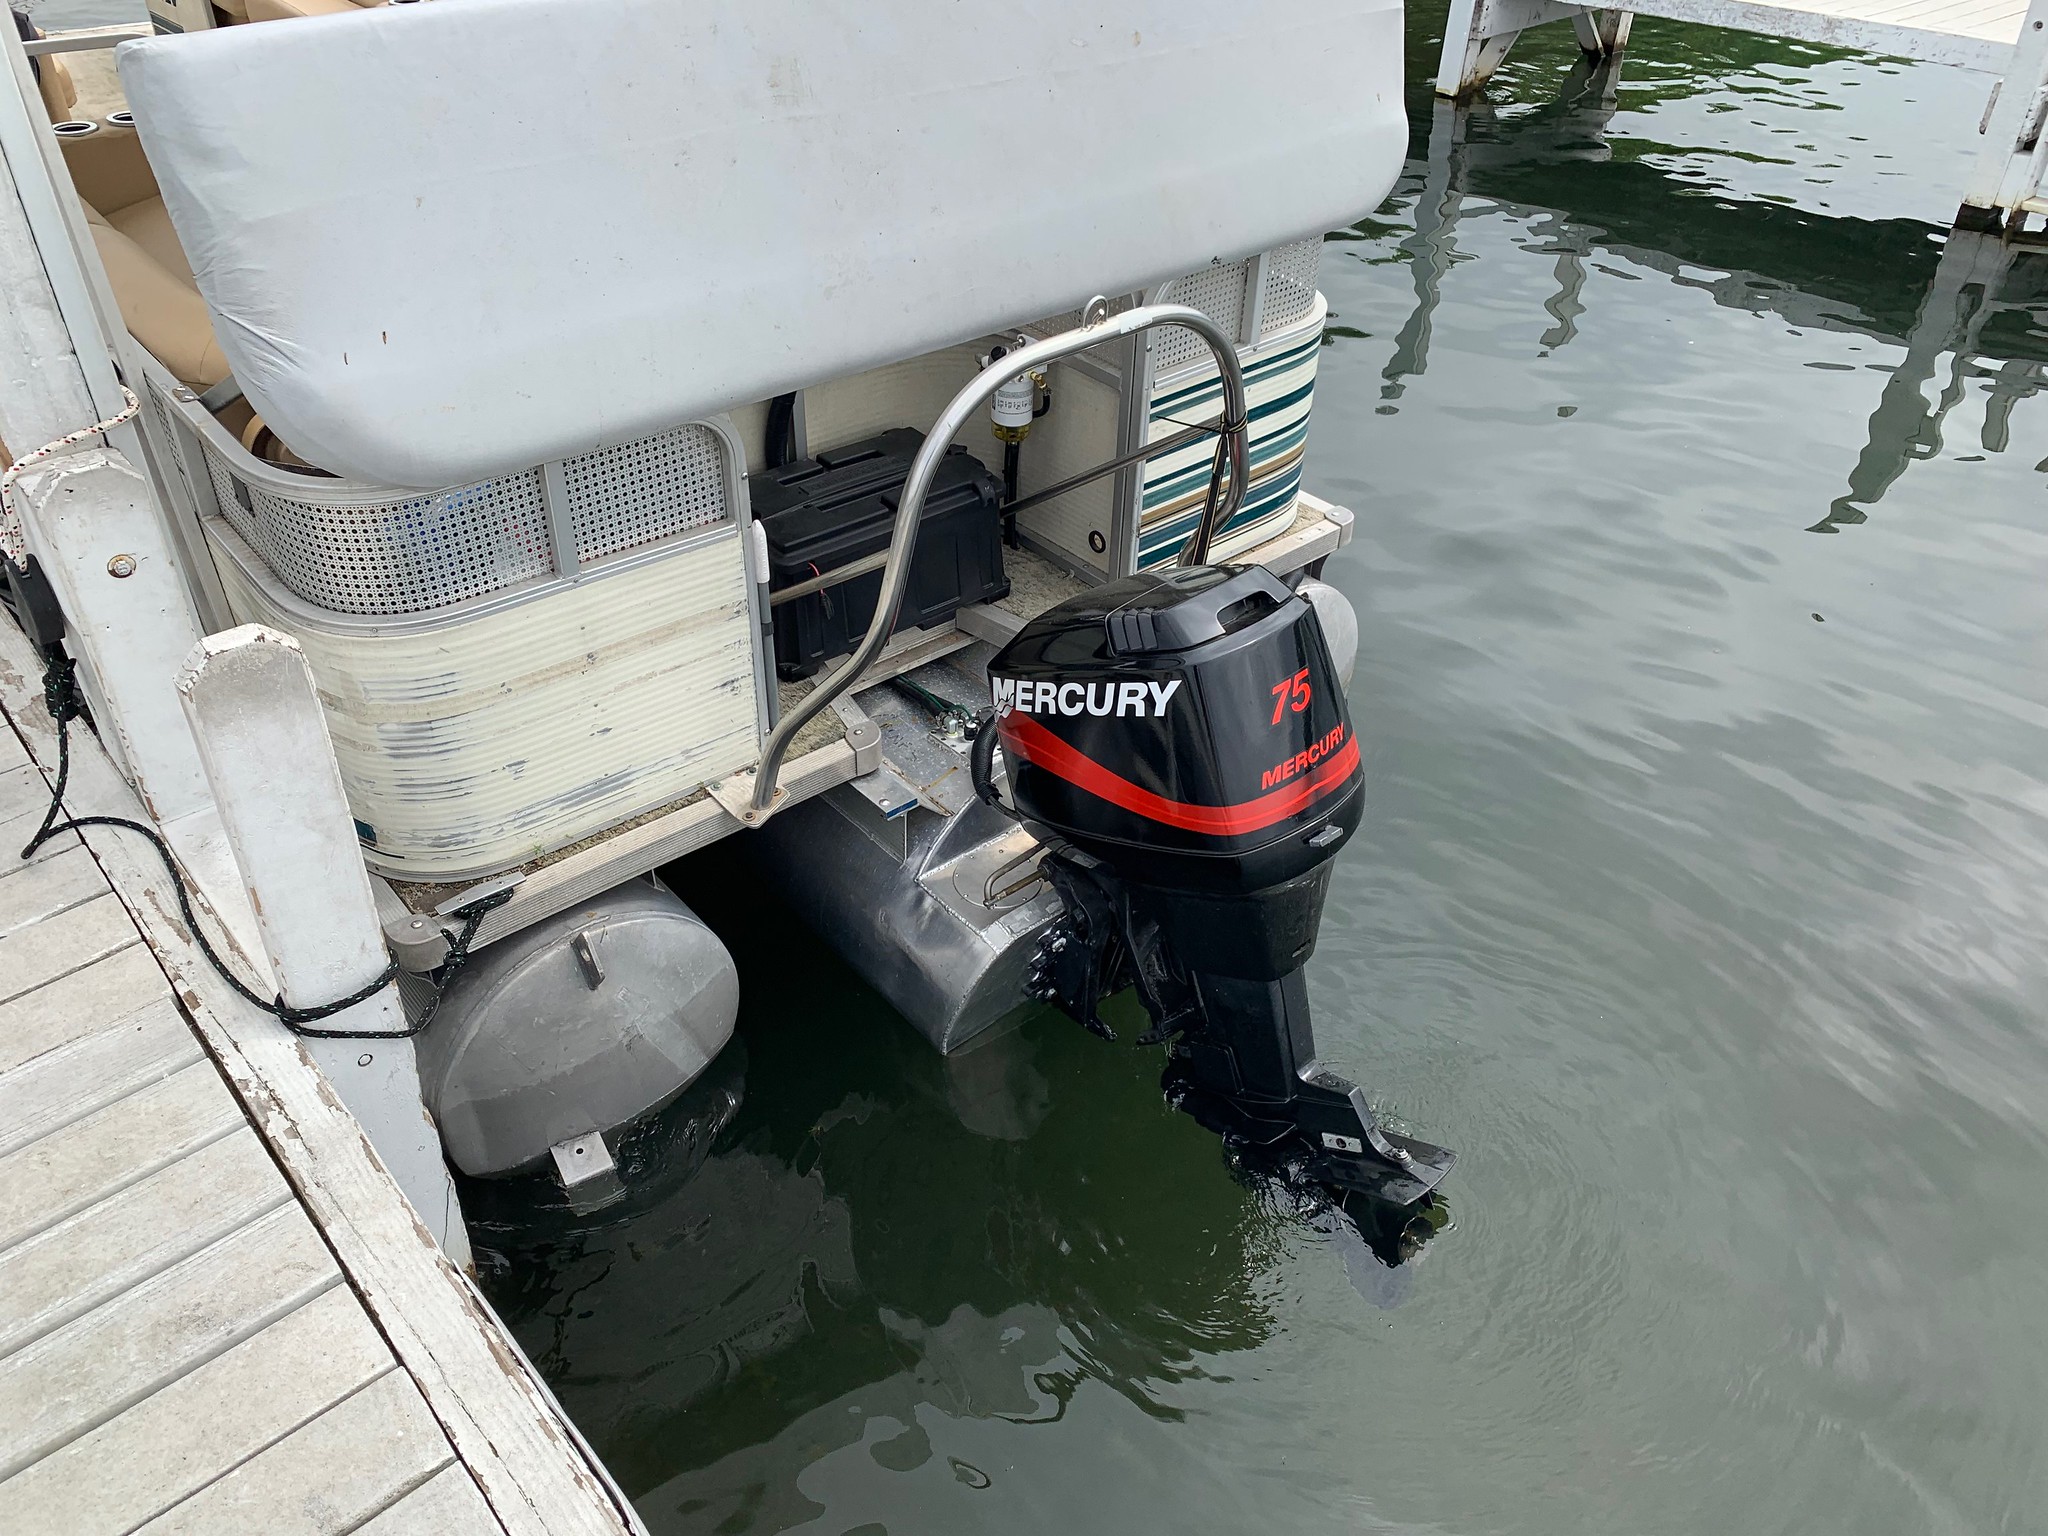
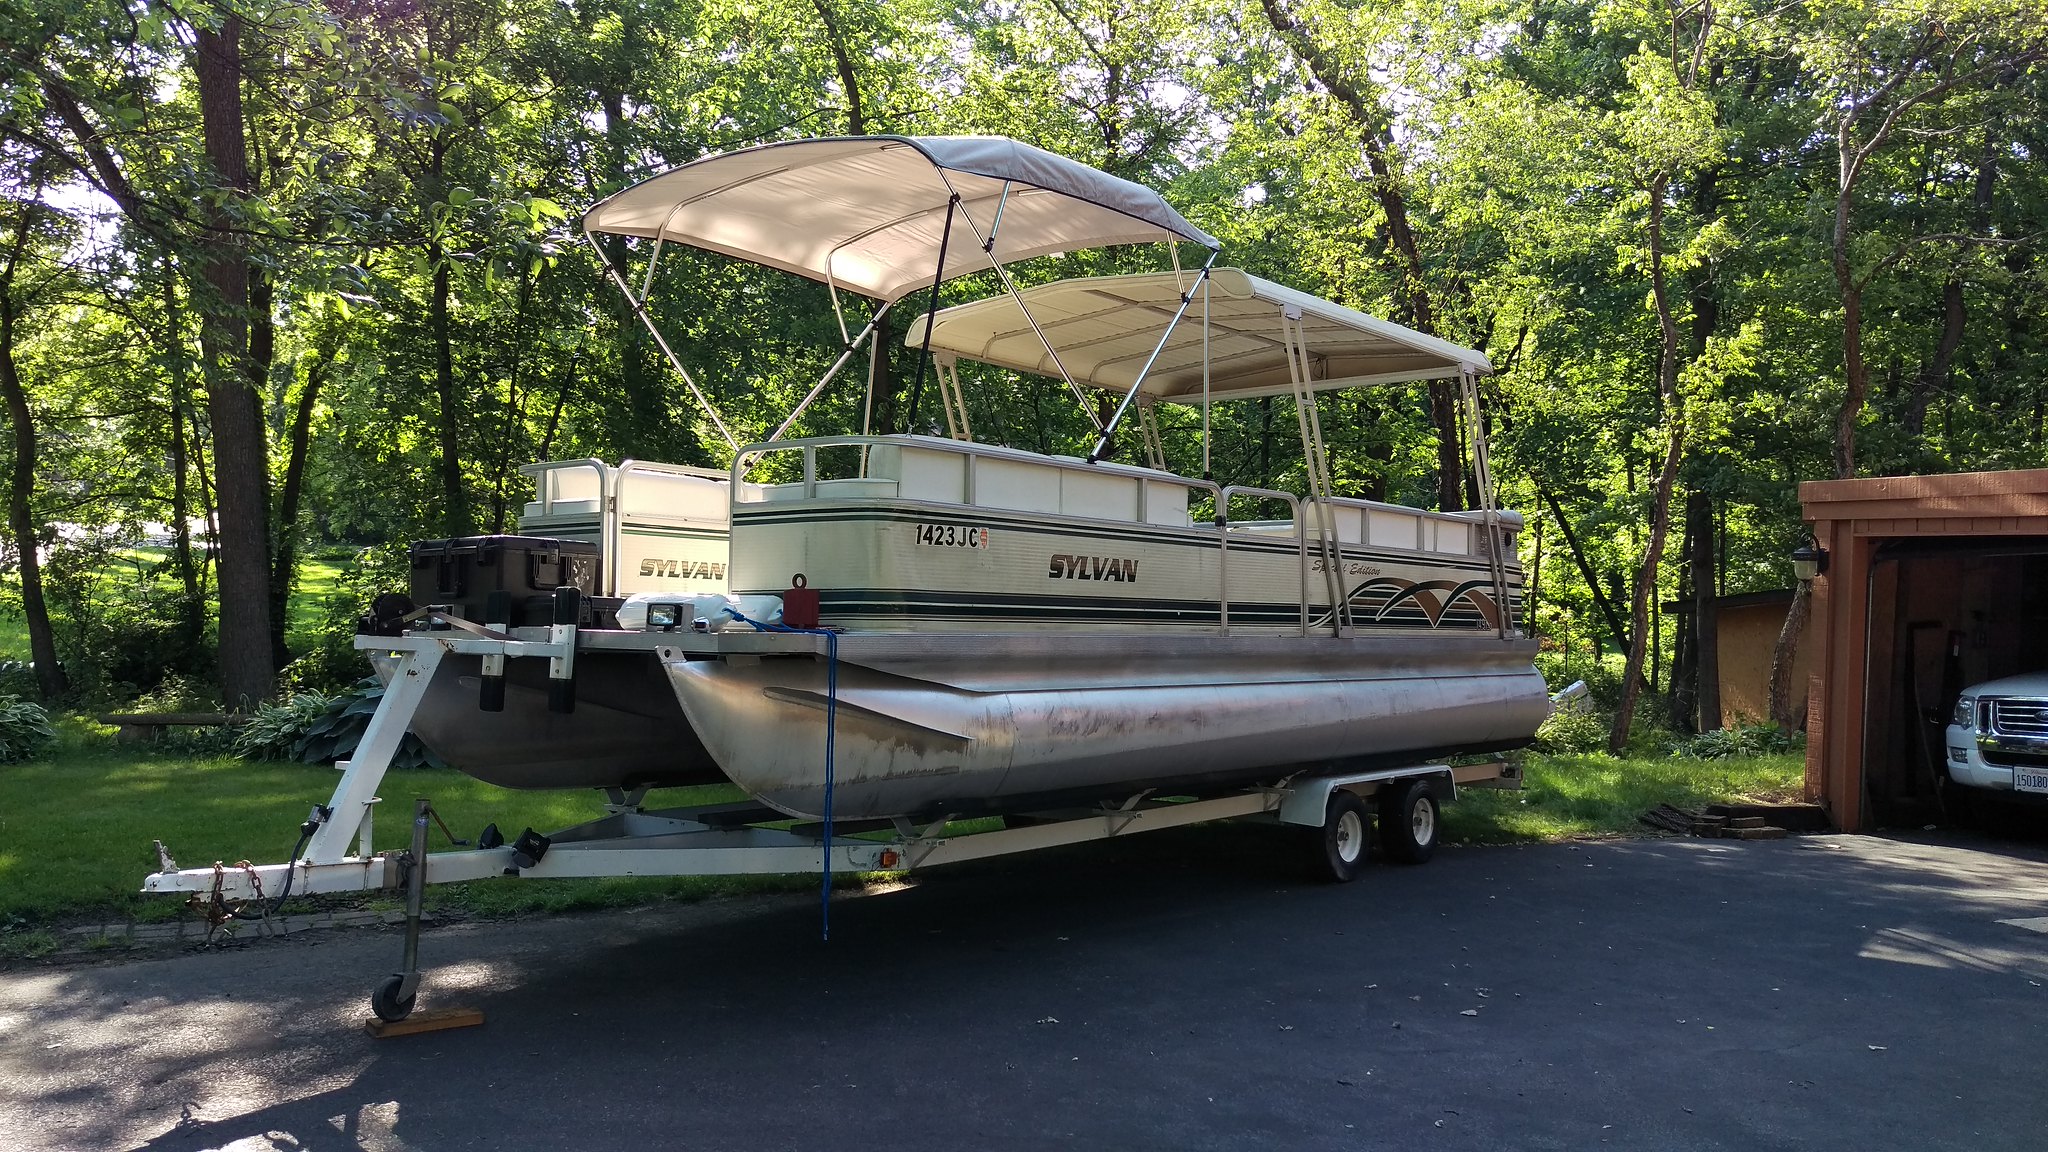
This is the best photo I have of the boat. Since then, We have redone the seats, electrical, outboard, lighting, added a staircase to the trailer and started revamping the playpen skin.

27588663735_b1ec234c52_k.jpg
IMAG0021 by scott011422, on Flickr

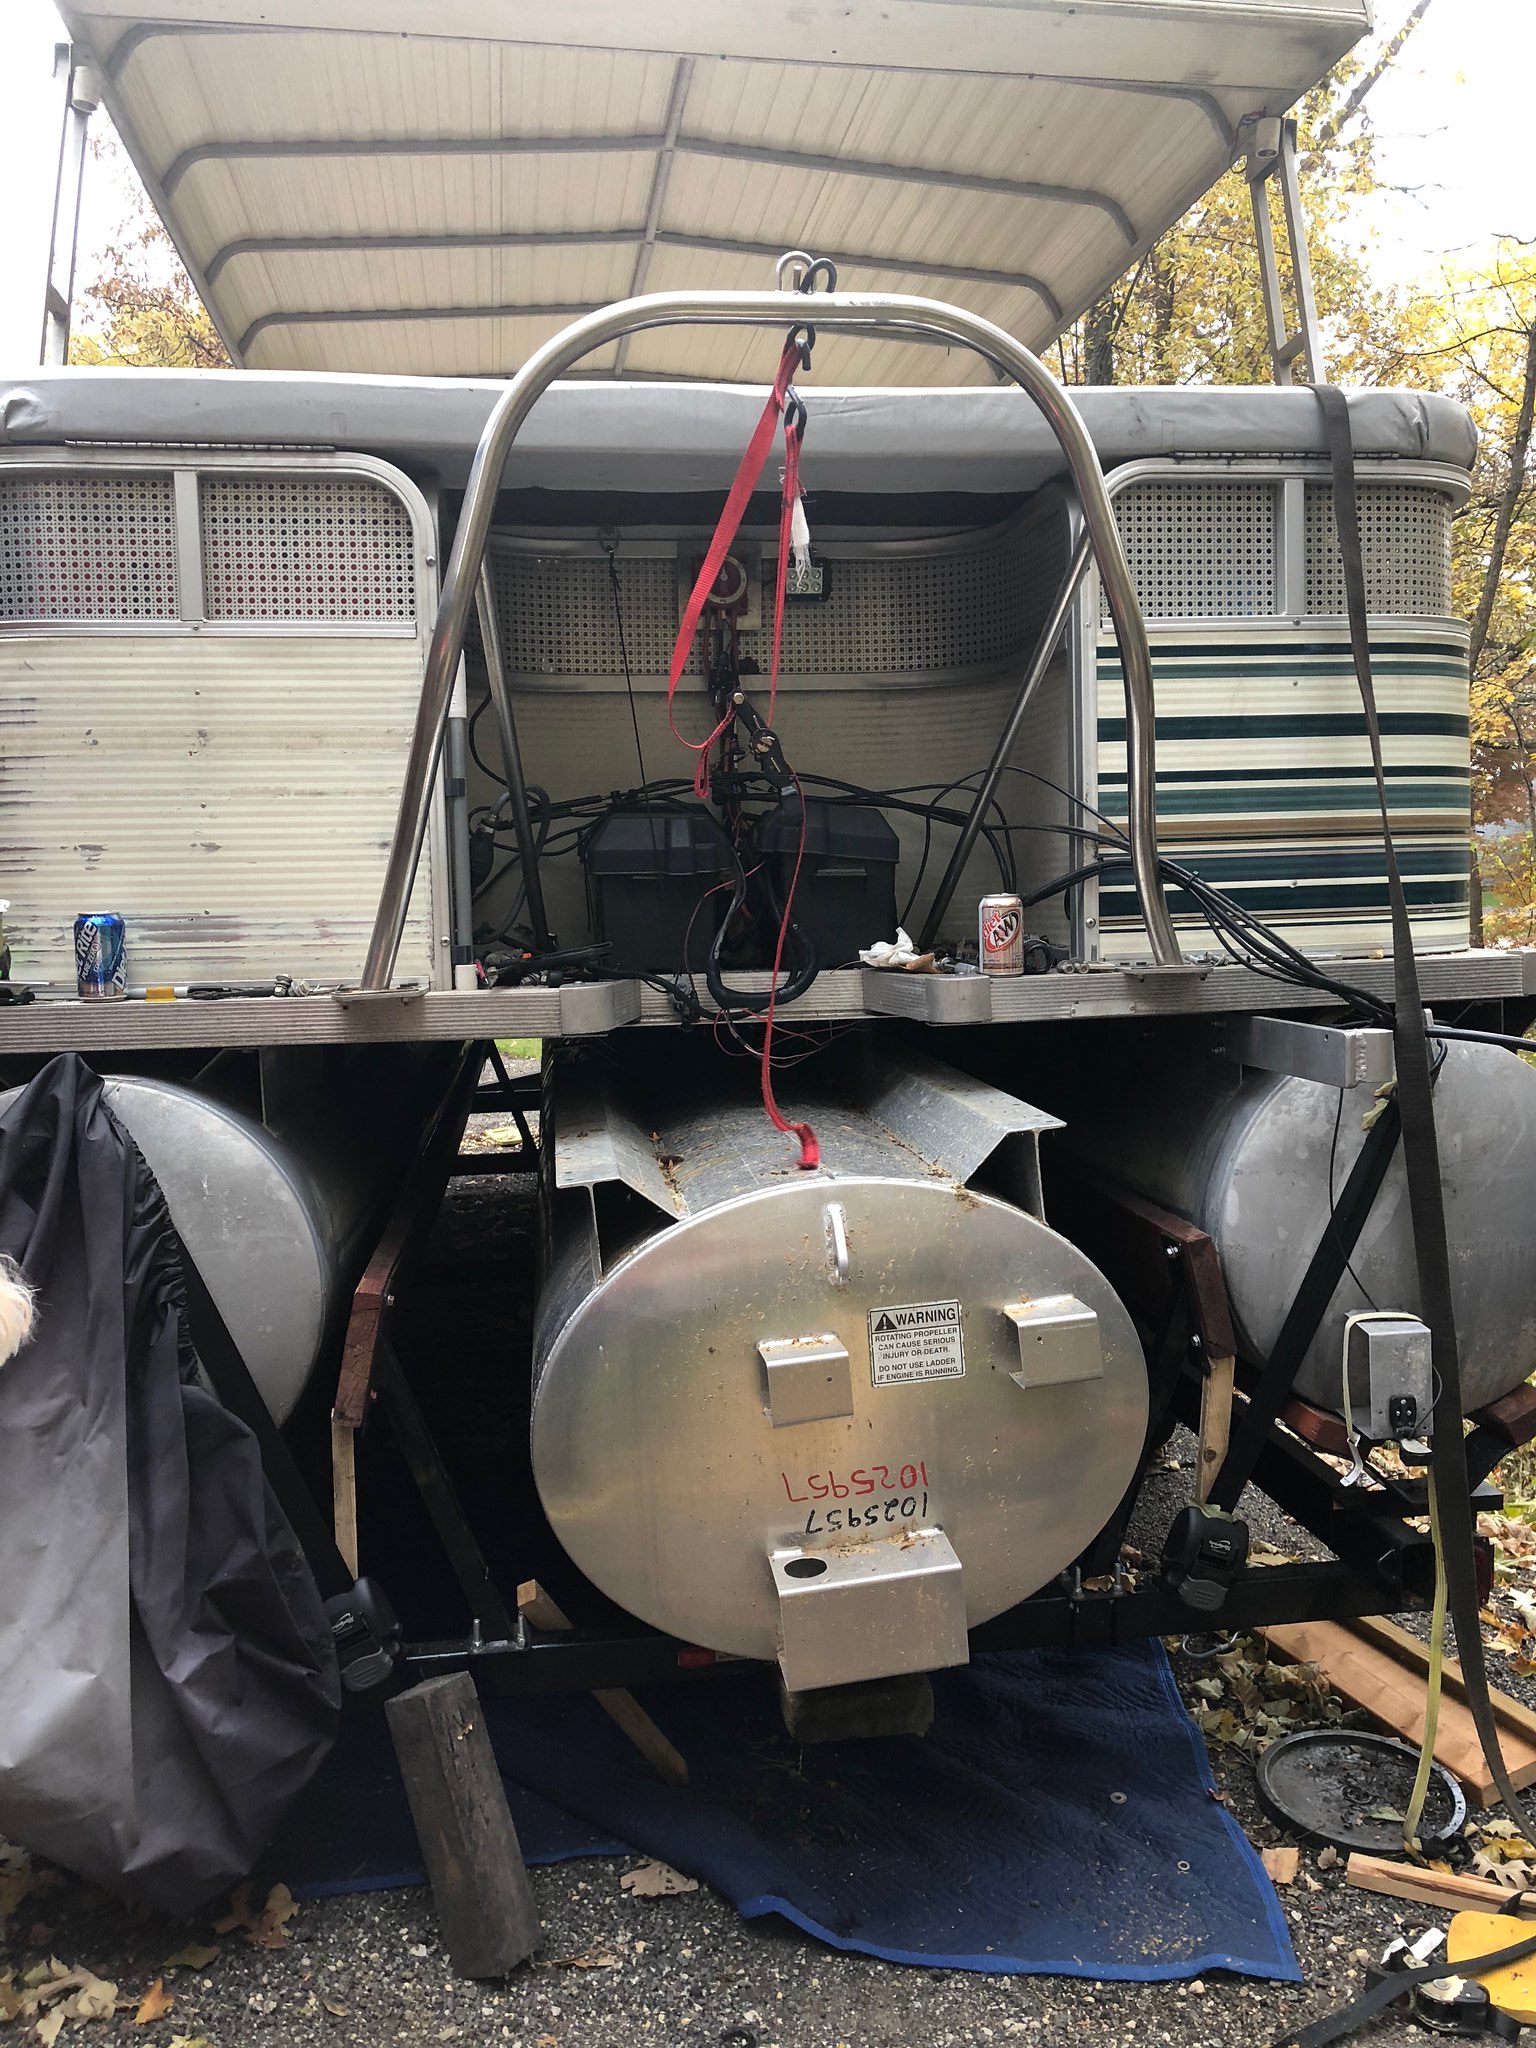
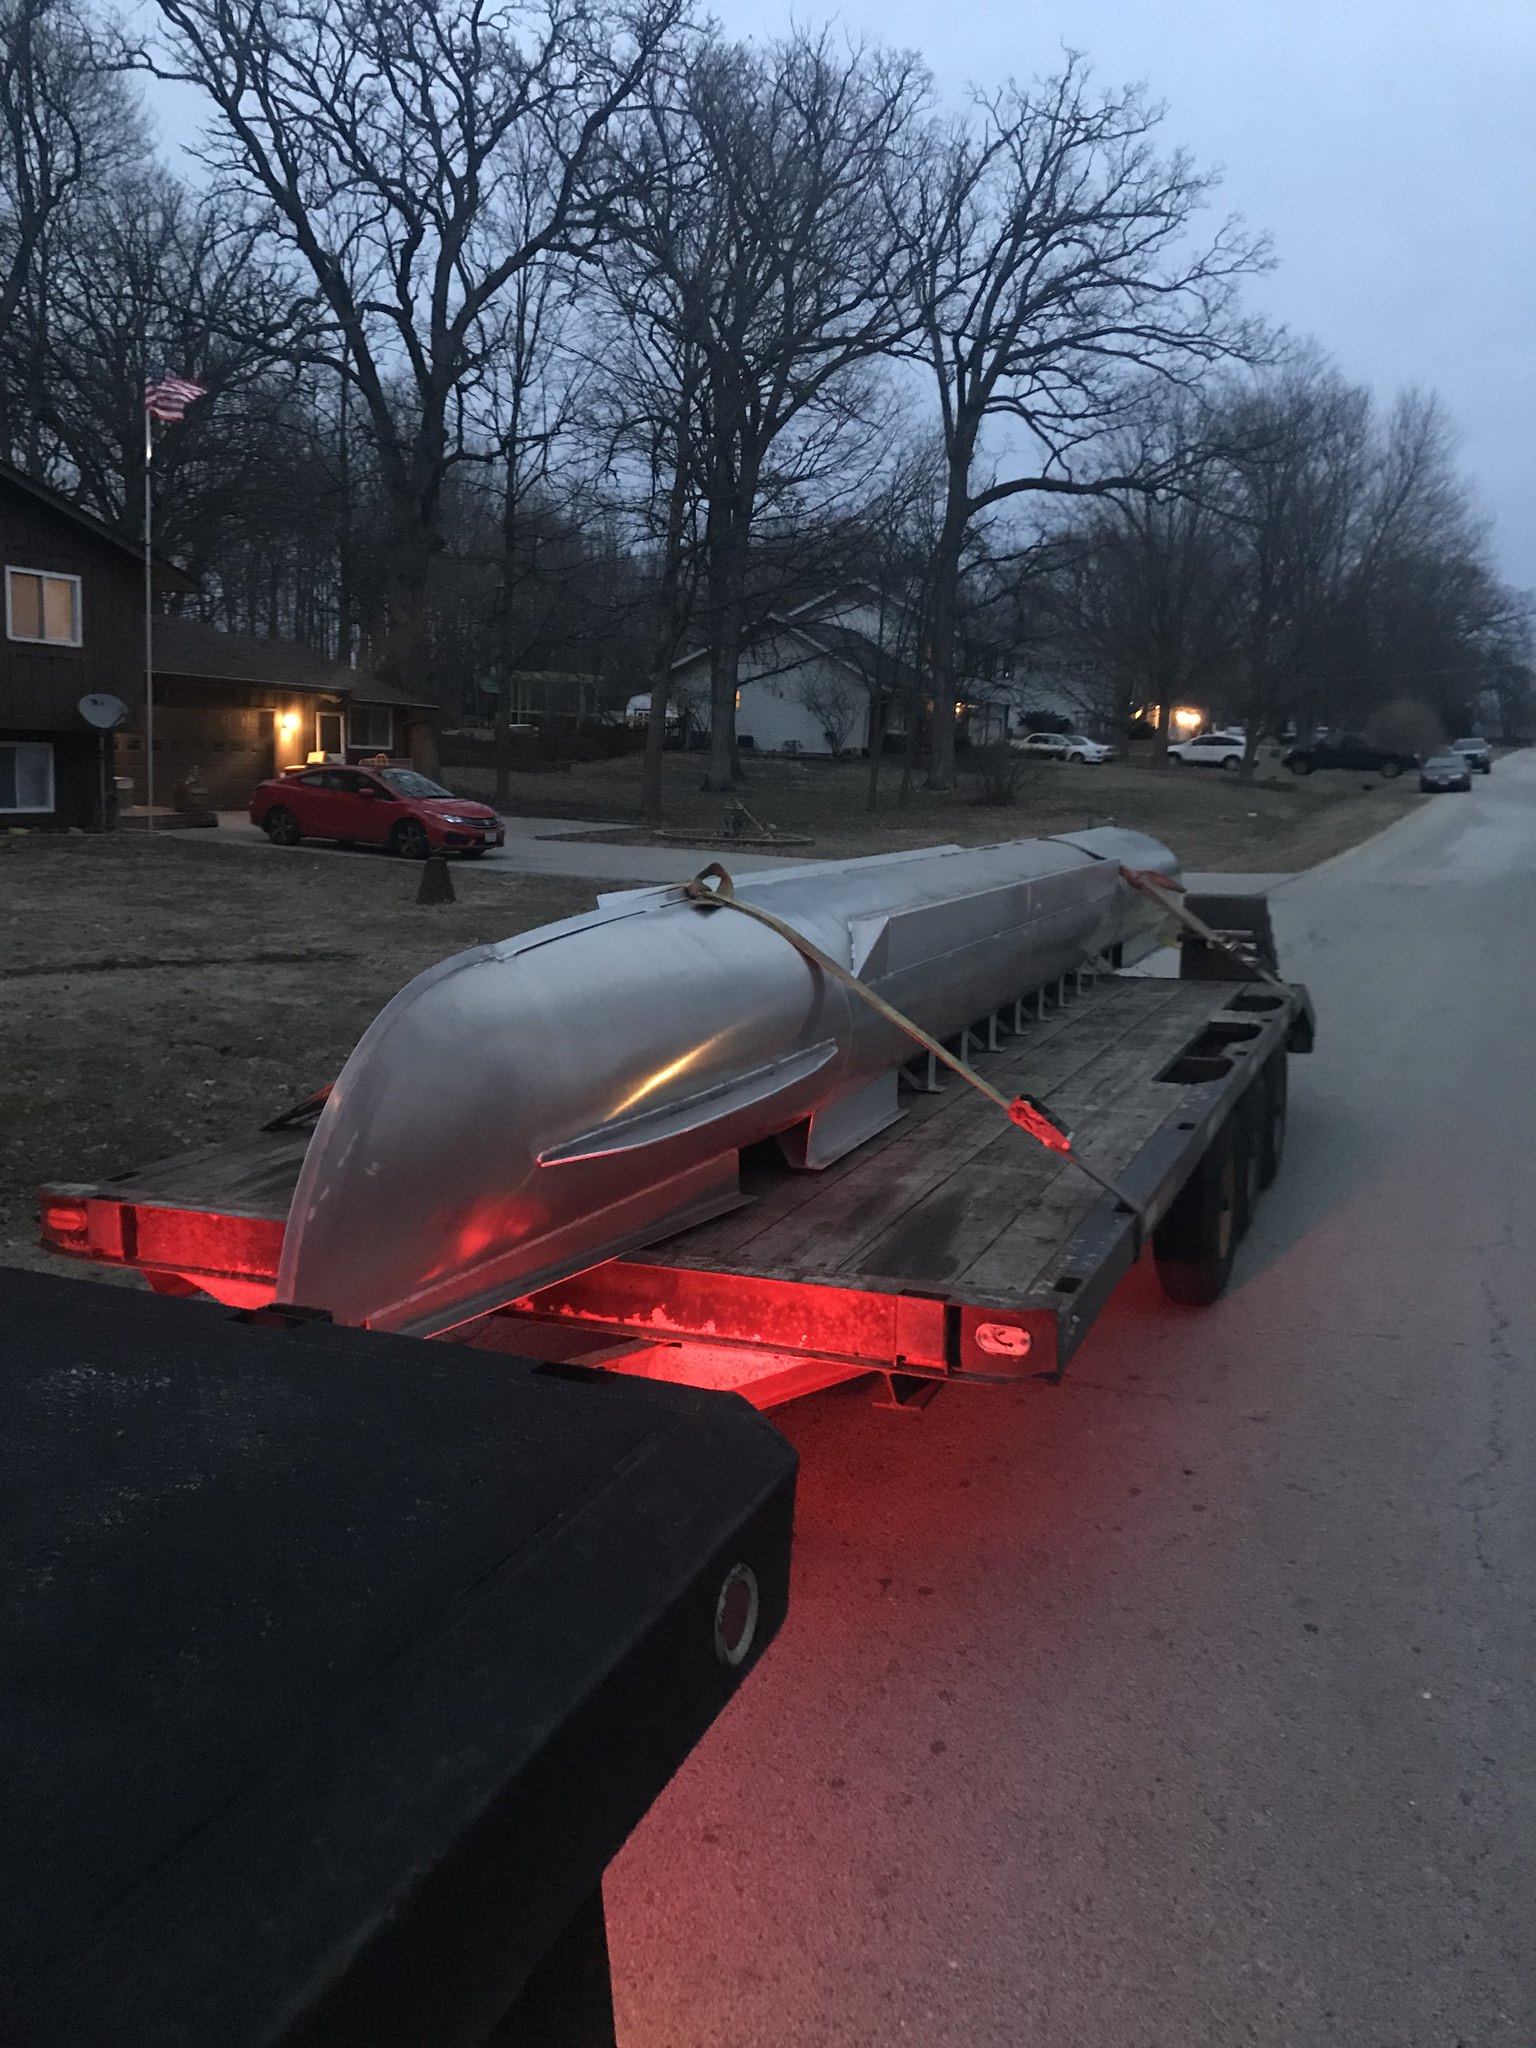
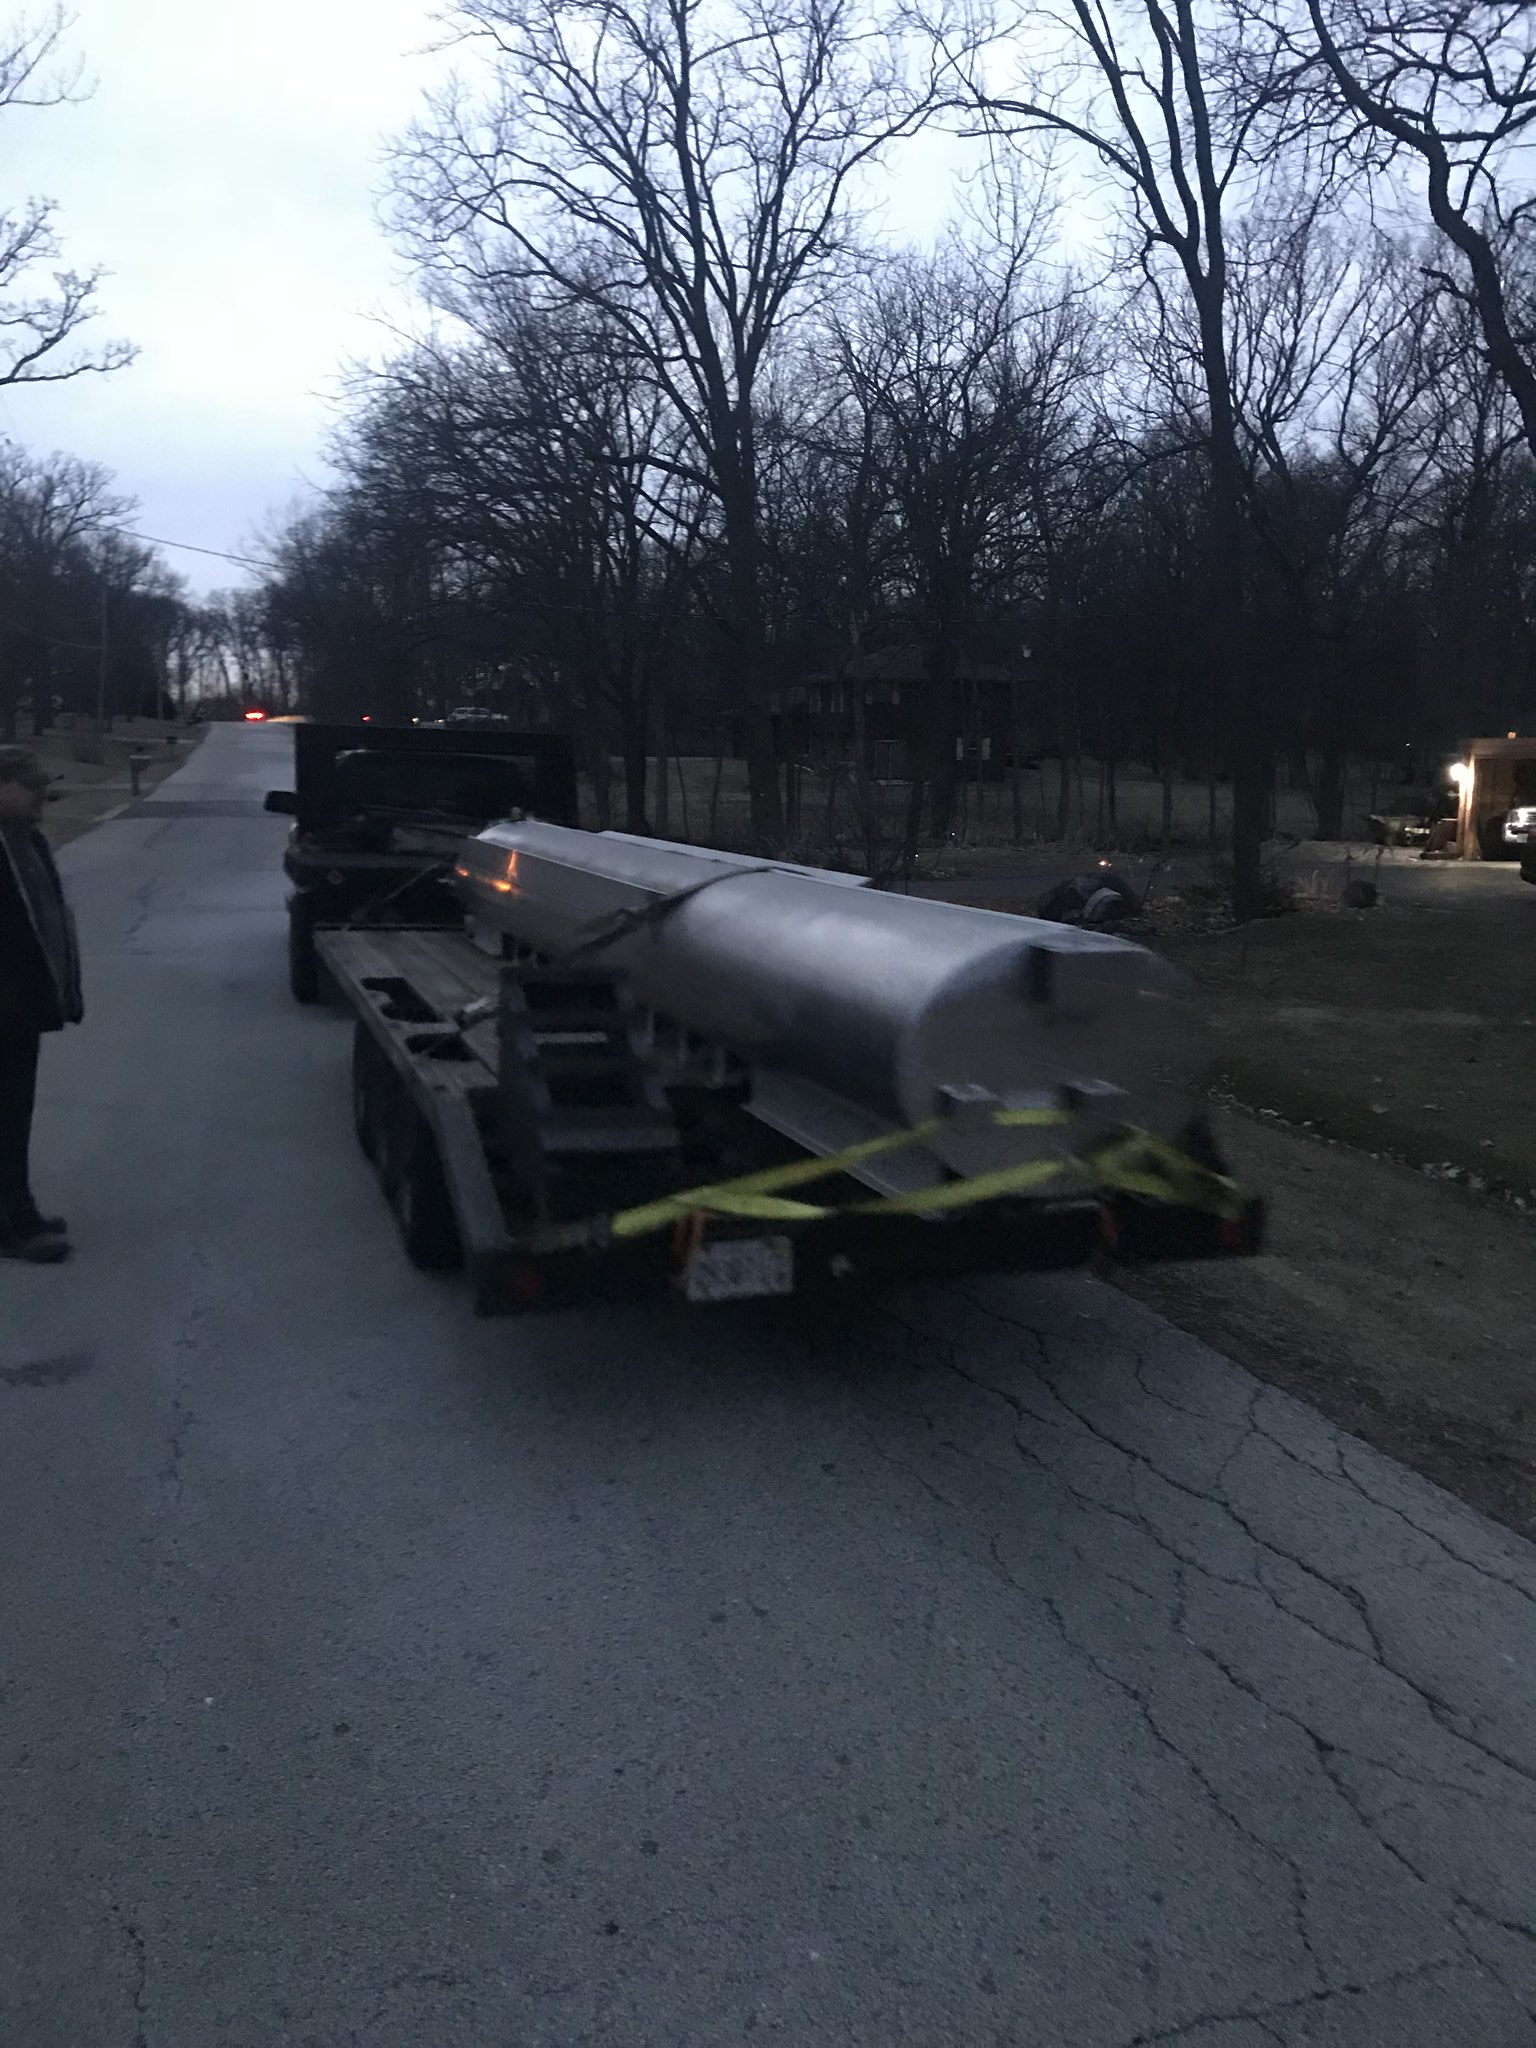
Had the Donor toon delivered from Great Lakes Skipper. Its a Bemmington 25.5ft oval toon.

40894608412_235cfc3104_k.jpg
Untitled by scott011422, on Flickr

26063461437_2bd70e7423_k.jpg
Untitled by scott011422, on Flickr

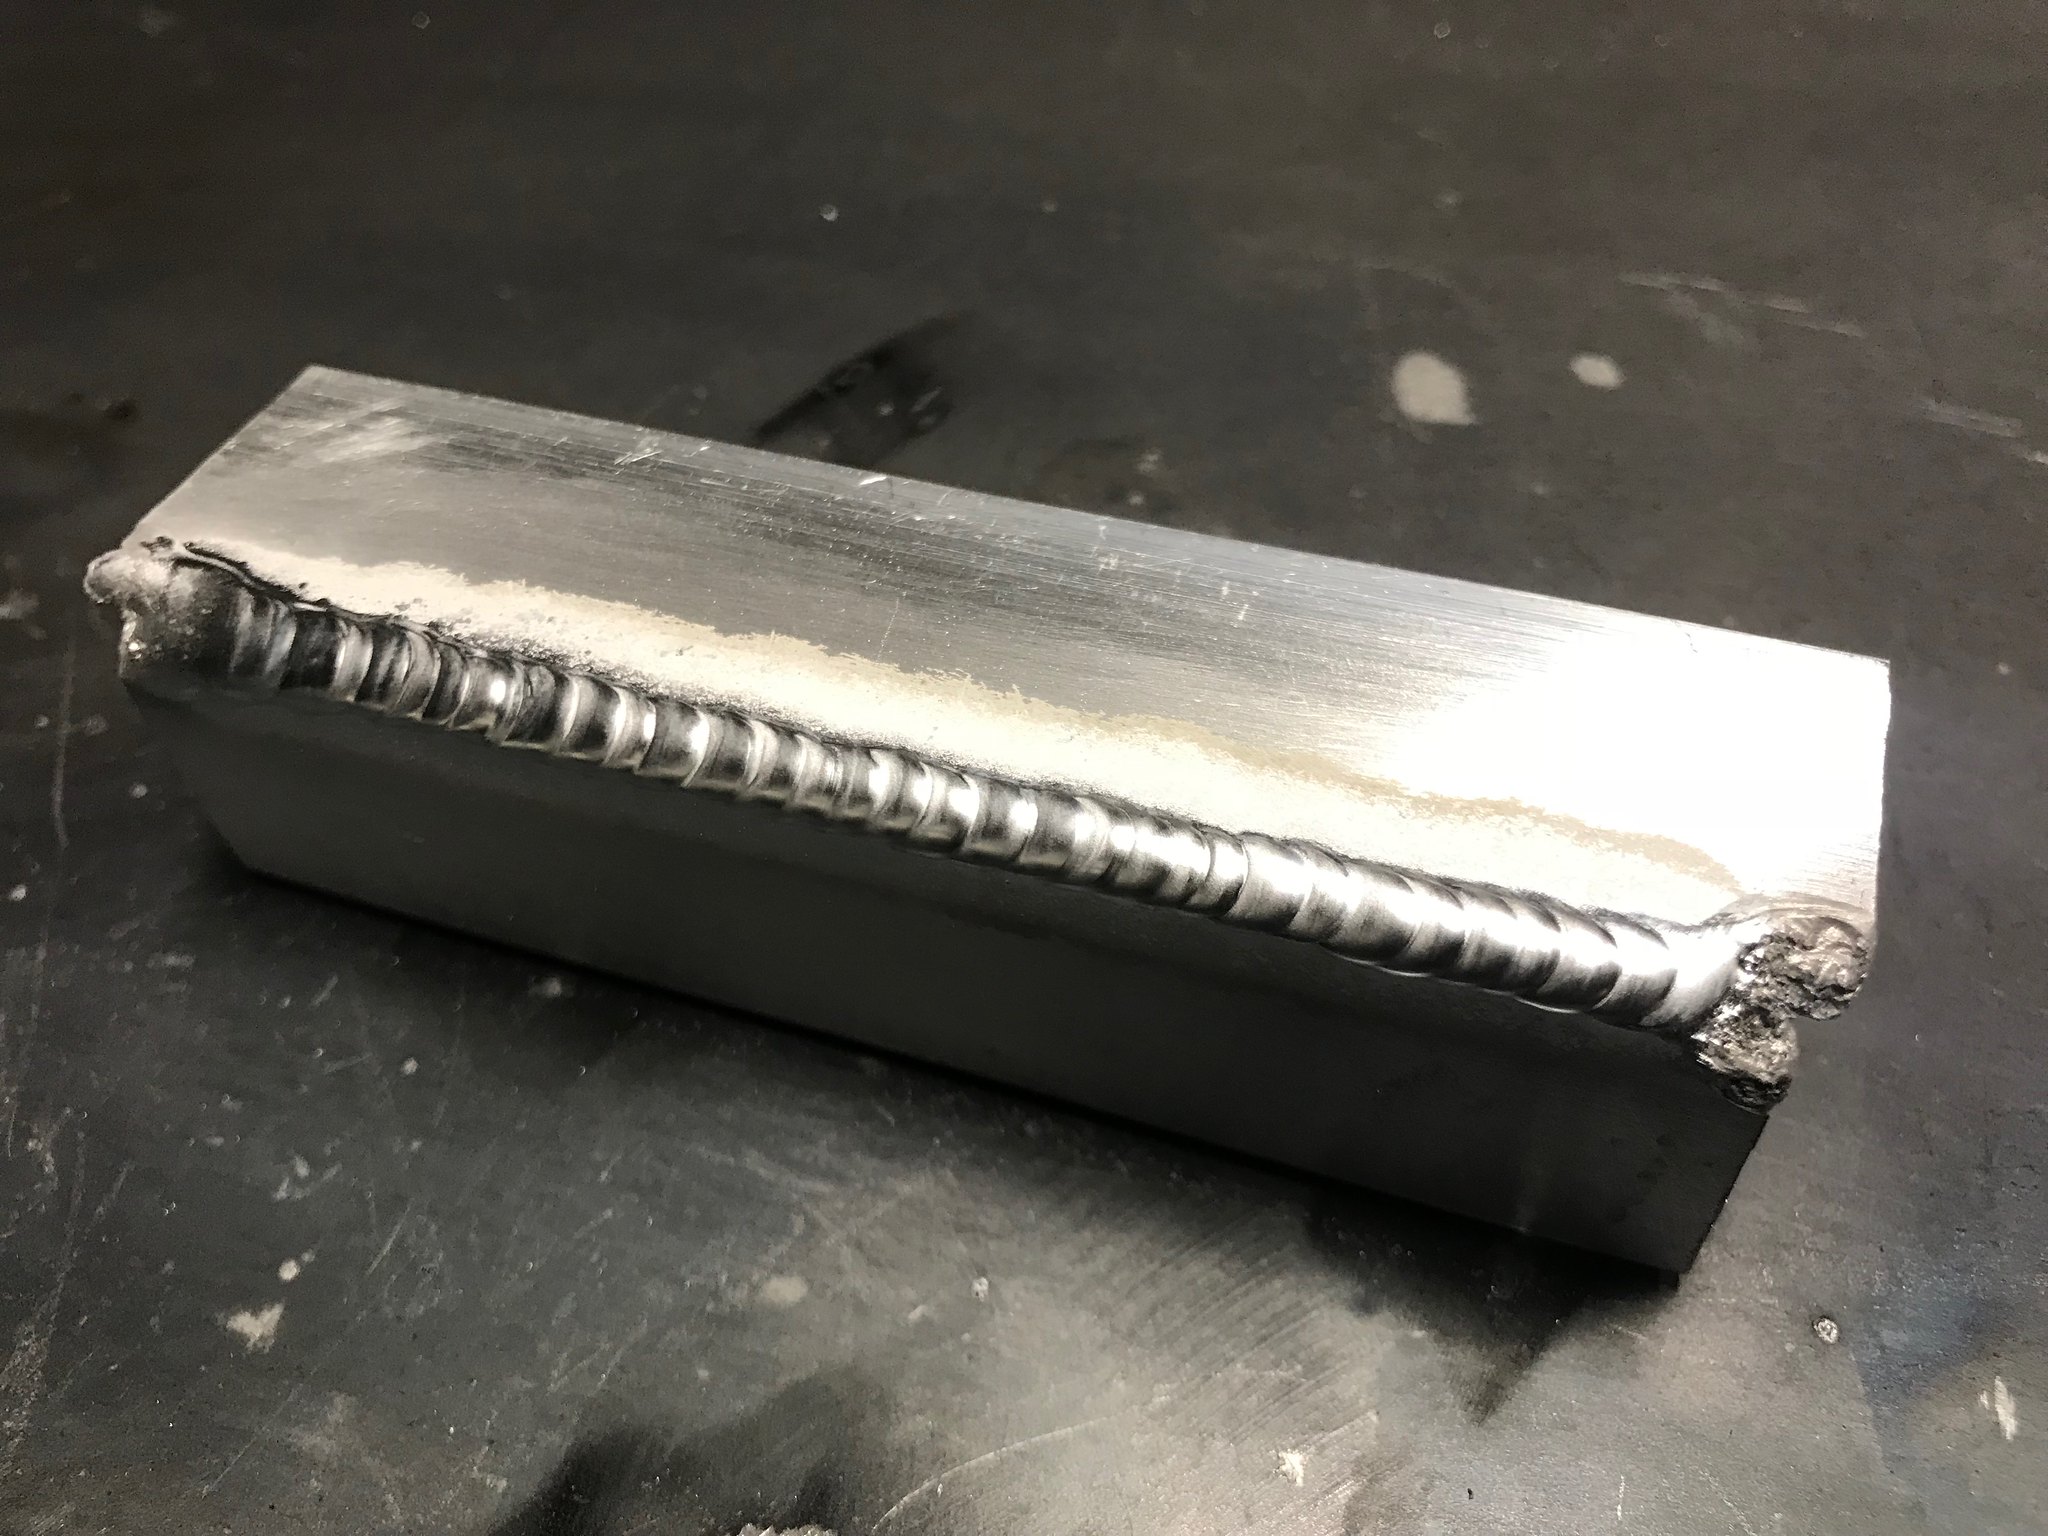
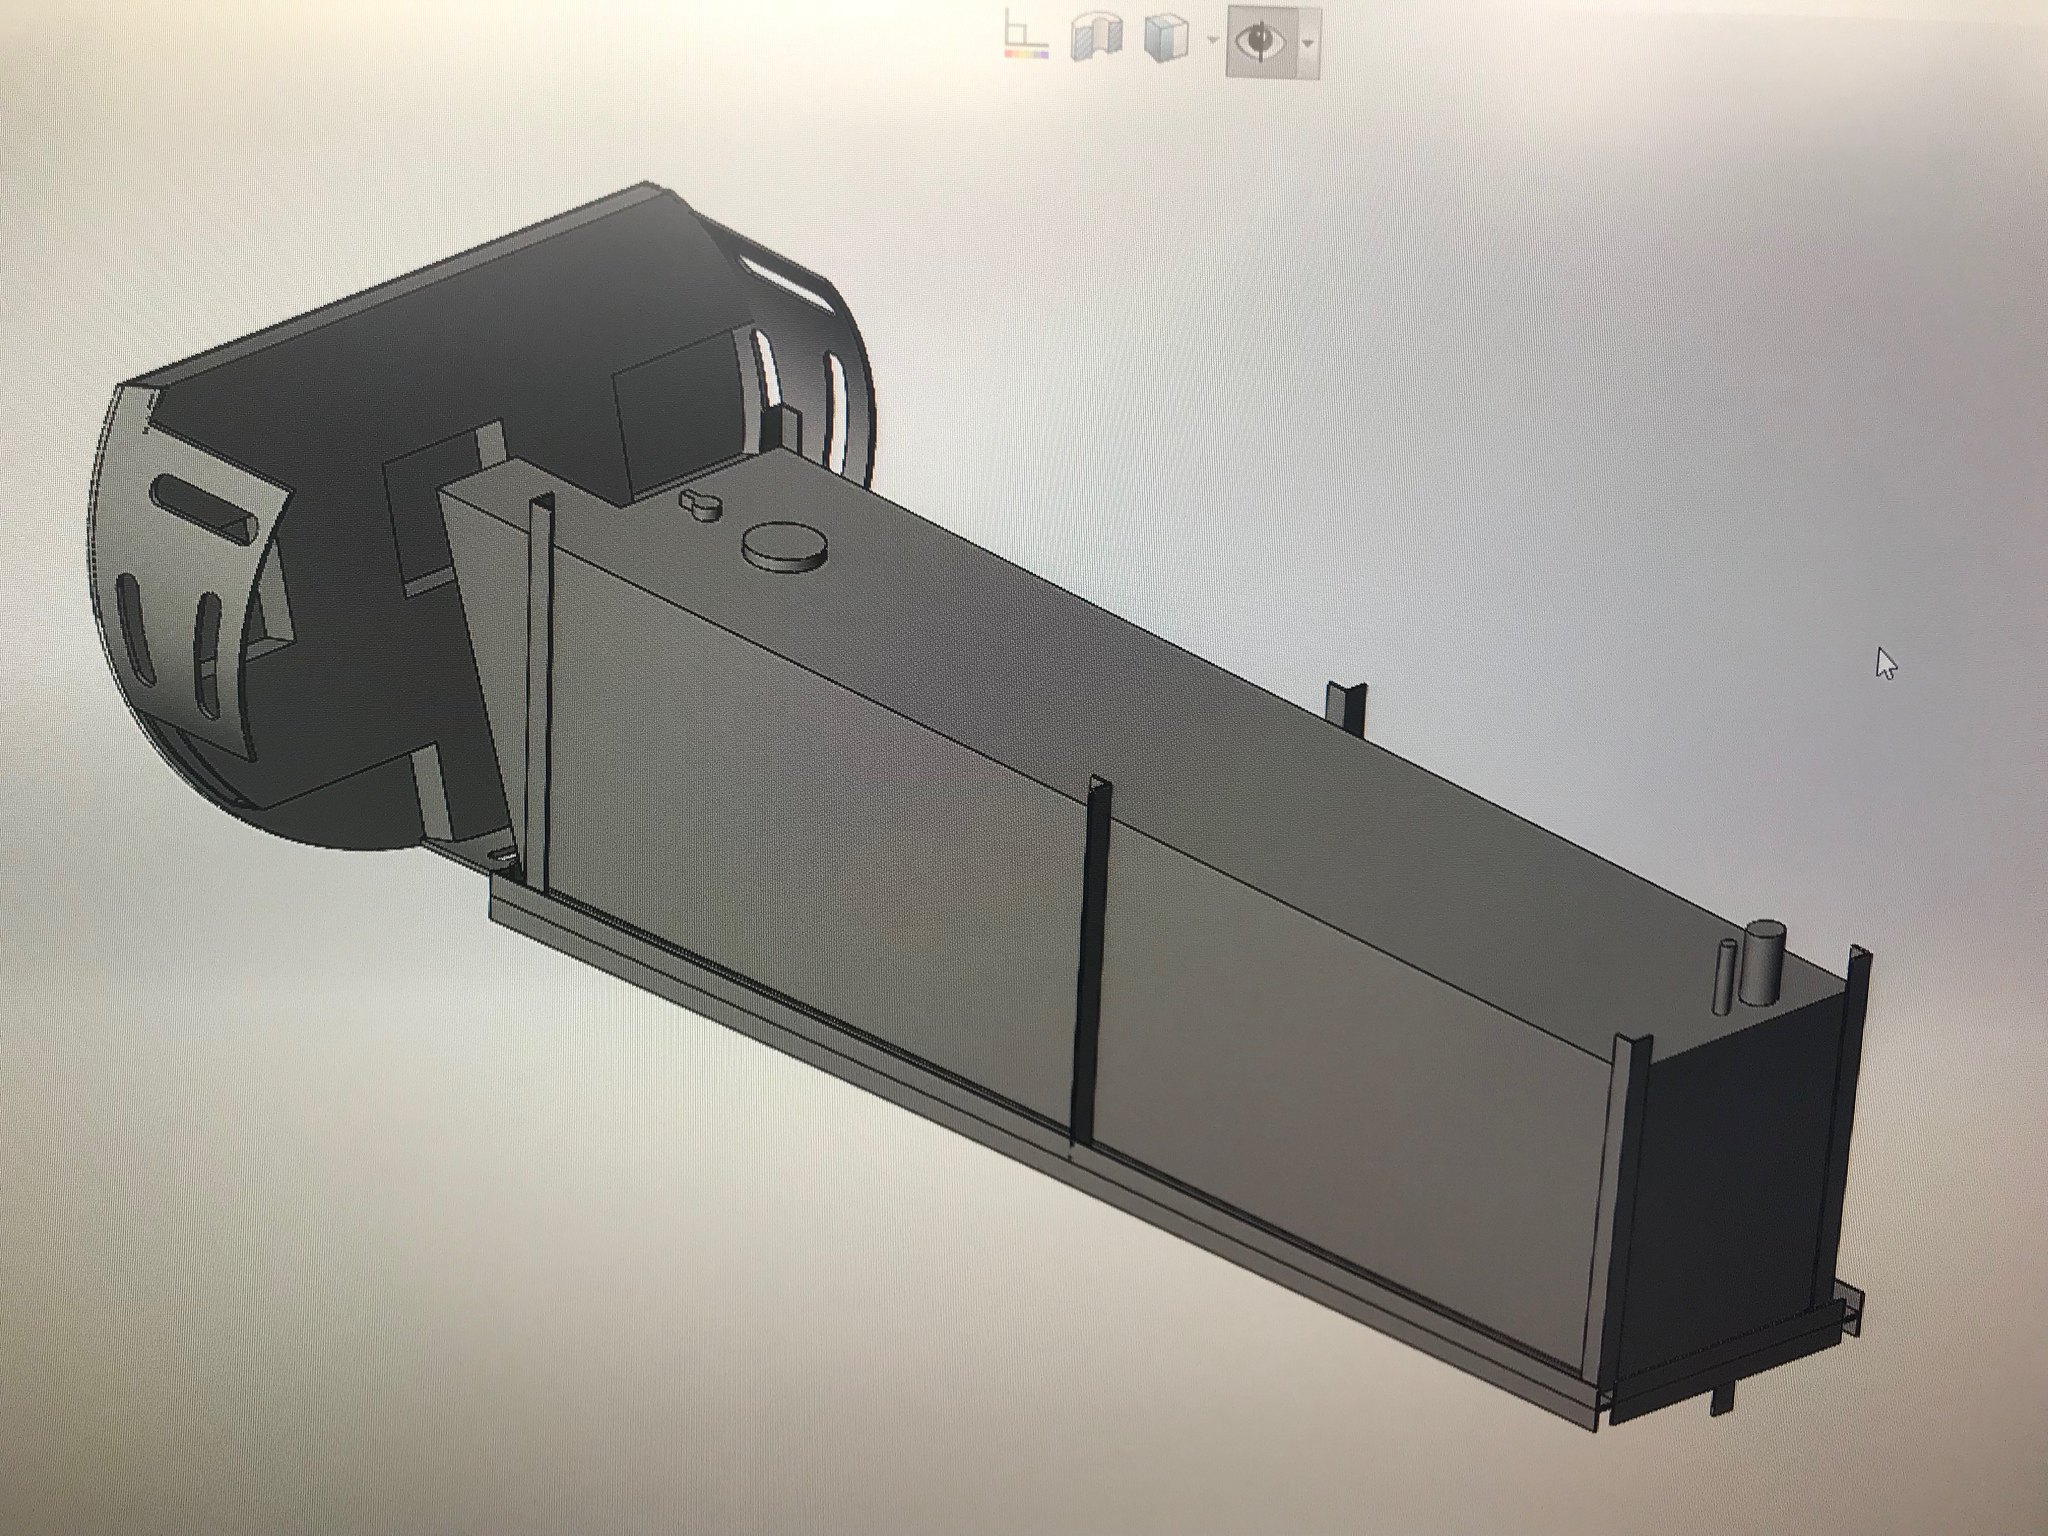
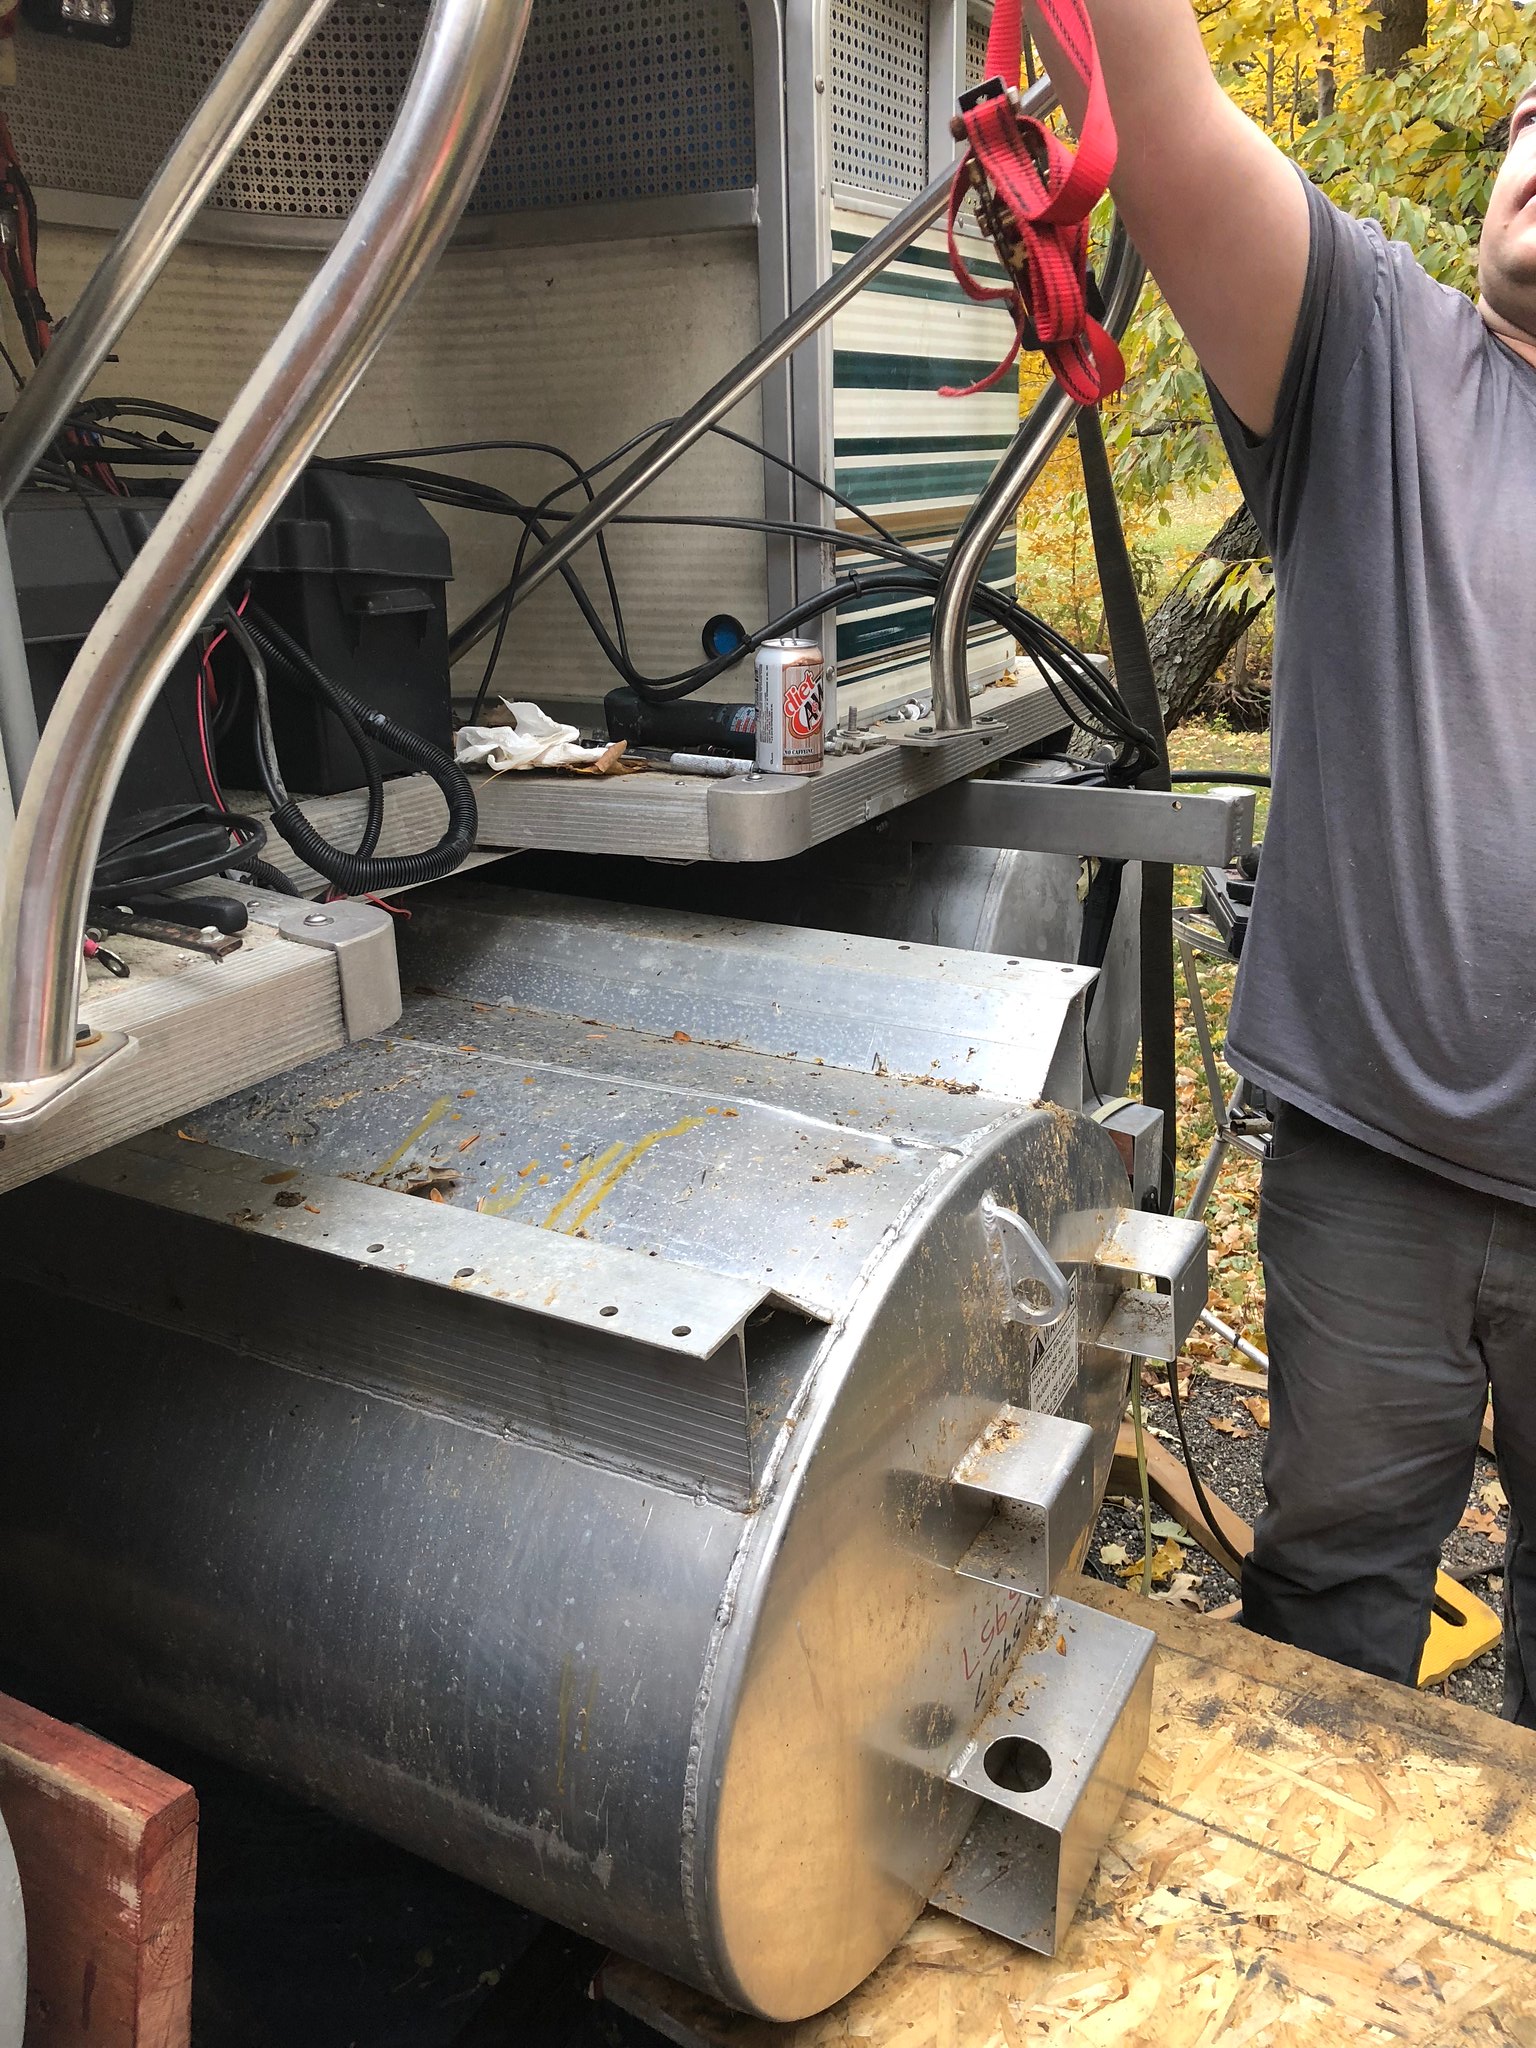
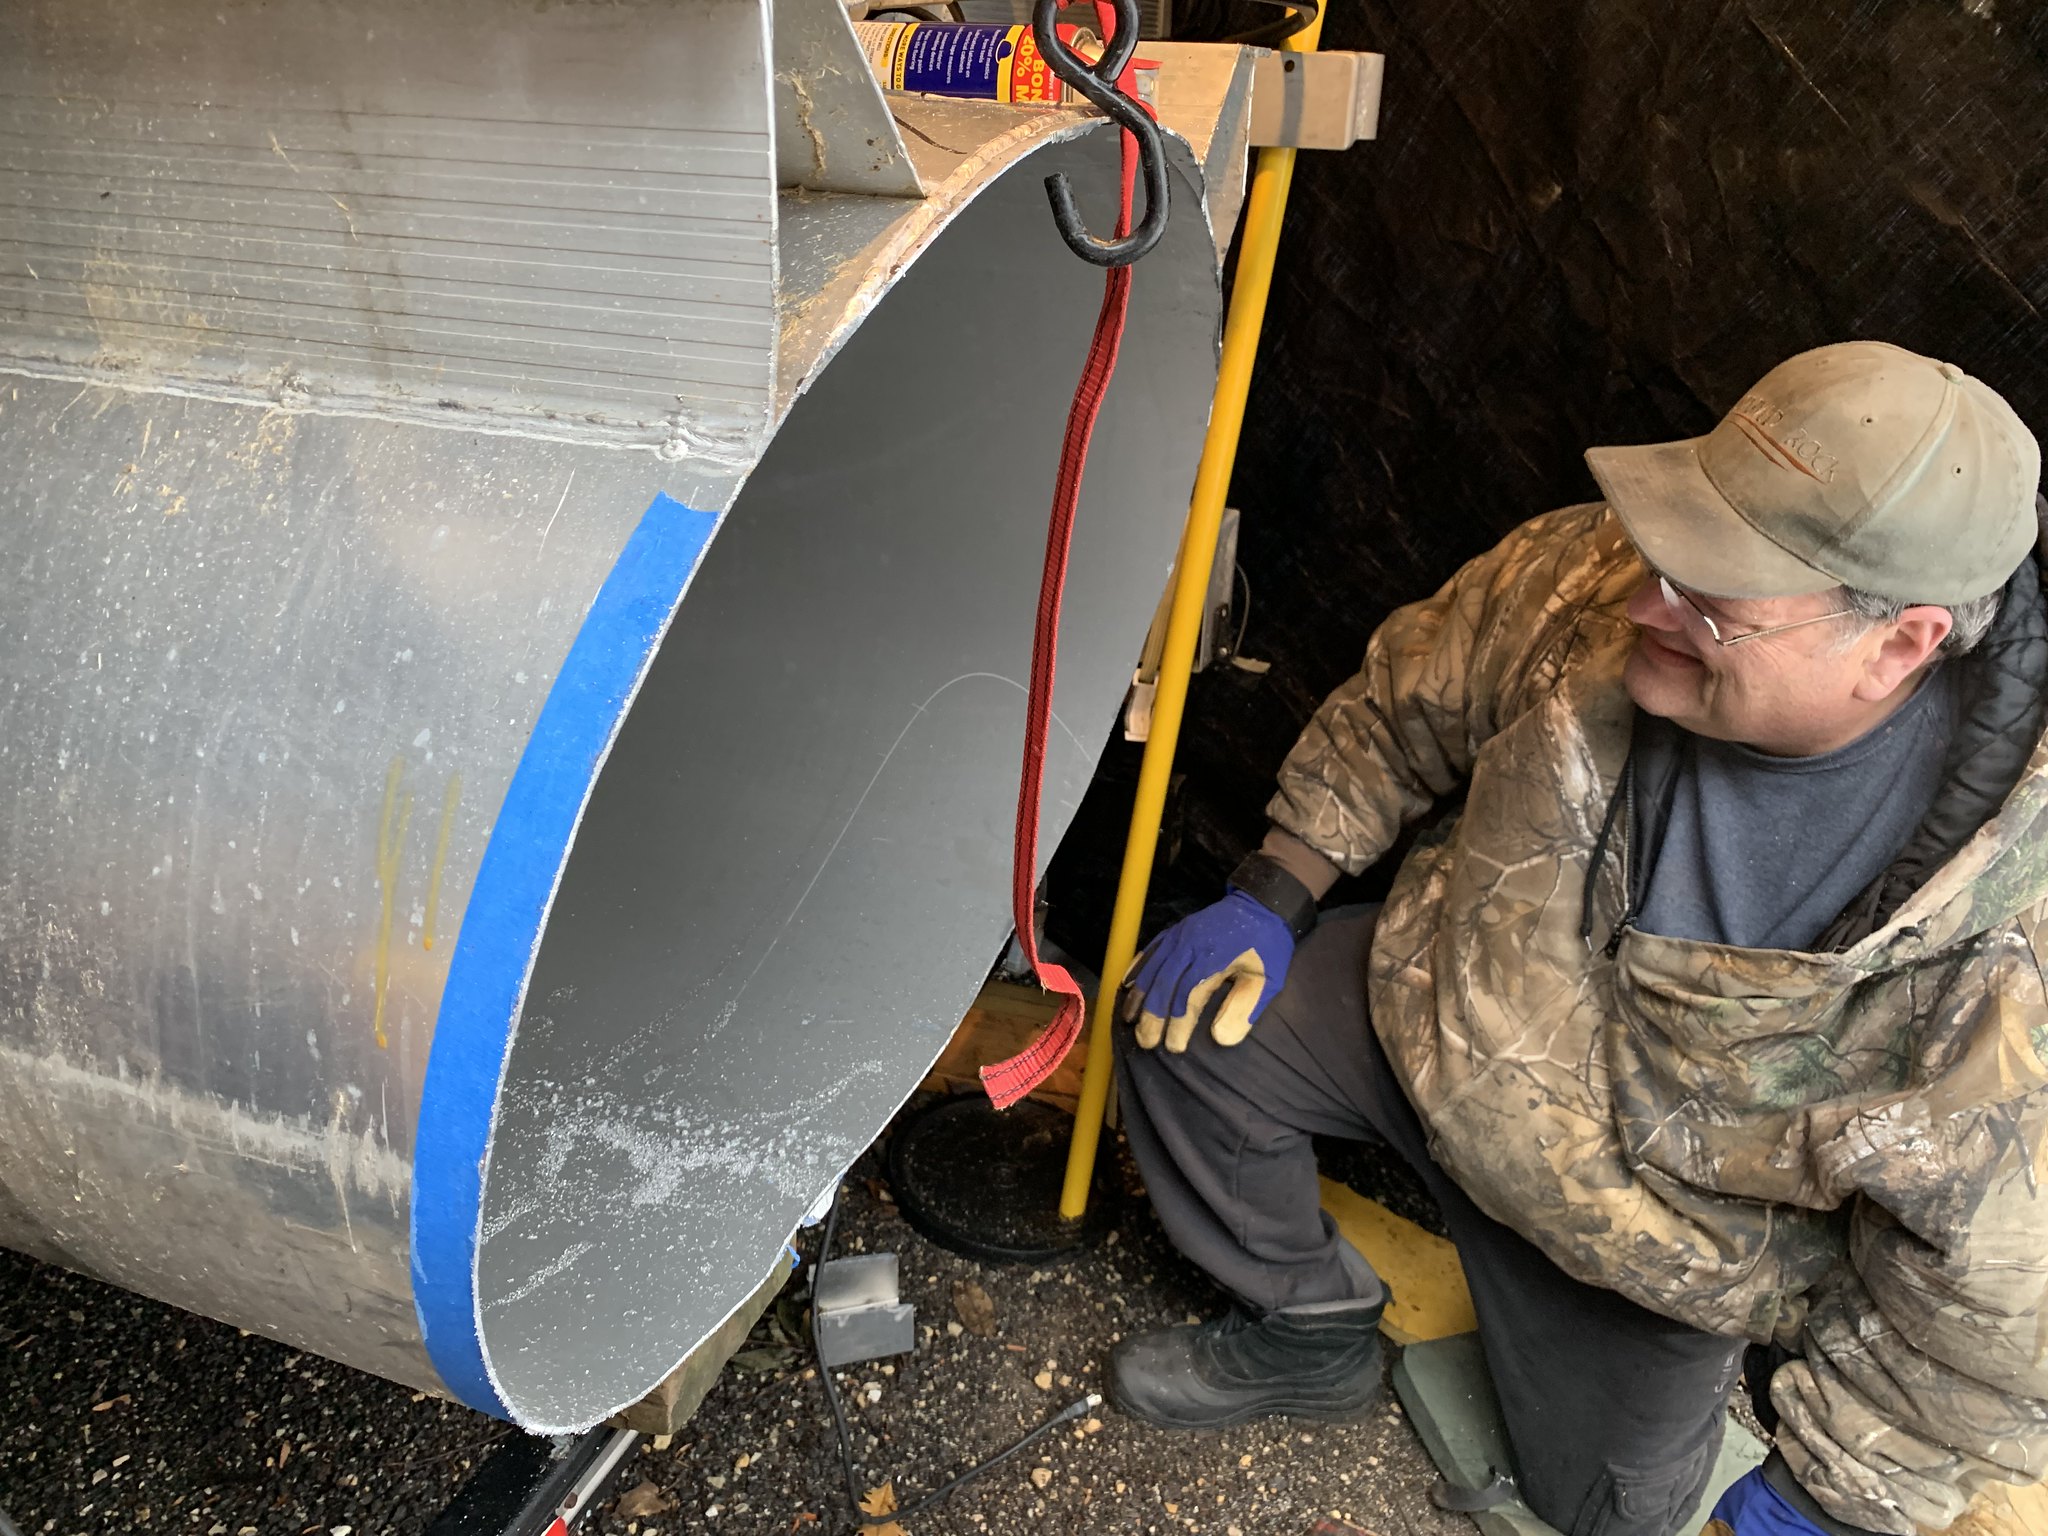
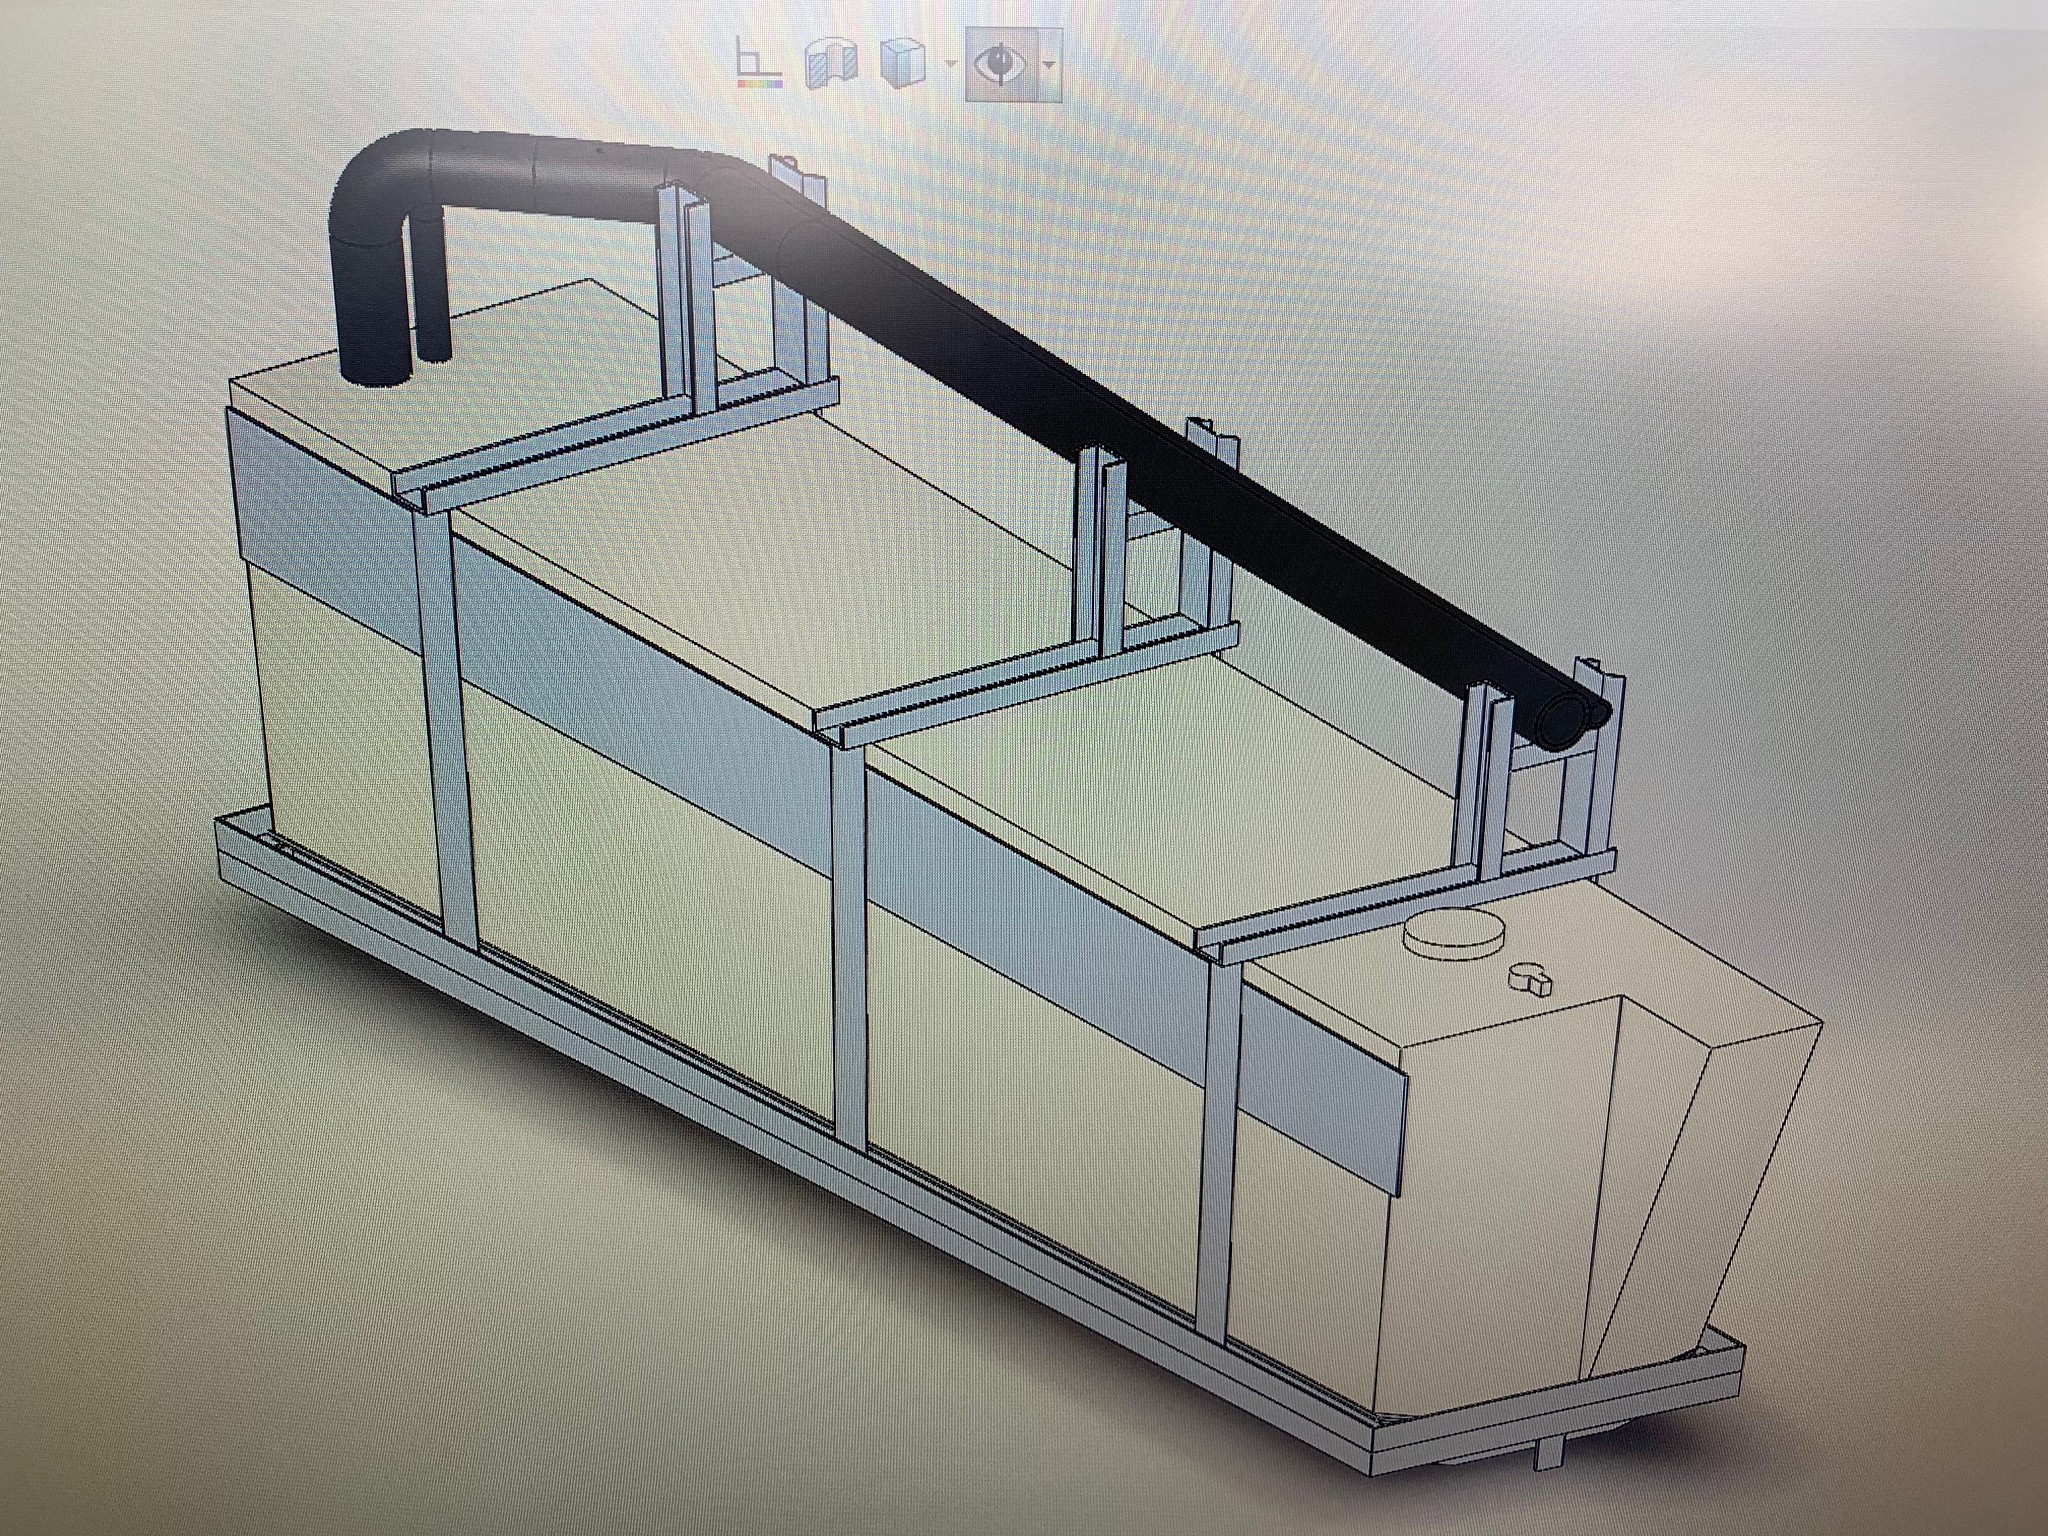
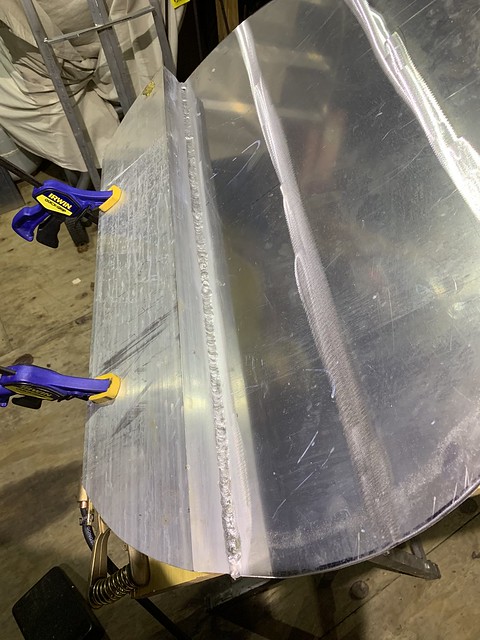
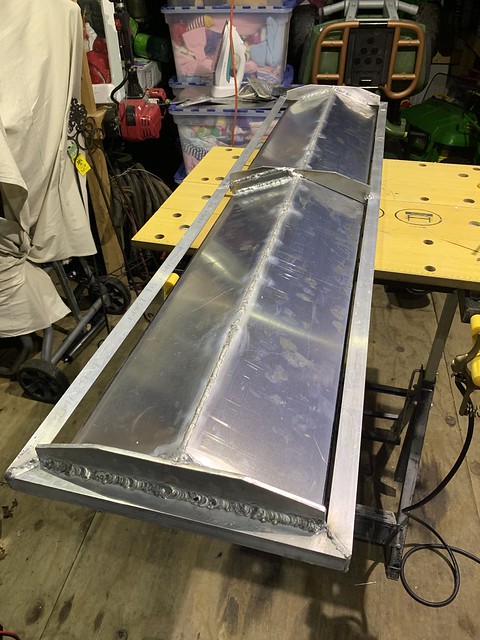
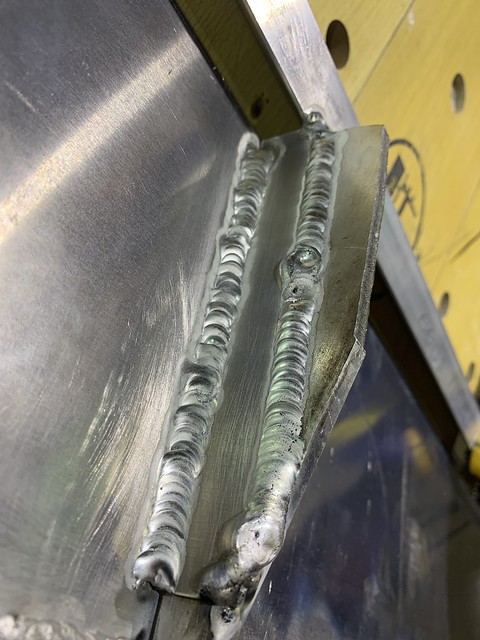
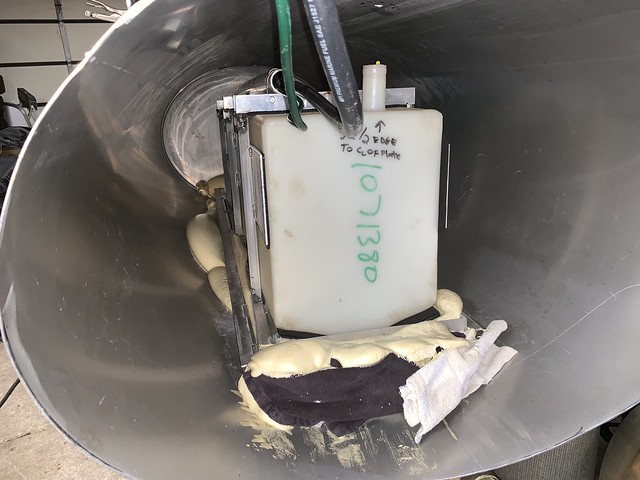
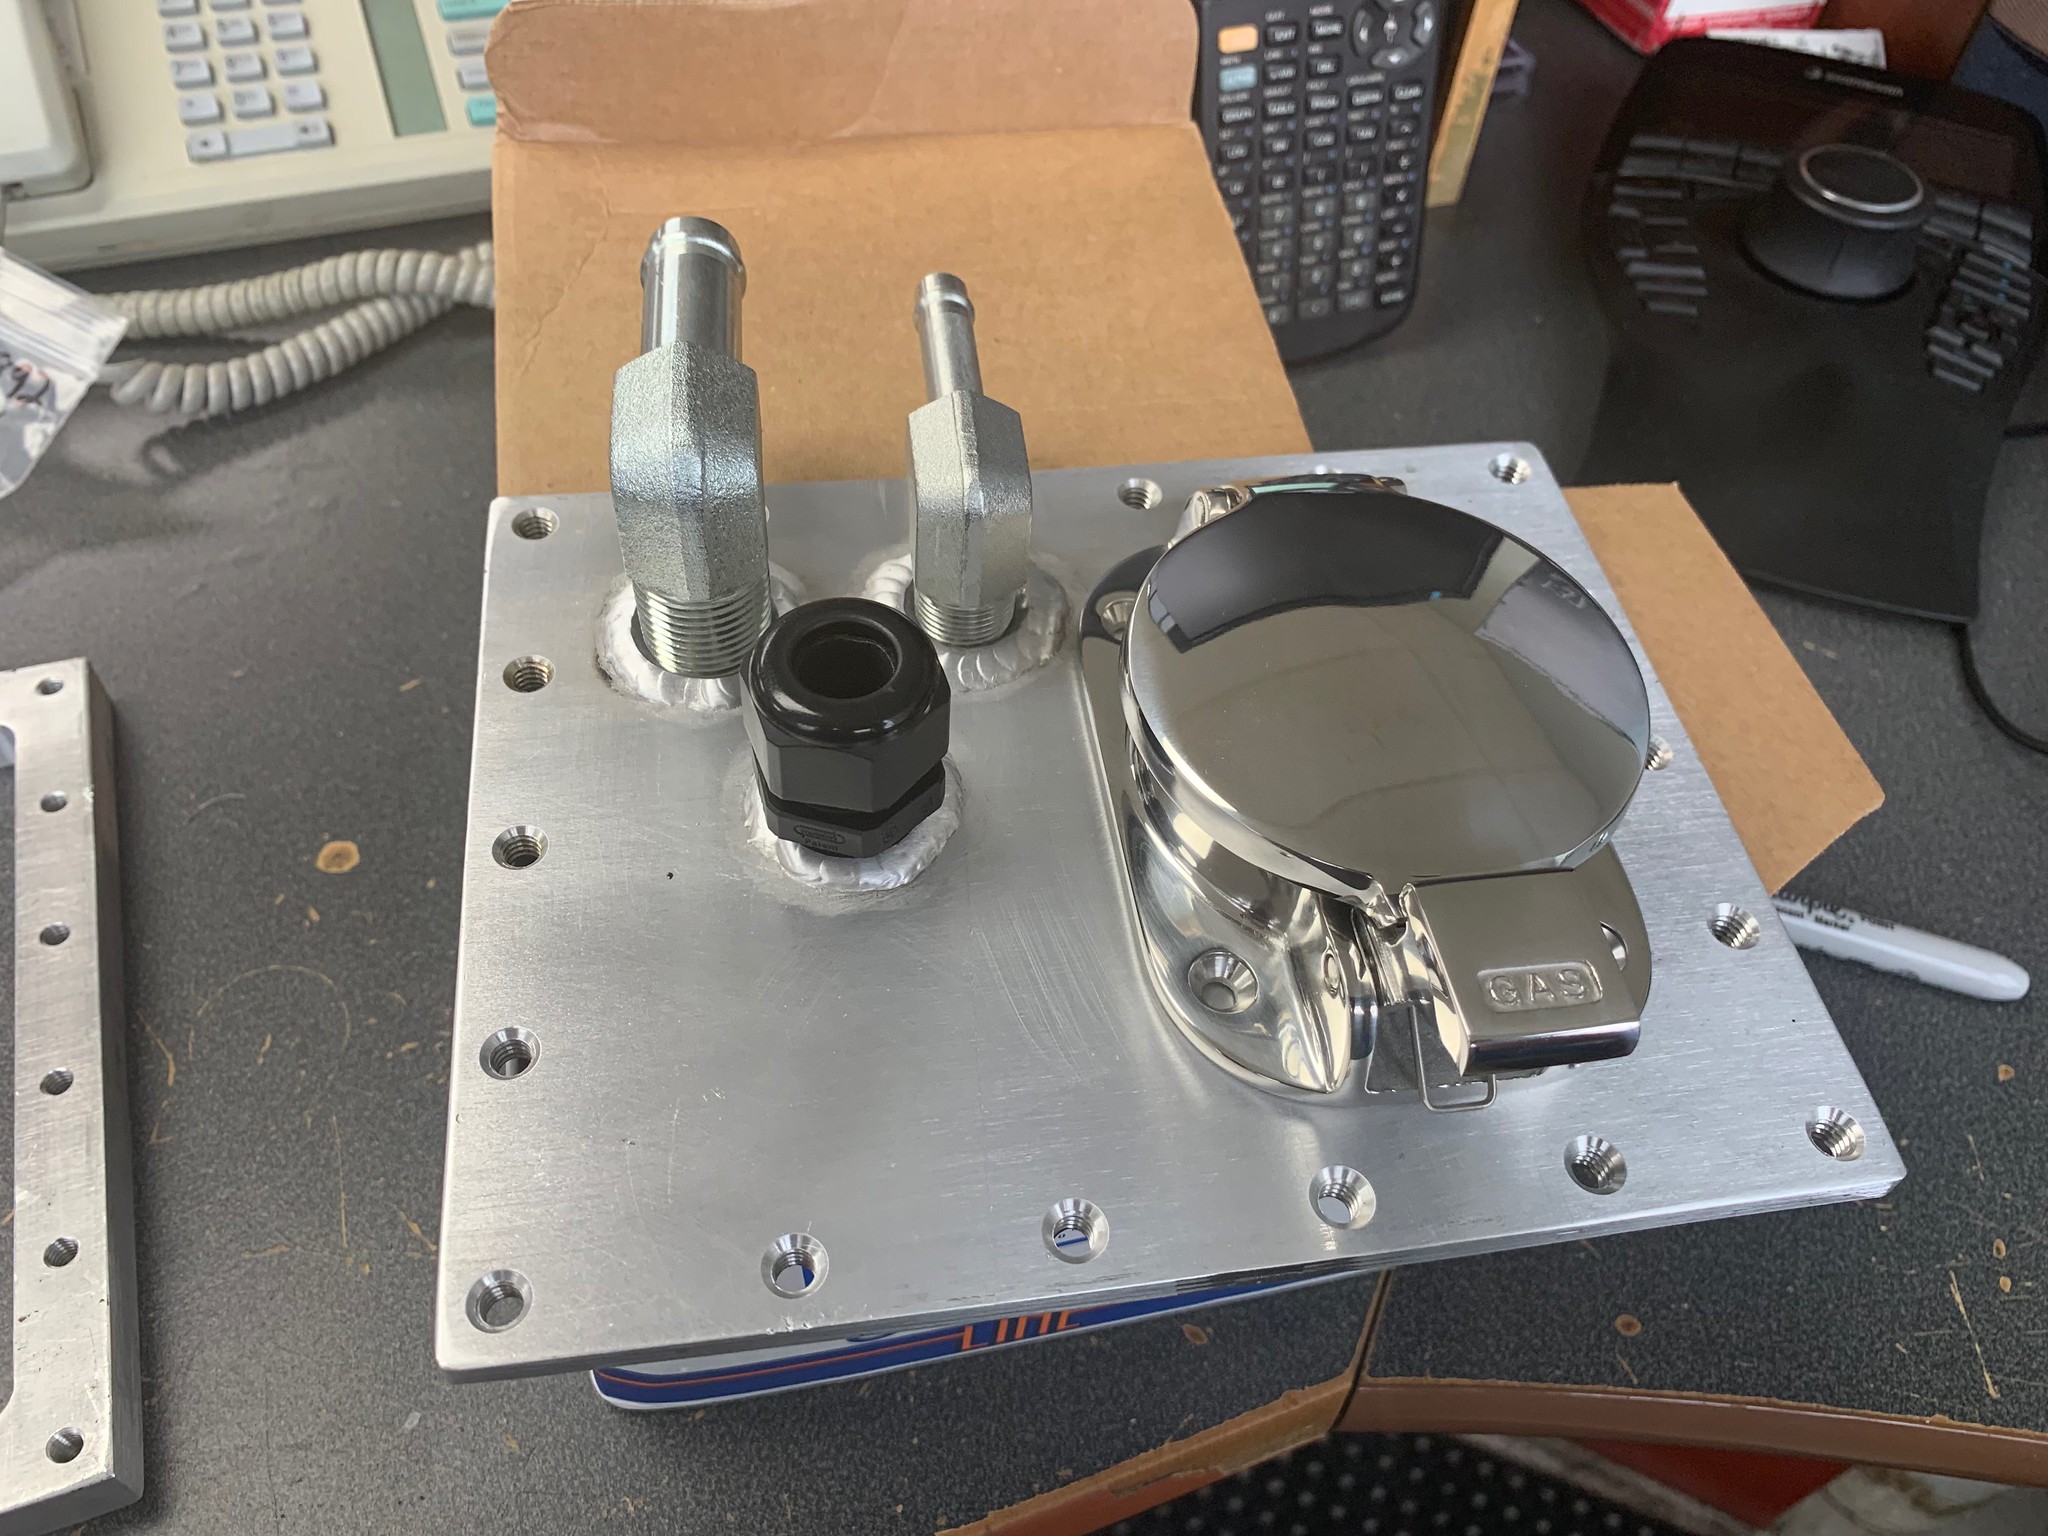
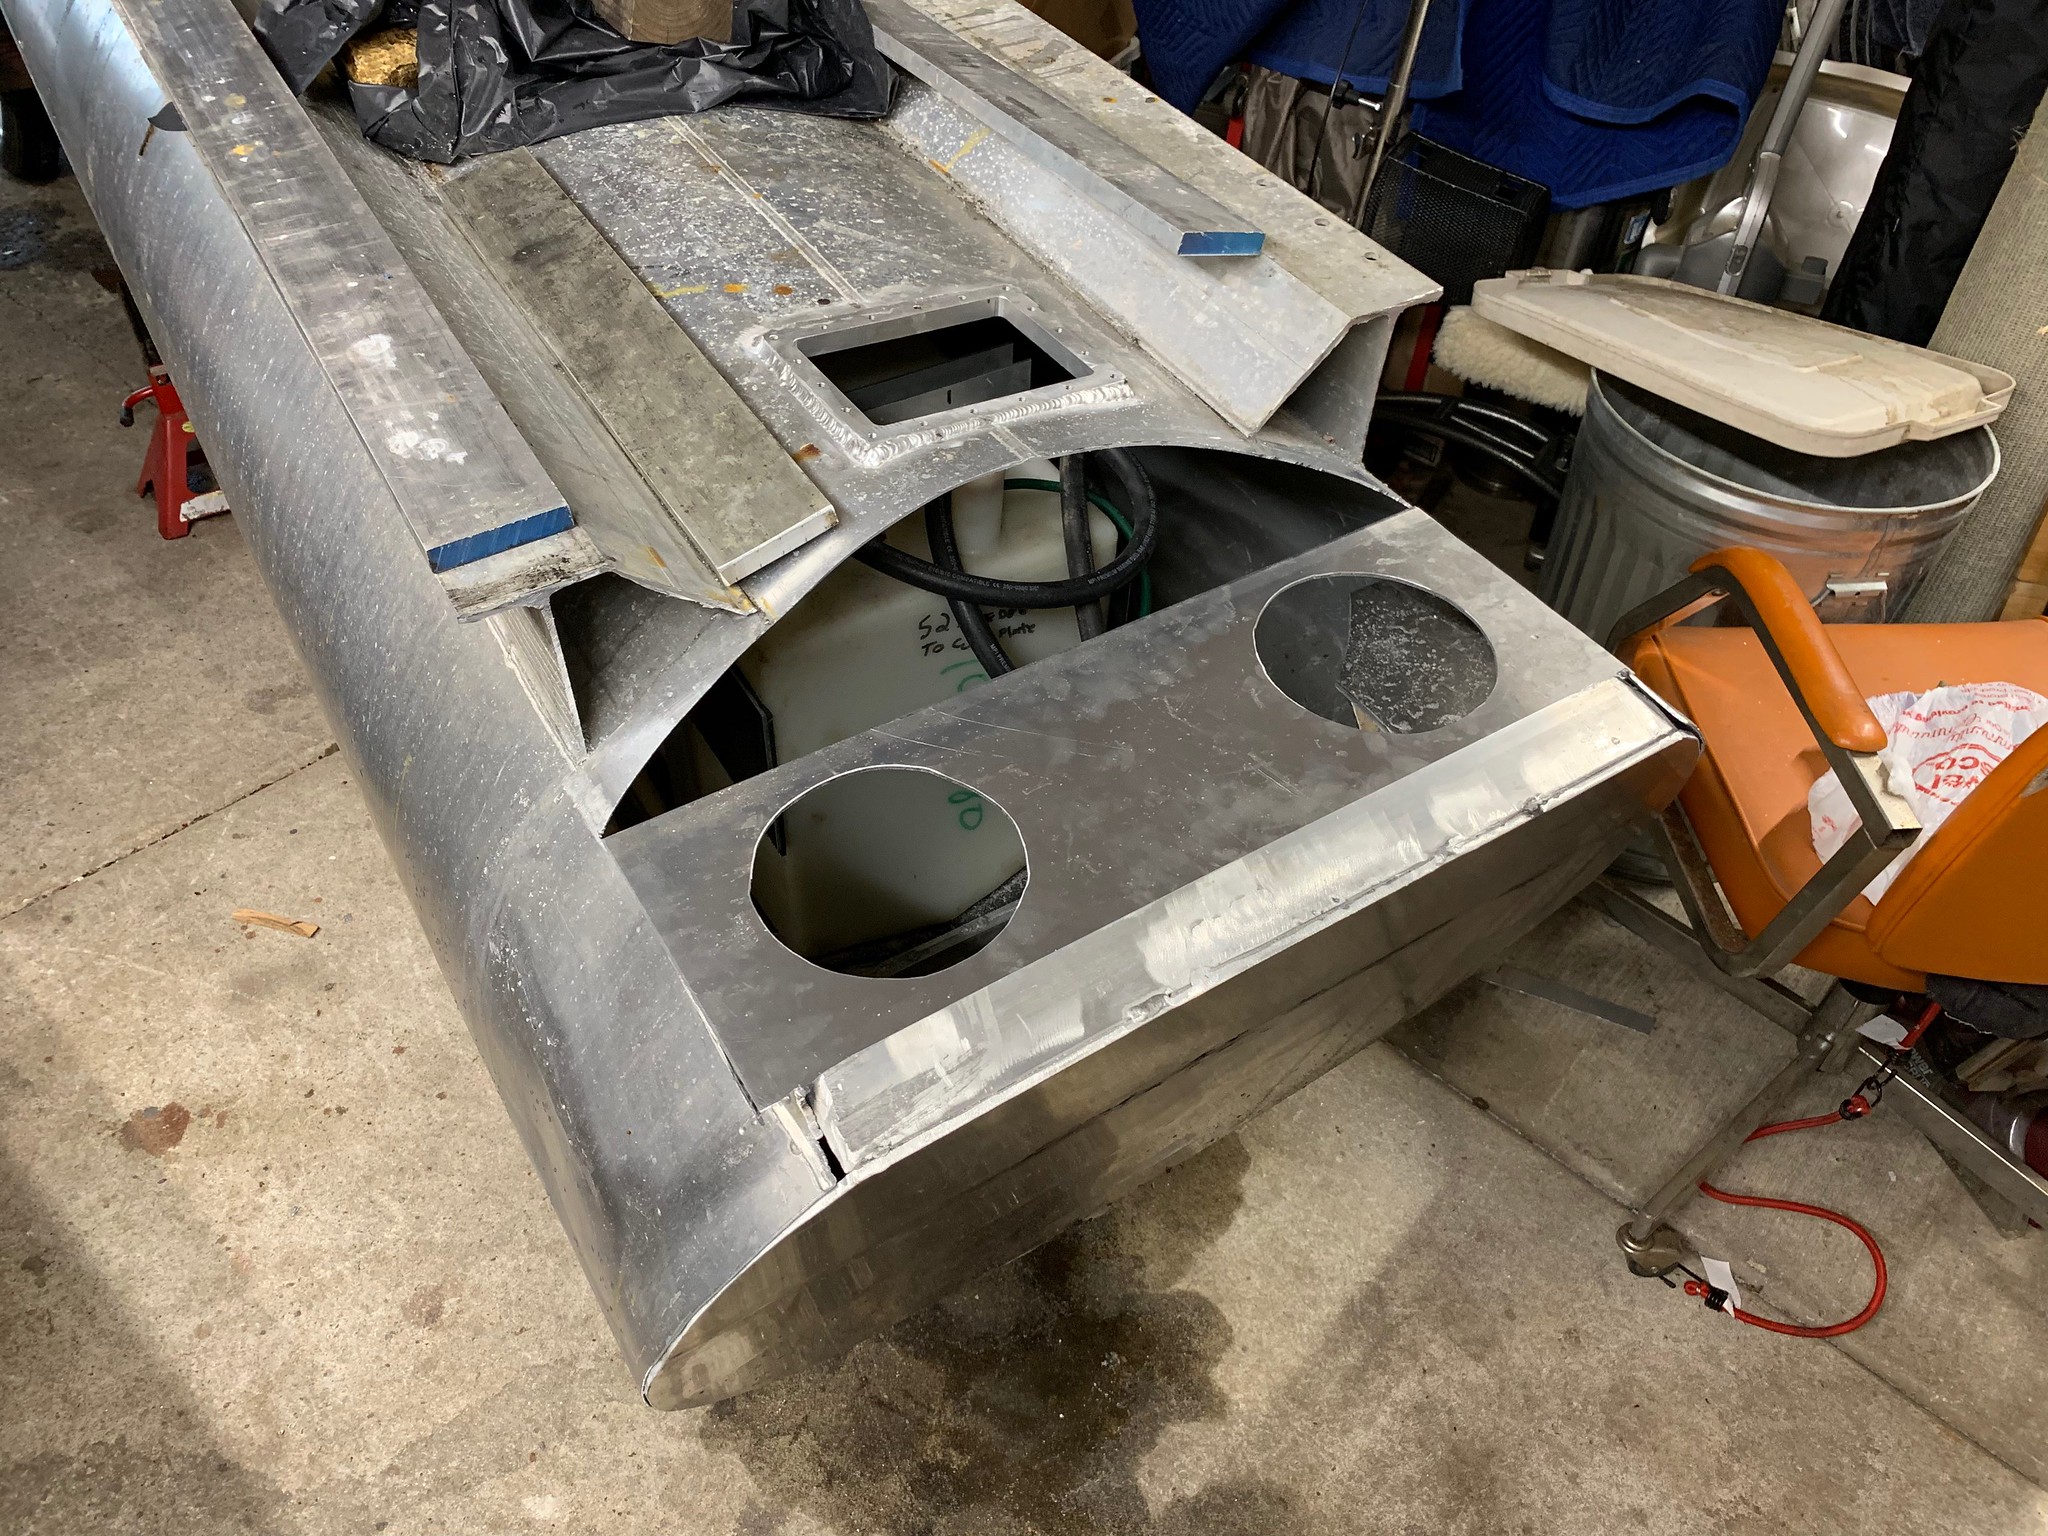
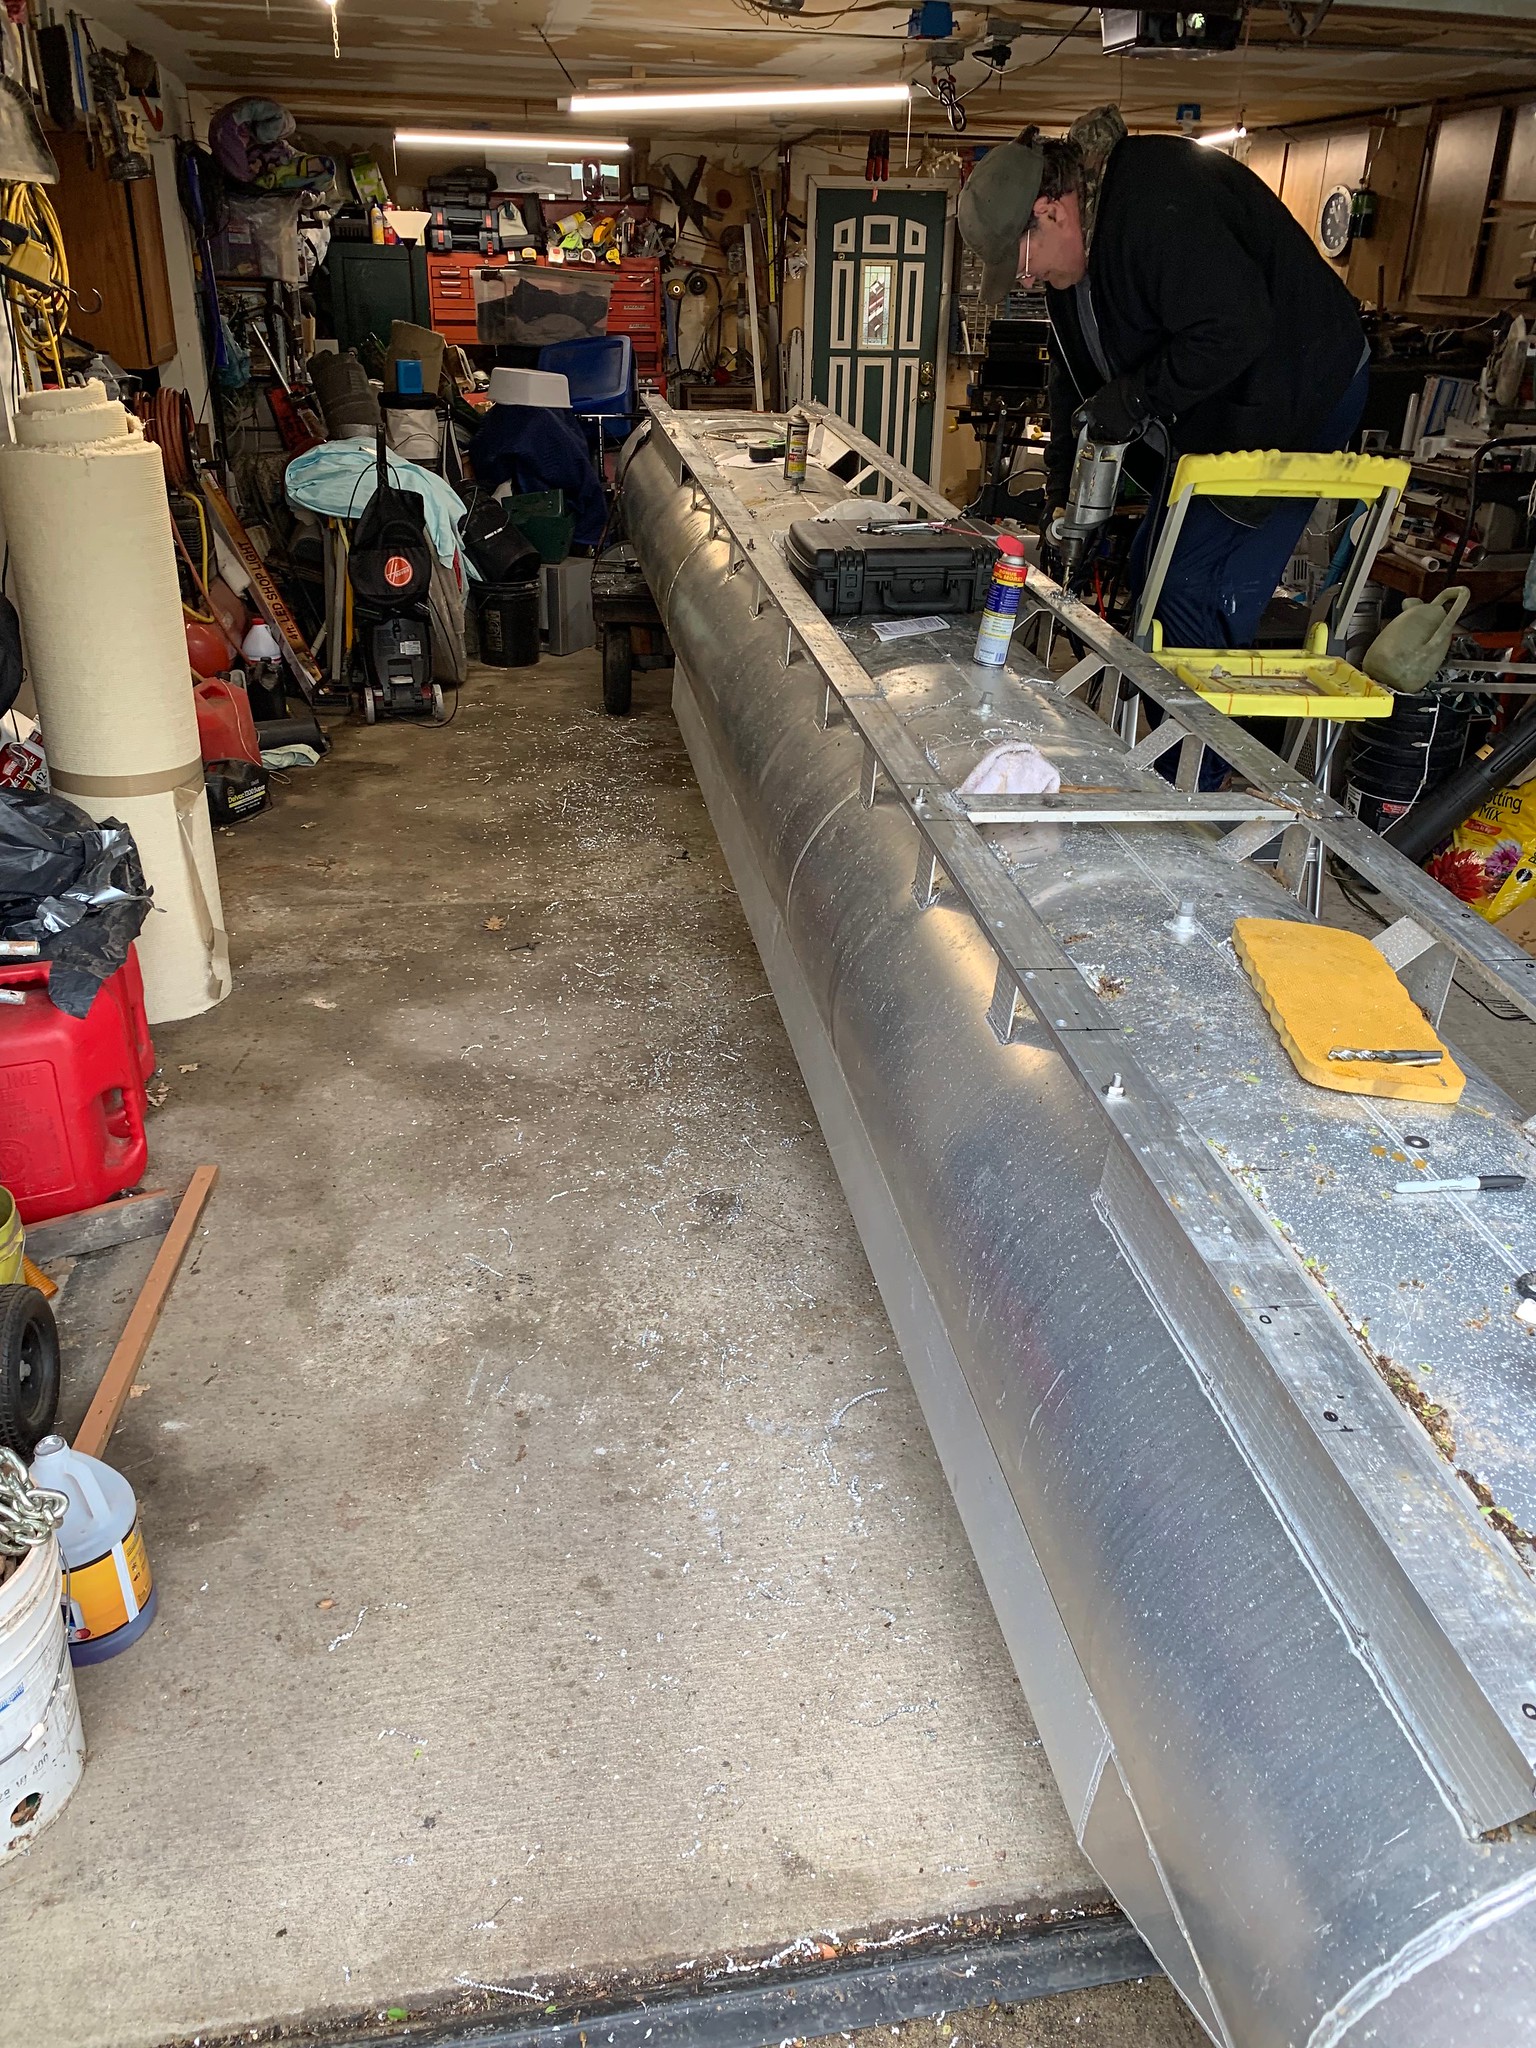
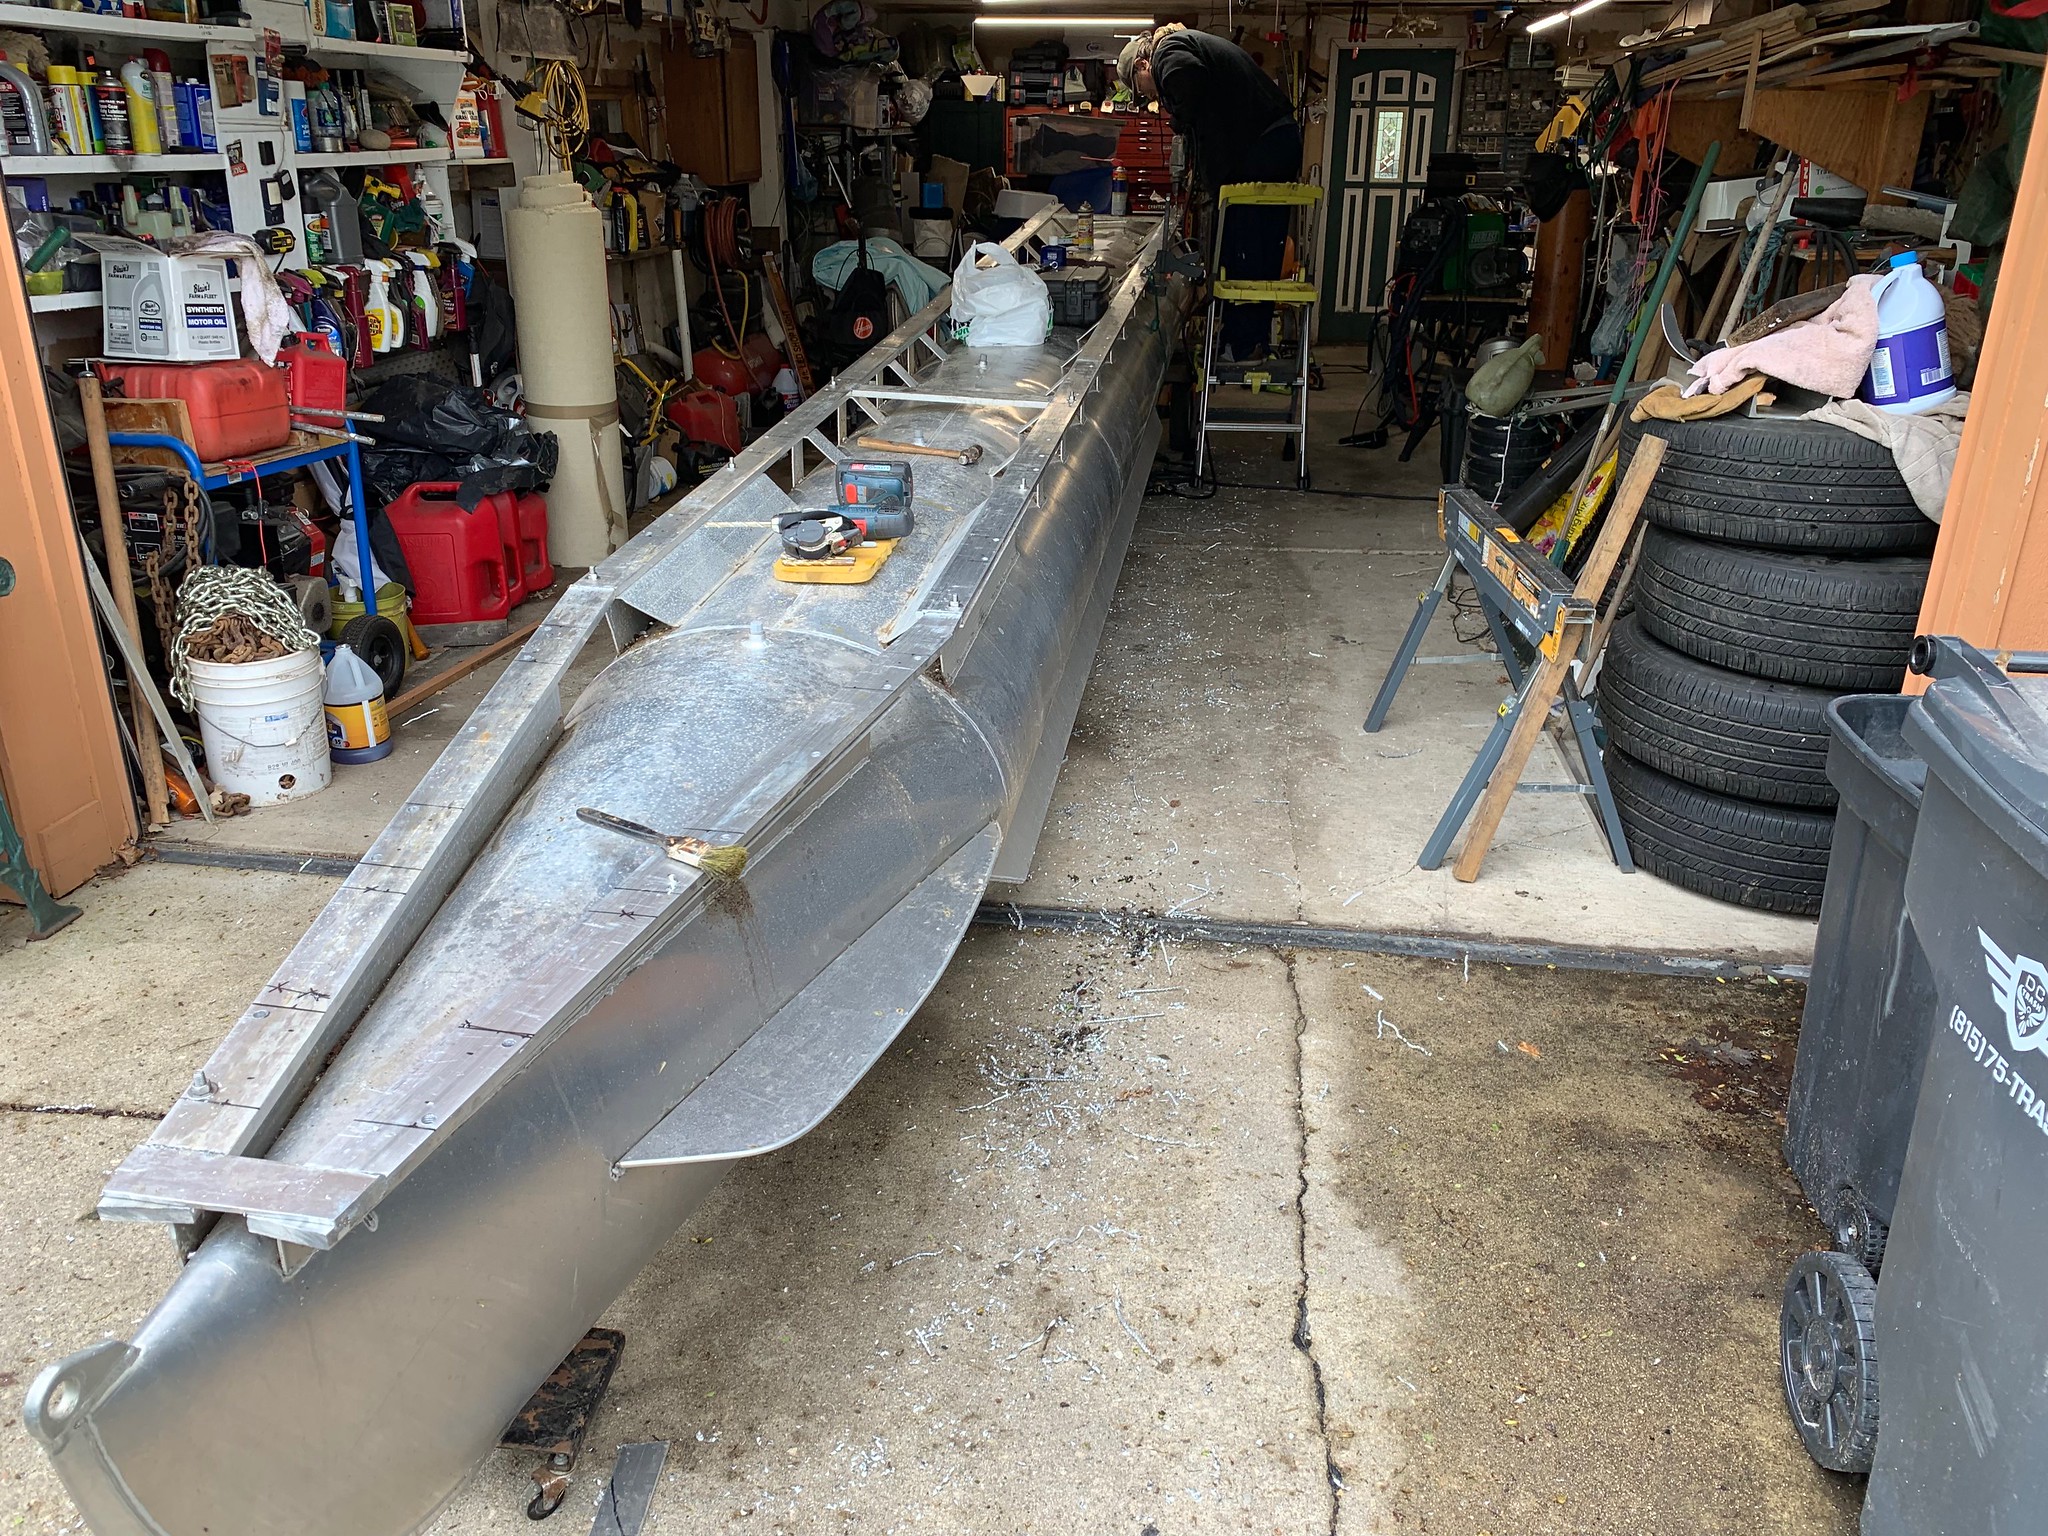
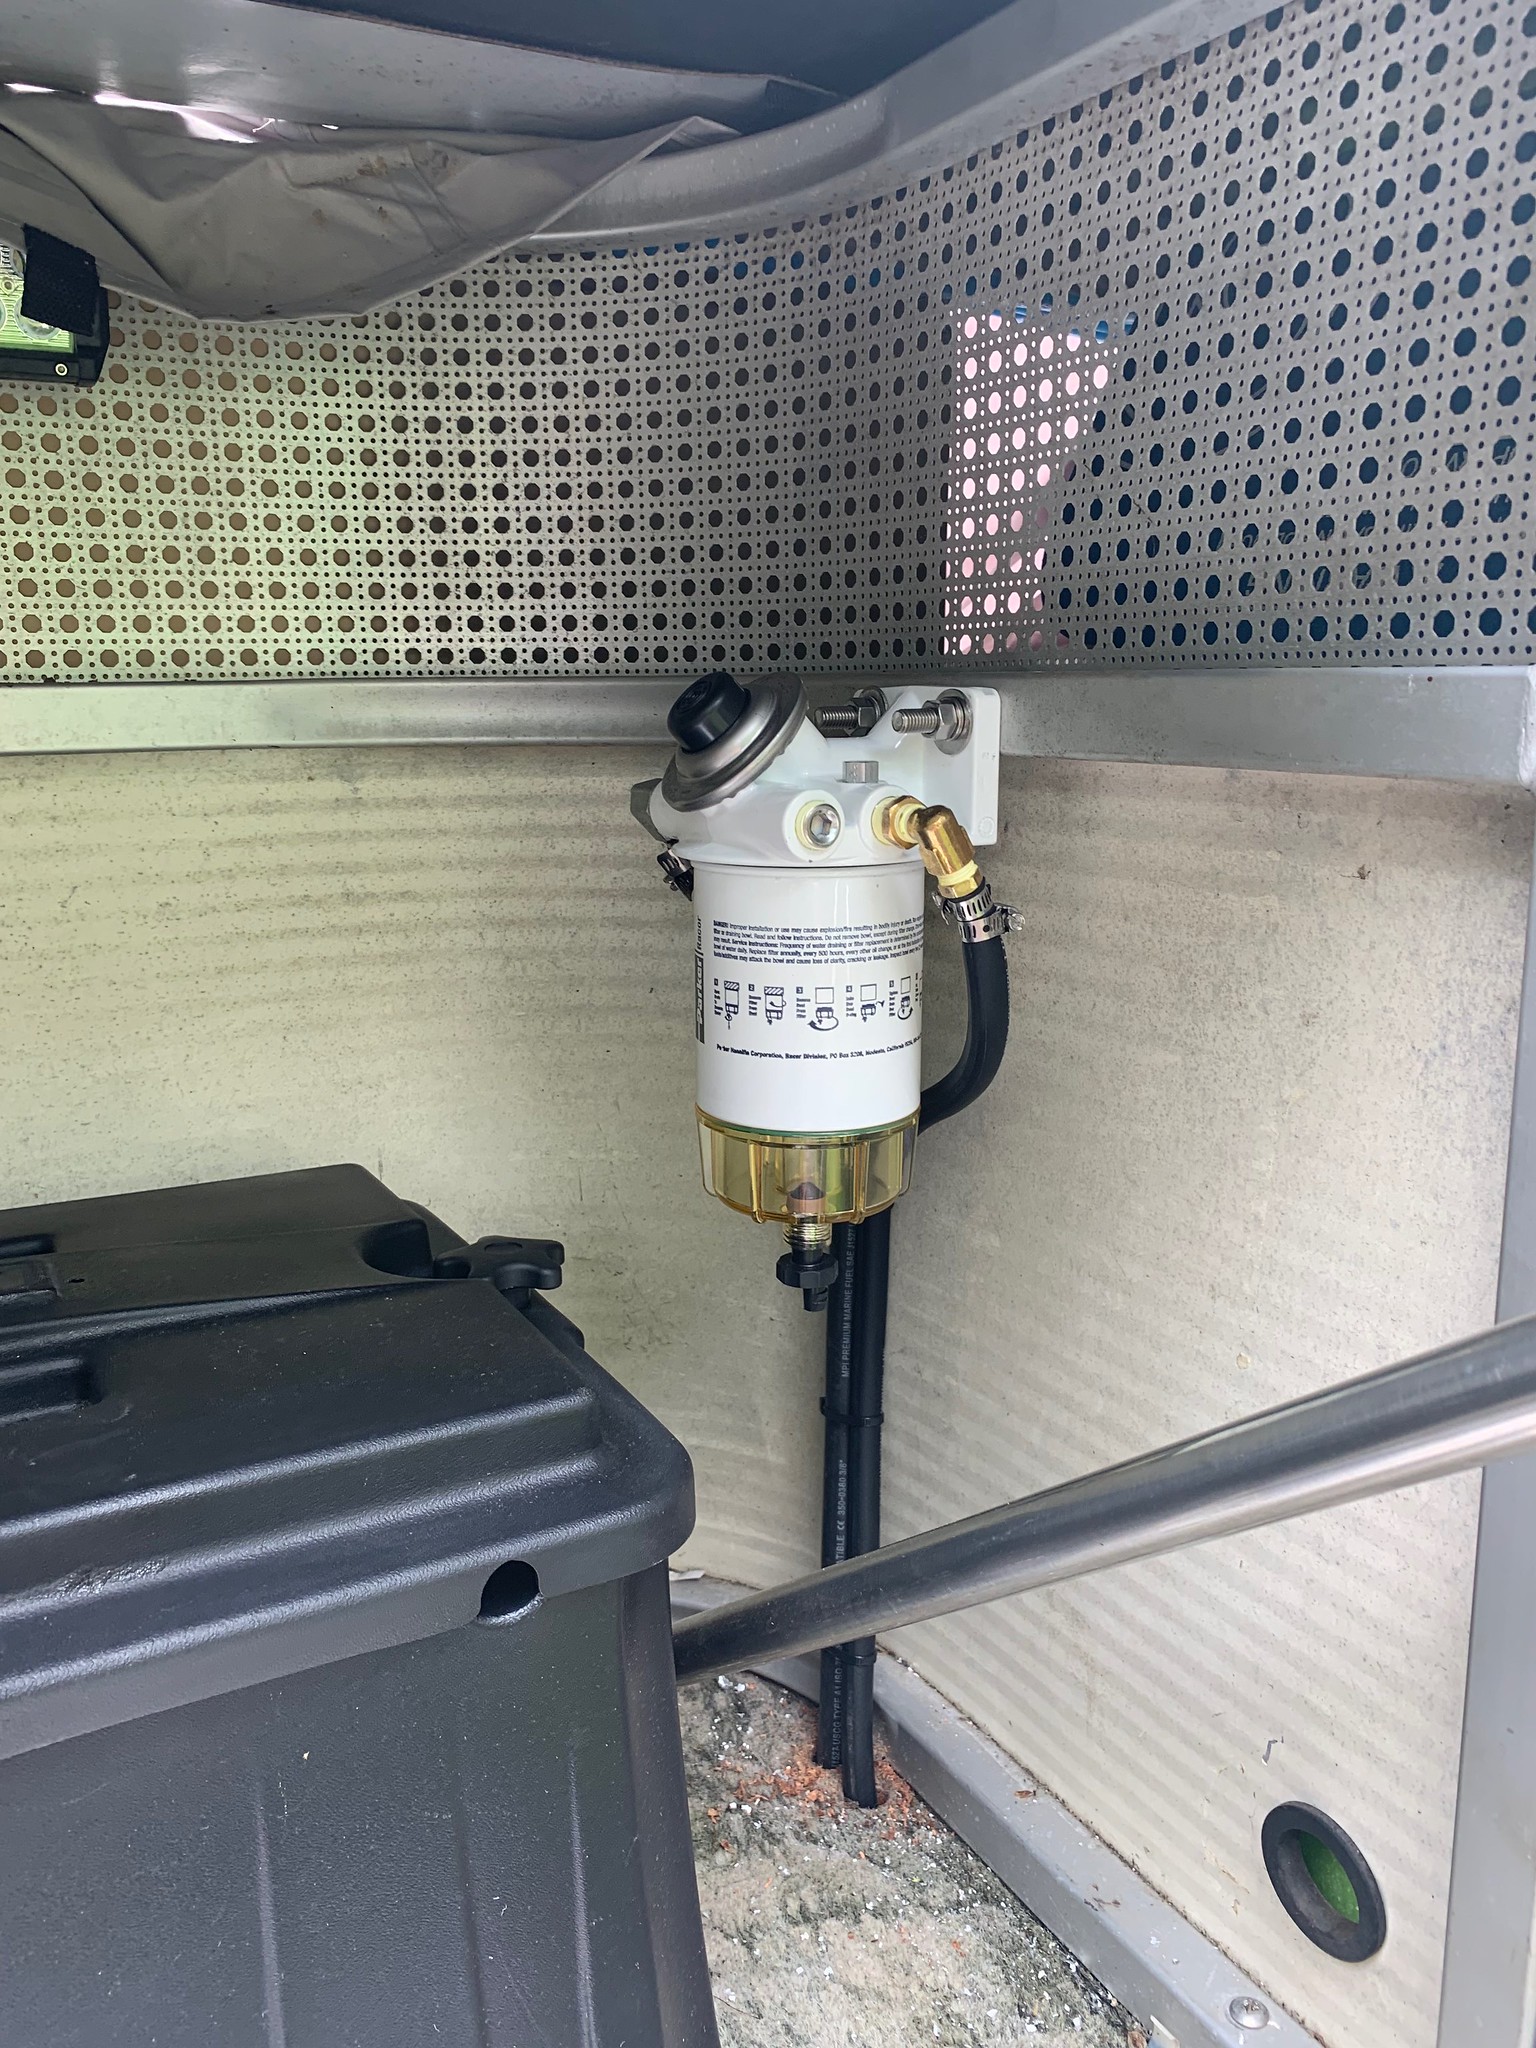
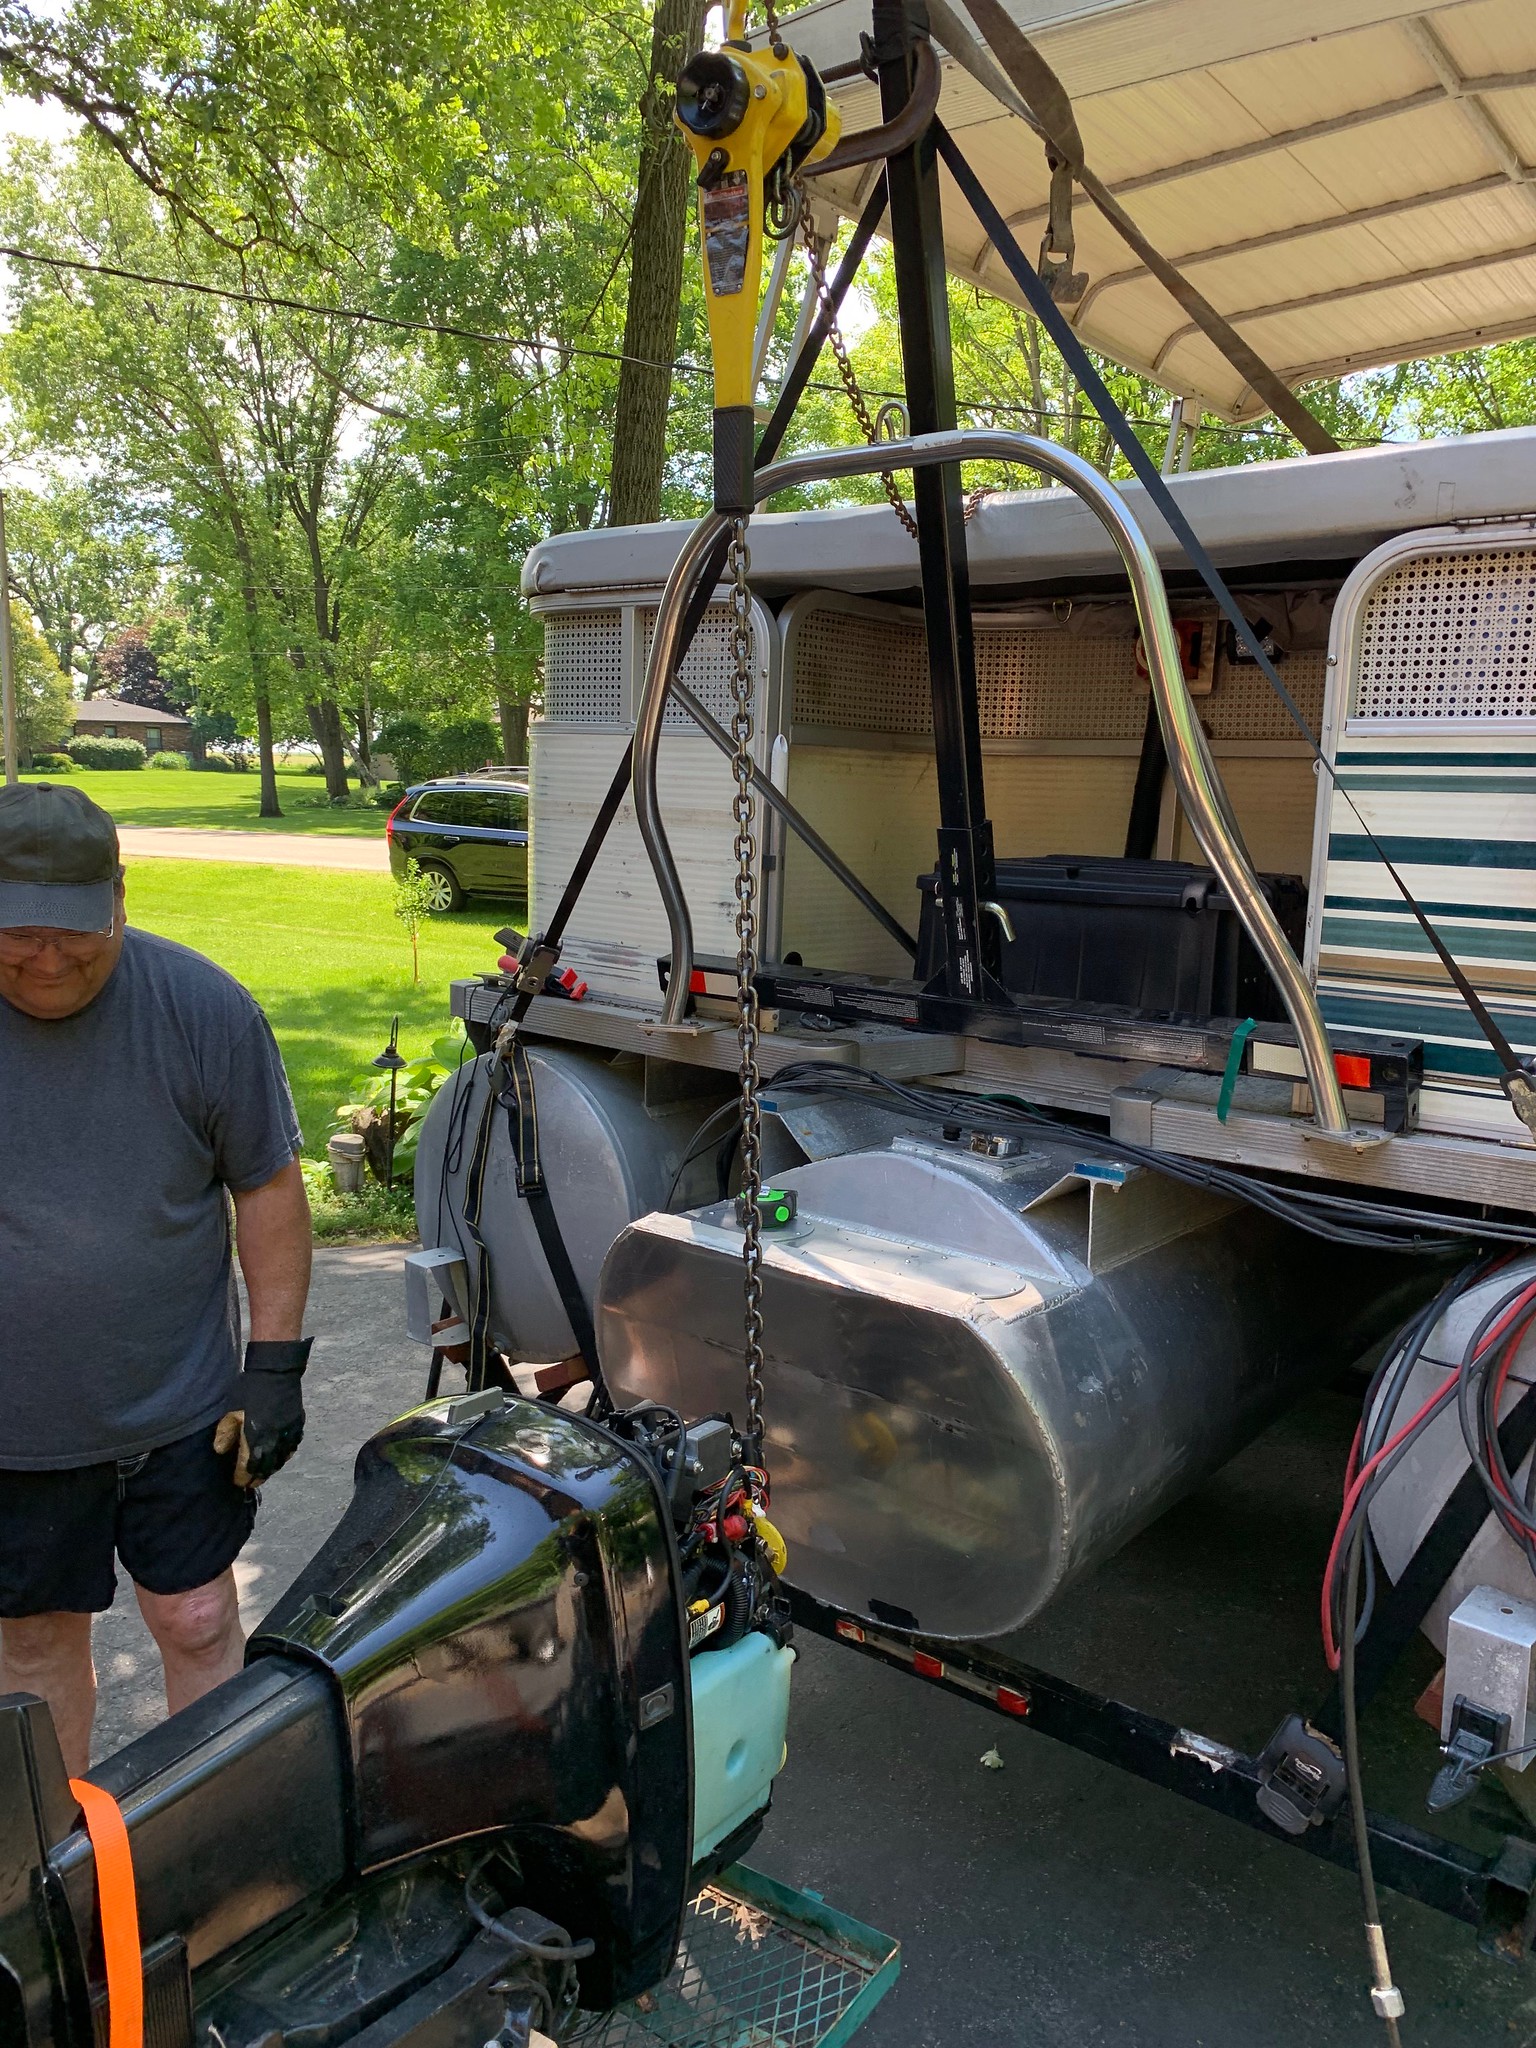
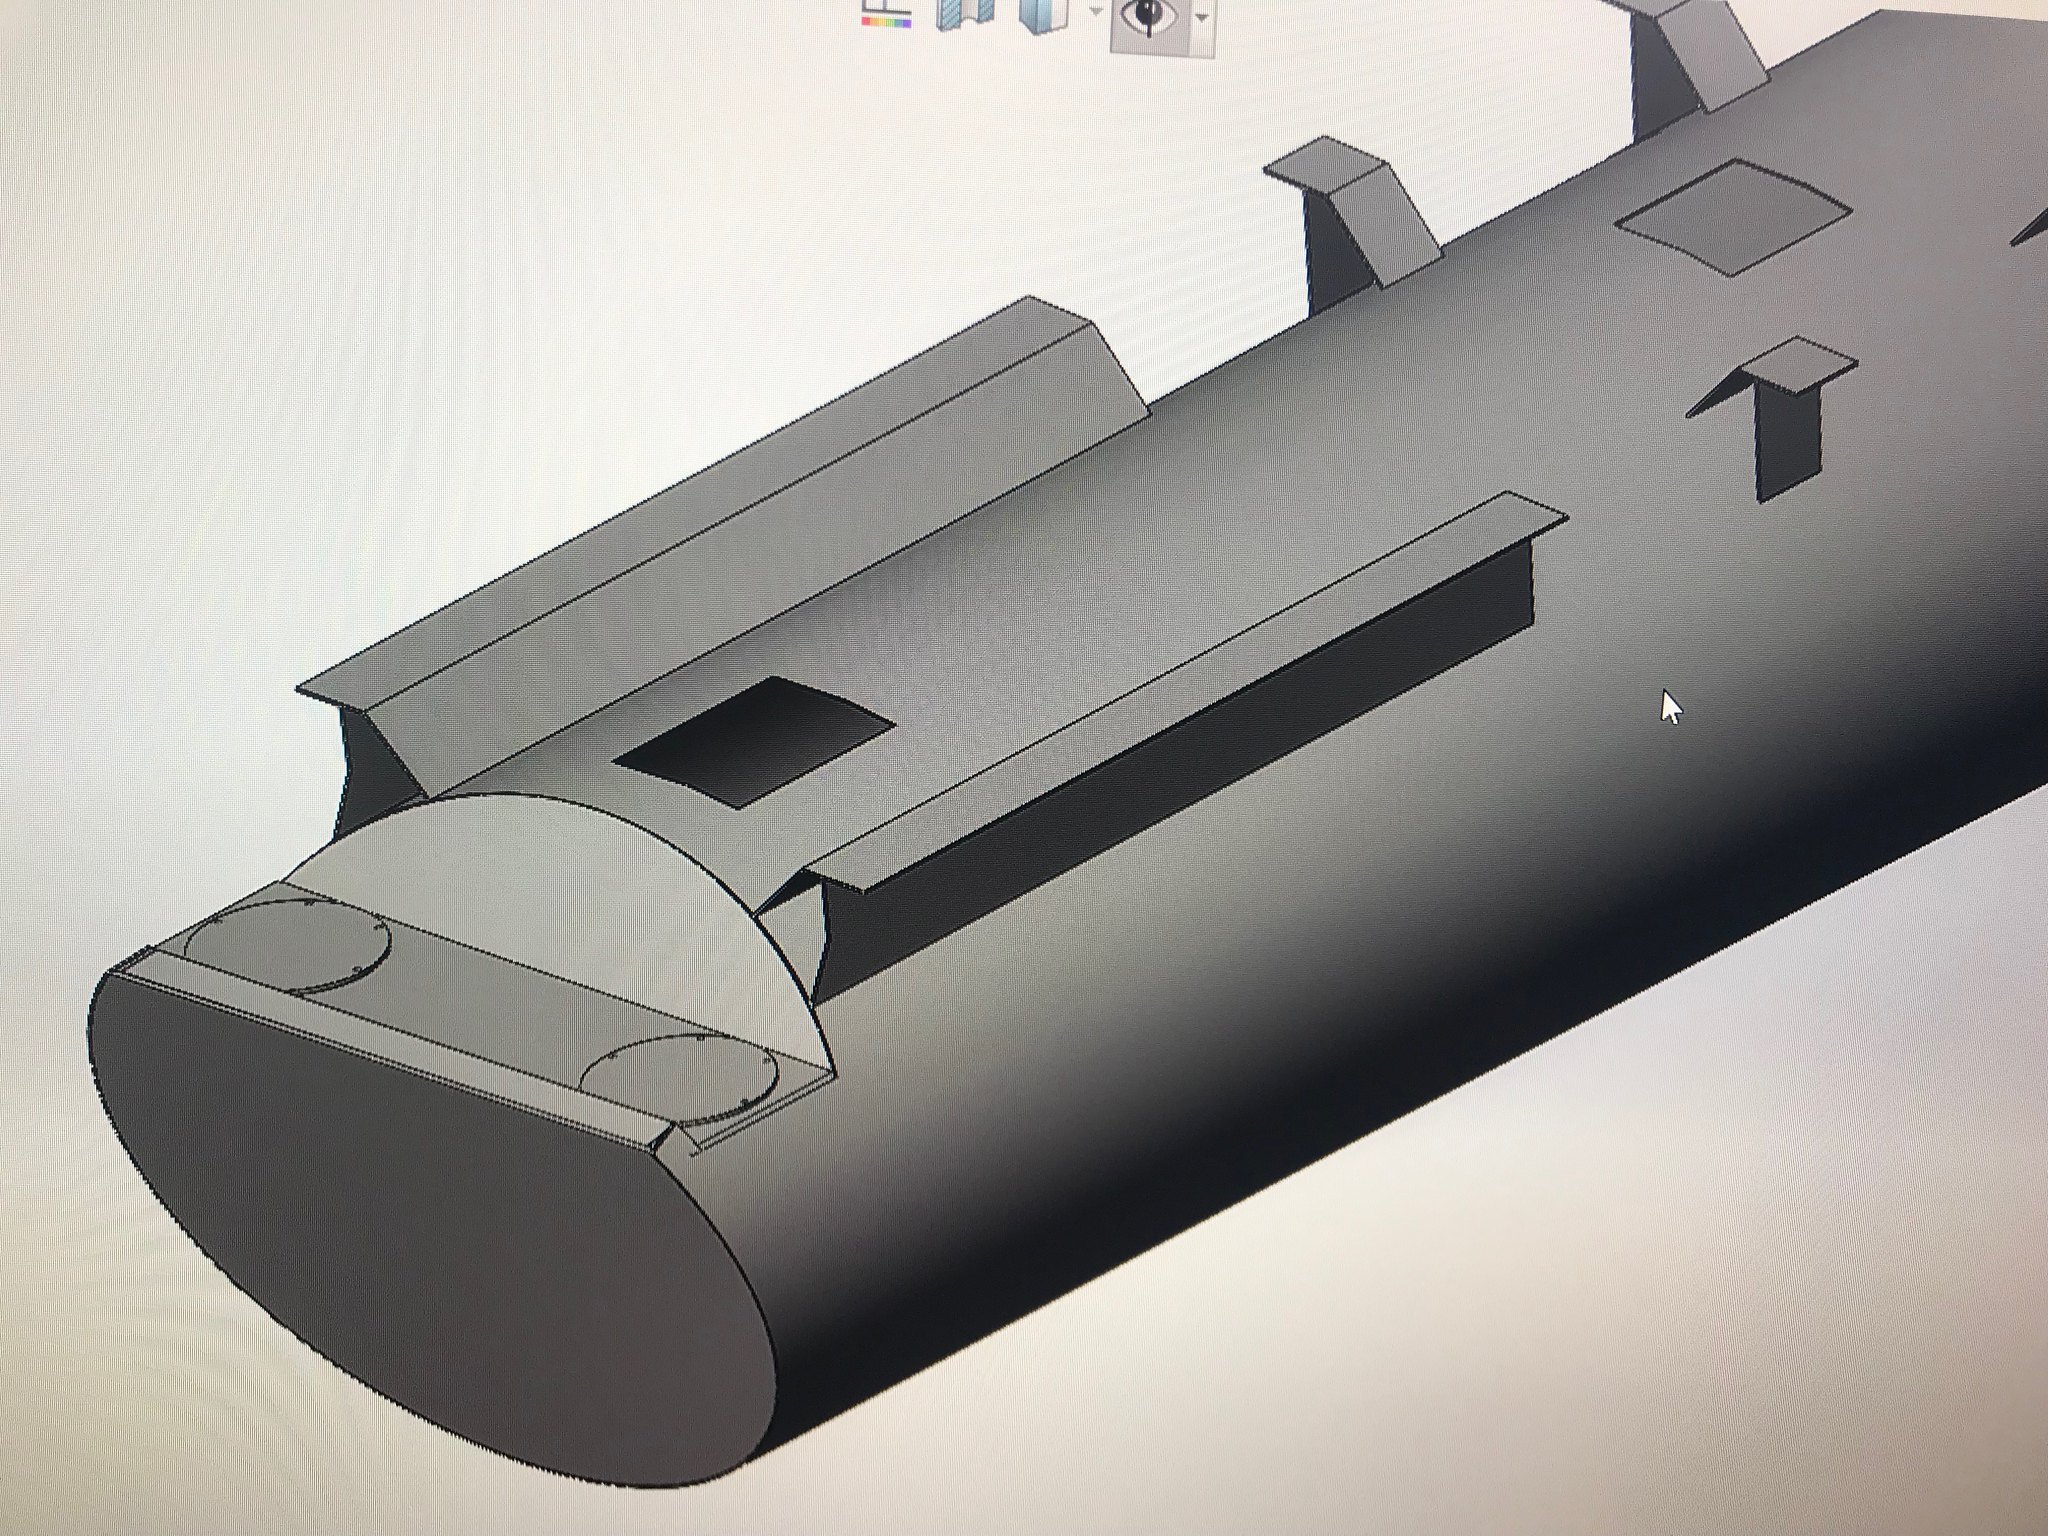
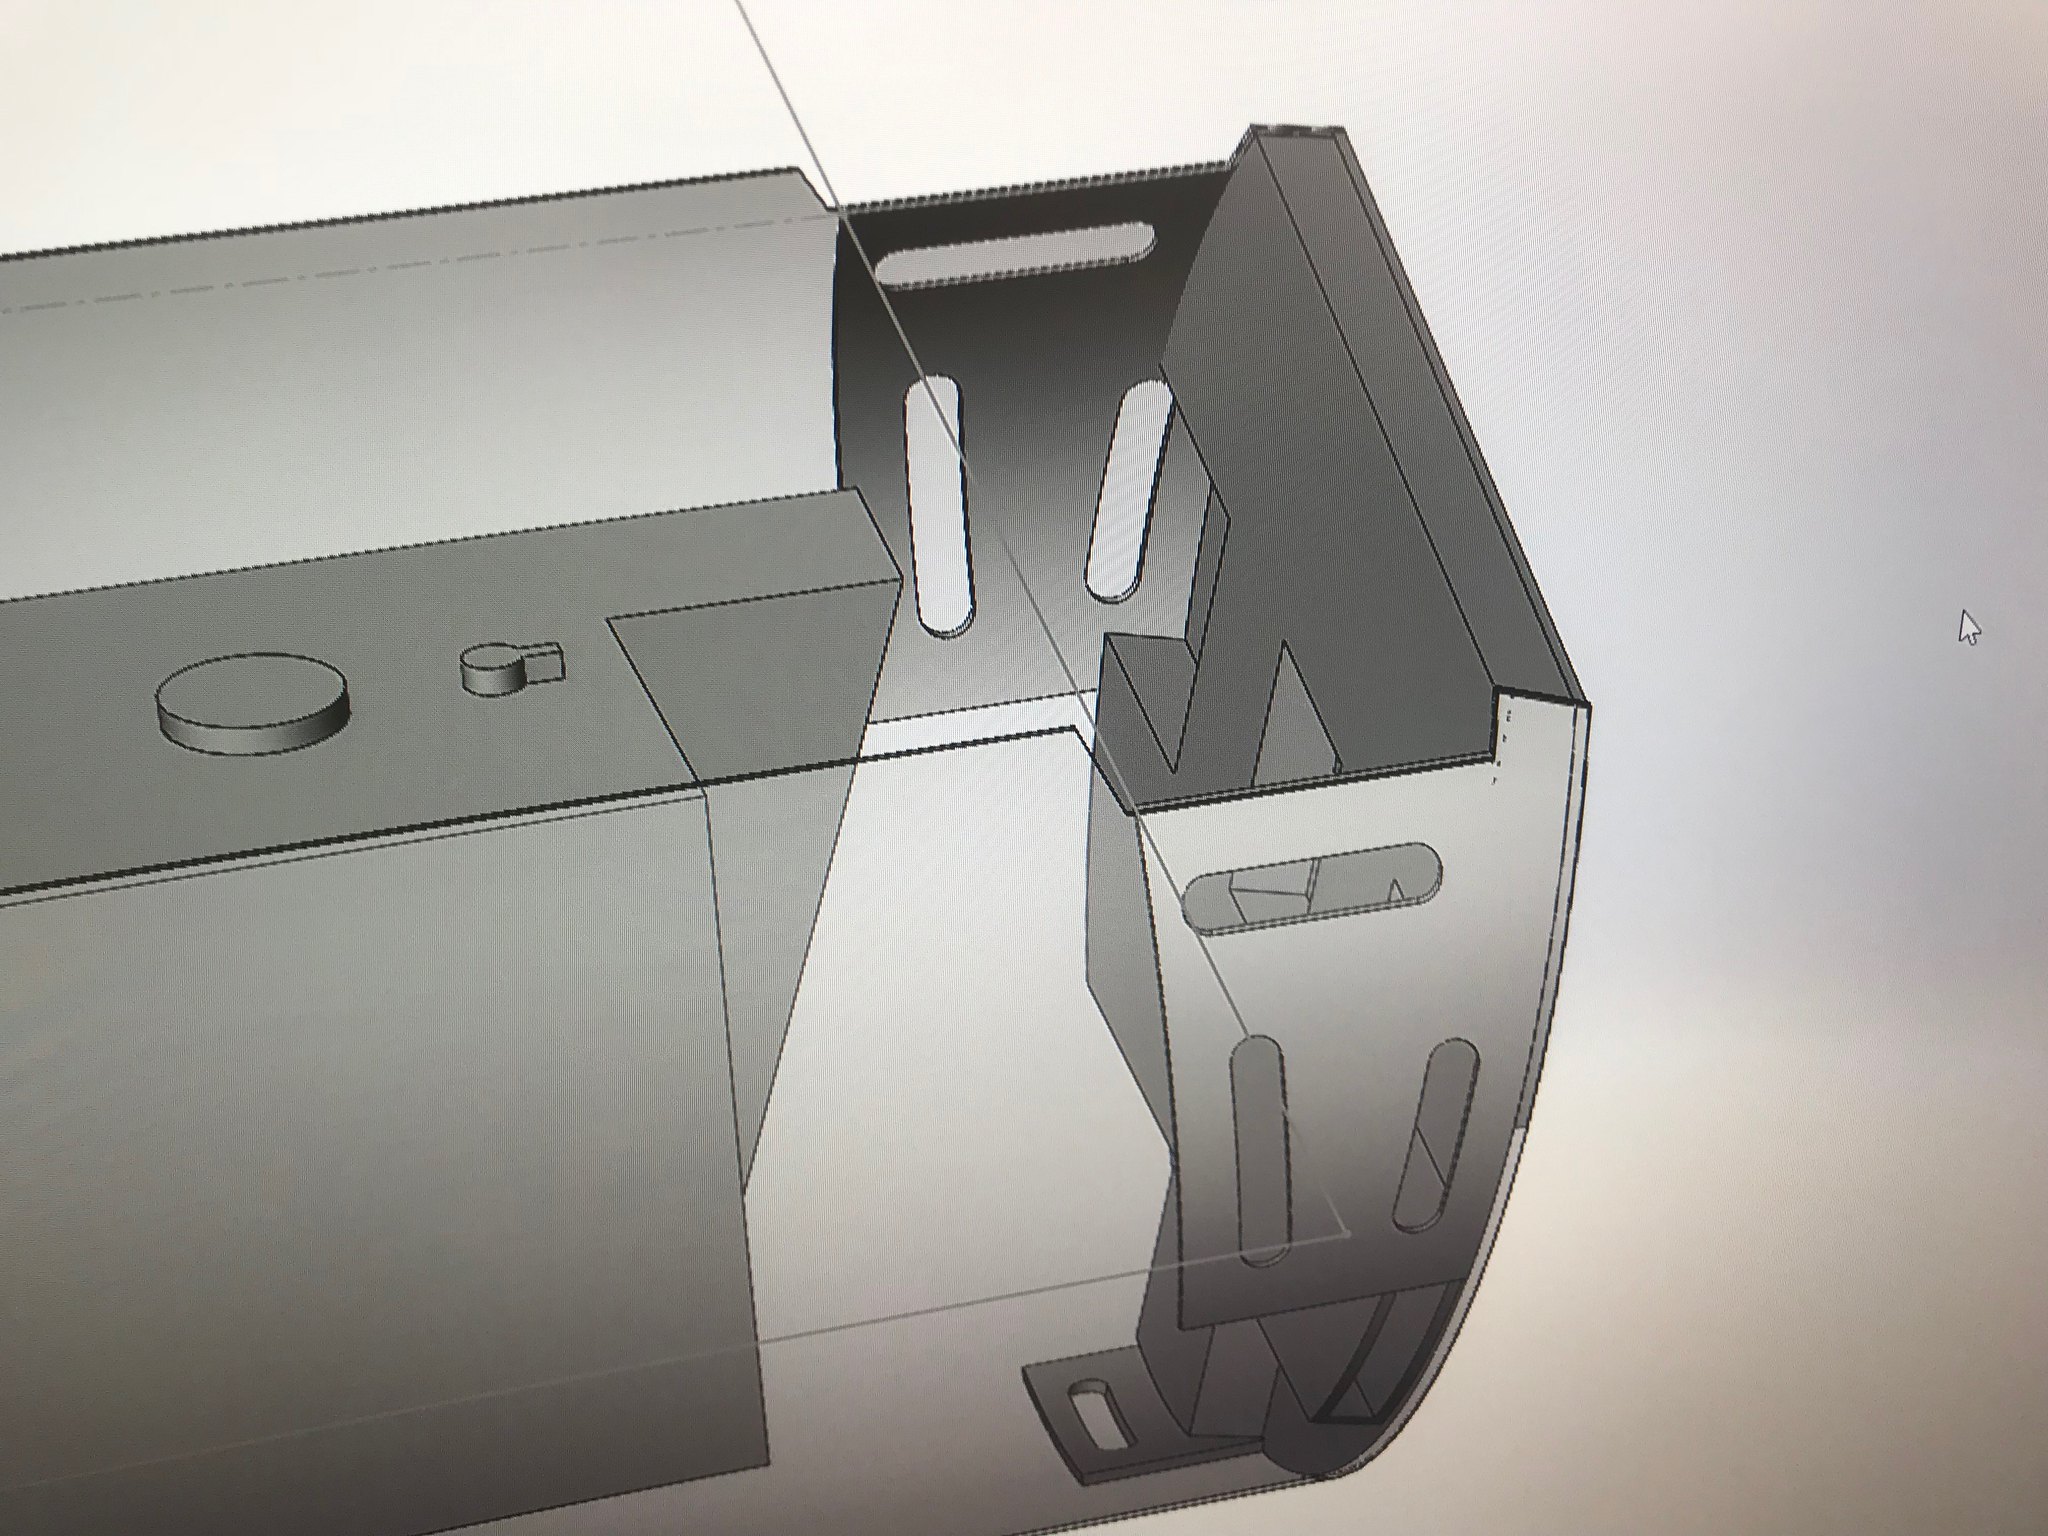
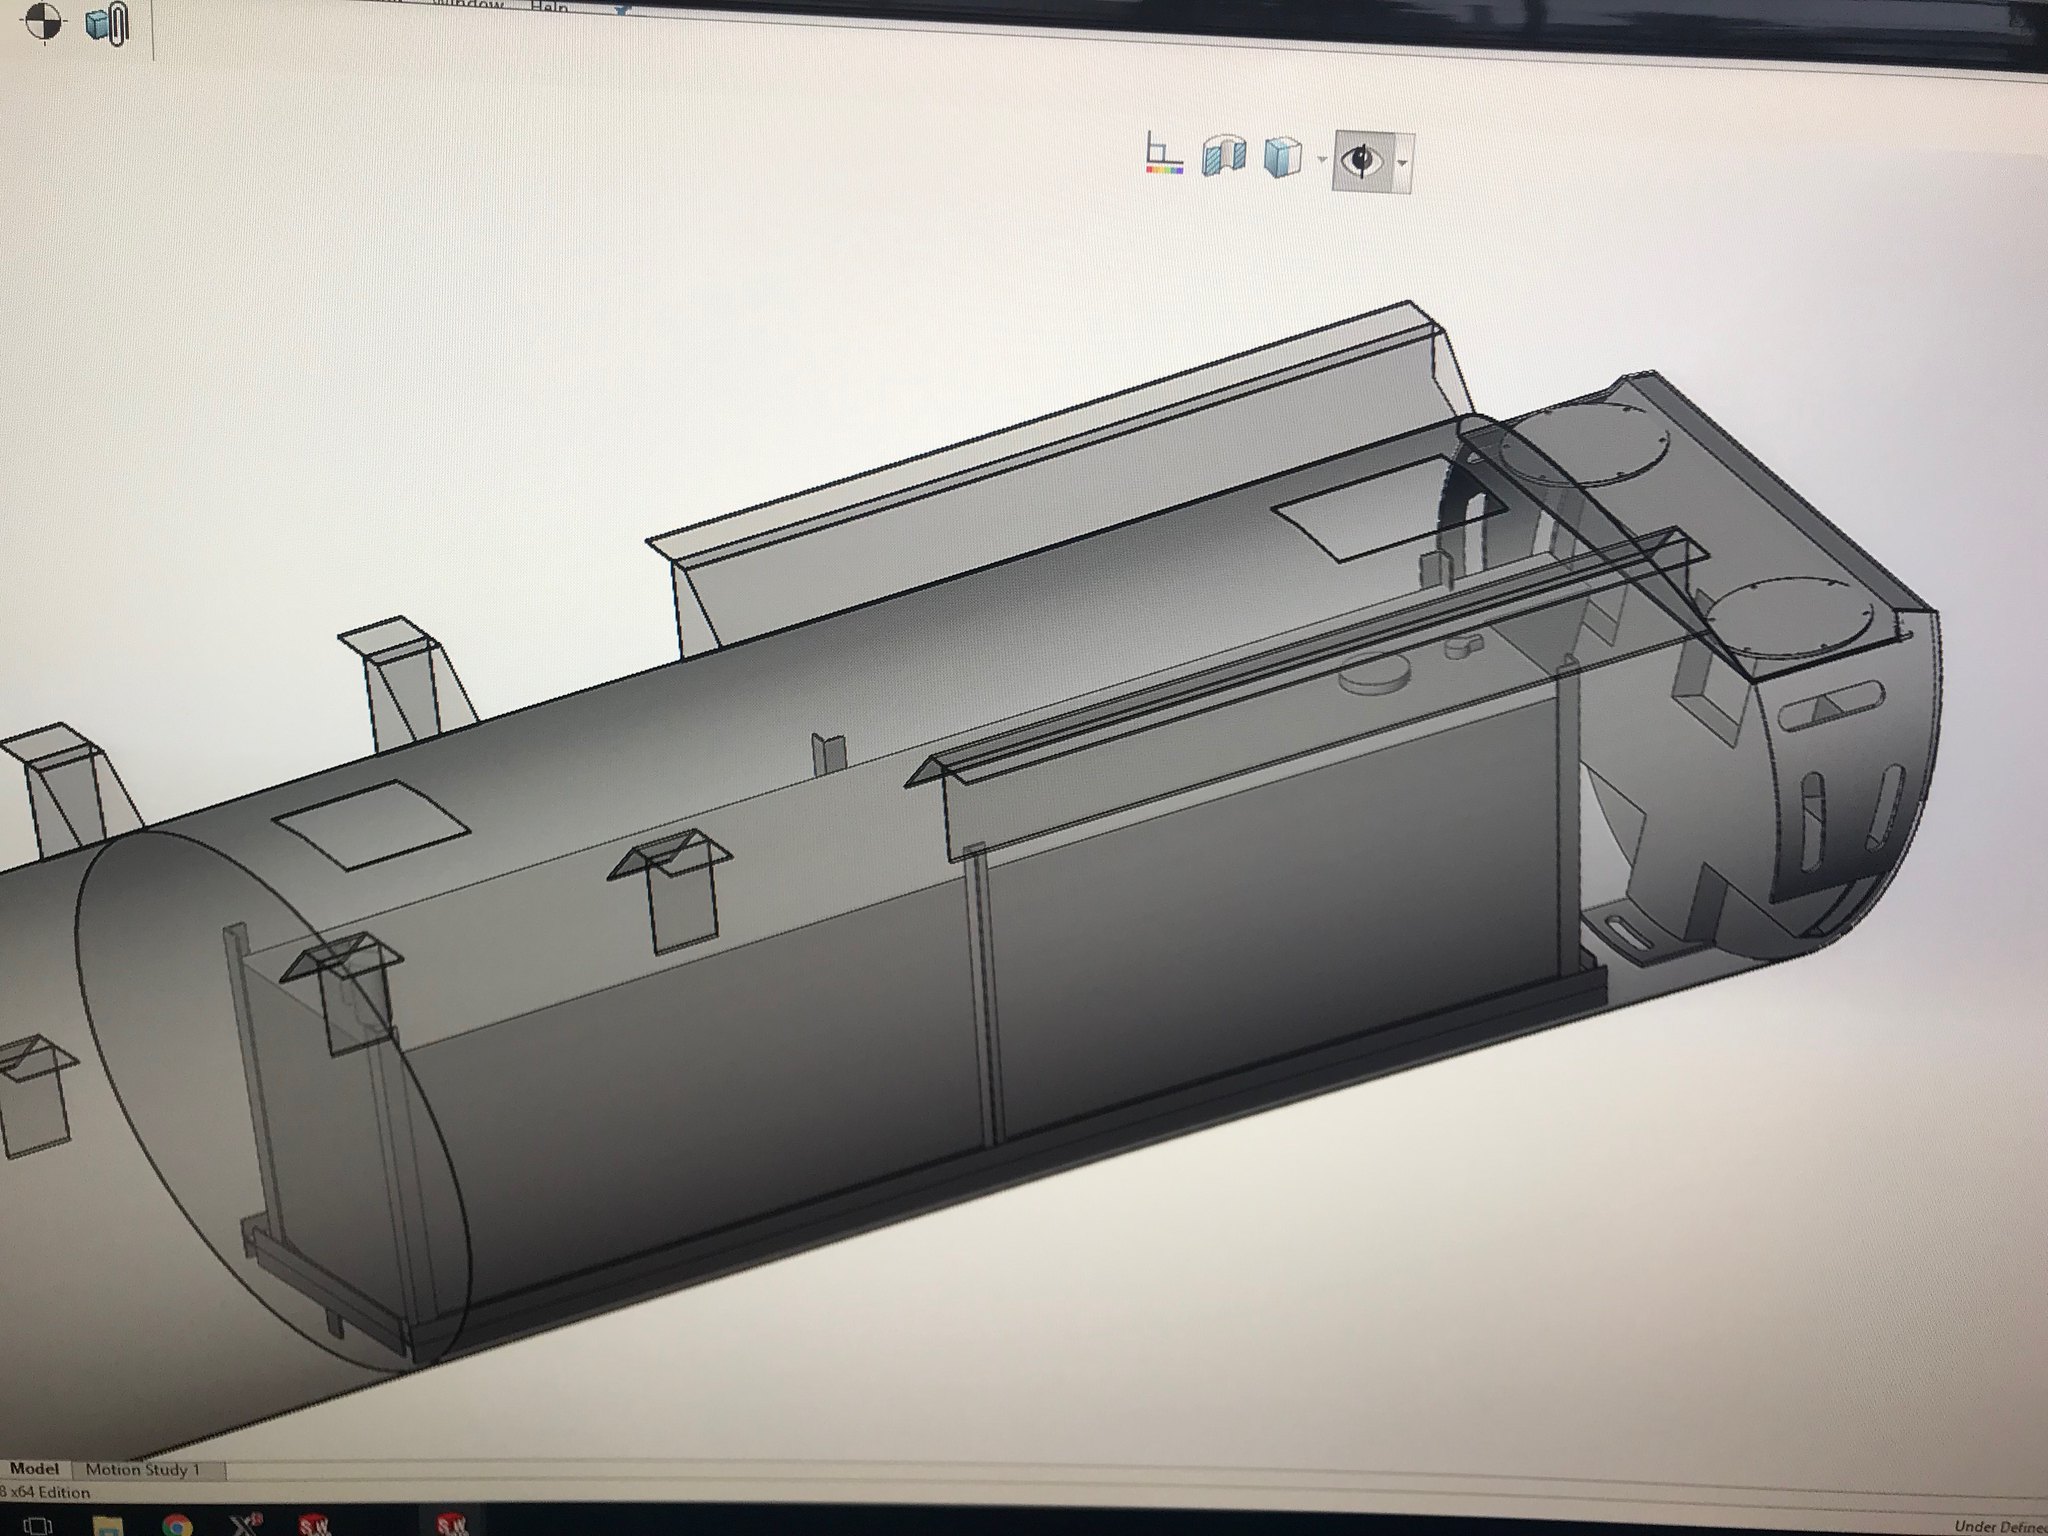
This toon is off a canceled special order. You can order any 2 toon boat with optional 32" oval logs. However, being its for a 2 toon boat, no integrated transom. So I purchased myself a TIG welder and am teaching myself to TIG Weld. Going to make my own transom. Since I'll be cutting off the back of the toon, its a good time to add a larger fuel tank too. We will be removing the factory 26 gallon tank off the deck which then gives us more storage space, and mounting a 49 gallon in the toon. To get the most out of this tool i am designing the transom to be 100% sealed for maximum flotation. All said and done, this should add roughly 1400 pounds of flotation on a normal outing with a maximum of 4000lbs when fully loaded. Here are my current designs:

Untitled by scott011422, on Flickr

Untitled by scott011422, on Flickr

Untitled by scott011422, on Flickr

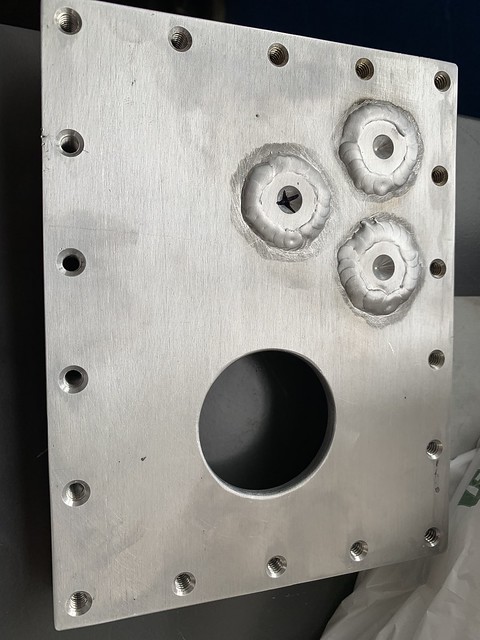
I will be using 3/16 Aluminum plate for the outer skin and 2"x 4" 1/4 wall tubing backing that up. I'll also have 3 1/4 thick plates that will be welded into the tubing and outer skin that will be welded onto the skin to help take up the stress from the outboard thrust.
 
Last edited:

Scott Danforth

Grumpy Vintage Moderator still playing with boats
Staff member
Joined
Jul 23, 2011
Messages
47,497
hire a welder. teaching yourself to tig weld steel is easy. teaching yourself to tig weld aluminum is insane.
 

scott011422

Cadet
Joined
Jan 15, 2018
Messages
23
I'm actually finding it fairly easy. I had a few problems the first week or so, But I'm about a month into my self teaching and its going great! Practice Practice Practice!

Untitled by scott011422, on Flickr
​​​​​​​
 

Scott Danforth

Grumpy Vintage Moderator still playing with boats
Staff member
Joined
Jul 23, 2011
Messages
47,497
your weld starts and stops wouldnt pass inspection.

it also looks like a few pieces of anodized 6061 However your tube should be 0.09" 5052. I would practice with 5052

what did you use for weld prep? U-groove is preferred to get full penetration. you can do a full-radius corner well where you have the tube meet the end cap.
 

scott011422

Cadet
Joined
Jan 15, 2018
Messages
23
On that sample i forgot to turn on the gas which is the ugliness at the right. I just started using a control pedal and am still getting the hang of it. The ending is a little hot. The aluminum is 1/4 6061 mill stock, no anodizing with a 50\50 overlap. Metal prep was scotch-brite, acetone wipe then stainless steel brush.

I've done a few samples welding 1/8 to 3/16 since that duplicates what I will be welding on the toon. According to Bemmington, Their ovals are 1/8 6061 aluminum.

I found out the hard way about anodized aluminum. That was my major setback when I started. i was buying metal from Menards to practice on. Found out 2 agonizing weeks later that all bigbox aluminum is anodized so it doesn't oxidize on the shelf. Started buying from a mill after that.
 

eggs712

Petty Officer 1st Class
Joined
May 8, 2012
Messages
333
Make sure you really fill the crater at the end of every weld. Basically jam the rod in there as you let off the heat. Aluminum is really bad about crater cracking and spreading through an otherwise sound weld.
 

Scott Danforth

Grumpy Vintage Moderator still playing with boats
Staff member
Joined
Jul 23, 2011
Messages
47,497
6000 series is not marine grade, I wonder why Bennington would use that over 5000 series. it cant be strength, because both are same strength at the HAZ (heat affected zone)
 

scott011422

Cadet
Joined
Jan 15, 2018
Messages
23
Who knows. After reading your post I called them back. Talked to 3 different people and got 3 different answers. They are both corrosion resistant to water both fresh and salt so no problems there. The 6061 is stronger, but also heat treatable. The 5000 series is cheaper and I don't have to temper the weld area after welding like i have to for the 6061. We machine some 6061 parts here that get welded and have issues in the past with the aluminum cracking around the welds. Now the customer has the welder temper back the welded area with a heat stick and flame to stop the cracking. I'll prolly go with the 5052.

On another note. Any issues welding 6061 to 5052?
 

scott011422

Cadet
Joined
Jan 15, 2018
Messages
23
Enough of the Fuel tank mount is designed, material ordered. Going to weld a frame to the bottom of the tube. There will be a lip sticking down on the far side of the tank mount that will slide under the tank frame so I can slide the mount onto the frame and then either bolt or weld the aft section of the mount to the frame.


41246519975_e497cb5c2c_k.jpg
Untitled by scott011422, on Flickr
 

scott011422

Cadet
Joined
Jan 15, 2018
Messages
23

scott011422

Cadet
Joined
Jan 15, 2018
Messages
23
It has finally warmed up around here long enough to get some initial cutting done. After removing some of the factory brackets, we laid out lines every 10 degrees to measure back from to get our cut lines. Then shot a line laser from the side to make sure there were no glaring errors. Time to start cutting.


47094639662_18aaf251de_k.jpg
Untitled by scott011422, on Flickr

32086932407_61f65b16a2_k.jpg
Untitled by scott011422, on Flickr

40063640043_efd525e66f_k.jpg
Untitled by scott011422, on Flickr

40063639693_532cad744b_k.jpg
Untitled by scott011422, on Flickr


Also mostly finished the fuel tank design:

47094683412_c9eb797bd0_k.jpg
Untitled by scott011422, on Flickr
 

scott011422

Cadet
Joined
Jan 15, 2018
Messages
23
So the big weekend was at hand. We were able to install the fuel tank and attach the transom. Were able to get all the main inside mig welds in while we had access to a spool gun. Welds were not all fantastic due to space constraints. Added in some extra gussets because we could and still have to TIG weld the entire outside. Don't think its going anywhere. Also ended up back filling the fuel frame with 6# closed cell foam which will give the tank and toon some extra support. Also started fabbing the panel that all the hoses and filling will be done thru.


47596723101_d0961b0113_k.jpg
Untitled by scott011422, on Flickr

46680967065_d86e25aac5_k.jpg
Untitled by scott011422, on Flickr

47647789651_dc6e14c6f6_k.jpg
Untitled by scott011422, on Flickr

46732080165_5361ac8301_k.jpg
Untitled by scott011422, on Flickr

32705145147_fa2ce56b7c_k.jpg
Untitled by scott011422, on Flickr

32705183277_29ed285868_k.jpg
Untitled by scott011422, on Flickr

46731986245_9d568001c7_z.jpg
Untitled by scott011422, on Flickr

32705145427_a9b682578e_z.jpg
Untitled by scott011422, on Flickr

46731986265_17029019a5_z.jpg
Untitled by scott011422, on Flickr

46923822354_8727ac5c9e_z.jpg
Untitled by scott011422, on Flickr

33770409238_a94ed50bca_z.jpg
Untitled by scott011422, on Flickr

40681398053_2ebebcc59e_z.jpg
Untitled by scott011422, on Flickr

46924035884_64b5f8f3db_z.jpg
Untitled by scott011422, on Flickr


47667316921_0b1166b609_k.jpg
Untitled by scott011422, on Flickr
 

scott011422

Cadet
Joined
Jan 15, 2018
Messages
23
Getting really close to getting the boat out on the water. I unfortunately didn't think to get any pics of the mounting process. We ended up taking the aluminum mount frame back off the toon and clamping that to the boat. Then we drilled all the holes in the boat using the mounting frame as a drilling jig. Worked Great! We also had to pull the fuel level sensor, in my haste, i forgot that the RTV i had at home wasn't fuel rated. so replaced that and sealed up the access door with some 4200.

Untitled by scott011422, on Flickr

Mounting Frame Work:
Untitled by scott011422, on Flickr

Untitled by scott011422, on Flickr

Untitled by scott011422, on Flickr


Time to start sealing it up

Untitled by scott011422, on Flickr


Untitled by scott011422, on Flickr

In place on the Boat

Untitled by scott011422, on Flickr

Untitled by scott011422, on Flickr

Untitled by scott011422, on Flickr


Also, I found this NOCO 8D Marine battery box to tidy everything up. Has enough room for 2 group 27 battery trays, distribution blocks, breakers and battery tender.

Untitled by scott011422, on Flickr
 

scott011422

Cadet
Joined
Jan 15, 2018
Messages
23
Have the toon pretty much done now. Access ports are complete. The fuel panel is done and sealed. All the wires are ran to the Battery box. Should be mounting the outboard this weekend.


48007978871_e73bf2a8b7_k.jpg
Untitled by scott011422, on Flickr
 
Top