1987 Ski Centurion Tru Trac II - First Time Rebuild - Floor, Engine, Dash, etc.

Status
Not open for further replies.

ACon977

Senior Chief Petty Officer
Joined
Nov 21, 2017
Messages
759
So got under the dash of the boat and installed my new fuse box to replace the rats nest that existed under there before. Checked all my connections and then popped a fuse into the ignition circuit and the motor turned over fine!
IMG_20200430_194651.jpg
 

archbuilder

Vice Admiral
Joined
Sep 12, 2009
Messages
5,697
Glad you got the starter going! I hate rats nest lol, nothing better than getting rid of them so you can tell what is what!
 

Sea18Horse

Chief Petty Officer
Joined
Jun 1, 2008
Messages
626
I wonder, have you tried the starter without the small added in white wire (the grounded one) connected to the solenoid? That terminal is usually connected to the ignition coil side of the ballast resistor to supply full battery voltage to the ignition when cranking. In the automotive world it was some times connected to ground through the neutral safety switch. But that's not really Fords M.O. That's an old American motors thing. I suspect it may be cranking over now because you upped the size or your start wire. Despite that white wire being grounded. Also it is good that you upped the size of the start wire. The current required to pull in the solenoid is on the order of about 30amps. 16 or 18 gauge is too small. Once the solenoid is engaged it only takes an amp or two to hold it in. Anyway try it now with that wire disconnected and see if it still cranks over. If it does You can check to see if you get power on that terminal when cranking. If you do then you can connect that wire to the coil + terminal on the ballast resistor. I presume that's the purple wire that goes to the ignition coil? Then you can put the other bigger red wire back on the other side where it belongs. Good luck!

Cheers................................Todd
 

ACon977

Senior Chief Petty Officer
Joined
Nov 21, 2017
Messages
759
Glad you got the starter going! I hate rats nest lol, nothing better than getting rid of them so you can tell what is what!

It felt very very good. They just had everything spliced together with those vampire bites or caps. But gosh was it tough to trace. Very grateful for that little fuse box. I think it helps to clean up under the dash and make tracing things much easier as well!
 

ACon977

Senior Chief Petty Officer
Joined
Nov 21, 2017
Messages
759
I wonder, -------------------------
Cheers................................Todd

Thanks Todd! Glad to have you chiming in.. Let me address your post a few lines at a time.

have you tried the starter without the small added in white wire (the grounded one) connected to the solenoid? That terminal is usually connected to the ignition coil side of the ballast resistor to supply full battery voltage to the ignition when cranking. In the automotive world it was some times connected to ground through the neutral safety switch. But that's not really Fords M.O. That's an old American motors thing.
This is how I was trying to use the relay before but it wasnt completing the circuit without returning to ground (and thereby back to the negative terminal). So the solenoid wasnt activating. What does the Ballast resistor do? Obviously a resistor will reduce the voltage, but dont I want full voltage (12V) going to the Ignition coil?


I suspect it may be cranking over now because you upped the size or your start wire. Despite that white wire being grounded. Also it is good that you upped the size of the start wire. The current required to pull in the solenoid is on the order of about 30amps. 16 or 18 gauge is too small. Once the solenoid is engaged it only takes an amp or two to hold it in.
Great info on the cranking amperage! I did not know it before. Also I did not up my starter solenoid wire gage. I just hooked it up to a higher gauge supply feed. It is probably a 14 or so. the 16 or 18 is what is run to the key.

Anyway try it now with that wire disconnected and see if it still cranks over. If it does You can check to see if you get power on that terminal when cranking. If you do then you can connect that wire to the coil + terminal on the ballast resistor. I presume that's the purple wire that goes to the ignition coil? Then you can put the other bigger red wire back on the other side where it belongs. Good luck!
So if that solenoid still closes to give power to my starter solenoid then the white wire would go back to the "hot" side of the ballast resistor? You are right in noting that the purple goes to the ignition coil.
Also the main power to the Starter is the "bigger red wire" you're referring to? Do I really need power to the starter at all times? I had it on the side with the starter solenid since it probably only needed power when cranking.

You seem to be a good reference! So Im asking too many questions... But looking forward to hearing your response!
 

Sea18Horse

Chief Petty Officer
Joined
Jun 1, 2008
Messages
626
Thanks Todd! Glad to have you chiming in.. Let me address your post a few lines at a time.


"This is how I was trying to use the relay before but it wasnt completing the circuit without returning to ground (and thereby back to the negative terminal). So the solenoid wasnt activating. What does the Ballast resistor do? Obviously a resistor will reduce the voltage, but dont I want full voltage (12V) going to the Ignition coil?

Whether you want full 12 volts going to your ignition coil all the time depends on the coil. Some are designed to operate at a lower voltage to save wear on the primary side of the ignition. I would recommend checking the part # on the coil and see what it calls for. It might even say on the side of the coil. I think mine does say "used with a ballast resistor" or some such on the side of it but I could be mistaken on that.

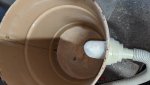
What are the small terminals on your relay labeled? I can make out an S on the upper terminal I think but can't make out the lower one. If it's a standard Ford style relay it would be marked I and would supply 12 volts (or at least cranking voltage) to the coil side of the ballast resistor where the purple wire is connected. Ignition power feed from the ignition switch on the red wire should be connected to the other end of the resistor (If the coil wants a ballast resistor).

Great info on the cranking amperage! I did not know it before. Also I did not up my starter solenoid wire gage. I just hooked it up to a higher gauge supply feed. It is probably a 14 or so. the 16 or 18 is what is run to the key.

I should back up and say that the start wire to the solenoid on the starter (yellow w/ red stripe) needs to be a heavy gauge which it seems to be. The one going to the S terminal on the relay doesn't need to be that heavy. Probably easier to keep things straight to refer to the remote solenoid as the relay and the one on the starter itself as the solenoid. Sorry about that.

So if that solenoid still closes to give power to my starter solenoid then the white wire would go back to the "hot" side of the ballast resistor? You are right in noting that the purple goes to the ignition coil.
Also the main power to the Starter is the "bigger red wire" you're referring to? Do I really need power to the starter at all times? I had it on the side with the starter solenid since it probably only needed power when cranking.

No I meant the bigger red wire on the ballast resistor. That one would come from the ignition switch and should have been connected to the other side of the ballast resistor. Again, if your ignition coil requires one. If it doesn't require one then it can be eliminated.

The main battery cable from the relay to the starter is fine. Many bigger Ford V8s use that arrangement.

You seem to be a good reference! So Im asking too many questions... But looking forward to hearing your response!

Thanks! Hope I can help. And don't hesitate to ask any questions.

Cheers.................................Todd
 

ACon977

Senior Chief Petty Officer
Joined
Nov 21, 2017
Messages
759
Thanks Todd those answers were awesome. I'll have to go out and check what I have on the coil and whatnot.

Without diving into that wiring stuff quite yet I decided it was time to break out the polyester resin and get seat bases and the side cabinets glassed in.

by the way. Using sawdust instead of cabosil worked very very well. I think I used less and it was free! I've got my shop vac hooked up to my mitre saw and although I cleaned it out a week ago, had a fair amount of fine sawdust that I mixed in to make my PB.
Click image for larger version  Name:	IMG_20200501_160654_copy_864x486.jpg Views:	1 Size:	114.3 KB ID:	10859107Click image for larger version  Name:	IMG_20200501_175434_copy_1536x864.jpg Views:	1 Size:	370.8 KB ID:	10859113
 

Attachments

  • IMG_20200501_160654_copy_864x486.jpg
    IMG_20200501_160654_copy_864x486.jpg
    114.3 KB · Views: 4
  • IMG_20200501_160650_copy_864x1536.jpg
    IMG_20200501_160650_copy_864x1536.jpg
    348.6 KB · Views: 2
  • IMG_20200501_233053_copy_864x486.jpg
    IMG_20200501_233053_copy_864x486.jpg
    132.5 KB · Views: 2
  • IMG_20200501_233058_copy_864x1536.jpg
    IMG_20200501_233058_copy_864x1536.jpg
    386.6 KB · Views: 2
  • IMG_20200501_233033_copy_864x1536.jpg
    IMG_20200501_233033_copy_864x1536.jpg
    471.6 KB · Views: 2
  • IMG_20200501_175434_copy_1536x864.jpg
    IMG_20200501_175434_copy_1536x864.jpg
    370.8 KB · Views: 3

ACon977

Senior Chief Petty Officer
Joined
Nov 21, 2017
Messages
759
Morning Everyone!

Happy Monday? I couldnt tell you what day it is without looking at a calendar to tell you the truth. Although I do know that I havent updated this thread in a week or so.

Few work updates:
  1. Got the last of the fiberglassing done, sanded down and then generally cleaned up.
  2. Admiral got a few coats of that marine paint onto the glass and the sides of the hull.
    1. we are going to put down foam floor on top of this so she only did the edges
  3. New speed pickups installed
  4. Speedometer Installed to dash
  5. got a new stereo receiver tested it with all of the speakers, im shocked to see that they all work!
  6. Tested the amplifier with the tower speakers
    1. surprisingly the amplifier still worked!
    2. other note. those things BUMP, we are going to be really obnoxious on the water with those boys.
  7. Installed Receiver into boat, wired for speakers
  8. Dissassembled and checked impeller (surprisingly in great shape!)
  9. installed a garden hose adapter into the water line
    1. this way I can hook up the garden hose for running the boat out of the water.
  10. AAAAND tried to get the engine to run with my gas line in a 5gal can, and the garden hose hooked up to the water intake.
    1. no dice. I got it to catch a few times but only for a single cylinder
    2. we also got a few backfires out of the carb so Im thinking the timing is off.
So sad news on the motor, was hoping that I had figured out all of the wiring on it. but obviously the timing and whatnot is the more difficult side of it. As I was putting the boat back in the garage our neighbors run an autoshop and he was outside. (he has one of those 200k wakeboard boats) we started talking and I asked if he would help with the engine debug since Im just hoping to have it running and will pay to have it done right.

Hoping to drop it off today and see what he can do.
 

ACon977

Senior Chief Petty Officer
Joined
Nov 21, 2017
Messages
759
trying to post about the picture upload error code but iBoats isnt letting my message go through. attempt 6
 

ACon977

Senior Chief Petty Officer
Joined
Nov 21, 2017
Messages
759
nevermind, Im giving up trying to post the code. to any moderator listening, the "Upload Attachment" and "Share Photos" buttons are popping up a PHP error code.
 

archbuilder

Vice Admiral
Joined
Sep 12, 2009
Messages
5,697
Sounds like you have been making progress! The picture issue has been going on all weekend, hopefully they get it fixed soon.
 

ACon977

Senior Chief Petty Officer
Joined
Nov 21, 2017
Messages
759
Hi Austin,

I had to dig into the WaterSki archive to try to find something else for a new Ski Centurion owner over on the centurioncrew.com site. In doing so, I accidentally found another article on your boat. So here it is:

https://books.google.com/books?id=_...terski magazine 1983 barefoot warrior&f=false

Good stuff Tim! The more old articles I read on it the more I realize that a lot of it is still original! crazy how thats still the case over 40 years later!
 

ACon977

Senior Chief Petty Officer
Joined
Nov 21, 2017
Messages
759
also got the boat back from the shop yesterday, he found a ground on the coil that wasnt making a good connection and then apparently I had the firing order wrong. Which was just a dumb me i guess. Also adjusted the timing so that it wasnt firing premature and he got it to run a few seconds with some fluid sprayed into the carb.

When I brought it back home I hooked it up to water and tried to get the engine to pull gas from a 5 gal can. I got it to catch a few times on starting fluid but never long enough to fill up the carb bowls and run only on the gas. I know that there is that vacuum tube from the carb to the fuel pump but even sucking on that didnt get it to fill.

Thoughts?
 

archbuilder

Vice Admiral
Joined
Sep 12, 2009
Messages
5,697
I don't remember what carb you have, but usually you can take one of those old style cheap restaurant ketchup bottles ( the kind with the screw off cap with the cone shaped spout on it) and fill the bowls up via the vent. I keep one of those around for that kind of stuff. Assuming you have a mechanical pump, it may take a bit to get it primed and gas to the carb. If you can get fuel in the bowls, it will probably run long enough to prime the fuel system.
 

archbuilder

Vice Admiral
Joined
Sep 12, 2009
Messages
5,697
Someone will probably chime in, but I am guessing the vacuum line is just to pull out of the pump if the diaphragm goes out.
 

Timr71

Petty Officer 1st Class
Joined
Jul 19, 2012
Messages
326
also got the boat back from the shop yesterday, he found a ground on the coil that wasnt making a good connection and then apparently I had the firing order wrong. Which was just a dumb me i guess. Also adjusted the timing so that it wasnt firing premature and he got it to run a few seconds with some fluid sprayed into the carb.

When I brought it back home I hooked it up to water and tried to get the engine to pull gas from a 5 gal can. I got it to catch a few times on starting fluid but never long enough to fill up the carb bowls and run only on the gas. I know that there is that vacuum tube from the carb to the fuel pump but even sucking on that didnt get it to fill.

Thoughts?

I had difficulty getting mine to draw fuel from the tank when it's dry too. Here's what we did. Get a ketchup squirt bottle, like they use in a restaurant. If you can find a clear one, that's better too. fill it with gas, and cut the tip to just smaller than your fuel line. Then use the squeeze bottle to force fuel into the line all the way up to the pump. you'll have to hold the fuel line up to keep it gravity fed. Then, quickly and carefully, with your thumb over the end of the fuel line attach it to the fuel tank or shove it into the 5 gallon can and hit the starter.
 

ACon977

Senior Chief Petty Officer
Joined
Nov 21, 2017
Messages
759
I don't remember what carb you have, but usually you can take one of those old style cheap restaurant ketchup bottles ( the kind with the screw off cap with the cone shaped spout on it) and fill the bowls up via the vent. I keep one of those around for that kind of stuff. Assuming you have a mechanical pump, it may take a bit to get it primed and gas to the carb. If you can get fuel in the bowls, it will probably run long enough to prime the fuel system.

hmm ok interesting, Its a Holley 4160 or 4150, dont remember now. But may have to give that a shot if I cant get it to draw like Tim recommended.

Regarding the vacuum tube. it goes from the fuel pump to the carb air intake, so it makes me feel like it opens up the fuel passageway to ensure that the motor is running before dumping a bunch of fuel into it. At least thats what my motorcycle carbs did. I messed with them far too long and then only had to suck on that tube while turning it over to get gas to flow. Yes its gross. but whatever gets the job done.
 

ACon977

Senior Chief Petty Officer
Joined
Nov 21, 2017
Messages
759
I had difficulty getting mine to draw fuel from the tank when it's dry too. Here's what we did. Get a ketchup squirt bottle, like they use in a restaurant. If you can find a clear one, that's better too. fill it with gas, and cut the tip to just smaller than your fuel line. Then use the squeeze bottle to force fuel into the line all the way up to the pump. you'll have to hold the fuel line up to keep it gravity fed. Then, quickly and carefully, with your thumb over the end of the fuel line attach it to the fuel tank or shove it into the 5 gallon can and hit the starter.

Hmmmmm ok this may be the easiest solution, although it sounds like it could be a nice mess lol. not sure I have a ketchup bottle but im sure I can find something.
 

mr300z87

Senior Chief Petty Officer
Joined
Sep 15, 2010
Messages
694
That so call vacuum tube is more than likely the fuel pump failure safety. On Mercruiser IO and inboards (GM) the fuel pump is designed in the case of diaphragm failure it will overflow into the carb (and stall the engine) as opposed to leaking fuel into the bilge. Can you say Kaboom!! I would think by 1987 Ford engine had something similar. This port and tube on the mechanical fuel pump is the difference between auto and marine, an auto mechanical fuel pump leaks to the ground upon failing where you can see it.

I know nothing about Holly carbs but A couple squirts of fuel in the carb as mentioned above should be enough to start the engine long enough to pump fuel up the float bowls. If it doesn't stay running after 2 or 3 trys, you might want to check to see if the fuel pump is working.
 
Status
Not open for further replies.
Top