1993 Chaparral Gemini 190: Chronicles of a New Boat Owner (Deck Rebuild) [SPLASHED June 2018]

bpounds1991

Petty Officer 1st Class
Joined
Nov 3, 2017
Messages
321
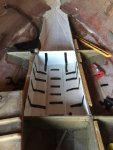
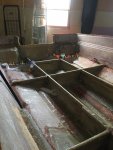
Some other things to check off the list include buying and installing new:
Speedometer
Aerator and hose
Bilge Pump and hose
Transom Plugs
Speakers
Underseat lighting
 

Baylinerchuck

Commander
Joined
Jul 29, 2016
Messages
2,726
I opted to eliminate the wiring through the deck and ski locker in my build. I was installing new wire anyway, and routed everything under the gunnels. Stereo wiring comes direct from the battery. It’s a little more wire, but easy to add to, modify, or repair should the need arise.
 

bpounds1991

Petty Officer 1st Class
Joined
Nov 3, 2017
Messages
321
Sounds good BC, I may just do that and call it a day. It certainly will make life easier not having to worry about getting it all back through the deck/locker lol, but as far as accessibility it's all pretty damn hard to get to with where it's wired in the gunnels currently on there.
 

bpounds1991

Petty Officer 1st Class
Joined
Nov 3, 2017
Messages
321
Pushing to get everything finished this weekend so we can move forward finally. Glassed in all 24 corner pieces this morning while the admiral capped the ski locker and start of the 1st bulkhead (ran out of clips lol). Tomorrow we'll finish all capping, grind out the fuel tank area, and then go from there as far as putting the tank support in. Possibly gel coating by Sunday, we'll see.
IMG_2987.JPG
 

Baylinerchuck

Commander
Joined
Jul 29, 2016
Messages
2,726
Looking great. Glad to see you using the plastic and clamp trick on the edges of your stringers. It works pretty slick, huh? Just have to play with it a bit.
 

bpounds1991

Petty Officer 1st Class
Joined
Nov 3, 2017
Messages
321
It's definitely helping, I used it on the transom as well on the tips and it was a major help! The admiral didn't quite put enough resin on the ski locker stringers so I'll be giving those a good bit more just to see what happens lol. Tomorrow is gonna be a busy but fun day (I hope). We'll be waking up to cap the rest of the stringers and put in the wood support for the fuel tank. After that the rain SHOULD be done early in the afternoon, so I'll be taking the boat out to grind the fuel area and clean the garage out. The holes need to be drilled out for conduit through the bilge to the fuel tank as well as a spot for the motor fuel line. I'll cut those to fit and peanut butter them in. Moving on from that we're hoping to fit the fuel tank and make sure it's all ready to go for gel coating.
 

bpounds1991

Petty Officer 1st Class
Joined
Nov 3, 2017
Messages
321
Stringers and bulkheads all capped finally, and we finished the back panels as well. I ended up covering the bulkhead ends and areas that seemed a little resin started with a thin layer of PB. I also went and picked up a piece of conduit to run the motor fuel line and fuel senders through (separately of course lol). Planning to get out tomorrow morning to cut the conduit holes, grind the fuel area, install the wood support and, depending on the time, gel coat the fuel tank/ski locker areas.

IMG_2988.JPG
 

Attachments

  • image_286649.jpg
    image_286649.jpg
    1.1 MB · Views: 2

bpounds1991

Petty Officer 1st Class
Joined
Nov 3, 2017
Messages
321
Well we didn't get as much done as we hoped today, but it was still pretty productive. The worst part of the day was spending grinding to make the fuel tank fit. I spent about 3 hours working on it, grinding, putting the tank in, pulling it out, regrinding, etc. and for some reason the corners just didn't want to cooperate. The tank is very snug in the front, has about 1/4" gap aft, and has about 1/2" gap on either side. From there I cut out the area for the fill and vent hoses to go through (I'll be going back through with some peanut butter later this week). I also cut out the 2 holes for the bilge-to-fuel PVC pipes, but with the gas tank having such a snug fit I can't put those in until the tank is in. Finished up with some 2x2 cleats, we only were able to get one side done as I didn't have enough clamps lol. I'm really pushing to try and get this deck on by the weekend.

Click image for larger version  Name:	IMG_2995.JPG Views:	1 Size:	134.1 KB ID:	10547712Click image for larger version  Name:	IMG_2993.JPG Views:	1 Size:	138.1 KB ID:	10547713Click image for larger version  Name:	IMG_2994.JPG Views:	1 Size:	141.1 KB ID:	10547714
 

bpounds1991

Petty Officer 1st Class
Joined
Nov 3, 2017
Messages
321
First layer of gel coat went on this morning. Aluminum tray was installed along with the left side of deck cleats, but I think I may add a few more just to be safe. The fuel tank area is only getting one layer of waxed GC, with it being such a tight squeeze I don't want to make it worse.

IMG_3001.JPGIMG_2999.JPG
 

bpounds1991

Petty Officer 1st Class
Joined
Nov 3, 2017
Messages
321
IMG_3032.JPGIMG_3033.PNG

Tank strips went in yesterday, and we got the tank in this morning. I glued it down with 3M 5200 and before the deck install Sunday I need to get the wood support pieces over the tank done, PB the PVC pipes, and add just a few more cleats. So far so good :)
 

Attachments

  • IMG_3030.JPG
    IMG_3030.JPG
    111.6 KB · Views: 2

Woodonglass

Supreme Mariner
Joined
Dec 29, 2009
Messages
25,924
Uhmm you do know that gelcoating the inside of the hull is NOT necessary and adds very little to the waterproofing or durability of the hull. IMHO waste of time and money. Only the areas that will be seen MIGHT need this but the resin and glass does all the work GelCoat is purely cosmetic.
 

bpounds1991

Petty Officer 1st Class
Joined
Nov 3, 2017
Messages
321
Thanks Eric, and yes WOG I know that it isn’t necesssry lol. I have 5 gallons of it though and had already planned on just putting 2 coats on the above deck hull, as a good bit of it is visible. I also just wanted to add a little thickness because of how transparent I noticed it was with the top cap off. The money’s spent, and I’ve got nothing but time ;)
 

bpounds1991

Petty Officer 1st Class
Joined
Nov 3, 2017
Messages
321
Quite the day working on the boat. Although we didn't get everything finished we did get enough done to let me finish it by myself throughout the week. We started off with shaping and cutting the 4x8 pieces of 1/2" plywood all the way up to the ski locker. After we finished the third piece, I went back over the first two with .75oz CSM on the underside, and we installed it in the back of the boat. A few more cleats were added in the bulkhead areas on both sides, and I installed the fuel hoses, wires, and cut the hole in the deck for those to run through. We also cut the fuel tank supports for the top.

Next steps are to cut out the access hatch holes for both the fuel sender/motor fuel line connection, and move forward on the boat installing the next 3 pieces.


Click image for larger version  Name:	IMG_3039.JPG Views:	1 Size:	130.5 KB ID:	10550372Click image for larger version  Name:	IMG_3038.JPG Views:	1 Size:	106.9 KB ID:	10550373Click image for larger version  Name:	IMG_3037.JPG Views:	1 Size:	92.3 KB ID:	10550374
 

bpounds1991

Petty Officer 1st Class
Joined
Nov 3, 2017
Messages
321
Well...my dad had planned on coming Saturday after work to finish the deck install and figure out how much/what type of wire we need to get ordered, but my 8-1 day has now turned into an 8-6:30. The admiral has agreed to help with whatever else needs to be done before she heads out of town Friday. She'll also be picking up another 7 gallons of resin :). I also ordered 4" and 8" inspection plates, and am planning on ordering this as a ski locker replacement (13x30"). I'll get the holes for those cut before the rest of the deck goes on, and hopefully we can get this thing moving along.
tmp-44630_lg__99325.1469113577.1280.1280.jpg
 

Bayou Dave

Lieutenant Commander
Joined
Dec 13, 2012
Messages
1,780
The ski locker hatch looks good. Try to visualize where it will go to make sure it doesn't hit anything when you open it.
 

bpounds1991

Petty Officer 1st Class
Joined
Nov 3, 2017
Messages
321
Thanks, I've taken plenty of pictures of the boat pre demo, so I've got a pretty good idea of where it'll be going back in
 

bpounds1991

Petty Officer 1st Class
Joined
Nov 3, 2017
Messages
321
Making a push to get a ton done this next week. We're on spring break, which means no work, and the ski locker hatch, 8" hatch, and 4" hatch all arrived Friday. The goal by Friday is to have the entire deck in and PB'd, so by the weekend my dad and I can A) start rewiring B) start glassing.
 
Top