1993 Chaparral Gemini 190: Chronicles of a New Boat Owner (Deck Rebuild) [SPLASHED June 2018]

mickyryan

Rear Admiral
Joined
Apr 18, 2016
Messages
4,210
that got me confused, if you are using 2215 and it has the csm attached there is no need for more csm under that, it doesnt hurt but not needed imho "no clue what 2215 is i even googled is it a biax stitched mat ?
 
Last edited:

bpounds1991

Petty Officer 1st Class
Joined
Nov 3, 2017
Messages
321
Thanks Mickey that’s what I was wanting to clarify. 2215 is a custom biaxial mat made by Collins Craft, it’s not a standard use material but I was able to get it at a fantastic price. Instead of the 17 oz of cloth and .8oz CSM it’s 22oz of cloth and 1.5oz mat. Building off your answer of not needing to use any of the .75oz mat since it is 2215, would you still recommend covering the bulkheads separately and then just tabbing with another layer once the wood is glued in?
All of my confusion has come from seeing people doing the layer of CSM, then the layer of 1708 which is essentially doubling the CSM thickness (if I’m thinking of the process correctly).
 
Last edited:

mickyryan

Rear Admiral
Joined
Apr 18, 2016
Messages
4,210
well what you are doing when you cover stringers before tabbing them is assuring you have good seal and epoxy/poly adhesion so in that regard, sure it would be good to put the first coat on, however if you seal edges real good before bedding then use your biaxle imho that would be fine too but you will have to wet it out a ton and would use more poly that way most likely, far easier to wet out on a bench and seal up then inside boat, also don't forget to rough the plywood up with 24 to 80 grit and then wipe down good to be sure its dust free before sealing, by roughing up you are increasing the surface area of the wood and improving the chances of adhesion. for some reason i found plywood soaks up resin more so then lumber and who knows that might be a good thing however got to be more careful that you don't resin starve the glass.
 

bpounds1991

Petty Officer 1st Class
Joined
Nov 3, 2017
Messages
321
Oh yeah, I’m definitely planning on wetting out the boards multiple times before tabbing on the work table. My biggest concern/curiosity at the moment is either 2215ing vs CSMing the wood prior to installing, versus just tabbing/finishing layups with the 2215 once all the wood is glued in.
 
Last edited:

mickyryan

Rear Admiral
Joined
Apr 18, 2016
Messages
4,210
you know for grinz i would csm them on a table so you know they are good to go then tab and run ya layup , that said every boat builder usually just slammed em on the floor and glassed them in and they lasted 25 yrs ... but we like to think as hobbyists we have the time to do it better:) that said if budget allows csm them first, one caveat is if you need them in the boat to get em right ie long stringer that has some sag i would do it in the boat besides bottoms, dont csm them outside boat only to find out you glassed a hook into them :)
 

bpounds1991

Petty Officer 1st Class
Joined
Nov 3, 2017
Messages
321
I think at this point for the sake of easibility and saving resin I’ll be precoating the wood, gluing the joints together, and doing all the glassing once it’s put in. Phew, now that’s handled on to some of the prep for this weekend. Went to Home Depot earlier to pick up 1/2”x10” lags and cut the 2x4s into 5 pieces that extend a foot above the transom. I’m planning on placing 2 more boards horizontally, just need to go back to pick up some shorter all threads for those. T minus 2 days until I make some real progress
 
Last edited:

Baylinerchuck

Commander
Joined
Jul 29, 2016
Messages
2,726
Wow, really moving along. The skeleton looks good. I like how you knotched everything to make strong joints. Nice work.
 

bpounds1991

Petty Officer 1st Class
Joined
Nov 3, 2017
Messages
321
Thanks BC, we tried to follow something similar to what you did with the finger joints
 

kcassells

Fleet Admiral
Joined
Oct 16, 2012
Messages
8,596
Whats up your sleeve for a gas tank Bp? Was the original able to be salvaged?
 

bpounds1991

Petty Officer 1st Class
Joined
Nov 3, 2017
Messages
321
Whats up your sleeve for a gas tank Bp? Was the original able to be salvaged?


We were able to salvage the original, I just haven't quite decided what I'd like to do as far as the fill and vent hoses are concerned. In the original design the hoses (both fore and aft) ran through a tunnel and were free to move around completely. I'd like to run PVC as a conduit to help seal those compartments better, because the original design allowed the section behind the gas tank to completely fill the flotation foam with water.

As far as the gas tank section itself, last weekend took a lot of tinkering to get the measurements just wide enough to allow the gas tank back in. It's a very tight fit, and I had to cut down 2 feet of overlapping stringer then butt the two pieces together. If you look back to the pictures from last weekend (in particular the picture only showing two bulkheads) you can see that we had cut that excess off, then jointed both stringers into the third bulkhead with a 3/4" plywood supporting piece running on the outside. The plan will be to PL that piece in on the outside of both stringers, and simply glass over it like the rest of the wood (in theory :D). The gas tank compartment itself will be getting gel coated, along with rubber strips glued in to prevent the tank from hitting the wood.
 
Last edited:

bpounds1991

Petty Officer 1st Class
Joined
Nov 3, 2017
Messages
321
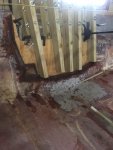
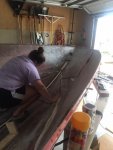
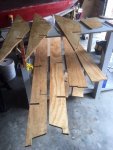
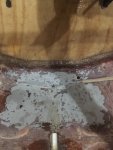
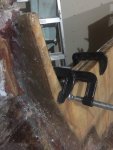
Great day of work on the boat today. Got out this morning to soak the end grain and both sides of the bulkheads/stringers. Moved on to getting the PVC pipe/U-bolt PVC peanut buttered, then glassed in. Finished off with gluing in the transom and getting some peanut butter in around that, although I do want to go back in tomorrow and add some more to smooth out the edges. Didn't get quite as far as we hoped but overall a pretty successful day, heck I even had the admiral out doing some heat gun work on the peanut butter lol. IMG_2895.JPGIMG_2891.JPGIMG_2894.JPGIMG_2892.JPGIMG_2893.JPG
 

bpounds1991

Petty Officer 1st Class
Joined
Nov 3, 2017
Messages
321
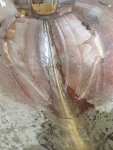
Always! Wanted to finish the night out right so I decided to go back out and finish contouring the curves with a little bit extra peanut butter. Here's the end product. Image-1 (1).jpgIMG_2897.JPGIMG_2898.JPGIMG_2900.JPG
 

bpounds1991

Petty Officer 1st Class
Joined
Nov 3, 2017
Messages
321
Took some time with the admiral last night to tab the transom and one of the wooden support pieces. I won’t be posting pictures because it wasn’t pretty to say the least lol. There’s about 4 1” spots that didn’t completely adhere so I’ll be grinding those down a little bit before giving the transom a full 2 layers. The 2215 isn’t the worst to work with, but it’s certainly not the easiest (due to the thickness, but I can’t compare the 2215 to the 1708 since I’ve never worked with it). Still dealing with the whole learning curve of glassing but I’d say the peanut butter is pretty much on point so far. With temperatures dipping back down into the 40s every night I’ll have to wait a few days to finish the transom, last night took WAYYYY too long to cure even with the heat gun and 14 drops/oz of resin (had both heaters going in the garage at about 65 degrees). My goal is to be ready to start the deck within 3 weeks.

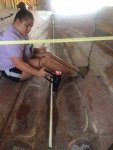
Just had to share my mini panic attack moment I had last night. When belt sanding the transom to shape the contours I realized I did an awful lot of sanding at the top where it glues to the hull, and that got me thinking that the hull may have flexed too much before I glued it on. I finally fell asleep after lying there awake for about 45 minutes, and immediately checked the measurements this morning. On the top cap the very left of the boat to the transom measures 26”, right side 25 1/2”, and transom width 34 1/2”. The bottom cap measures 25 3/4” left, 25” right, 34 1/4” transom, which means my blood pressure returned to normal lol.
 

oldrem

Commander
Joined
Nov 7, 2013
Messages
2,002
Just had to share my mini panic attack moment I had last night. When belt sanding the transom to shape the contours I realized I did an awful lot of sanding at the top where it glues to the hull, and that got me thinking that the hull may have flexed too much before I glued it on. I finally fell asleep after lying there awake for about 45 minutes, and immediately checked the measurements this morning. On the top cap the very left of the boat to the transom measures 26”, right side 25 1/2”, and transom width 34 1/2”. The bottom cap measures 25 3/4” left, 25” right, 34 1/4” transom, which means my blood pressure returned to normal lol.

Sounds like me, except I know I won't get to sleep so end up getting dressed, strap on a head light and going out to check immediately. I've done that a few times in my life.
 

bpounds1991

Petty Officer 1st Class
Joined
Nov 3, 2017
Messages
321
Had it not been 2:30 in the morning I probably would’ve LOL. Good to know though, I thought I was fixing to have to redo the transom (again).
 

mickyryan

Rear Admiral
Joined
Apr 18, 2016
Messages
4,210
Sounds like me, except I know I won't get to sleep so end up getting dressed, strap on a head light and going out to check immediately. I've done that a few times in my life.

been there myself with the missus going really ? .... now she dont even bat a eye when i don my night light :)
 

chevymaher

Commander
Joined
Mar 29, 2017
Messages
2,915
LOL my wife is good with e going and looking. But start working and oh no get up here it will still need fixed in the morning.
 
Top