1977 Sylvan Sea Monster Side Console Rebuild

kcassells

Fleet Admiral
Joined
Oct 16, 2012
Messages
8,598
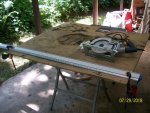
Got the inner trim piece aligned so I could drill the holes for it now rather than after it's painted. After that I just worked on cutting some of the flotation foam.

I hate to admit it, but I was moving rather slowly all afternoon after arriving home from picking everything up. Lost my grip on one of the 5/8" sheets of ply while at Menards and it dropped about a foot on my toes. I hobbled around the best I could and didn't want to look at it until about 8PM last night. :(

Watermann I could really use your input on the transom cap installation when you have the time please.


Oh man......Remind me to stay behind you if I work with ya. Hard hat, steel tips required!:faint2:
 

oldrem

Commander
Joined
Nov 7, 2013
Messages
2,002
Well guys, I did say I'm accident prone lol.. Always surprised I haven't had and major breaks in my lifetime - just cracked ribs twice. :laugh:
 

oldrem

Commander
Joined
Nov 7, 2013
Messages
2,002
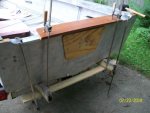
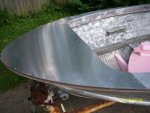
Got the transom cap glued in and clamped tonight. Also finished the final install of the bow plate.

Transom Cap Install.jpgBowplate Install.jpg
 

Watermann

Starmada Splash of the Year 2014
Joined
Jan 12, 2013
Messages
13,753
I can't wait for you to paint over that wood motor pad on the transom, sorry but they make me cringe when I see them put back on.
 

oldrem

Commander
Joined
Nov 7, 2013
Messages
2,002
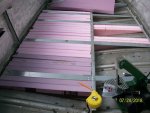
Spent 2-1/2 hours tonight cutting and fitting foam. It's painstakingly slow especially fitting in the rib areas. Re-purposed my 1" belt sander as a strop to keep the blade sharp.

Foam 1.jpg
 

BWR1953

Vice Admiral
Joined
Jan 23, 2009
Messages
5,852
Spent 2-1/2 hours tonight cutting and fitting foam. It's painstakingly slow especially fitting in the rib areas. Re-purposed my 1" belt sander as a strop to keep the blade sharp.

thumb.png
 

Attachments

  • thumb.png
    thumb.png
    140.5 KB · Views: 0

oldrem

Commander
Joined
Nov 7, 2013
Messages
2,002
Thanks BWR

I quit a half hour early tonight after I cut 2 pieces of foam wrong - danged tape measure shrunk on me. Only thing it will hurt is my ego thankfully. Some nights you just have to walk away.

Did some measuring and sent for a sample panel of Nautolex just in case I decide to try that route. 8 yards would do it. Also double checked to make sure I got the right swivel brackets for the roller bunks I'll be putting on the trailer when I redo that.
 

oldrem

Commander
Joined
Nov 7, 2013
Messages
2,002
Nothing exciting - no more injuries :) just cutting and fitting more foam. Took a break from the boat after work today to get some plumbing done the Admiral has been after me to do, then mowed the lawn before she could say anything about 6 inches being high for a lawn lol. After that went back and fitted more foam until I got sick of seeing it. Almost done, but decided to play with laying some of the old decking in to see how I'll be doing things differently. After I get all the foam fitted, I'll be pulling it all out to glue it together in sections and do a final thorough cleaning and wash down before putting it back. Used almost 2 full sheets of 2" plus some 1-1/2" I had left over from my old garden railroad.
 

oldrem

Commander
Joined
Nov 7, 2013
Messages
2,002
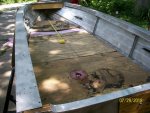
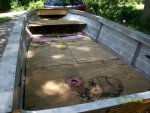
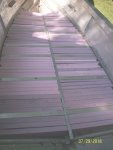
Glad I kept the old decking to cut up and lay out the way I'm planning on doing the new. With the mods even the old deteriorating 1/2" feels solid under foot, so the new 5/8" should be great.

The Admiral and I tossed the pros and cons of keeping the forward raised deck design and decided to do it. Gives us a good storage area underneath for life preservers, paddles etc.

One thing I definitely want to change is the bilge area. The way they had it cut, there's no way to clean out any crud that might plug up the passage from the starboard to the port side. I had thought of putting the pump on the starboard away from the drain plug. The port is just a tad deeper, but the starboard would let me get it back closer to the transom so probably a trade off.

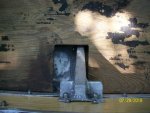
old decking 1.jpgold decking 2.jpgold decking 3.jpgold decking 4.jpg
 

kcassells

Fleet Admiral
Joined
Oct 16, 2012
Messages
8,598
Looking great! The boss has the last say anyway. Keeps peace. Hows that piggy toe?
I like the look and storage aspect too.
 

oldrem

Commander
Joined
Nov 7, 2013
Messages
2,002
Foam 2.jpg Cut and finished off any sharp protruding areas on some of the old side brackets with the multi-tool.

Pulled the decking back out after marking it up for where I need to make some mods for the new wood, then finally finished cutting and sculpting the foam. Now I just need to pull it and glue it together in sections with some PL300 Foamboard
 
Top