99 Larson 186 SEI Ski-n-Fish Re-Deck Project

QuickPuppy

Petty Officer 1st Class
Joined
Oct 18, 2017
Messages
230
We will see. Going to probably be yet another week plus before I can get back to it again.
 

JASinIL2006

Vice Admiral
Joined
Feb 10, 2012
Messages
5,541
On mine, I used the original pedestal for the passenger seat, to keep the seat well below the windshield. I used an adjustable pedestal for the drivers seat. It keeps the driver quite a bit higher, which I prefer, to allow me to look over the windshield. (I used this in lieu of a bolster seat, because I wanted to keep the original bucket seats.) It has worked very well. Initially, I thought it might look funny to have the seats at two different heights, but it really doesn't and it's very nice to be able see over the windshield.
 

QuickPuppy

Petty Officer 1st Class
Joined
Oct 18, 2017
Messages
230
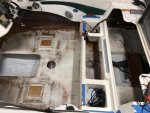
It has been 6 months since I last posted... I didn't get rid of the boat! (Although there were times when my wife wanted me too!) The on again/off again process has continued as it has from the start, with life getting in the way of the project. Here is a synopsis of the past 1/2 year...
 
Last edited:

QuickPuppy

Petty Officer 1st Class
Joined
Oct 18, 2017
Messages
230
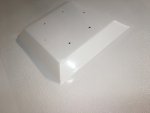
Cut new interior panels from 1/2' marine ply, Resined and gel coated.
14a Storage Box fitting.jpg15 Resined Panels.jpg16 Gelled Panels.jpg
 

Attachments

  • 14b Panels pre resin.jpg
    14b Panels pre resin.jpg
    365.4 KB · Views: 2

QuickPuppy

Petty Officer 1st Class
Joined
Oct 18, 2017
Messages
230
Faired the Deck 17 Deck with Fairing.jpg
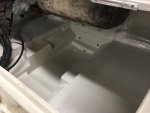
Gel coated deck and Bilge
20 Seat Base Pre Sand.jpg18 Gelled Bilge.jpg22 Seat Base Sanded Close Up.jpg


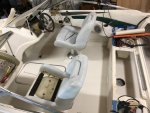
Installed the seat pedestals and seats. These also took a good bit of work to complete. The new adjustable pedestals ended up being way to high. My knees were in the dash and in the lowest position, my line of vision was at the top of the windshield. In addition, new tubes were not the same size as the original socket on the seat. My choices were to keep the corroded original pedestals and be able to adjust the seat forward and backward. Use the complete new pedestals and be too high and not have any front to back adjustment. Or lastly, modify the new pedestals so that they would be low enough and keep the original seat slider assembly. I chose last option. The outer tube of the new pedestals was close to the diameter of the original tube so I decided to cut it down to the correct height. That meant no more vertical adjustment. Oh well. I cut out a couple of strips of plastic container to make a bushing between the tube and socket. This allowed a tight enough fit not to wobble and still allowed the seat to swivel.

This pic was taken before I cut the pedestals down. They are significantly lower now.
24 Deck w Seat.jpg
 

Attachments

  • 21 Deck Post Sand and Grip.jpg
    21 Deck Post Sand and Grip.jpg
    231.4 KB · Views: 3
  • 19 Gelled Deck.jpg
    19 Gelled Deck.jpg
    263.6 KB · Views: 3
  • 23 Textured Area.jpg
    23 Textured Area.jpg
    140.7 KB · Views: 3

QuickPuppy

Petty Officer 1st Class
Joined
Oct 18, 2017
Messages
230
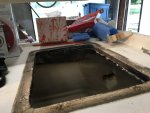
Started to reinstall all of the interior parts and when I was putting the baitwell back in, discovered that the wood it mounted to was rotted. I thought I was well past the demolition portion of this job.:grumpy:
1 New Rot in Livw Well.jpg5 Live well Spacers.jpg

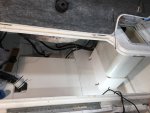
Here it is all together. I put a rubber door seal gasket between the top of the live well and where it mounted to keep it from sloshing into the bilge. I also installed the bilge pump, live well pump and all related hose included fuel hoses.
6 Live Well Completed Bilge.jpg
 

Attachments

  • 2 Live Well Rot.jpg
    2 Live Well Rot.jpg
    371.1 KB · Views: 2
  • 3 Live Well Rot Gone.jpg
    3 Live Well Rot Gone.jpg
    339.3 KB · Views: 2
  • 4 Live Well Fixed.jpg
    4 Live Well Fixed.jpg
    491.9 KB · Views: 2

QuickPuppy

Petty Officer 1st Class
Joined
Oct 18, 2017
Messages
230
Some things I learned that would probably save some of you time on similar jobs... I would spend far far less time trying to get the surface of the deck faired out and perfectly flat in the areas that will get anti-slip rolled on. That stuff hides a host of little issues!

The second thing is that I would use paint instead of gelcoat. Gelcoat is way to hard to get a flat surface with if you are brushing or rolling it. I had to roll 3-4 coats in order to sand off 2 of them to get a remotely smooth surface.


Next steps are to finish installing the interior panels, modifying the ski locker hatch that is still not fitting smoothly, and a bit of engine maintenance.
 
Last edited:

kcassells

Fleet Admiral
Joined
Oct 16, 2012
Messages
8,598
Nice work and nice fixit! Always seems like somethings to do. Looks nice. So how thick/high are the seat base ply?
Looks Nice. Welcome back. :eek:
 

QuickPuppy

Petty Officer 1st Class
Joined
Oct 18, 2017
Messages
230
Thanks!

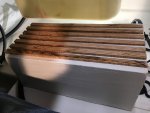
Seat bases are two pieces of 3/4' marine ply resined together. (1.5")

Here's both of them at the beginning. They were stacked together to clamp them until the resin dried.
Click image for larger version  Name:	Seat base start.jpg Views:	1 Size:	357.1 KB ID:	10721863
 

kcassells

Fleet Admiral
Joined
Oct 16, 2012
Messages
8,598
Cool thanks...looks thicker. Very nice. So then what are you using to bolt down the pedestal?
 

QuickPuppy

Petty Officer 1st Class
Joined
Oct 18, 2017
Messages
230
Look back starting at post #211. That has the whole process. I used stainless steel bolts and t-nuts. I didn't want anything to
penetrate through the deck.
 
Last edited:

QuickPuppy

Petty Officer 1st Class
Joined
Oct 18, 2017
Messages
230
Anyone have ideas as to why some of my older posts in this thread seem to have disappeared? There are a bunch of older posts that are just blank entries now.
 
Top